Instagram remains a powerhouse for visual content, and knowing how to effectively upload your photos is crucial for engaging your audience. While the platform started as a mobile-first app, Instagram has expanded its accessibility. This guide will walk you through different methods to upload your photos to Instagram, whether you’re on your phone, computer, or using a social media management tool. Mastering these techniques ensures you can always share your visual stories, regardless of your device.
Uploading Photos to Instagram from the Mobile App
The Instagram mobile app is designed for seamless photo uploads. It’s intuitive and offers all the features you need right at your fingertips. Here’s how to upload photos directly from your iOS or Android device:
- Open the Instagram App: Launch the Instagram application on your smartphone. Ensure you have the latest version installed from the iOS App Store or Google Play Store for optimal performance.
- Tap the ‘+’ Icon: Look for the ‘+’ button, usually located at the bottom center or top right of your screen. Tapping this will initiate the process of creating a new post.
- Select Photo from Library or Capture a New One: You’ll be given the option to choose a photo from your phone’s gallery or take a new photo using your camera. Navigate your library to select the desired image.
- Edit Your Photo: Instagram provides a range of editing tools. You can apply filters to enhance your photo’s look, adjust brightness, contrast, and more. You can also crop or adjust the size of your image to fit Instagram’s specifications.
- Write Your Caption and Add Details: Craft an engaging caption for your photo. Use this space to tell a story, ask a question, or provide context. You can also tag other users, add relevant hashtags to increase discoverability, and include a location to your post.
- Publish Your Post: Once you’re satisfied with your edits and caption, tap the ‘Share’ or ‘Publish’ button, typically located at the top right corner. Your photo is now live on your Instagram feed.
 Instagram mobile app upload process showing the plus button and photo selection screen
How to Post on Instagram from Your Computer (Instagram Web)
For those who prefer working on a larger screen or have photos readily available on their computer, Instagram Web offers a convenient alternative to mobile uploads. Here’s How To Upload Photos To Instagram using your desktop:
- Go to Instagram Website and Log In: Open your web browser and navigate to the Instagram website. Log in using your Instagram credentials.
- Click the ‘+’ Button: Similar to the mobile app, find and click the ‘+’ button, usually located in the top navigation bar.
- Upload or Drag and Drop Your Photo: A window will appear, allowing you to upload your photo. You can either click ‘Select from computer’ to browse your files or simply drag and drop the image file into the window.
- Edit Your Image: Instagram Web provides basic editing options. You can adjust the crop ratio (original, 1:1, 4:5, 16:9) and zoom. You can also apply filters and make adjustments to brightness, saturation, and contrast to enhance your image directly in the browser.
- Add Caption, Tags, and Settings: Write your caption, include relevant hashtags, and tag other Instagram accounts if needed. You can also access advanced settings, such as options to disable comments or hide like counts.
- Share Your Post: Click the ‘Share’ button to publish your photo to your Instagram feed.
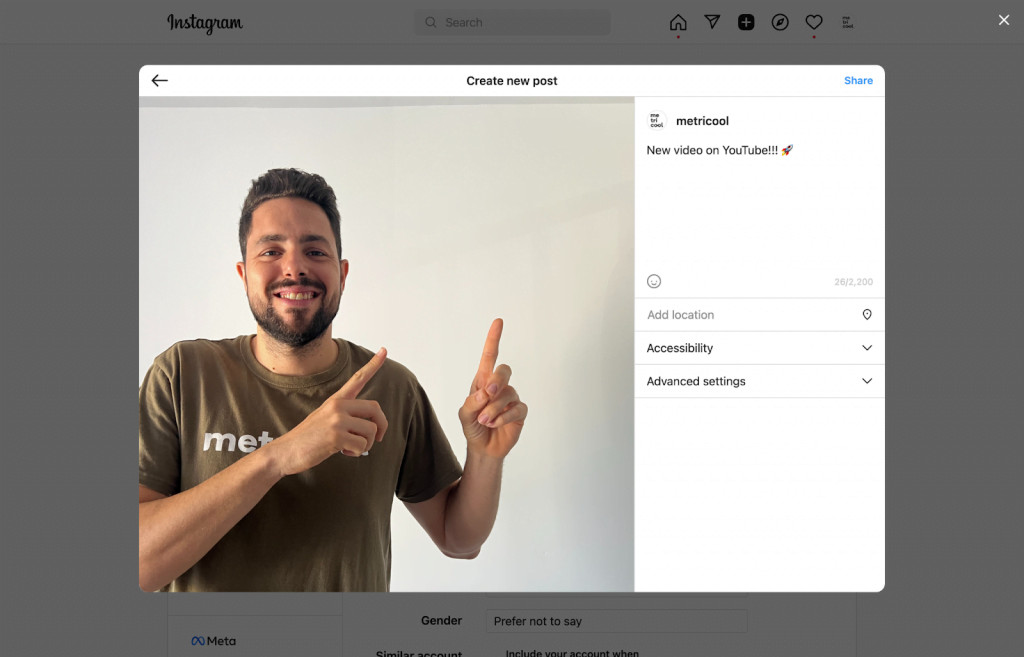 Instagram web interface showing the upload photo button and editing options
Uploading Photos to Instagram Using Metricool
For social media professionals and businesses managing multiple Instagram accounts or seeking advanced scheduling options, third-party tools like Metricool offer a powerful solution. Metricool simplifies the process of uploading and scheduling Instagram content, along with providing analytics and other management features. Here’s how to upload photos to Instagram with Metricool:
- Access Metricool and Go to Planning: Visit the Metricool website and log in to your account (or sign up for free). Navigate to the ‘Planning’ section in the dashboard. This is where you can manage and schedule content for all your connected social media platforms.
- Create a New Post and Select Instagram Feed: Click on ‘Create Post’ to open the post composer. Choose Instagram as the platform and select ‘Post in feed’ to create a regular Instagram photo post.
- Customize Your Post: Upload your photo and craft your caption. Metricool allows you to add hashtags, tags, and mentions just like on Instagram itself. Utilize the preview feature to see exactly how your post will look on your Instagram feed before it goes live.
- Enhance Your Image with Pexels Integration (Optional): Metricool integrates with Pexels, a free stock photo website. If you need an image and don’t have one readily available, you can search for and use Pexels images directly within Metricool using keywords or color palettes.
- Publish or Schedule Your Post: To post immediately, ensure the ‘Publish Now’ option is selected and click ‘Save’. Alternatively, you can schedule your post for a later date and time by choosing a specific time in the planner.
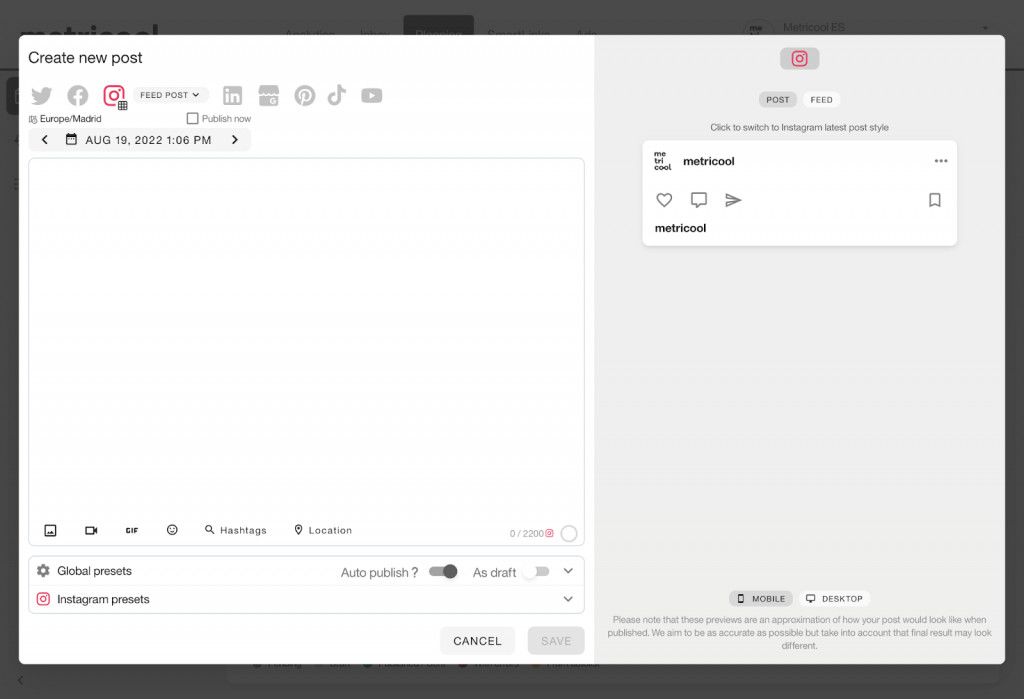 Metricool interface showing the post planning and Instagram upload options
Metricool offers benefits beyond just uploading photos. It’s a comprehensive social media management suite that allows you to:
- Schedule content across multiple social media platforms, including Instagram, Facebook, Twitter, and more.
- Analyze your social media performance with detailed metrics and reports on your posts and profiles.
- Manage community engagement by responding to comments and direct messages from various platforms within the ‘Inbox’ feature.
By understanding these three methods – using the mobile app, Instagram Web, and Metricool – you have the flexibility to upload photos to Instagram in a way that best suits your workflow and needs. Whether you prioritize convenience, desktop efficiency, or advanced social media management, Instagram offers options for every user. Which method will you use for your next post?