Discover the simple and rewarding craft of transferring photos onto wood! This easy-to-follow tutorial will guide you through each step, allowing you to create personalized home décor or unique, heartfelt gifts. Using the magic of photo transfer to wood, you can transform your cherished memories into rustic and beautiful keepsakes.
Recently, I explored a fantastic way to showcase photos and incorporate free printables into my home décor. Transferring photos to wood has emerged as a truly captivating method to produce personalized photo decorations. What I particularly appreciate is the ability to customize any gift with this straightforward and budget-friendly Mod Podge transfer technique.
 DIY Photo Transfer to Wood
This process is genuinely achievable in just 6 quick steps! The most challenging aspect is simply waiting for it to dry, so a little foresight is all you need to create a stunning piece of décor or thoughtful presents for your loved ones.
Update: I’ve refined the method to expedite the process, significantly reducing the waiting time. I recently completed one of these projects in under 20 minutes! The updated process is detailed below!
If you’re unfamiliar with Mod Podge, it’s essentially a water-based glue that dries transparently. It’s available in both matte and gloss finishes. For these kinds of projects, I consistently prefer a matte finish for its subtle and natural look.
The creative possibilities for utilizing these photo transfer ideas are vast. Any photos holding sentimental value can be transformed into exceptional, personalized gifts when transferred onto wood. Further in this guide, I’ll share some of my favorite ways to display these unique wood pieces.
Supplies You’ll Need for a Photo Transfer to Wood Craft
Before you begin your photo to wood transfer, gather these essential supplies:
- Piece of Wood: Opt for round wood slices for charming Christmas ornaments or distinctive gift tags. For my project, I selected this wooden plaque for a slightly larger display.
- Laser Printed Photo or Image (Mirrored): Crucially, your image must be laser printed in reverse (mirrored) on thin paper. Inkjet prints will not work with this method. Detailed notes on printing are in Step 2.
- Scissors: For precisely cutting out your photo or image.
- Mod Podge: The key adhesive for transferring your photo. Matte Mod Podge is recommended for a non-glare finish.
- Foam Brush or Small Craft Brush: For applying Mod Podge smoothly and evenly. Foam brushes are ideal for minimizing brush strokes.
- Wash Cloth or Paper Towel: Dampened for gently removing the paper backing in a later step.
- Hair Dryer (Optional): To accelerate the drying process of the Mod Podge.
- Drill and Drill Bit (Optional): If you intend to hang your wood slice as an ornament or wall décor.
Steps to Transfer a Photo to Wood
Follow these step-by-step instructions to successfully transfer your photos onto wood:
1. Gather Your Supplies
Begin by acquiring your chosen wood pieces. I’m particularly fond of wood slices with natural bark edges, but you can use any wood shape you prefer – blocks, plaques, or rounds.
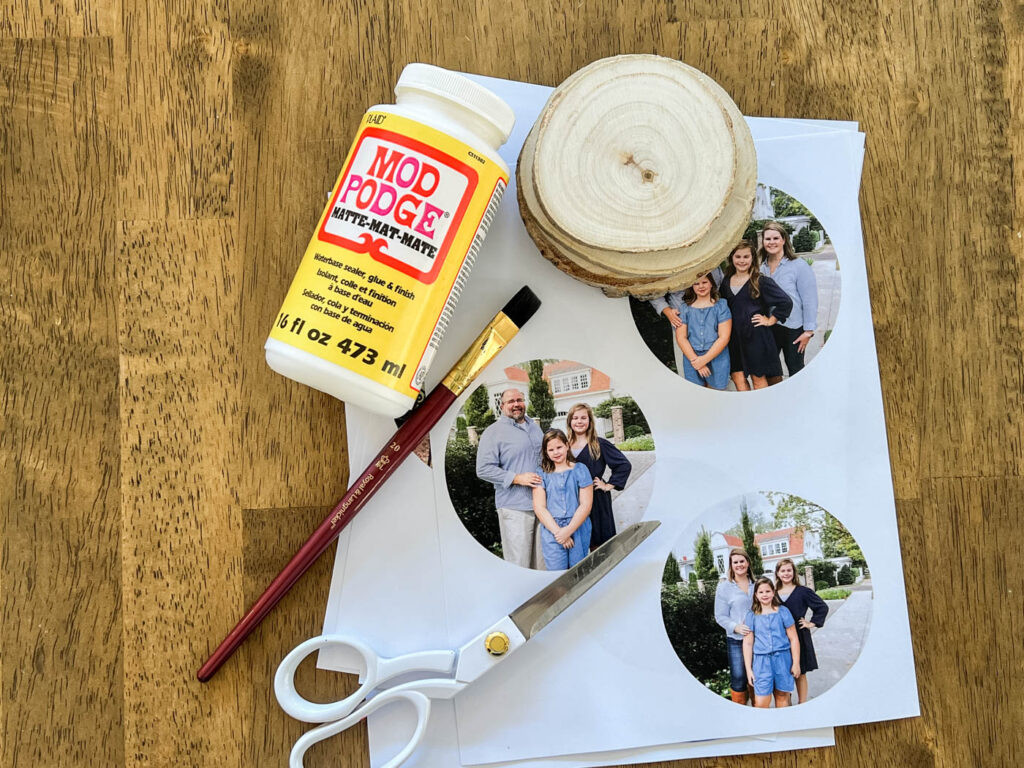 Supplies for DIY photo transfer to wood
Make sure you have your Mod Podge, brushes, and cloths ready. The next crucial step is preparing your photo print.
2. Print out Your Image or Photo
Before printing your photo or image, consider these important points to ensure a successful transfer:
- Mirror the Image: If directionality is important, especially with text, mirror your image. For photos, mirroring may not be necessary unless there’s a specific directional element. For easy image editing, Canva or PicMonkey are excellent user-friendly options for cropping and mirroring images.
- Resize if Necessary: Adjust the image size to fit your wood piece. For example, if using 4-inch wood slices, resize your photo to approximately 4 inches in diameter. Canva is great for creating custom sized designs.
- Laser Print is Essential: Your photo MUST be printed with a laser printer. Inkjet prints will smudge and not transfer correctly. If you only have an inkjet printer, like myself, utilize services like Staples for laser printing.
- Thin Paper is Best: Use regular, thin printer paper (around 20-24lb paper weight). Thinner paper makes it easier to rub away later once adhered to the wood.
- Cut Out Your Photo: Use scissors to carefully cut out your printed photo, leaving minimal excess paper around the edges of the image.
3. Adhere your Photo to the Wood with Mod Podge
Apply a medium, even layer of Mod Podge to the wood surface, ensuring complete coverage. Avoid applying too little or too much – you want a consistent layer.
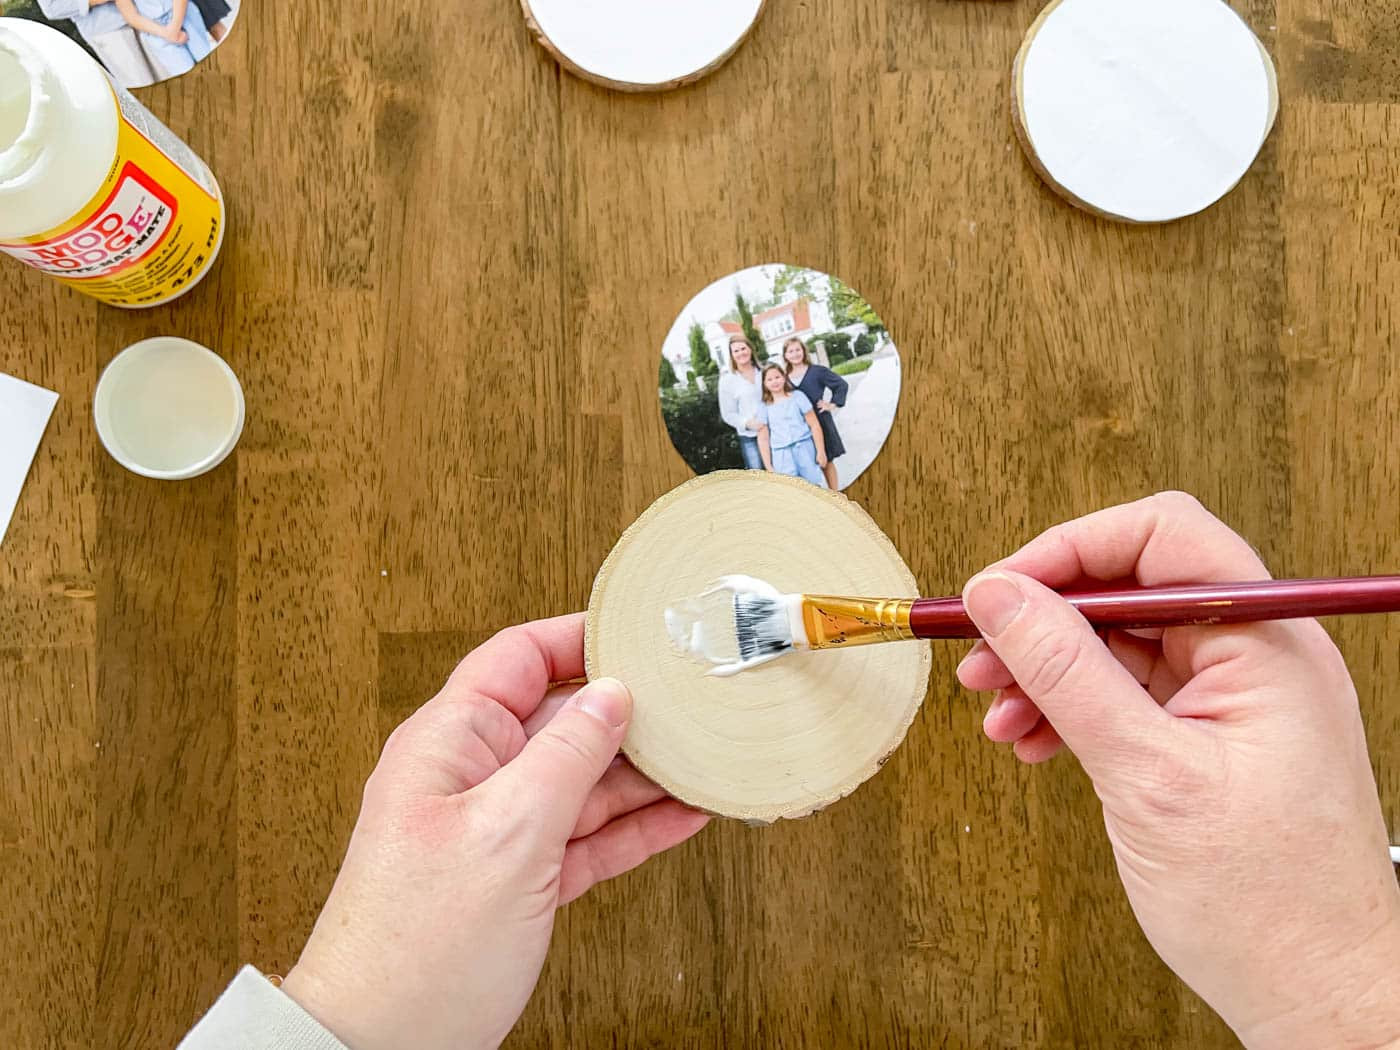 Paint a layer of Mod Podge on the wood slice
Carefully place your photo face-down onto the Mod Podge-covered wood slice.
Using your fingers or a credit card edge, gently press out any air bubbles. Air bubbles can prevent the photo from properly adhering to the wood in those areas, affecting the transfer quality.
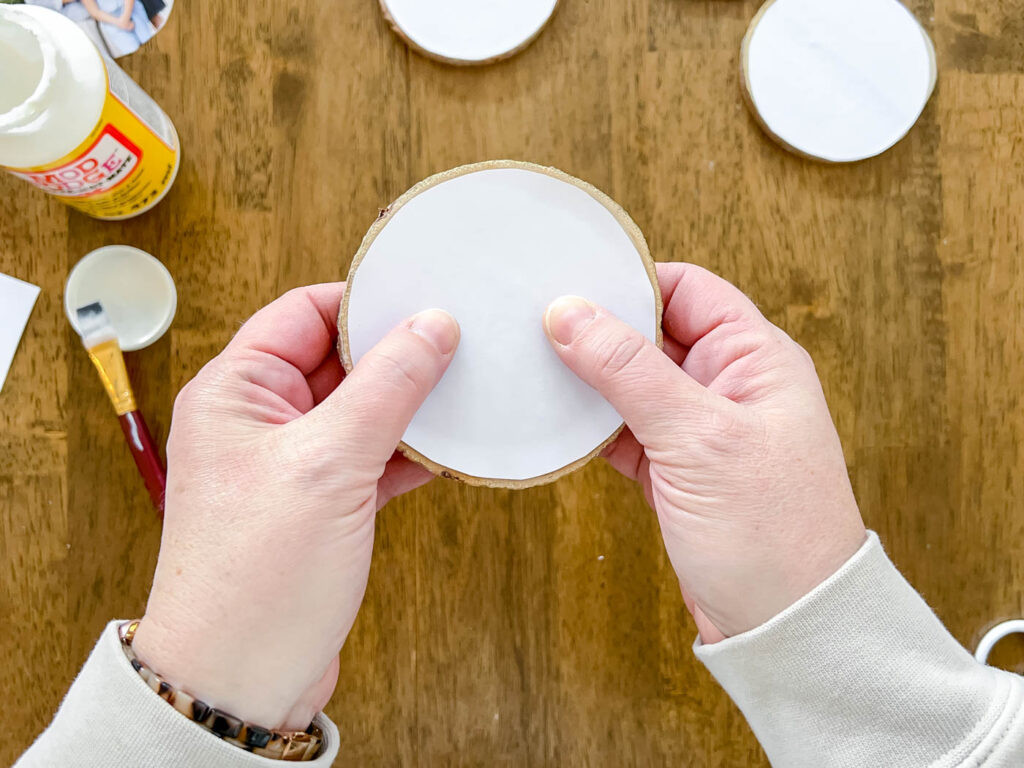 Press bubbles out of wood slice
4. Allow the Mod Podge to Dry
Drying time is crucial. While some tutorials suggest drying times from 24 to 72 hours, I’ve found approximately 48 hours to be ideal for thorough drying. Use your best judgment, but generally, longer drying times yield better transfer results.
Quick Tip: Use a Hair Dryer to Speed Up Drying
To expedite the drying, use a hair dryer on medium heat for about 2-3 minutes, ensuring the photo adheres well. Allow it to cool completely before proceeding to the next step. This significantly reduces the waiting time, letting you finish your project faster.
5. Rub Away the Paper Backing with a Damp Cloth
Once the Mod Podge is fully dry and cool, it’s time for the exciting reveal! Remove the paper backing to unveil your transferred image.
Dampen a washcloth or paper towel with water and wring out any excess moisture. The cloth should be damp, not dripping wet.
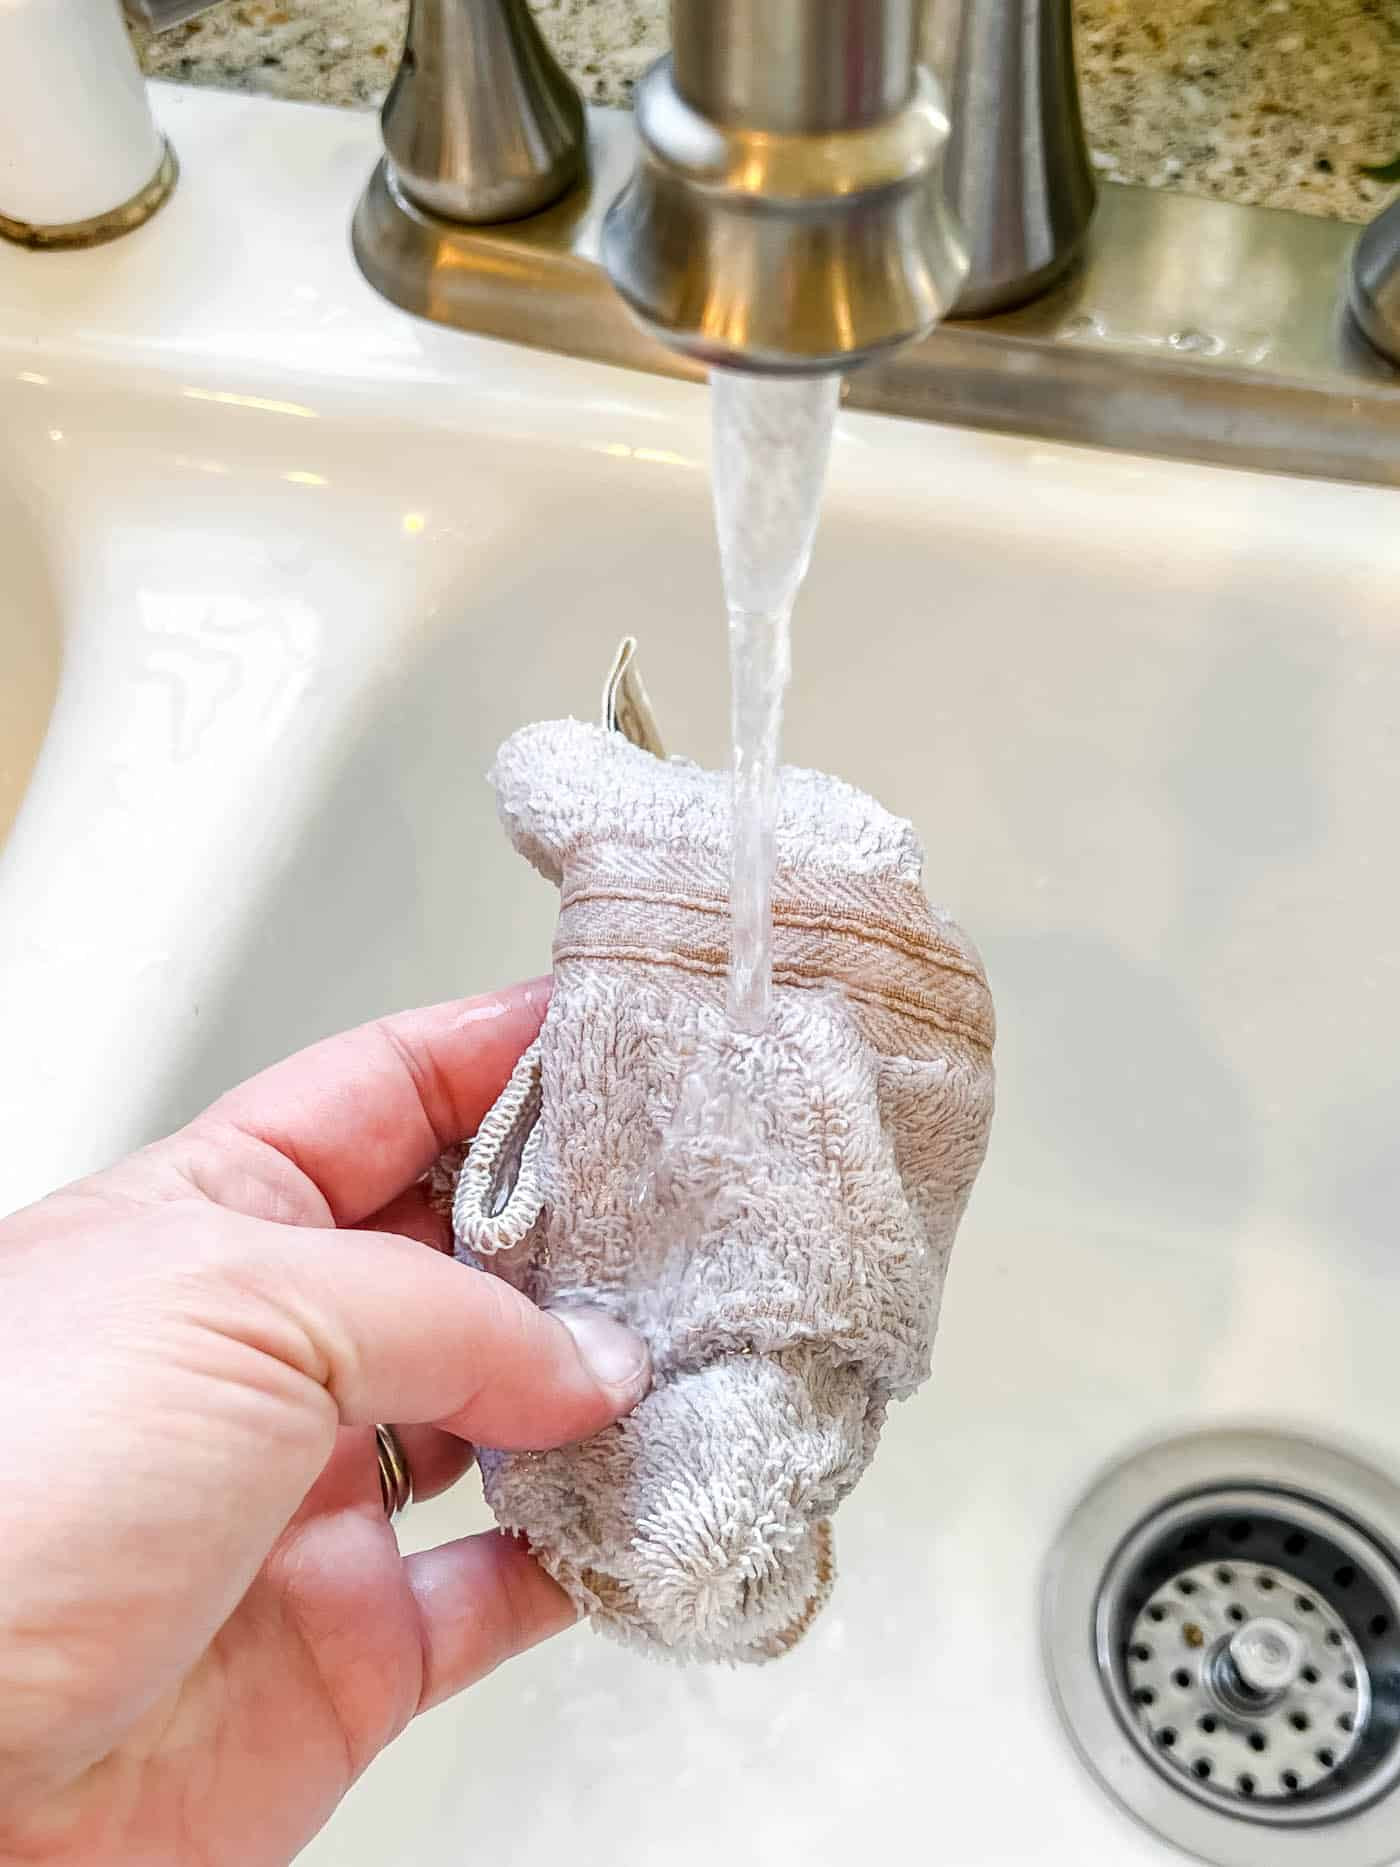 Wet a rag to rub the paper off the wood slice
Begin gently rubbing away the paper in small circular motions. It’s crucial to be patient and rub lightly to avoid removing the image along with the paper. Take your time and work slowly.
You’ll likely need to make several passes, as paper fibers may remain even after the initial rub. Continue gently rubbing until all paper residue is removed, and your image is clear.
Running your fingers over the surface can help you detect remaining paper fibers. If you notice the image starting to scratch or fade, reduce pressure. Embrace a slightly rustic look if desired, as minor imperfections can add character.
6. Use Mod Podge as a Sealer
To protect your transferred image from dust and moisture, and to enhance its longevity, apply a thin top coat of Mod Podge. This final layer acts as a sealer, preserving your beautiful photo transfer for years to come.
Applying a final coat of Mod Podge as a sealer to protect the transferred photo on wood, ensuring durability.
The finished product is truly rewarding! I love how simple this project is, making it accessible even for kids to participate.
This method has sparked endless ideas for creating personalized items for my home. I’m eager to use more family photos for unique gifts and will be sharing those projects with you soon!
Ideas for Displaying a Photo Transfer to Wood Craft
Once your photo is beautifully transferred to wood, explore these creative display ideas:
1. Make a Decorative Plaque
For this example, I utilized my fall wreath printable, which was already mirrored. However, you can use any image you like. If you need to mirror an image, a quick Google search for “how to mirror an image” will provide numerous online tools, or utilize editing software like PicMonkey.
I’m passionate about crafting beautiful home décor using affordable or readily available materials. This is why I’m a big fan of decorating with free printables. It’s an inexpensive and easy way to add personal touches, requiring only a good color printer for printables.
Grab the Free Fall Printables
Gain access to the printable used in this example, plus two additional designs! They’re already mirrored for your convenience.
Get them Now!
Access ALL of my Free Printables
Sign up for email updates and unlock access to over 100 stunning free home décor printables. Use them for cards, personalized gifts, home decoration, and more!
Grab the Free Printables NOW!
(Note: In the printables library, look for files labeled “mirrored”.)
** If you’re already a VIP email subscriber, you can locate these printables in the free printable library, accessible via a link at the end of every email I send.
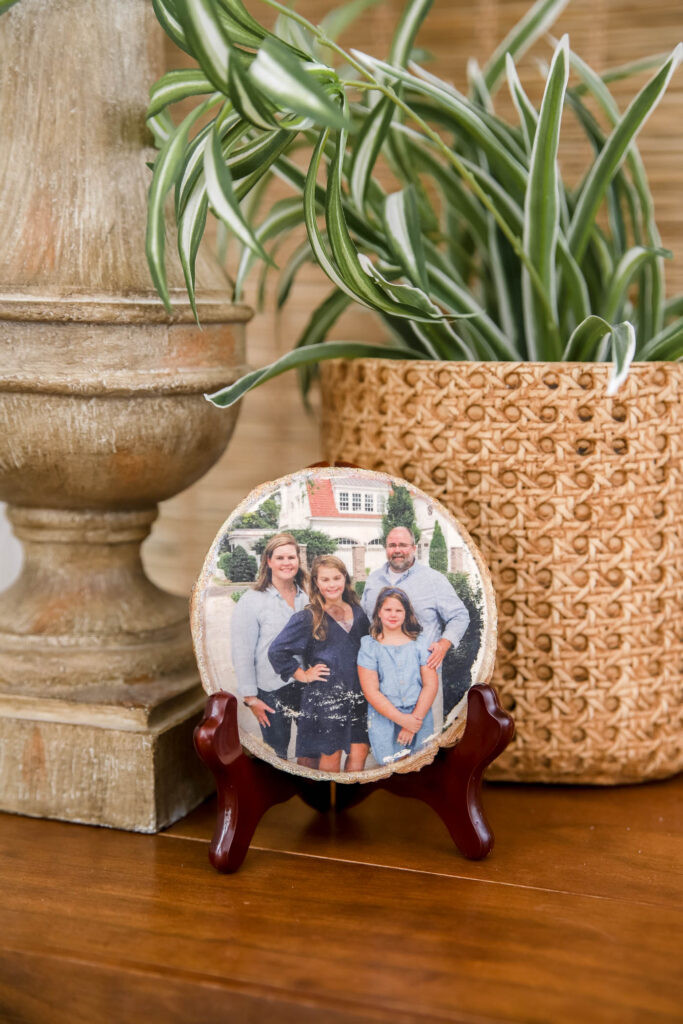
2. Place a Photo on Wood Slice in a Stand
 DIY Photo Transfer to Wood
3. Hang a Christmas Ornament
Transform your wood slice into a personalized Christmas ornament! Simply drill a small hole at the top of the slice. Thread ribbon or twine through the hole and hang it on your Christmas tree. These make wonderful, sentimental gifts for grandparents or parents during the holiday season.
4. Decorate with a Personalized Gift Tag
Create a unique and personal gift tag by transferring a photo of the gift recipient onto a small wood slice. This adds an extra special touch to any present, making it instantly recognizable and memorable.
A wood slice photo transfer used as a personalized gift tag tied to a beautifully wrapped present, adding a personal touch to gift-giving.
I encourage you to try this rewarding craft project. I’m excited to see your creative outcomes, so please tag me on social media if you decide to try it!
More Craft Posts You Will Love: