Moving your photo library to an external hard drive is a great way to free up space on your Mac. This guide provides a step-by-step process on how to safely transfer your photos without losing any data.
 macOS Photos app Choose Library window
Preparing Your External Hard Drive
Before transferring your photos, it’s crucial to prepare your external hard drive correctly. This ensures compatibility and prevents potential data loss.
Formatting the Drive
Your external drive needs to be formatted using a file system compatible with macOS. The recommended formats are:
- APFS (Apple File System): Apple’s latest file system, optimized for modern Macs and SSDs.
- Mac OS Extended (Journaled): A robust and reliable file system that supports journaling for data integrity.
Important Considerations:
- Avoid using Time Machine backup drives: Do not use a drive already used for Time Machine backups to store your photo library.
- Avoid removable storage: Refrain from using unreliable storage devices like SD cards or USB flash drives for long-term photo storage. Network or cloud-based storage is also not recommended for this process due to potential data loss. An external hard drive dedicated solely to your photo library is the best option.
Transferring Your Photos Library
Once your external drive is properly formatted, follow these steps to transfer your Photos library:
- Quit Photos: Ensure the Photos application is completely closed before proceeding.
- Locate Your Photos Library: In Finder, navigate to your Pictures folder (Go > Home > Pictures). Your Photos Library is typically located here.
- Drag and Drop: Click and drag the “Photos Library” file onto your external hard drive’s icon in Finder. This will initiate the copying process. Be aware, this process may take a considerable amount of time depending on the size of your library.
 External Drive Info window with
- Open the Library: After the transfer is complete, double-click the “Photos Library” file on your external drive to open it in the Photos application.
- Designate as System Photo Library (Optional): If you use iCloud Photos or want this library accessible in other applications, designate it as the System Photo Library in Photos preferences. (Photos > Preferences > General).
Deleting the Original Library (Optional)
If you want to reclaim space on your Mac’s internal drive, you can delete the original Photos Library after confirming the successful transfer and verifying all your photos are accessible on the external drive. Drag the original library from your Pictures folder to the Trash, then empty the Trash.
Important: Always ensure your external hard drive is connected and powered on before launching Photos. If the drive is unavailable, Photos will create a new, empty library in the default location.
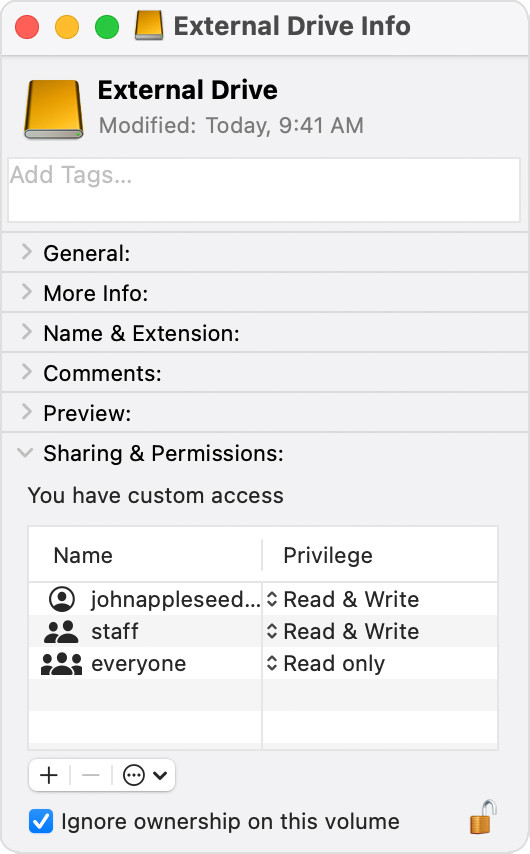
Troubleshooting
Error When Moving Photos Library
If you encounter an error while moving your library, check the following:
- Permissions: Verify permissions on the external drive. In Finder, right-click the drive, select “Get Info,” and check “Ignore ownership on this volume” under Sharing & Permissions. You might need to unlock the settings by clicking the lock icon first.
- Disk Utility: Use Disk Utility to repair any disk errors on your external drive. Disk Utility can be found in Applications/Utilities.
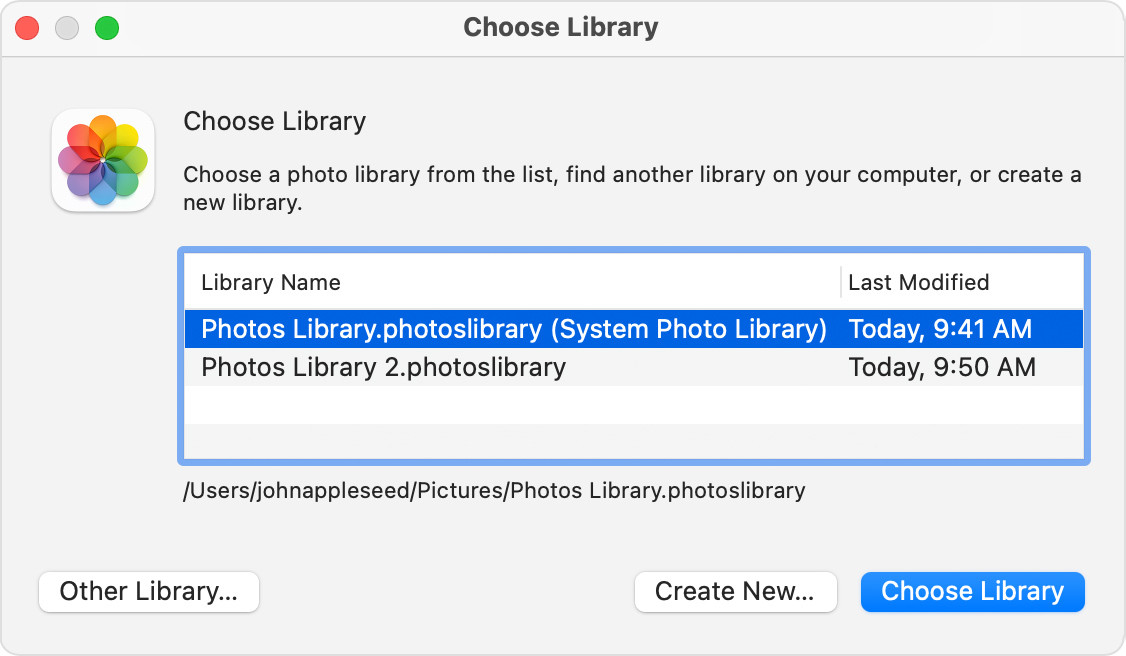
Opening a Different Photos Library
To switch between different photo libraries:
- Quit Photos.
- Hold Option Key: Press and hold the Option key while opening the Photos application.
- Choose Library: A window will appear allowing you to select the desired photo library.
Conclusion
Transferring your Photos library to an external hard drive is a straightforward process that can significantly free up space on your Mac. By following these steps and taking the necessary precautions, you can ensure a smooth transition and keep your precious memories safe and accessible. Remember to always back up your photo library regularly to prevent data loss.