Live Photos bring your still images to life by capturing a short video clip of 1.5 seconds before and after you press the shutter button. This fantastic feature, available on iPhones, allows you to go beyond static pictures and relive moments with motion and sound. Whether you’re new to iPhone photography or looking to enhance your skills, understanding How To Take A Live Photo and utilize its features can significantly elevate your photo game.
Getting Started with Live Photos on Your iPhone
Taking a Live Photo is incredibly straightforward. Here’s a step-by-step guide to ensure you capture those dynamic moments:
-
Launch the Camera App: Begin by opening the Camera app on your iPhone. It’s the quickest way to access all your phone’s photography features.
-
Ensure Photo Mode is Active: Verify that your camera is set to ‘Photo’ mode. Swipe left or right on the screen, or tap on the options above the shutter button to select ‘Photo’. This is crucial as Live Photos are a feature within the standard photo mode.
-
Activate Live Photos: Look for the Live Photos icon at the top right (or top center depending on your iPhone model) of your screen. It resembles a series of concentric circles. If the icon is yellow, Live Photos is already enabled. If it’s white with a slash through it, tap the icon to turn Live Photos on. When activated, the icon will become yellow, indicating that every photo you take will now be a Live Photo.
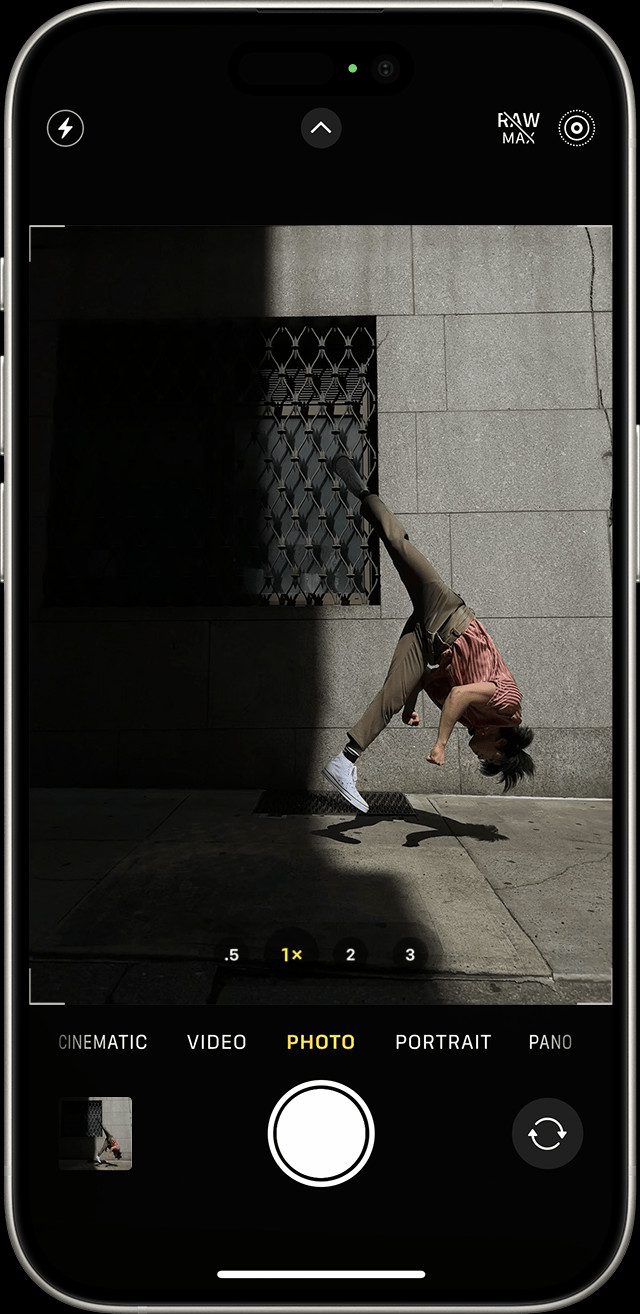 iPhone Camera App with Live Photos Feature Turned On
 -
Hold Your iPhone Steady: To ensure the best quality Live Photo, keep your iPhone as still as possible when you press the shutter. This minimizes blur and ensures the motion captured in your Live Photo is smooth and clear.
-
Press the Shutter Button: Once you’ve framed your shot and confirmed Live Photos is active, simply tap the circular shutter button at the bottom center of the screen to take your Live Photo. Your iPhone will automatically capture the moments just before and after you press the button, creating a short, dynamic clip.
Finding and Playing Your Live Photos
After capturing Live Photos, you’ll want to view and enjoy them. Here’s how to find and play your Live Photos on your iPhone:
-
Open the Photos App: Navigate to and open the Photos app on your iPhone, where all your captured images and videos are stored.
-
Locate the Live Photos Album: Scroll down within the Photos app until you reach the ‘Media Types’ section. Here, you will find a dedicated album labeled ‘Live Photos’. Tap on ‘Live Photos’ to view all the Live Photos you’ve taken.
 Navigating to the Live Photos Album in the Photos App
 -
Open a Live Photo: Tap on any photo within the ‘Live Photos’ album to open it in full-screen view.
-
Play the Live Photo: To bring the photo to life, simply press and hold your finger on the screen. Holding down on the image will activate the Live Photo, playing the short video clip and sound captured with it. Release your finger, and the photo will revert to a still image.
Editing Your Live Photos: Key Photo and Effects
Live Photos are not just about capturing motion; they also offer editing capabilities to enhance your dynamic images. You can change the key photo, add fun effects, and even perform standard photo edits.
Changing the Key Photo
The ‘key photo’ is the still frame that represents your Live Photo when it’s not playing. You can change this to the perfect moment within your 1.5-second clip:
-
Open and Edit: Open the Live Photo you wish to edit in the Photos app and tap the ‘Edit’ button located at the top right of the screen.
-
Access Live Photo Edit Tools: In the edit interface, tap the ‘Live Photos’ icon. It’s usually located at the bottom of the screen and looks like the Live Photos activation icon.
Alt text: A close-up of the Live Photos icon, used within the editing interface to access Live Photo specific editing options on iPhone.
-
Select a New Key Photo: A frame slider will appear below your Live Photo. Drag the slider left or right to browse through each frame of your Live Photo.
-
Set as Key Photo: Once you’ve found the perfect frame, release your finger from the slider and tap ‘Make Key Photo’. This selected frame will now be the still image representing your Live Photo.
-
Save Changes: Finally, tap ‘Done’ to save your changes. Your Live Photo will now use the newly selected frame as its key photo.
Adding Live Photo Effects: Loop, Bounce, and Long Exposure
Beyond changing the key photo, you can also apply creative effects to your Live Photos to make them even more engaging:
-
Open the Live Photo: Open the Live Photo you want to enhance in the Photos app.
-
Access Effects Menu: Tap the ‘Live Photos’ icon located near the top left of the screen. This will open a dropdown menu with effect options.
-
Choose an Effect: Select from the following effects:
- Loop: Transforms your Live Photo into a seamless video loop that plays continuously.
- Bounce: Creates a back-and-forth animation, playing your Live Photo forward and then instantly in reverse.
- Long Exposure: Simulates a long exposure effect, ideal for smoothing water, light trails, and creating motion blur. This effect was traditionally only achievable with professional DSLR cameras.
Standard Photo Editing for Live Photos
You can also apply standard photo editing adjustments to your Live Photos, just like regular still photos. This includes adjusting exposure, contrast, colors, adding filters, and more. Simply tap the ‘Edit’ button on a Live Photo and use the familiar editing tools available in the Photos app.
Sharing Your Live Photos
Sharing Live Photos allows your friends and family to experience these dynamic moments as well. Here’s how to share them effectively:
-
Select and Share: Open the Live Photo you wish to share and tap the ‘Share’ button (the upward-pointing arrow in the bottom left corner).
-
Choose Sharing Method: Select your preferred sharing method from the share sheet, such as Messages, Mail, social media platforms, or AirDrop.
-
Sharing as Still Photo (Optional): If you wish to share just the still image and not the Live Photo effect, tap ‘Live’ in the upper-left corner of the photo before sharing. This will convert it to a static image for sharing. Note that sharing via Mail will always send a still image, not the Live Photo.
When someone receives a Live Photo via Messages on an iPhone or iPad, they can simply tap the photo to open it and then firmly press and hold to play the Live Photo animation. On a Mac using Messages, double-clicking the Live Photo will play it once, and clicking the ‘LIVE’ button in the bottom-left corner allows replay.
Turning Off Live Photos
While Live Photos are a fun and engaging feature, there might be times when you prefer to take standard still photos. Here’s how to turn Live Photos off, temporarily or permanently:
Temporarily Disabling Live Photos
To temporarily turn off Live Photos, simply tap the yellow Live Photos icon in the Camera app. When it turns white with a slash through it, Live Photos is disabled for your current photo session. However, it will automatically re-enable the next time you open the Camera app.
Permanently Disabling Live Photos (Preserving Settings)
If you prefer to keep Live Photos turned off by default, you can adjust your iPhone settings to preserve this preference:
-
Open Settings: Go to the ‘Settings’ app on your iPhone home screen.
-
Navigate to Camera Settings: Scroll down and tap on ‘Camera’.
-
Preserve Settings: Tap on ‘Preserve Settings’.
-
Enable Live Photo Preservation: Toggle the switch next to ‘Live Photo’ to the ‘on’ position (green).
With this setting enabled, your iPhone will remember whether Live Photos was on or off the last time you used the Camera app. If you turned it off, it will remain off until you manually turn it back on.
Live Photos are a fantastic way to capture more than just a still moment. By understanding how to take, edit, and share Live Photos, you can unlock a new dimension in your iPhone photography and bring your memories to life. Experiment with different effects and editing options to discover the full potential of this dynamic feature.