In today’s digital world, images are essential. They enhance websites, social media, and presentations. However, large image file sizes can significantly slow down page loading times, consume excessive storage space, and negatively impact user experience. Knowing How To Shrink File Size Of Photos is a crucial skill for anyone working with digital media. This guide will provide you with a comprehensive understanding of image compression, different file formats, and effective techniques to reduce photo file sizes without sacrificing quality.
Understanding Image File Formats and Compression
Before diving into the methods of reducing file size, it’s important to understand the basics of image file formats and compression. The three most common image formats for web use are JPEG, PNG, and GIF. Each format handles compression differently, making them suitable for various types of images and purposes.
JPEG (or JPG) – Joint Photographic Experts Group
JPEG is the go-to format for photographs and complex images with many colors and gradients. It uses lossy compression, which means some image data is discarded during the compression process. This reduction in data results in smaller file sizes but can also lead to a decrease in image quality if compression is applied excessively. The key advantage of JPEG is its ability to achieve significant file size reduction, making it ideal for web images where loading speed is critical.
PNG (Portable Network Graphics)
PNG comes in two main types: PNG-8 and PNG-24.
- PNG-8 is best suited for simple graphics, logos, and images with limited colors. It uses lossless compression for indexed colors (up to 256 colors), similar to GIF, but generally offers better compression efficiency.
- PNG-24 is designed for images requiring full color depth (millions of colors) and lossless compression. Lossless compression means no image data is lost during compression, preserving the original image quality. This makes PNG-24 excellent for images where quality is paramount, such as detailed graphics, screenshots, and images with transparency. However, PNG-24 files are typically larger than JPEGs.
GIF (Graphics Interchange Format)
GIF is an older format primarily used for simple animated images and graphics with limited colors (256 colors or fewer). Like PNG-8, GIF uses lossless compression for indexed colors. While GIFs are still popular for animations, PNG-8 often provides better compression and quality for static images with limited color palettes.
Compressing JPEG Files: Balancing Quality and File Size
JPEG compression revolves around the concept of quality. When you save a photo as a JPEG, you are usually presented with a quality setting. This setting determines the amount of compression applied. Higher quality settings result in larger file sizes and better image fidelity, while lower quality settings lead to smaller file sizes but potentially noticeable quality degradation.
Most image editing software offers quality settings as:
- Presets: Low, Medium, High, Maximum
- Numerical range: 0-12 (or similar), where higher numbers indicate better quality.
- Percentage: 0%-100%, where 100% is the highest quality.
The key to effective JPEG compression is to find the lowest quality setting that still produces an acceptable image for your intended purpose.
Visual Example of JPEG Compression Levels:
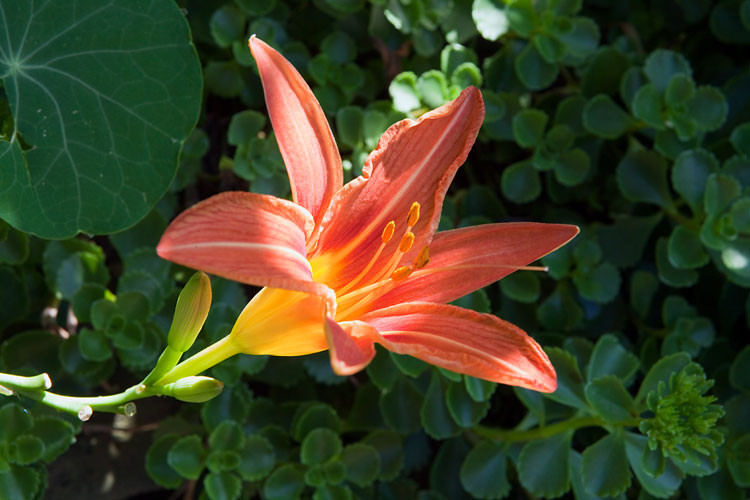
Let’s examine how different JPEG quality settings affect file size and image quality using a sample flower photo.
100% Quality: File Size: 103 KB
 Daylily flower and buds at 100% quality
This image, saved at 100% quality, retains maximum detail but results in the largest file size among the examples. In most cases, 100% quality is unnecessary for web use and leads to unnecessarily large files.
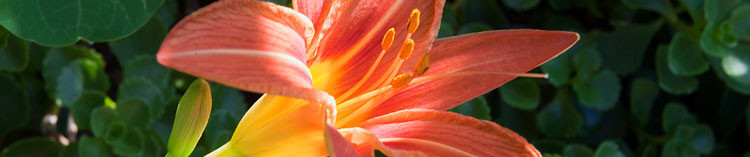
80% Quality: File Size: 48 KB
 Daylily flower and buds at 80% quality
At 80% quality, the file size is significantly reduced (more than halved) compared to 100%, with virtually no discernible difference in visual quality. This level of compression is often a good starting point for balancing quality and file size.
60% Quality: File Size: 28 KB
 Daylily flower and buds at 60% quality
Even at 60% quality, most viewers would struggle to notice any quality loss compared to the 100% version. The file size is now a quarter of the original, leading to much faster loading times.
40% Quality: File Size: 17 KB
 Daylily flower and buds at 40% quality
For many general web uses, 40% quality can still be acceptable. The image remains reasonably clear, and the file size is significantly reduced, making it five times smaller than the original 100% quality image.
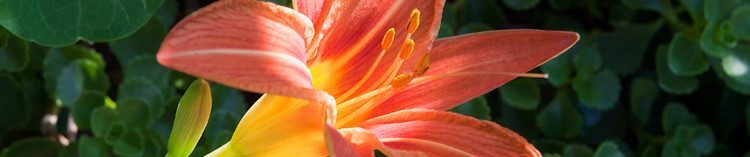
20% Quality: File Size: 12 KB
 Daylily flower and buds at 20% quality
At 20% quality, noticeable image degradation begins to appear. Blockiness and artifacts become visible, especially in areas with fine details.
0% Quality: File Size: 7 KB
 Daylily flower and buds at 0% quality
At the lowest quality (0%), the image exhibits severe blockiness and quality loss, making it unsuitable for most purposes.
Sample photo from FCIT’s collection of stock plant photos on the ClipPix ETC website.
Best Practices for JPEG Compression:
- Iterative Approach: Start with a relatively high quality setting (e.g., 80%). If the image looks good, gradually reduce the quality in steps, checking the visual output at each step. Stop reducing quality when you notice unacceptable image degradation.
- Consider the Purpose: The required image quality depends on its purpose. High-detail images for professional portfolios or botanical encyclopedias may need higher quality settings. Casual social media posts or decorative website elements can often tolerate lower quality.
- Blurring for Backgrounds: For background images, slight blurring can significantly reduce file size without impacting visual appeal, as backgrounds are often intentionally out of focus.
Blurring Example:
Consider a photo with a sharp foreground subject and a busy background. Compressing the original image at 60% quality results in a 77 KB file size.
 Day lily with sharp background
By selectively blurring the background in an image editor and then saving at the same 60% JPEG quality, the file size reduces to just 54 KB – a ~30% reduction. This technique not only shrinks the file size but can also enhance the image by drawing more focus to the main subject.
 Day lily with blurred background
Important Note on JPEG and Lossy Compression:
JPEG is a lossy format. Each time you save an image as a JPEG, even without changing quality settings, you may introduce further quality degradation. To avoid this, always maintain a master copy of your image in a lossless format like TIFF or PSD. Export to JPEG only when you need a compressed version for web use or sharing. Avoid repeatedly editing and re-saving JPEGs.
Compressing GIF Files: Color Reduction and Dithering
GIF compression is primarily controlled by reducing the color palette. GIFs are limited to a maximum of 256 colors. By reducing the number of colors used in a GIF, you can significantly decrease its file size.
Color Depth and File Size:
The file size of a GIF is directly related to its color depth. Aim for color palette sizes that are powers of 2 (256, 128, 64, 32, 16, 8, 4, or 2 colors) for optimal compression. For instance, reducing a 33-color image to a 32-color palette will yield noticeable file size savings, while reducing from 32 to 31 colors will not provide the same level of reduction.
Dithering:
When reducing the color palette, you might encounter banding in areas with color gradients. Dithering is a technique used to minimize banding by adding a pattern of pixels of different colors to simulate colors that are not in the reduced palette. The “diffusion” dither pattern is often the most effective for reducing banding in GIFs.
Transparency:
GIF supports transparency. When saving GIFs with transparent areas, ensure the “transparency” option is selected in your image editing software.
Settings to Ignore:
- Web snap: This setting is outdated and no longer relevant for modern displays.
- Matte: While matte settings were previously used to blend transparent GIF edges, PNG format is now a better solution for transparency issues.
Example of GIF Usage:
GIF remains a popular choice for simple animations.
 Dancing robot GIF animation
Sample graphic from FCIT’s collection of robot illustrations on the TIM website.
Compressing PNG Files: PNG-8 vs. PNG-24
PNG offers versatility, combining aspects of both JPEG and GIF. Understanding the difference between PNG-8 and PNG-24 is key to effective PNG compression.
PNG-8 Compression:
PNG-8 is similar to GIF in its compression approach. When exporting to PNG-8, you’ll encounter similar settings to GIF, including:
- Number of Colors: Select from color palettes like 2, 4, 8, 16, 32, 64, 128, or 256 colors.
- Dithering: Apply dithering patterns to reduce banding.
- Transparency: Enable transparency if needed.
The primary advantage of PNG-8 over GIF is that it generally achieves smaller file sizes for images with similar color palettes and visual quality.
Comparison: GIF vs. PNG-8
Consider a cartoon graphic saved as both GIF and PNG-8 with a 32-color palette.
32-color GIF: File Size: 13.6 KB
 Cartoon saved as GIF format
32-color PNG-8: File Size: 10.2 KB
Cartoon saved as PNG-8 format
In this example, PNG-8 achieves a 25% file size reduction compared to GIF while maintaining the same visual quality.
Sample graphic from FCIT’s collection of tech cartoons on the TIM website.
PNG-24 Compression:
PNG-24 is a lossless format, meaning it preserves all image data during compression. As a result, there are fewer compression options compared to JPEG or PNG-8. You generally don’t adjust “quality” settings with PNG-24.
File Size Considerations for PNG-24:
Due to its lossless nature, PNG-24 files are typically larger than JPEGs, especially for photographs.
Comparison: PNG-24 vs. JPEG
Consider a photo of macaws saved as PNG-24 and JPEG at different quality settings.
PNG-24: File Size: 400 KB
 Photo of macaws saved as PNG-24
JPEG (Maximum 100% Quality): File Size: 259 KB
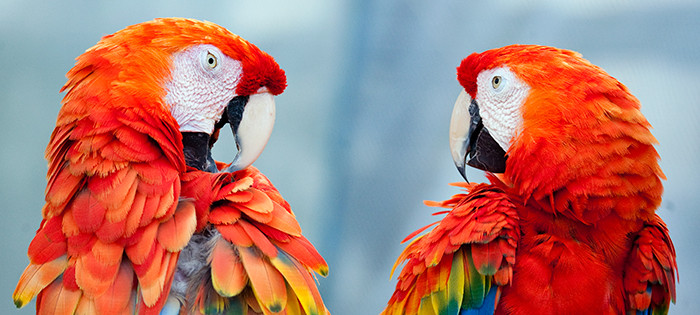 Photo of macaws saved as maximum quality JPEG
JPEG (High 60% Quality): File Size: 69 KB
 Photo of macaws saved as high quality JPEG
Sample photo from FCIT’s collection of stockanimal photos on the ClipPix ETC website.
When to Choose PNG-24 over JPEG:
Despite the larger file sizes, PNG-24 is preferable to JPEG in several situations:
- Transparency: If your image requires transparency, PNG-24 is necessary as JPEG does not support transparency.
- Lossless Quality: When preserving original image quality is paramount and any data loss is unacceptable, PNG-24 is the choice. This is crucial for archival purposes or when further editing is anticipated.
- Sharp Lines and Text: For images containing sharp lines, text, or screenshots, PNG-24 excels at reproducing pixel-perfect clarity without the “smudging” artifacts that JPEG compression can introduce.
Conclusion: Optimizing Photo File Size for the Web
Mastering how to shrink file size of photos involves understanding image formats, compression techniques, and the trade-offs between file size and image quality. By carefully selecting the appropriate file format (JPEG, PNG-8, or PNG-24) and applying optimal compression settings, you can significantly reduce photo file sizes, improve website loading speeds, and enhance user experience without compromising visual quality. Remember to always consider the intended use of the image and strive to find the perfect balance between file size and visual fidelity.