Switching between iPhones and Androids, or juggling both? Sharing photos between these different ecosystems can seem tricky. Whether you’re moving from Android to iPhone, vice versa, or just need to keep your photos accessible across devices, understanding the best transfer methods is essential. The number of photos you want to move will influence the most practical approach, from quick and easy to robust solutions for large libraries.
While cloud storage like Google Drive offers convenience, long-term storage costs can accumulate. Fortunately, options like Wi-Fi-enabled USB drives and direct transfer methods provide cost-effective alternatives for even the largest photo collections. This guide breaks down the most effective ways to share your precious photo memories between your iPhone and Android devices.
Understanding Cross-Platform Photo Sharing Challenges
The rivalry between Apple and Samsung is well-known, and for users of both ecosystems, transferring photos between iPhones and Android devices is a common need. It can be inconvenient to feel locked into one device when your life spans both. While some transfer methods are as simple as plugging in a cable and hitting “import,” others are more involved. This guide will navigate you through common pitfalls and ensure a smooth photo sharing experience.
Key Considerations Before You Start:
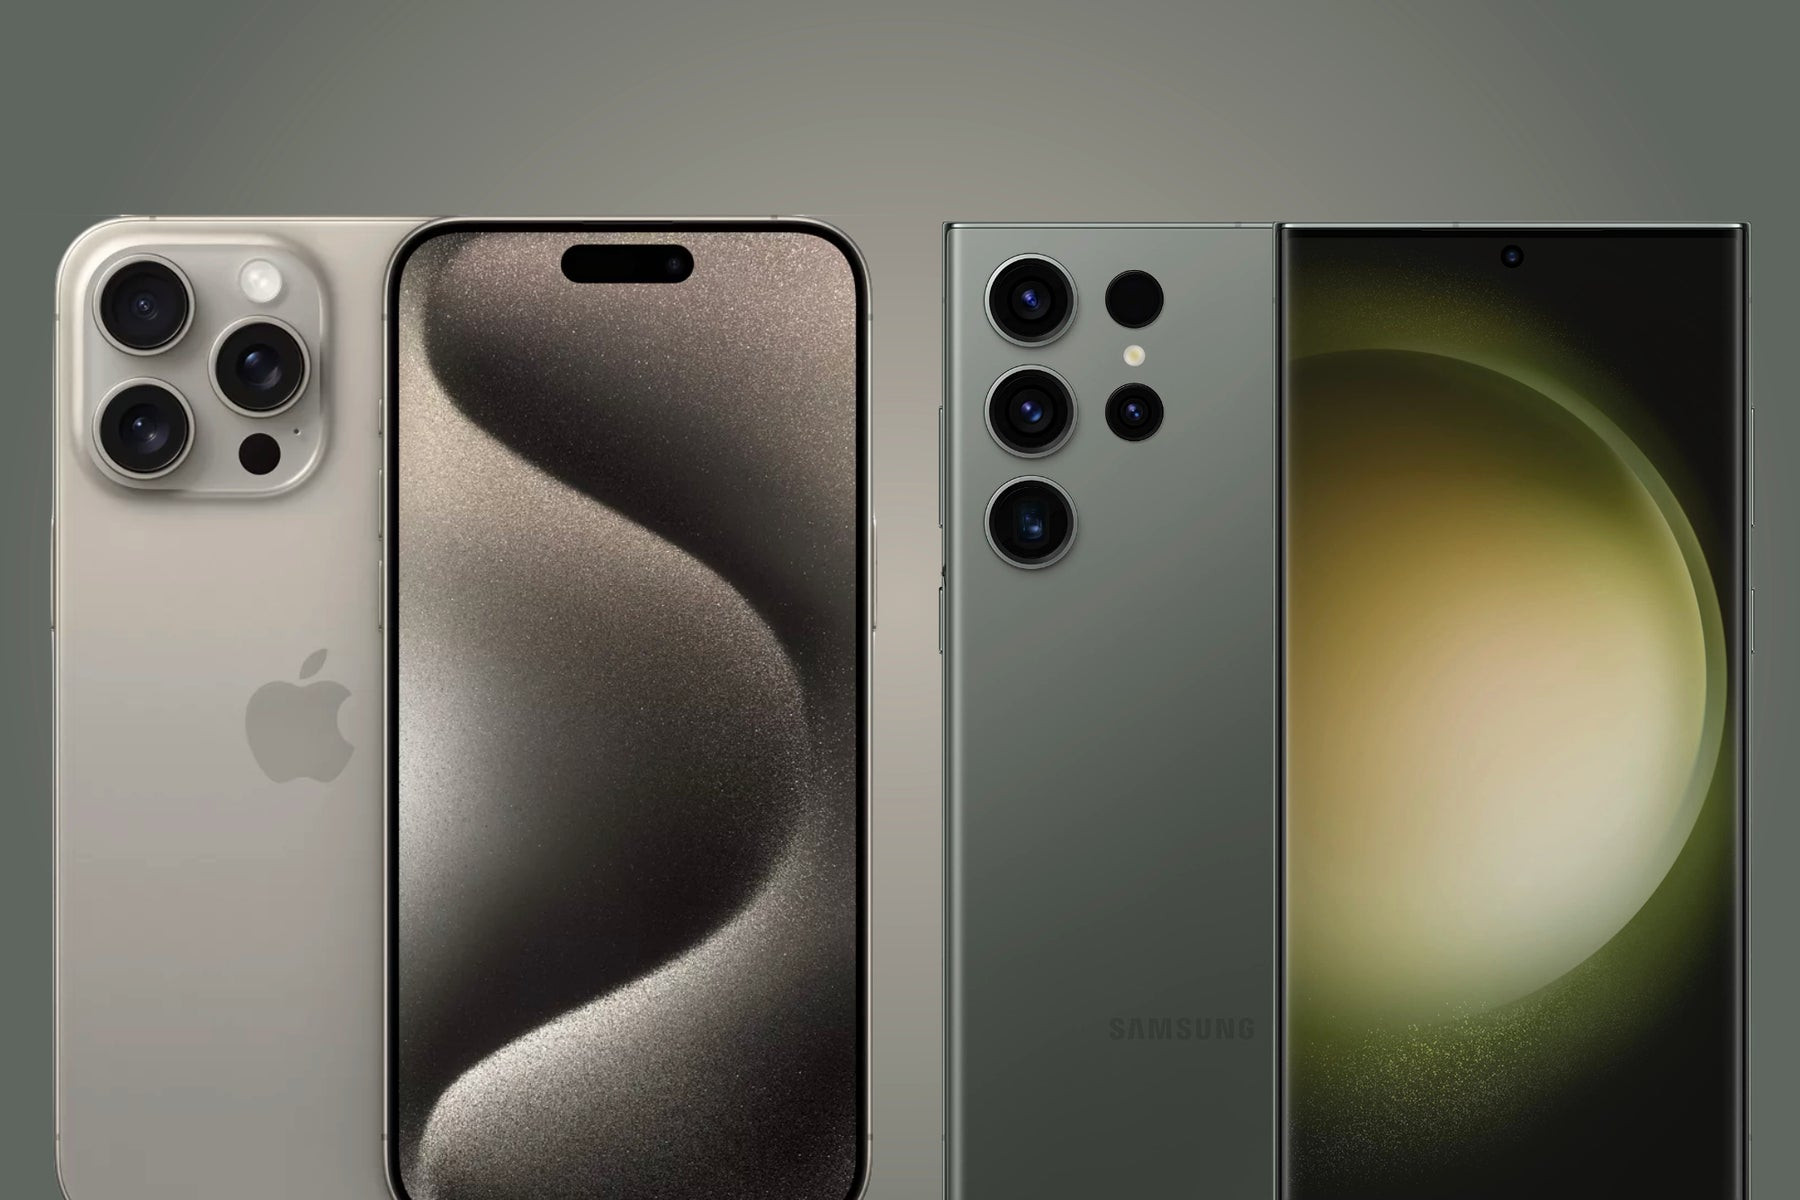 Close up of a person holding an iPhone 15 Pro Max next to a Samsung Galaxy S23 Ultra, illustrating the comparison between the two phone models.
Compatibility Hurdles
Always verify that any software or apps you use are fully compatible with both iOS and Android operating systems. Most reputable apps are designed for cross-platform use, and the methods detailed below are proven solutions. Additionally, ensure both your iPhone and Android are running the latest operating system versions for optimal compatibility and performance.
Data Size and Transfer Speed Limitations
Large photo and video libraries can lead to lengthy transfer times and potential timeouts. Before initiating any transfer, confirm you have sufficient storage space on the receiving device. Once a transfer begins, interrupting it is generally not recommended and can lead to data corruption. For massive transfers, using a computer as an intermediary can often be more stable.
Common User Errors
A frequent mistake is interrupting the transfer process prematurely. Even if progress seems slow, let the process complete uninterrupted. For large transfers, it can take hours or even days. Following step-by-step instructions carefully, especially for app-based transfers, is crucial. App permissions and settings are often essential for successful operation.
Risk of Data Corruption or Loss
Backing up your photos before any transfer is always a wise precaution. Cloud services are generally the most reliable for data integrity during transfers between Android and iPhone. They also typically maintain the original photo quality. To minimize corruption risks during direct transfers, consider moving photos in smaller batches and ensure a stable Wi-Fi connection where applicable. Dedicated file transfer apps like Zapya, Send Anywhere, and ShareIt are also known for their reliability.
File Type Differences
While less of an issue now, it’s worth noting that older iOS versions used HEIC (photos) and HEIV (videos) formats, whereas Android traditionally used JPG. Modern Android versions (9 and later) can handle HEIC and HEIV formats, simplifying transfers from iPhone to Android. However, transferring from Android to older iPhones might require format considerations if compatibility issues arise, although most modern transfer methods handle this automatically.
Effective Ways to Transfer Photos Between iPhone and Android
Cloud-based solutions are generally the easiest and most popular methods for transferring photos between Android and iPhone. Many users already utilize cloud services like Google Drive or Google Photos. However, several other methods exist, each with its own advantages. We’ll categorize each method by its compatibility: Android to iPhone, iPhone to Android, or bi-directional.
Here’s a quick overview of the methods we’ll cover:
- Cloud Services
- Google Photos
- Samsung Smart Switch
- Third-Party Apps
- SanDisk Wireless USB Drive
- Huawei Phone Clone
- PC Data Transfer
The iPhone to Android Trend: Interestingly, 2023 saw a significant trend of users switching from Android to iPhone. Reports indicate that a substantial percentage of new iPhone users were previously Android owners, driven by new features and perceived value. This shift has spurred the development of numerous apps and methods specifically designed to facilitate data transfer, including photo migration, from Android to iPhone.
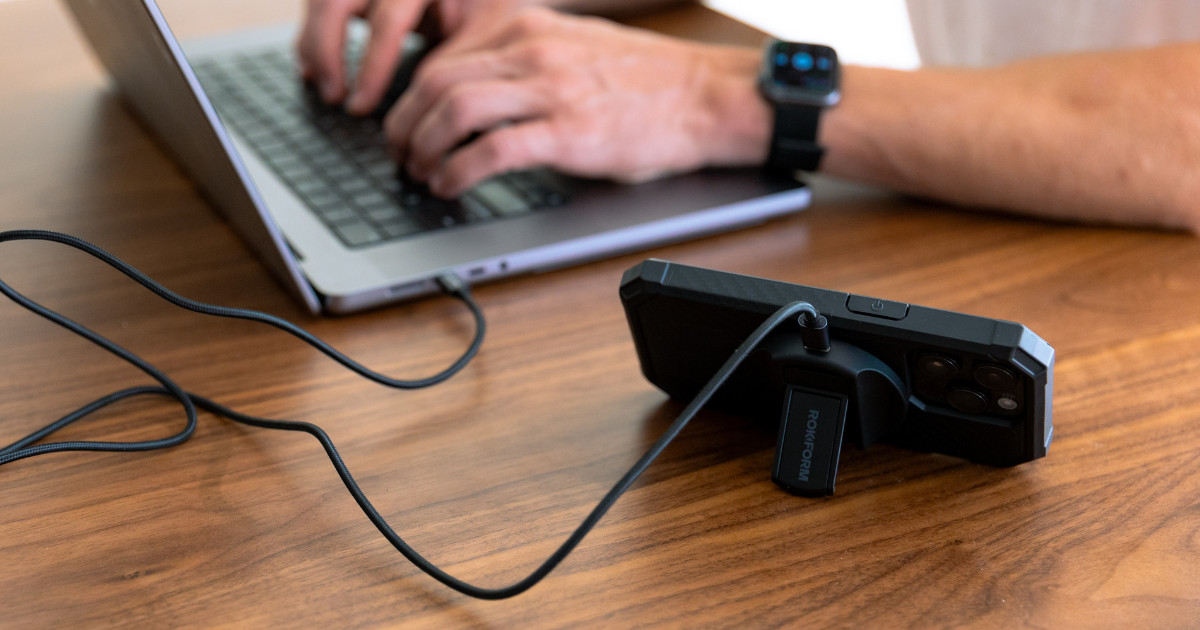 A person working on a laptop with an iPhone charging next to it, symbolizing data transfer and device management.
1. Cloud Services: Google Drive, Dropbox, OneDrive, and iCloud [Android ↔️ iPhone]
Cloud storage is a widely adopted strategy for transferring data across different operating systems. Photos stored in the cloud are accessible from any device with the appropriate login credentials, making it a straightforward way to share files between iPhones and Androids.
Google Drive is a particularly popular choice due to its widespread use and cross-platform compatibility. While other services like Dropbox, OneDrive, and iCloud exist, Google Drive boasts billions of users. Let’s compare the top cloud storage options for photo transfer:
Google Drive: Offers 15GB of free storage shared across Drive, Gmail, and Google Photos. Storage limitations can become a factor for large photo libraries. Google One subscriptions offer expanded storage at various price points.
Dropbox: Starts with 2GB of free storage, with paid plans scaling up to terabytes. Dropbox can be slower for large transfers and has file size limits, although the 2GB per file limit is unlikely to affect photo transfers.
iCloud: Provides 5GB of free storage, expandable with iCloud+ subscriptions. iCloud has a 2GB file transfer limit, which might be restrictive for video transfers. Cross-platform compatibility is also more limited compared to Google Drive.
OneDrive: Begins with 5GB free storage, with options for terabytes in paid subscriptions. OneDrive requires a stable internet connection and has a generous 250GB file upload limit.
 Screenshot of Google Drive interface on a mobile device, showing files being transferred, illustrating cloud-based photo sharing.
Step-by-Step Guide: Using Google Drive
While the exact steps vary slightly between cloud services, the general process is similar. Here’s a detailed walkthrough using Google Drive, the most commonly used option:
The Google Drive app can be somewhat clunky for photo transfers, but it’s functional. Here’s how to transfer photos from iPhone to Android using Google Drive:
- Install Google Drive: Download the Google Drive app from the App Store on your iPhone.
- Sign In: Open Drive and sign in with your Google account.
- Upload Initiation: Tap the “+” (Add) button.
- Select Upload: Choose “Upload.”
- Choose Photos: Select the photos you wish to transfer from your iPhone’s photo library.
- Start Upload: Tap “Upload” and allow the transfer to complete. Wi-Fi is strongly recommended for this step.
- Access on Android: On your Android device, open the Google Drive app (usually pre-installed).
- Locate Uploaded Photos: Find the images you uploaded from your iPhone.
- Download to Android: Tap the three-dot menu icon (More options) next to the selected images.
- Download: Tap “Download” to save the photos to your Android device.
Key Considerations for Cloud Transfers
Ease of Use: Cloud services offer a relatively user-friendly drag-and-drop interface and are generally intuitive.
Time Required: Transfer times can range from 24 to 48 hours, depending on the volume and size of photos and videos.
Data Usage: Cloud transfers consume data. Transferring 100MB of photos uses approximately 100MB of data. Wi-Fi is highly recommended to avoid mobile data charges.
Wi-Fi Requirement: While not strictly mandatory, a stable and fast Wi-Fi connection is strongly advised for efficient and cost-effective cloud transfers.
2. Google Photos: Seamless Syncing [Android ↔️ iPhone]
For users prioritizing image quality, Google Photos provides a straightforward way to transfer photos between iPhones and Androids without compression. The Google Photos app is pre-installed on most Android devices and is available as a free download from the App Store for iPhones. It’s a top choice for easily sharing photos in both directions.
 Google Photos logo on a mobile screen, representing the app-based photo sharing service.
Step-by-Step Guide: Using Google Photos
Google Photos offers two main methods for transferring photos:
Method 1: Full Sync (High Storage Usage, Minimal Effort)
- Install and Sign In: Install the Google Photos app on both your Android and iPhone and sign in using the same Google account.
- Set Backup Quality: In the app settings, set the backup quality to “Original” to maintain full image resolution.
- Enable Backup & Sync: Turn on “Backup & sync” on both devices. Photos and videos will automatically sync between devices.
- Access Photos: Use the Google Photos app on either phone to view and download synced photos.
Method 2: Selective Sharing (Lower Storage Usage, More Manual Steps)
- Select Photos: In the Google Photos app, select the specific photos you want to transfer.
- Share: Tap the “Share” icon.
- Choose Device/Contact: Select your other phone or your Google account as the recipient.
- Send: Tap “Send.”
Key Considerations for Google Photos
Ease of Use: Google Photos is highly intuitive, offering drag-and-drop functionality and automatic photo backup options.
Time Required: Transfer times vary from minutes to days depending on the volume and size of photos and videos being synced or shared.
Data Usage: By default, Google Photos is configured to back up photos and videos only over a Wi-Fi connection to minimize mobile data consumption.
Wi-Fi Requirement: A Wi-Fi connection is strongly recommended for Google Photos due to its data-intensive nature, especially when backing up in original quality.
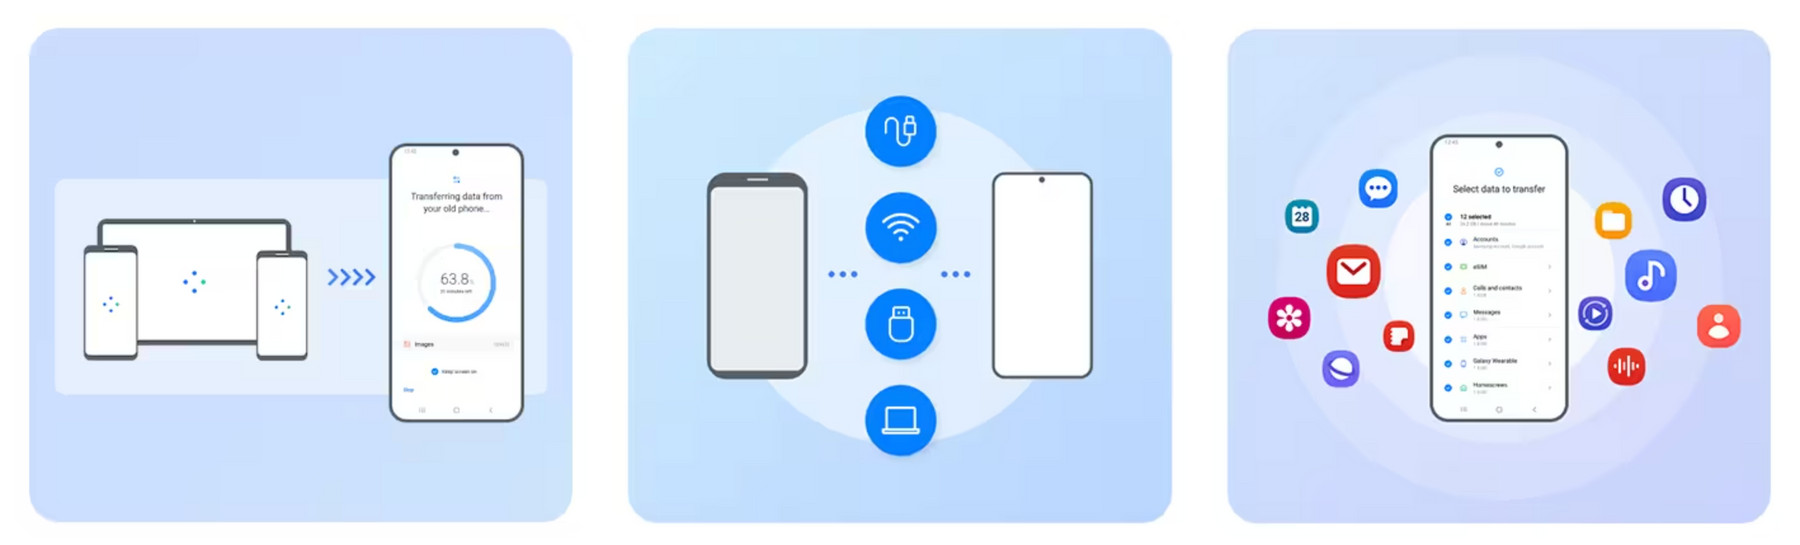
3. Samsung Smart Switch: For Samsung to iPhone Transfers [Android ➡️ iPhone]
Samsung Smart Switch is designed primarily for users migrating to a new Samsung Galaxy device. It facilitates data transfer, including photos, from an old iPhone or Android to a new Samsung phone. Smart Switch comes pre-installed on most recent Galaxy models and can transfer data via USB cable or Wi-Fi. It also supports restoring iPhone backups from a computer to a Samsung device.
This method is ideal if you’re transitioning from an iPhone to a Samsung Galaxy. However, it’s specifically for transferring to a Samsung device, not from a Samsung to an iPhone. For transferring photos to an iPhone from an Android, other methods are necessary.
 Samsung Smart Switch interface on a phone screen, showing options for data transfer from iPhone to Android.
Step-by-Step Guide: Using Samsung Smart Switch
Here’s how to transfer photos from an iPhone to a Samsung Android phone using Smart Switch:
- Connect Devices: Connect your Android and iPhone using a USB cable and a compatible adapter (if needed).
- Launch Smart Switch: Open the Smart Switch app on your Samsung Android phone and select “Receive data.”
- Choose Connection Type: Select “Cable” as the connection method. A prompt will appear on your iPhone asking you to trust the connected device. Tap “Trust.”
- Initiate Search: Tap “Next” on your Android. Smart Switch will automatically scan for transferable data on your iPhone, including photos.
- Select Photos: Choose “Photos” and any other data types you wish to transfer from the list displayed on your Android. Then, initiate the transfer process and wait for it to complete.
Key Considerations for Samsung Smart Switch
Ease of Use: Smart Switch is designed for simplicity and user-friendliness, with an intuitive interface.
Time Required: Transfer time depends on the amount of data being transferred, ranging from minutes to potentially hours for large libraries.
Data Usage: Data transfer via USB cable does not consume mobile data.
Wi-Fi Requirement: While cable transfer is data-free, Wi-Fi transfer options within Smart Switch may use Wi-Fi, but not your mobile data plan. Wi-Fi is generally recommended for stability.
4. Third-Party Apps: SHAREit, Zapya, Xender, Move to iOS, Copy My Data, Dr.Fone [Android ↔️ iPhone]
Numerous third-party apps are designed to facilitate photo transfers between iPhones and Androids. The best choice depends on your specific needs, data volume, and device compatibility. Here are some of the top-rated apps:
 Collage of app icons for SHAREit, Zapya, Xender, Move to iOS, Copy My Data, and Dr.Fone, representing app-based transfer solutions.
App Options:
-
SHAREit [Android ↔️ iPhone]: A versatile file-sharing app with networking features for easy photo and file transfers across various operating systems. It offers encrypted transfers and no file size limits.
- Capacity: All file types (photos, video)
- Wi-Fi Required: No (but devices need to be on the same Wi-Fi network for network features)
- Cloud Service Needed: No
- Good for large files: Yes
- Cost: Free with premium subscription options.
-
Zapya [Android ↔️ iPhone]: Known for its fast transfer speeds, Zapya uses peer-to-peer networking to share large files quickly without internet access. It works across major operating systems and is useful for collaborative file sharing.
- Capacity: All file types (photos, video)
- Wi-Fi Required: No
- Cloud Service Needed: No
- Good for large files: Yes
- Cost: Free
-
Xender [Android ↔️ iPhone]: Another peer-to-peer app that emphasizes security with added encryption. It offers reliable and simple file transfers without needing an internet connection.
- Capacity: All file types (photos, video)
- Wi-Fi Required: No
- Cloud Service Needed: No
- Good for large files: Yes
- Cost: Free
-
Move to iOS [Android ➡️ iPhone]: An Apple-developed app specifically for transferring data from Android to iPhone. It moves contacts, messages, bookmarks, calendars, photos, and videos seamlessly.
- Capacity: All file types (photos, video)
- Wi-Fi Required: Yes
- Cloud Service Needed: No
- Good for large files: Yes
- Cost: Free
-
Copy My Data [Android ➡️ iPhone]: Designed for both Android and iPhone, Copy My Data is useful for transferring data to a new phone, including contacts, calendars, and photos.
- Capacity: All file types (photos, video)
- Wi-Fi Required: Yes
- Cloud Service Needed: No
- Good for large files: Yes
- Cost: Free
-
Dr.Fone [Android ➡️ iPhone]: A Wondershare software suite that includes data recovery, file transfer, backup, and WhatsApp transfer tools.
- Capacity: All file types (photos, video)
- Wi-Fi Required: Yes
- Cloud Service Needed: No
- Good for large files: Yes
- Cost: Paid software suite with various modules available.
Step-by-Step Guide: Using Zapya
For this guide, we’ll focus on Zapya due to its speed and ease of use. However, the general steps are similar for many file-sharing apps.
Zapya uses QR codes for quick connections and transfers photos and videos between iPhones and Androids without quality loss or internet dependency, similar to AirDrop but using QR codes.
Transferring Photos from iPhone to Android with Zapya: (Reverse the device roles for Android to iPhone transfers)
-
Enable Receiving on Android:
- Open Zapya on your Android device.
- Tap the “Transfer” icon at the bottom.
- Grant necessary permissions and tap “Receive.”
- Zapya creates a Wi-Fi hotspot; no internet is needed. A QR code will appear.
-
Connect with iPhone:
- Open Zapya on your iPhone.
- Tap “Scan” at the top right.
- Scan the QR code displayed on your Android.
- Tap “Allow Connection” (you may need to manually connect to the Zapya hotspot in your iPhone’s Wi-Fi settings).
-
Transfer Photos:
- Once connected, tap the “Files” tab on your iPhone.
- Select the photos and videos to transfer.
- Tap “Send.” Photos and videos are sent in original quality, without compression.
Key Considerations for App-Based Transfers
Ease of Use: Most file-sharing apps are designed to be user-friendly with intuitive interfaces.
Time Required: Zapya, for example, boasts transfer speeds of up to 260 photos per minute. Actual transfer times depend on file sizes and volume.
Data Usage: Apps like Zapya, Xender, and SHAREit do not use mobile data for transfer, as they create direct Wi-Fi connections between devices.
Wi-Fi Requirement: No external Wi-Fi network is needed for many of these apps, as they create their own direct Wi-Fi connections.
5. SanDisk Wireless USB Drive: Portable Wireless Transfer [Android ↔️ iPhone]
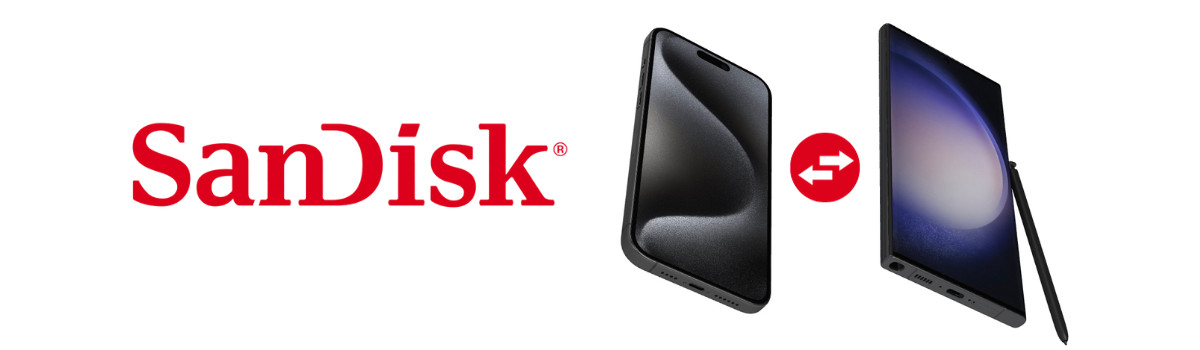 SanDisk Wireless USB Drive and phone, illustrating wireless photo transfer via a portable drive.
The SanDisk Connect Wireless USB Drive, paired with the SanDisk Connect Drive app, offers a unique method for wireless photo transfer. It allows automatic uploads from your camera roll to the drive when connected.
A key advantage is its ability to transfer photos wirelessly between Android and iPhone, and even to multiple devices simultaneously (up to three). This is useful for photographers wanting to quickly transfer photos from a DSLR (often Wi-Fi enabled) to both iOS and Android devices after a shoot. The drive can also stream media to multiple devices.
SanDisk Connect Wireless Stick Capacities:
- 32GB
- 64GB
- 128GB
- 200GB
- 256GB
Step-by-Step Guide: Using SanDisk Wireless USB Drive
The SanDisk Wireless Drive and app system is designed for ease of use.
- Install App and Charge Drive: Download the SanDisk Connect Drive app on your mobile device and ensure the Wireless Stick is fully charged.
- Power On and Connect: Plug in the Wireless Stick with a USB cable adapter and turn it on by pressing the power button.
- Connect to Wi-Fi: On your phone, go to Wi-Fi settings and select “SanDisk Connect” to connect to the drive’s Wi-Fi network.
- Access App and Transfer: Open the SanDisk Connect Drive mobile app. You can now select and save photos and other files to or from the drive.
Key Considerations for SanDisk Wireless USB Drive
Ease of Use: The system is simple and straightforward, with a user-friendly app interface.
Time Required: Transfer times depend on file size and Wi-Fi speed.
Data Usage: No mobile data is used, as the drive creates a local Wi-Fi network.
Wi-Fi Requirement: Yes, devices connect to the drive’s Wi-Fi network.
6. Huawei Phone Clone: Phone Cloning for Huawei Devices [iPhone/Android ➡️ Huawei Android]
Huawei Phone Clone provides a method for transferring photos and other data when migrating to a new Huawei Android device. It offers data backup and secure transfers across operating systems, using a Wi-Fi hotspot connection. Besides photos, it can transfer videos, contacts, apps, and messages, essentially cloning your old phone to the new Huawei device.
 Huawei Phone Clone interface on two phones, showing the QR code connection process for phone cloning.
Step-by-Step Guide: Using Huawei Phone Clone
Huawei Phone Clone focuses on complete phone cloning for device migration:
- Launch App: Start the Huawei Phone Clone app on both your old and new phones.
- Select New Phone: On the new Huawei phone, select “This is the new phone.” A QR code will be displayed.
- Connect via QR Code: On the old phone, select “This is the old phone” and use its camera to scan the QR code on the new phone.
- Initiate Transfer: Once devices are connected, a confirmation message appears. Tap “Transfer” to begin cloning data.
Key Considerations for Huawei Phone Clone
Ease of Use: The process is simple and guided by the app.
Time Required: Transfer time ranges from minutes to hours, depending on the amount of data being cloned.
Data Usage: No mobile data is used.
Wi-Fi Requirement: Yes, a Wi-Fi hotspot connection is required for device communication.
7. PC Data Transfer: Reliable and Versatile [Android ↔️ iPhone]
Using a PC as an intermediary is considered a robust and versatile approach for transferring photos between Android and iPhone. It eliminates concerns about storage space and battery life during transfer. The process is fundamentally the same in both directions (Android to iPhone and iPhone to Android), just reversed.
Pros of PC Transfer:
- Large Data Support: Ideal for transferring very large photo and video libraries.
- Universal Compatibility: Works for both iPhone to Android and Android to iPhone transfers.
- Image Format Conversion: Facilitates format conversion, particularly from iPhone’s HEIC to more universal formats like JPG.
- Backup Opportunity: Provides an easy opportunity to back up photos to your PC during the transfer.
- No Wi-Fi Needed: Does not require an internet connection.
Cons of PC Transfer:
- PC Required: Requires access to a computer, which may not be available to all users.
- Two-Step Process: Involves a two-step process (phone to PC, then PC to phone).
- Compatibility Issues: Driver or software issues may sometimes hinder phone-PC communication.
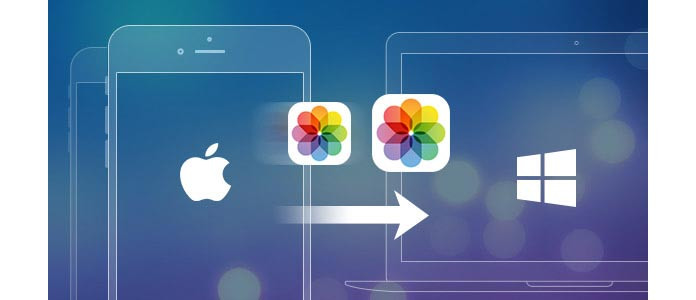 Illustration of transferring photos from an Android phone to a PC, symbolizing PC-based transfer method.
Step-by-Step Guide: Using a PC
Here’s how to transfer photos from Android to iPhone using a PC: (Reverse device roles for iPhone to Android transfer)
Step 1: Transfer Photos from Android to PC
- Connect Android to PC: Use a USB cable to connect your Android phone to your computer.
- Transfer Photos: Use File Explorer (Windows) or Finder (Mac) to access your Android phone’s storage. Navigate to the DCIM folder (or the folder where your photos are stored) and copy the photos to a folder on your PC.
Step 2: Transfer Photos from PC to iPhone
- Connect iPhone to PC: Disconnect the Android and connect your iPhone to your PC using a USB cable.
- Sync with iTunes (or Finder on macOS Catalina and later):
- iTunes (Windows/Older macOS): Open iTunes, select your iPhone icon, go to “Photos,” check “Sync Photos,” choose the folder on your PC where you saved the Android photos, and click “Sync.”
- Finder (macOS Catalina and later): Open Finder, select your iPhone in the sidebar, click “Photos,” check “Sync photos to your device,” choose the folder, and click “Apply.”
Key Considerations for PC Transfer
Ease of Use: PC transfer is generally easy and intuitive for users familiar with file management on computers.
Time Required: Transfer time depends on file sizes and the speed of USB connections.
Data Usage: No data usage as transfers are done via USB cable.
Wi-Fi Requirement: No Wi-Fi network is needed.
Which Method is the Easiest?
The “easiest” way to transfer photos between iPhone and Android depends on the number of photos and file sizes, as well as your technical comfort level.
Easiest Ways to Transfer Photos from iPhone to Android:
- PC, Cloud, or Google Photos: These are generally the most user-friendly options. PC transfer is reliable and avoids battery/storage limitations. Cloud and Google Photos offer wireless convenience.
- Apps like Zapya: Apps provide a seamless experience with fast transfer speeds and no data usage.
Easiest Ways to Transfer Photos from Android to iPhone:
- PC: Again, PC transfer is a top choice for reliability and control.
- Cloud and Google Photos: Cloud services offer wireless convenience and cross-platform compatibility.
- Move to iOS App: Apple’s “Move to iOS” app is designed specifically for this migration and is quite user-friendly.
Avoid Old-School Methods (Not Recommended)
Quick fixes like sending photos via SMS or social media are not recommended for large transfers or maintaining image quality. These methods typically compress photos significantly.
Direct phone-to-phone transfer using older methods can be cumbersome. Sticking to the recommended techniques ensures speed, efficiency, and avoids potential issues.
 Table summarizing different photo transfer methods between iPhone and Android, highlighting ease of use and other factors.
Why Android and iPhone Users Choose Rokform
Beyond photo transfer, both Android and iPhone users share a common need: protecting their smartphones. Rokform offers rugged phone cases, mounts, and accessories known for their durability, style, and functionality.
Rokform Phone Cases
Protect your iPhone or Samsung Galaxy with Rokform’s rugged phone cases. Designed for Galaxy models including the S23 and S24, Rokform cases feature innovations like a non-magnetic plug for S-Pen compatibility on Samsung Ultra models.
Rokform iPhone cases also feature strategically placed magnets for attaching to magnetic surfaces. Magnets are safe for smartphones!
Rokform cases for both iPhone and Samsung are compatible with most wireless chargers, and Rokform offers a range of phone chargers and power adapters.
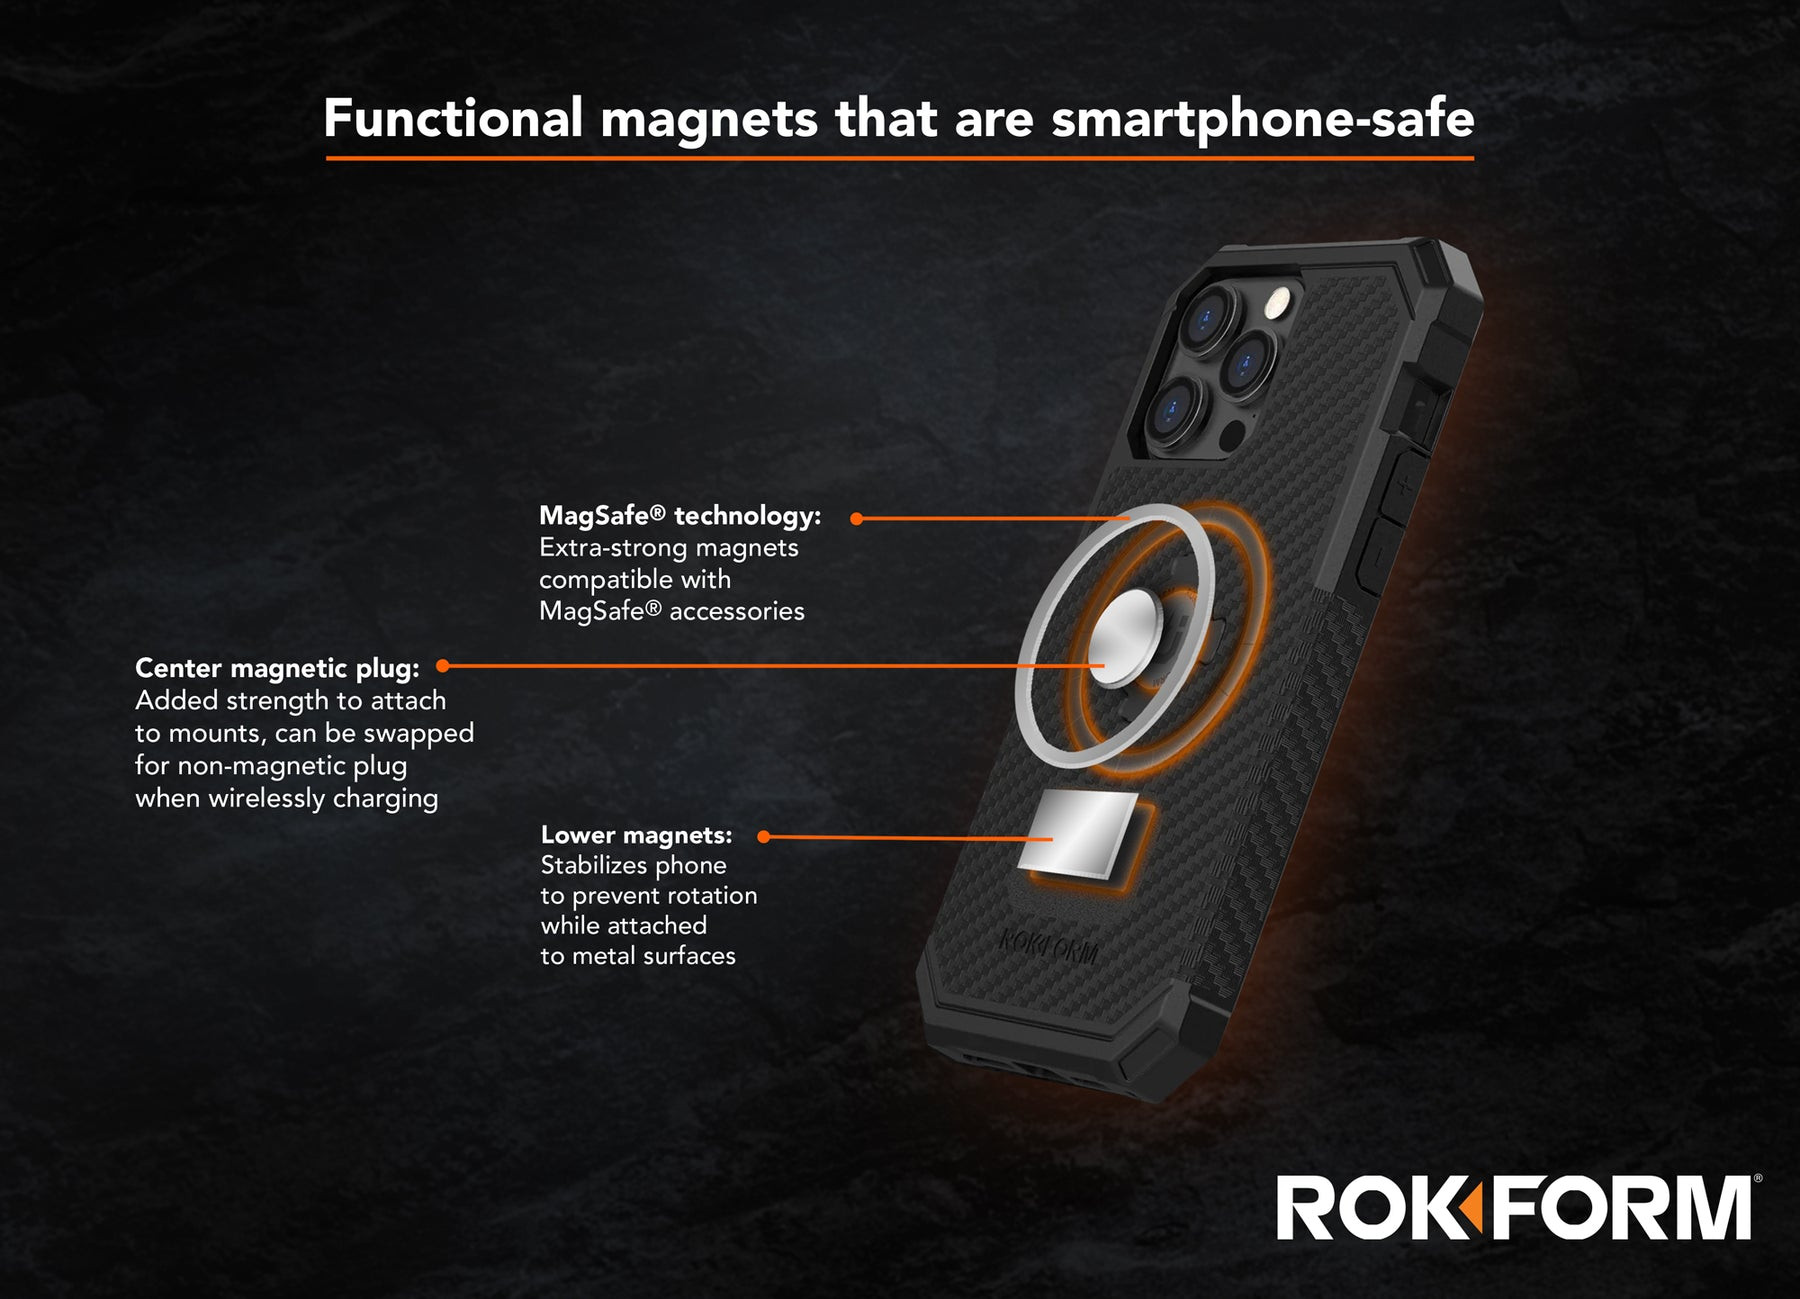 Infographic explaining the safety of magnets with smartphones, emphasizing Rokform's magnetic case designs.
Rokform iPhone Case Product Link
Rokform Samsung Case Product Link
Rokform Google Pixel Case Product Link
Rokform Phone Mounts & Accessories
Rokform offers a diverse range of mounts and accessories for various lifestyles and activities, compatible across devices:
- Motorcycle Mounts
- Car Mounts
- Bike Mounts
- Other Mounts
For adventurers, the Rokform Sport Utility Belt Clip and detachable lanyard provide secure and convenient phone carrying options.
Rokform Belt Clip Product Link
Rokform Motorcycle Mount Product Link
Rokform Windshield Mount Product Link
Conclusion: Photo Sharing Made Simple
Transferring photos between iPhone and Android doesn’t need to be complicated. Using a PC is a highly recommended method for its speed and backup benefits.
Top Recommended Methods:
- Cloud Services
- Google Photos
- Samsung Smart Switch
- Third-Party Apps
- SanDisk Wireless USB Drive
- Huawei Phone Clone
- PC Transfer
While personal preference varies, PC transfer is often the best overall solution for sharing photos between iPhone and Android due to its reliability and lack of storage/battery constraints. Cloud services and Google Photos are also excellent for their ease of use and data safety. Apps like Zapya offer fast, direct transfer options. With the right method, photo sharing between different phone ecosystems can be a smooth and efficient experience.