Feeling overwhelmed by the chaos of your digital photos? It’s a common struggle. While organizing physical items might come naturally to some, tackling digital clutter, especially photos, can feel like a daunting task. Just like many, I find sorting through digital files a different beast compared to arranging physical prints. However, as our lives become increasingly digital, mastering digital organization is essential. If you’re looking for a straightforward system to get your digital photo library in order, you’ve come to the right place. Let’s dive into How To Organize Digital Photos effectively!
Step 1: Schedule Your Digital Photo Organizing Time
It might not be the most exciting item on your to-do list, but scheduling time for digital photo organization is absolutely crucial. Think of it as an appointment with yourself to bring order to your visual memories. Consistency is key when it comes to managing digital photos. The good news is, once you set up the system outlined below, you’ll only need to dedicate a short, manageable amount of time each month – perhaps just 10-15 minutes – to keep your digital photo library sorted. Consider your photo habits; if you’re a frequent photographer, weekly sessions might be beneficial. For others, monthly organization might suffice. Regardless of the frequency, the most important step is to add “organize digital photos” as a recurring event in your calendar right now. This simple act dramatically increases the likelihood of you sticking to the plan!
Step 2: Create a Logical Folder System
To get started with a practical photo organization system, begin with the current year. Create a main folder labeled with the current year. Inside this year folder, create subfolders for each month of the year. For clear chronological order, I recommend labeling each month folder with the month’s number followed by its name. This consistent dating method ensures nothing gets lost and your folders remain easily searchable.
For example:
01_January
02_February
To enhance your organization further, within each month folder, create additional folders for significant events that you know are happening or have happened. This can be done proactively or as you go. Pre-planning event folders can save time later. Label each event folder with the date, followed by the event name.
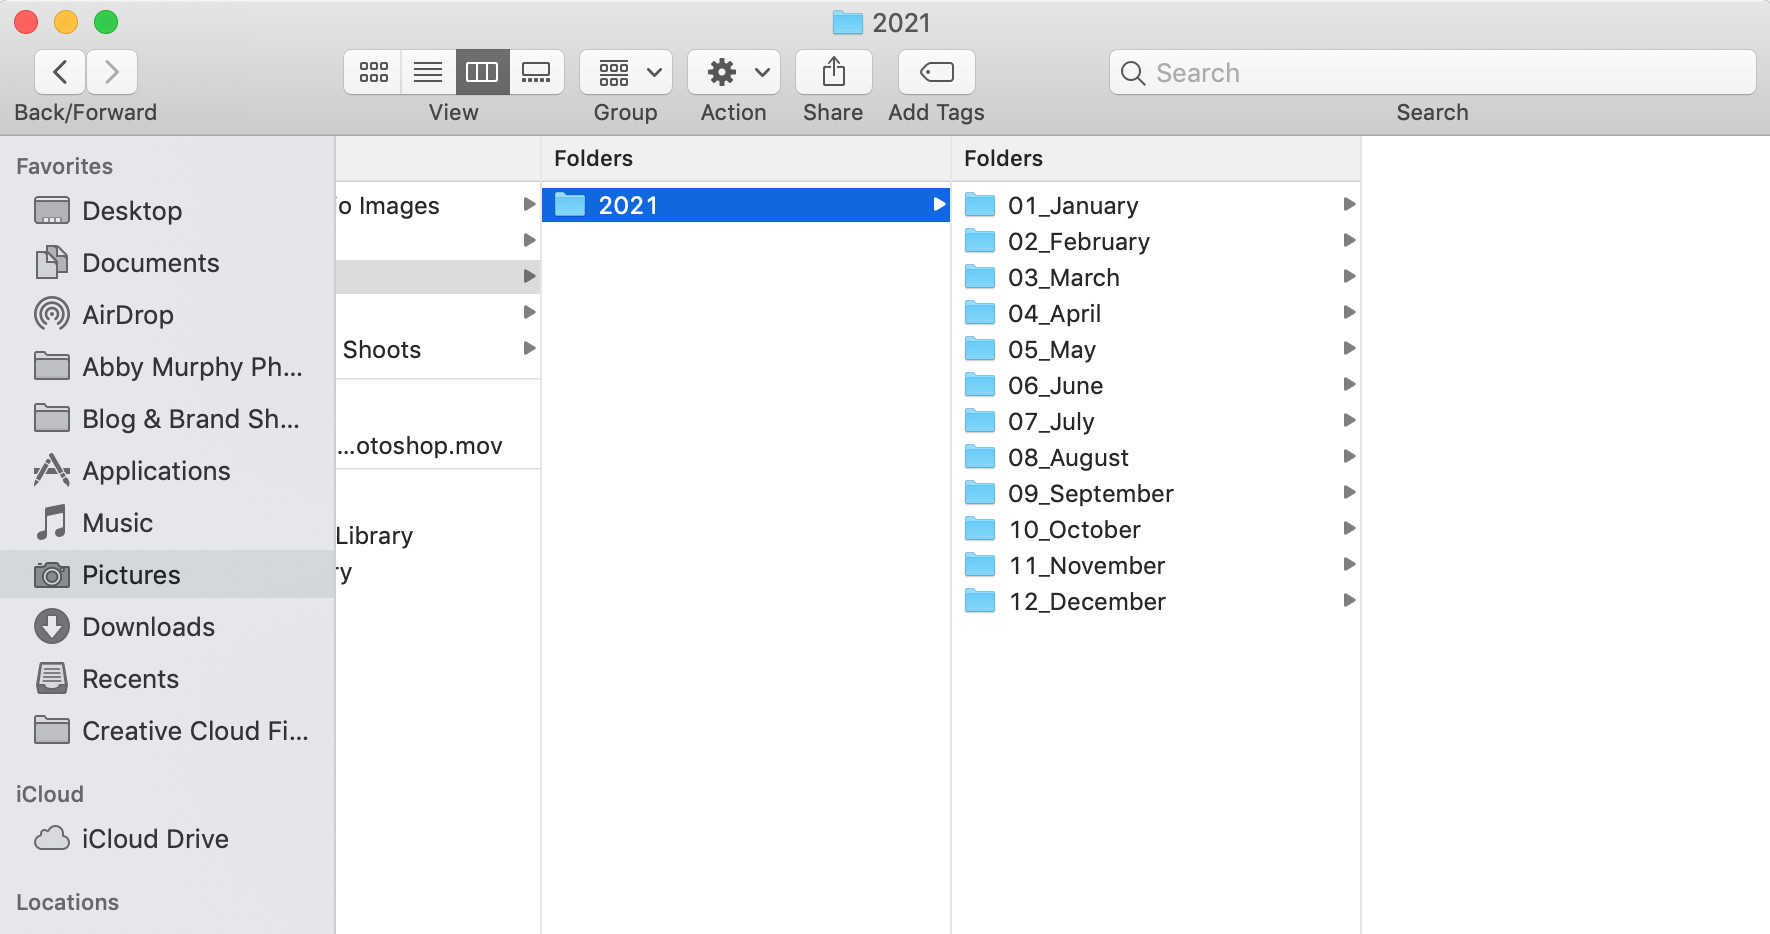 Folder structure example showing year, month, and event folders
Here’s a clearer example of how to name event folders:
04-19-2024_Sarah’s Birthday
12-25-2024_Christmas_Holiday
You can even add another layer by including the event type for even easier sorting and filtering later:
04-19-2024_Sarah’s Birthday_Birthday
12-25-2024_Christmas_Holiday
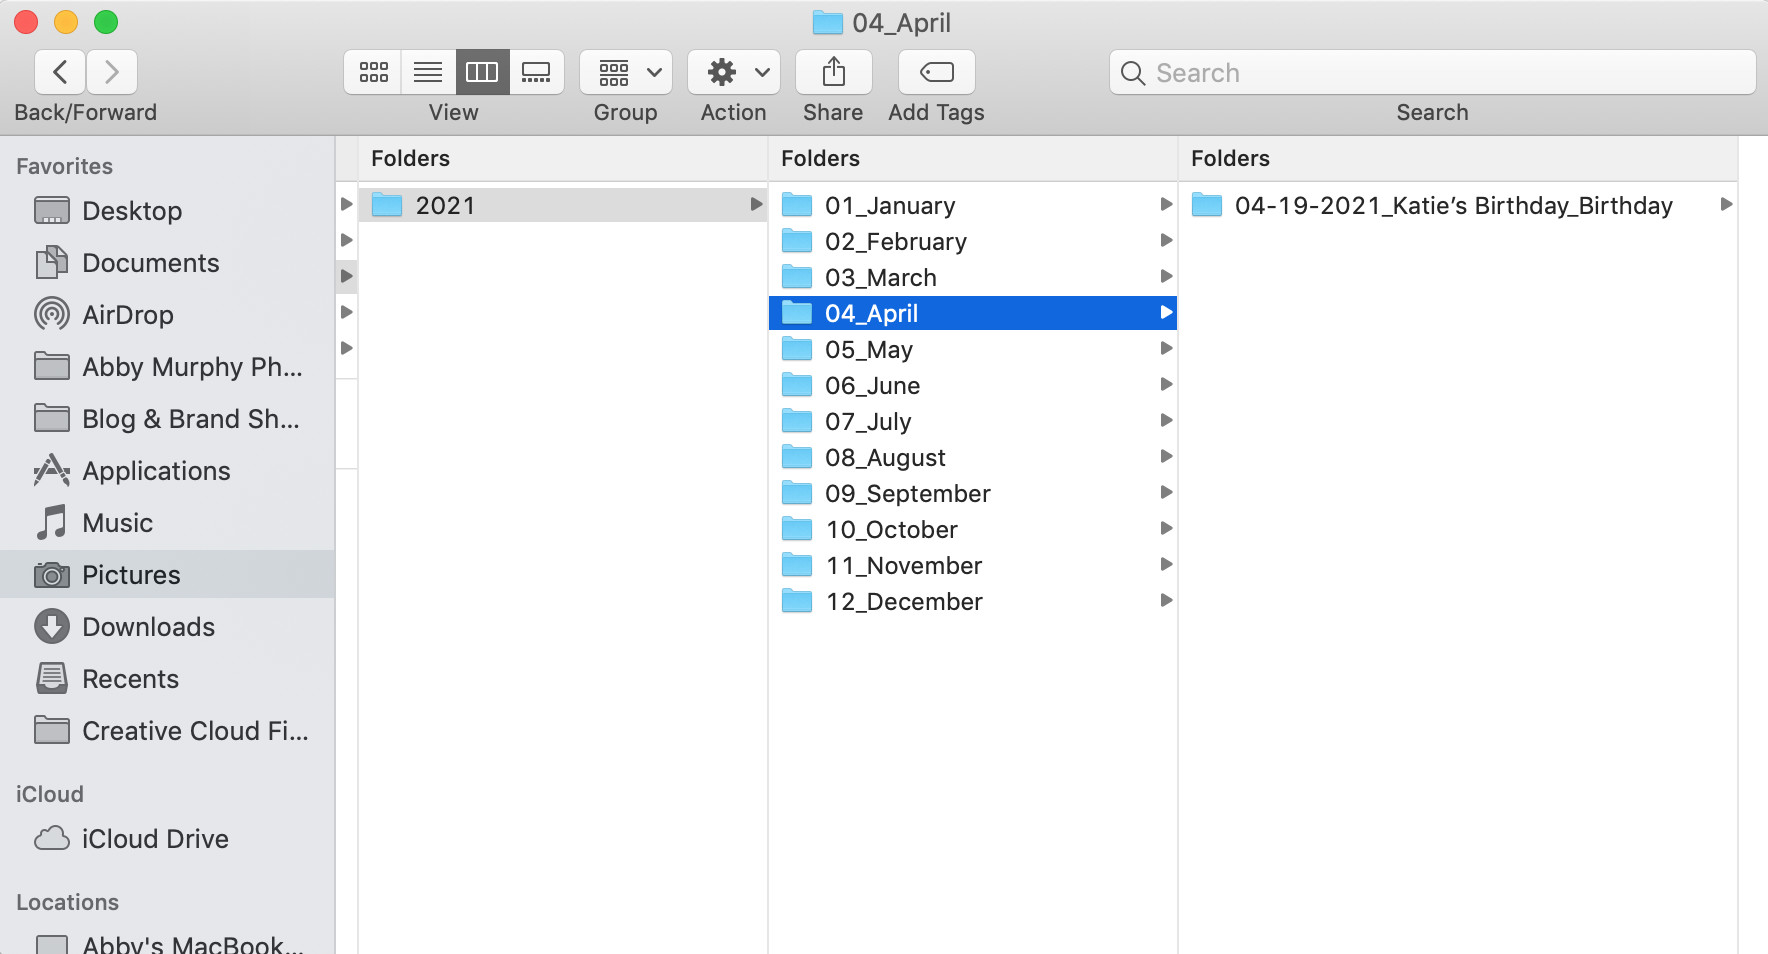 Detailed folder naming example with date, event, and event type
Personally, I find renaming individual image files unnecessary when using this folder system, as the well-organized folders provide sufficient context. However, renaming files is an option if you prefer more granular control.
If you have years of photos waiting to be organized, starting by setting up this folder framework is incredibly helpful. Having the folder structure in place makes it much easier to sort and place your photo files correctly. Organizing past photos is a project that takes time, so be patient with yourself and avoid feeling pressured to complete it all at once. Schedule your organizing sessions incrementally, and gradually, you’ll bring your entire digital photo archive under control.
And just like that, your core photo organizing system is established! Simple and effective, isn’t it?
Step 3: Back Up Your Precious Memories – Multiple Times!
No digital photo organization system is complete without robust backups. Skipping this critical step is not an option! You absolutely need at least one backup of your photos in addition to their primary location. Ideally, aim for a third backup location for ultimate peace of mind. Just as physical photos can be lost to unforeseen events, digital photos are vulnerable to hard drive failures and computer mishaps. Multiple backups provide a safety net, ensuring your memories are protected.
Cloud storage is an excellent starting point for backups. Numerous reputable services specialize in photo storage. Consider options like Adobe Creative Cloud, Google Photos, Dropbox, or Apple iCloud Drive. Explore a few to find a service that aligns with your ease of use preferences and desired features. For comprehensive system backups, services like Backblaze and iDrive offer solutions to back up your entire computer hard drive and external drives to the cloud.
I also strongly recommend using physical hard drives for backups. I personally use this G-Technology drive and this Seagate drive. Hard drives are available in various storage capacities, starting from 500GB. To minimize risk, avoid storing everything on a single large drive, especially without a backup of that drive! I utilize multiple hard drives categorized by year, as my photography business requires extensive storage. For personal photo collections primarily consisting of JPG files, a 500GB or 1TB drive should offer ample space. When selecting a hard drive, prioritize features like SSD (Solid State Drive) for speed, USB 3.0 or faster connectivity, compatibility with your operating system (PC and/or Mac), and positive user reviews.
Step 4: Regularly Organize Your Digital Photos!
Remember that scheduled photo organizing time you marked in your calendar? Now it’s time to put your system into action! On your designated day each week or month, gather your memory cards and phone, and open your prepared photo folders. Here are the step-by-step actions for organizing your digital photos:
-
Open your photos in a photo viewer: Use a program that allows you to easily view and manage your photos. Options include Adobe Bridge, the Photos app (on both Mac and Windows), Adobe Lightroom, or ACDSee. This step allows you to preview and select the photos you need to organize.
-
Create dated and labeled event folders: As you review your photos, create folders within the appropriate month folder for each event or occasion captured in your photos. Your calendar is a helpful resource to recall dates of events, or you can check the file information of your photos to determine the date and time they were taken.
-
Drag and drop photo files into folders: Simply drag and drop your photo files from your photo viewer into their corresponding month and event folders within your carefully structured system.
-
Back up your organized photos immediately: Connect your hard drive or initiate your Cloud backup service. Back up the newly organized photos right away to ensure your work is protected.
-
Celebrate your organized photos! Take a moment to appreciate the order you’ve created and the peace of mind that comes with knowing your photos are organized, safe, and easily accessible.
Doesn’t it feel fantastic to have a clear plan for managing your digital photos? The sheer volume of digital information we manage can feel overwhelming at times. However, implementing a system like this can significantly reduce that feeling of being frazzled and bring a sense of control. If you also need guidance on organizing your printed family photos, be sure to check out this post for tips. And if you’re now wondering what to do with your beautifully organized photos, explore some creative projects like digital scrapbooking to further enjoy your visual memories!
READ NEXT