Navigating the world of cloud storage can sometimes feel like a digital maze, especially when dealing with photos and videos across different Google platforms. If you’re wondering How To Move Pictures From Google Drive To Google Photos, you’re not alone. While Google Drive is excellent for general file storage and sharing, Google Photos is specifically designed for managing, editing, and enjoying your visual memories. This guide will walk you through several effective methods to seamlessly transfer your precious photos from Google Drive to Google Photos, ensuring they are organized and readily accessible in the right place.
Why Move Your Pictures from Google Drive to Google Photos?
Although both Google Drive and Google Photos are Google services and can store your photos, they operate quite differently and offer distinct advantages. Understanding these differences clarifies why moving your photos to Google Photos is often the better choice for image management.
Google Drive functions primarily as a file storage and synchronization service. It’s a digital hard drive in the cloud where you can store any type of file, including photos. However, when it comes to viewing, organizing, and editing images, Google Drive’s capabilities are limited. You can view photos and download them, but advanced features are lacking.
On the other hand, Google Photos is purpose-built for photos and videos, offering a superior experience in several key areas:
⭕ Enhanced Viewing Experience: Google Photos provides a visually appealing and intuitive interface for browsing your photos. Images are automatically organized by date, allowing you to easily scroll through your memories chronologically. You can access your library through photos.google.com or the dedicated Google Photos mobile app, ensuring convenient access across devices.
⭕ Intelligent and Powerful Search: One of Google Photos’ standout features is its AI-powered search capability. You can search for virtually anything within your photos – from “beach” and “birthday party” to specific people, animals, or objects. Google Photos uses facial recognition and object detection to deliver remarkably accurate search results, making it incredibly easy to find specific photos even within vast libraries.
⭕ Built-in Photo Editing Tools: Google Photos offers a range of basic to advanced photo editing tools directly within the platform. You can easily apply filters, adjust brightness, contrast, and color levels, rotate and crop images, and even use AI-powered enhancements to improve your photos with just a tap.
⭕ Superior Organization and Sharing: Beyond simple storage, Google Photos excels at organization. It automatically creates albums, collages, and animations from your photos. Sharing photos and albums with friends and family is also seamless and user-friendly within the Google Photos ecosystem.
In essence, while Google Drive serves as a reliable storage space, Google Photos transforms into a dynamic, intelligent photo library, designed to make the most of your visual content. Moving your pictures to Google Photos unlocks these powerful features, making photo management a more enjoyable and efficient experience. Let’s explore the methods to achieve this transfer.
 Comparison of Google Photos and Google Drive interfaces highlighting features for photo management vs general file storage
Step-by-Step Guide: Moving Photos from Google Drive to Google Photos
There are several ways to transfer your photos from Google Drive to Google Photos, catering to different needs and technical preferences. We’ll cover four primary methods for computers, followed by instructions for mobile devices.
Method 1: Using MultCloud (The Easiest Way for Cloud Transfer)
For users seeking the most streamlined and efficient way to move photos without the hassle of downloading and re-uploading, MultCloud stands out as a powerful, free, third-party cloud management tool. MultCloud specializes in managing multiple cloud storage accounts from a single platform, making cloud-to-cloud transfers incredibly simple.
![]() MultCloud logo representing cloud data management and transfer
MultCloud logo representing cloud data management and transfer
Key Advantages of MultCloud:
- Direct Cloud-to-Cloud Transfer: Transfer photos directly from Google Drive to Google Photos without needing to download files to your local device first.
- Efficiency and Speed: MultCloud utilizes its own data traffic, ensuring stable and fast transfers, even with large photo libraries.
- Background Transfer: Once the transfer starts, you can close your browser or turn off your computer; MultCloud handles the process in the background.
- Scheduled Transfers: Set up automatic, recurring syncs or transfers on a daily, weekly, or monthly basis.
- File Filtering: Use filters to select specific file types (like photos) for transfer, ensuring only your images are moved.
Steps to Move Photos from Google Drive to Google Photos with MultCloud:
-
Create a MultCloud Account and Log In: Visit MultCloud’s website and sign up for a free account. Log in to the MultCloud platform once your account is created.
Sign up for MultCloud Free (Secure Signup)
-
Add Google Drive and Google Photos to MultCloud: Click the “Add Cloud” button on the left-hand sidebar. Select “Google Drive” and follow the on-screen instructions to authorize MultCloud to access your Google Drive account. Repeat this process to add “Google Photos” as well.
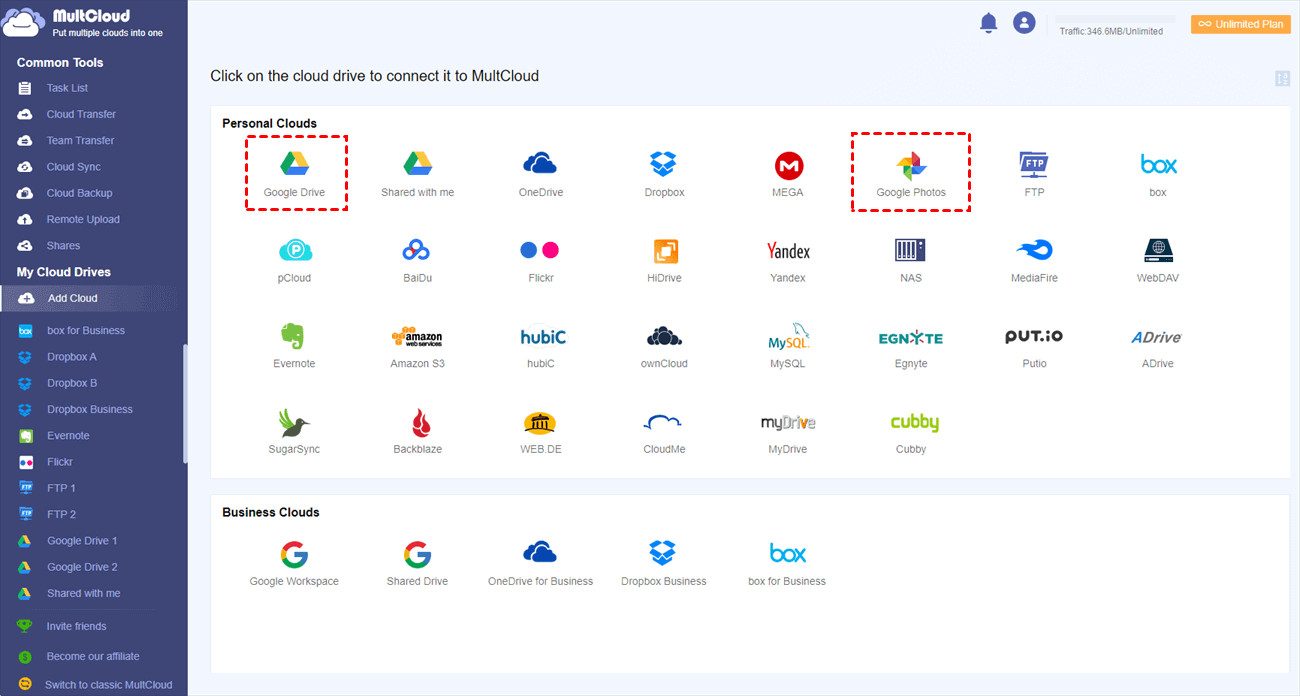 Screenshot showing the "Add Cloud" option in MultCloud and selection of Google Drive and Google Photos
 -
Initiate “Cloud Sync” or “Cloud Transfer”: Click on either “Cloud Sync” or “Cloud Transfer“. Both features can move your photos. “Cloud Sync” keeps source and destination synchronized, while “Cloud Transfer” is a one-time move. For moving photos, “Cloud Transfer” is usually sufficient.
-
Configure the Transfer Task:
- Set Google Drive as the source cloud and select the specific folders containing your photos.
- Set Google Photos as the destination cloud and choose where in Google Photos you want to move the pictures (e.g., directly to your main Photos library).
- Click “Transfer Now” or “Sync Now” to begin the process.
MultCloud Notes:
- Explore the “Schedule” option to set up automated transfers at regular intervals.
- The “Options” menu offers advanced sync modes (One-way, Two-way, Real-Time Sync, etc.) and features like email notifications and file filtering.
- For faster transfer speeds and advanced features, consider upgrading to a MultCloud premium account, which provides dedicated transfer threads and more functionalities.
Explore MultCloud Premium Features
Advantages of MultCloud over Manual Methods:
- Data Traffic Efficiency: MultCloud doesn’t rely on your internet connection to upload and download data. It transfers directly between cloud servers, saving bandwidth and time.
- Online Operation: The entire transfer process happens online. Your local computer is not involved in the data transfer, freeing up local storage and resources.
- Scheduled Automation: Automate the transfer process with scheduled tasks, ensuring your photo libraries stay synchronized without manual intervention.
- Efficient Filtering: Use file filters to precisely select photos for transfer, avoiding manual selection and ensuring only desired files are moved.
Method 2: Manual Download and Re-Upload (Simple but Time-Consuming)
The most basic approach is to manually download your photos from Google Drive to your computer and then re-upload them to Google Photos. This method is straightforward but can be time-consuming, especially for large photo collections.
Steps for Manual Download and Re-upload:
-
Download Photos from Google Drive:
- Go to Google Drive in your web browser and locate the folders or files containing the photos you want to move.
- Select the photos or folders.
- Click the three-dot “More actions” menu (either at the top or next to the selected item) and choose “Download“.
- The selected files will be compressed into a ZIP archive and downloaded to your computer.
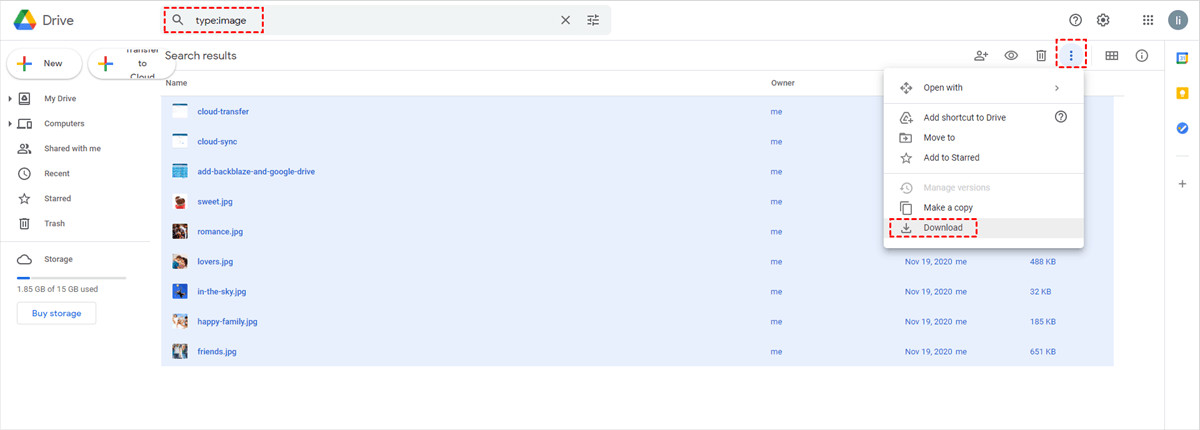 Screenshot of Google Drive interface showing the "Download" option after selecting image files
Note: You will need to unzip the downloaded ZIP file on your computer to access your photos.
-
Upload Photos to Google Photos:
- Go to Google Photos in your web browser.
- Click the “Upload” button at the top right.
- Choose “Computer” and navigate to the location on your computer where you unzipped the photos.
- Select the photos or the folder containing them and click “Open” or “Upload“.
- Google Photos will upload and process your images.
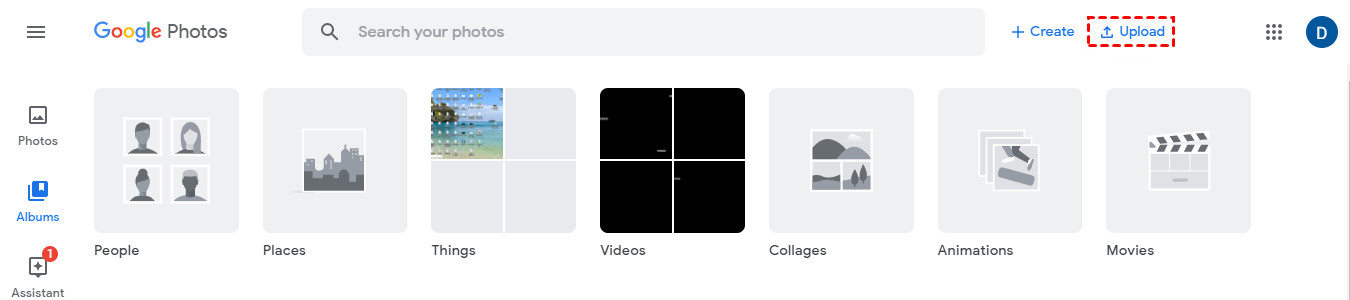 Screenshot of Google Photos interface showing the "Upload" button and the option to upload from "Computer"
Important Note: After confirming the photos are successfully uploaded to Google Photos, remember to delete the original photos from Google Drive to avoid duplicate storage and manage your Google Drive space effectively.
This method is simple but requires local storage as temporary space and can be inefficient for large transfers.
Method 3: Direct Import from Google Drive via Google Photos Website (Faster for Smaller Transfers)
Google Photos offers a direct “Upload from Google Drive” feature on its website, which can be a quicker alternative to manual download and upload, especially for smaller sets of photos.
Steps for Direct Import via Google Photos Website:
-
Access Google Photos Upload:
- Go to Google Photos in your web browser.
- Click the “Upload” button at the top right.
- In the dropdown menu, select “Google Drive“.
-
Select Photos from Google Drive:
- A pop-up window will appear, displaying your Google Drive files and folders.
- Navigate to “My Drive” or other sections like “Recent“, “Shared with me“, etc., to find your photos.
- You can filter by file type, date, or owner to locate images more easily.
- Select the photos you want to move.
- Click “Upload” to import them to Google Photos.
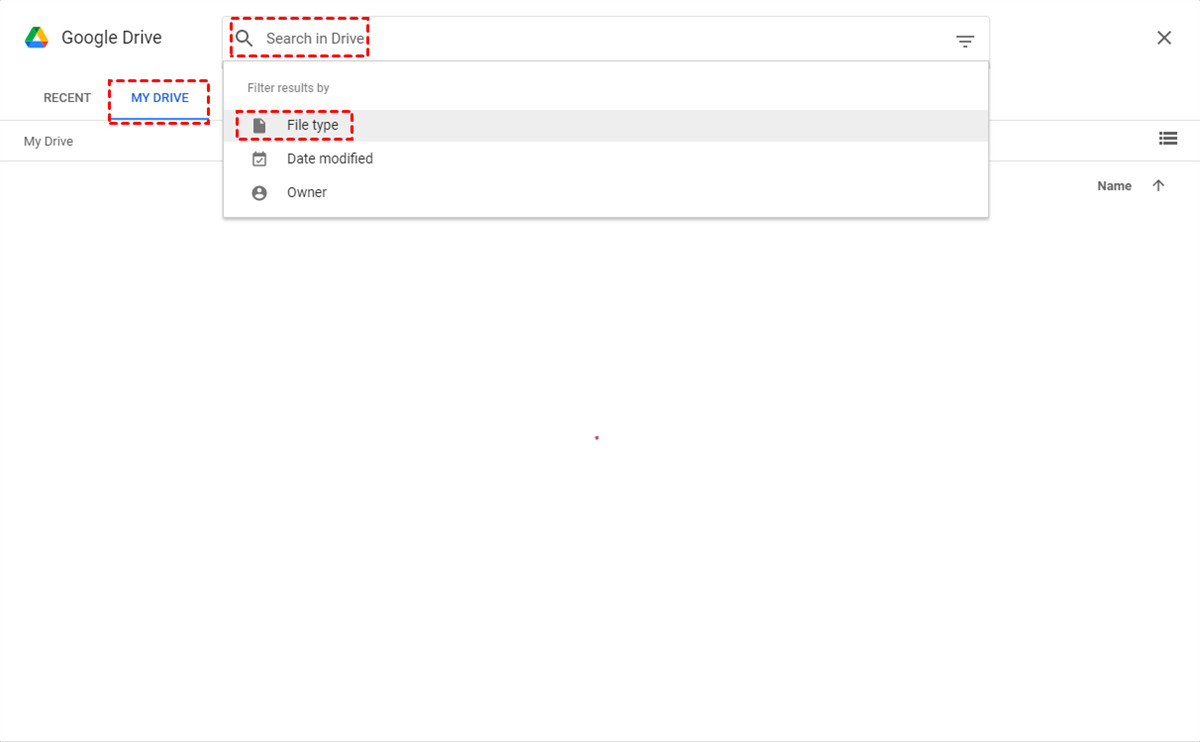 Screenshot of Google Photos "Upload from Google Drive" window, showing file selection from "My Drive"
Important Considerations:
- File Size and Type Limits: Ensure your photos meet Google Photos’ requirements (larger than 256 pixels, file types: .jpg, .gif, .webp, .tiff, .raw).
- Work or School Accounts: If you’re using a Google account through work or school, this direct import method might be restricted. You may need to download and re-upload in such cases.
This method avoids the download and decompression steps, saving time and effort compared to the manual method.
Method 4: Using Google Drive for Desktop (For Synced Local Photos)
If you use Google Drive for Desktop to sync files between your computer and Google Drive, you can leverage this application to back up your local Google Drive photos to Google Photos.
Steps using Google Drive for Desktop:
-
Install Google Drive for Desktop: If you haven’t already, download and install the Google Drive for Desktop application on your computer.
-
Run and Sign In: Launch the Google Drive for Desktop application and sign in with your Google account.
-
Access Preferences: Right-click the Google Drive icon in your system tray (bottom right on Windows, top right on Mac) and select “Preferences” (or “Settings”).
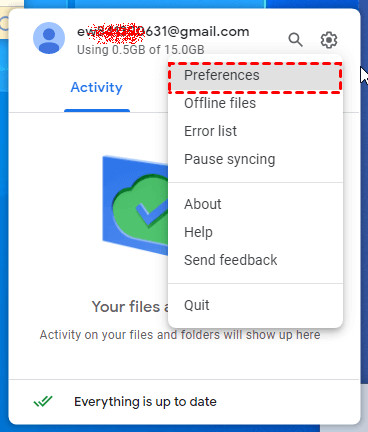 Screenshot of Google Drive for Desktop icon and the "Preferences" option in the menu
 -
Add Google Drive Folder for Backup:
- In the Preferences window, go to “My Computer” (or “Folders”).
- Click “Add Folder“.
- Navigate to the Google Drive folder on your local computer (typically found in your user folder).
- Select the specific photo folder within your Google Drive that you want to back up to Google Photos.
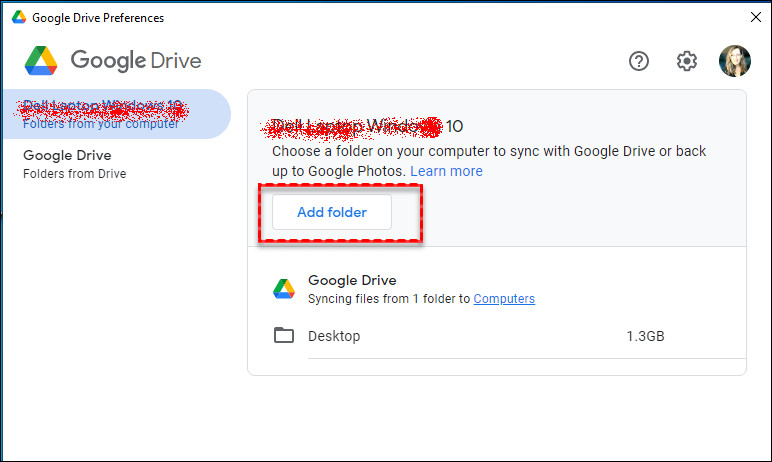 Screenshot of Google Drive for Desktop Preferences showing "Add Folder" option under "My Computer"
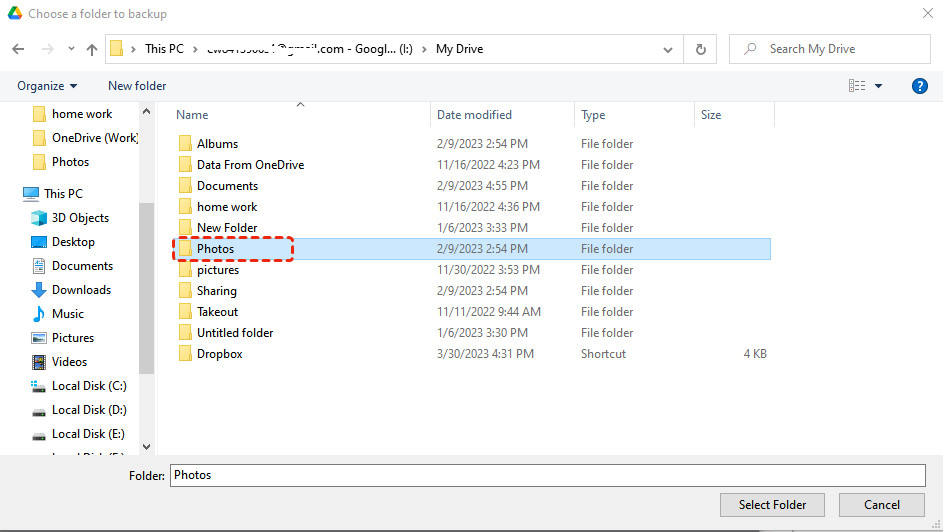 Screenshot showing folder selection within Google Drive in Google Drive for Desktop settings
 -
Enable Backup to Google Photos:
- After selecting the Google Drive photo folder, ensure the “Back up to Google Photos” option is checked.
- Click “Done” or “Save” to apply the settings.
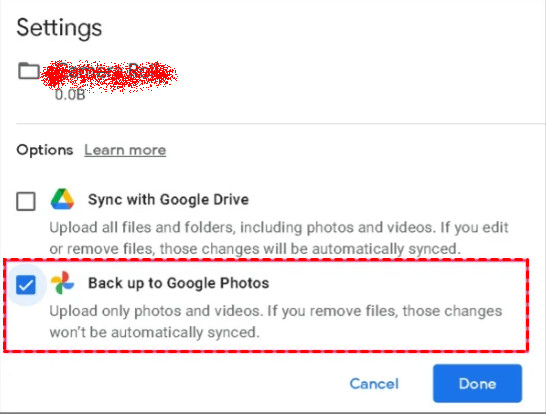 Screenshot of Google Drive for Desktop settings with "Back up to Google Photos" option ticked
Google Drive for Desktop will now continuously back up the selected Google Drive photo folder to Google Photos.
Important Note: This method assumes you have Google Drive for Desktop installed and your Google Drive photos are already synced to your local computer. It essentially backs up your local Google Drive folder to Google Photos.
How to Move Photos from Google Drive to Google Photos on Android
Moving photos directly on Android is also straightforward using the Google Drive app.
Steps on Android:
-
Open Google Drive App: Launch the Google Drive app on your Android device.
-
Navigate to Files: Tap “Files” at the bottom right of the app interface.
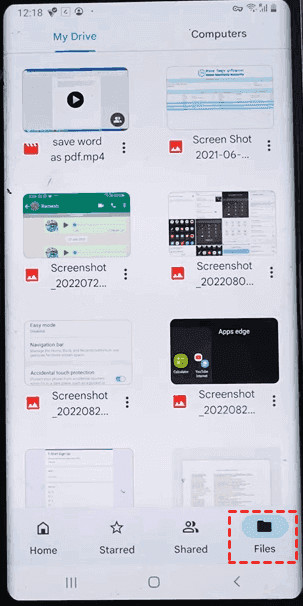 Screenshot of Google Drive Android app showing the "Files" tab at the bottom
 -
Select Photos: Locate the photos you wish to move. Long-press to select individual photos or use checkboxes for multiple selections. Tap the three-dot menu icon (More options) at the top right.
-
Choose “Send a copy”: From the menu, select “Send a copy“.
-
Select “Upload to Photos”: In the sharing options, choose “Upload to Photos“.
-
Choose Account and Upload: Select the Google account associated with your Google Photos if prompted, and tap “Upload” to finalize the transfer.
How to Move Photos from Google Drive to Google Photos on iPhone
Moving photos on iPhone involves a slightly different process, requiring a download step before uploading to Google Photos.
Steps on iPhone:
-
Open Google Drive App: Open the Google Drive app on your iPhone.
-
Select Photos: Find and select the photos you want to move. Tap the three-dot menu icon next to the photo or at the top right for multiple selections.
-
Choose “Send a copy”: Select “Send a copy” from the menu.
-
Save Image: From the share sheet, choose “Save Image” (or “Save Video” for videos). This will download the selected photos to your iPhone’s Photos app.
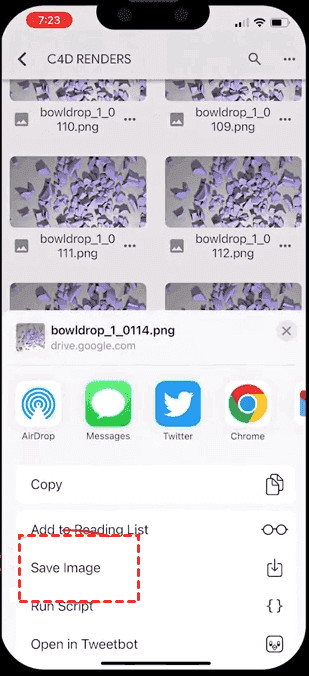 Screenshot of iPhone share sheet with "Save Image" option highlighted
 -
Upload to Google Photos App: Open the Google Photos app on your iPhone. Tap “Photos” at the bottom left, then select the photos you just downloaded from Google Drive. Tap “Back up” (cloud icon) to upload them to Google Photos.
Conclusion
Moving your pictures from Google Drive to Google Photos is a worthwhile step to better manage and enjoy your visual memories. Whether you choose the ease of MultCloud for seamless cloud-to-cloud transfer, the direct import option on the Google Photos website, the manual download and upload method, or leveraging Google Drive for Desktop, you now have a comprehensive understanding of how to move pictures from Google Drive to Google Photos.
For quick, efficient, and automated transfers, especially for large photo libraries, MultCloud offers a compelling solution. However, the other methods are also effective depending on your specific needs and technical comfort level. Select the method that best suits your situation and start enjoying the enhanced photo management capabilities of Google Photos today!
Explore More Cloud Transfer and Sync Tutorials
