Creating a film aesthetic in your digital photographs is a popular trend, with many seeking to infuse their social media feeds with vintage and nostalgic vibes. The allure of film photography lies in its unique character, often evoking a sense of history and timelessness that resonates deeply with viewers.
Traditional film cameras, while offering authentic results, can be a significant investment. Disposable cameras contribute to environmental waste. For digital photographers, transitioning to film solely for a specific aesthetic might seem impractical.
This is where the power of Lightroom Mobile comes in. It offers a convenient and effective way to emulate the film look directly on your digital images, without the need for new equipment.
 Opening shot showcasing a film-like edited photo in a natural setting
As a digital photographer myself, I’ve always been drawn to the film aesthetic and wondered how to bridge the gap between digital clarity and filmic charm. Without owning a film camera, I embarked on a journey to learn how to transform my digital photos into images that echo the beauty of film.
One of the defining characteristics of film photography is its inherent limitations. Film rolls typically offer only 24 or 36 exposures. This constraint encourages photographers to be more deliberate and mindful, focusing intently on capturing the essence of the moment, the narrative, and the composition, rather than being overly concerned with technical perfection like color accuracy and sharpness.
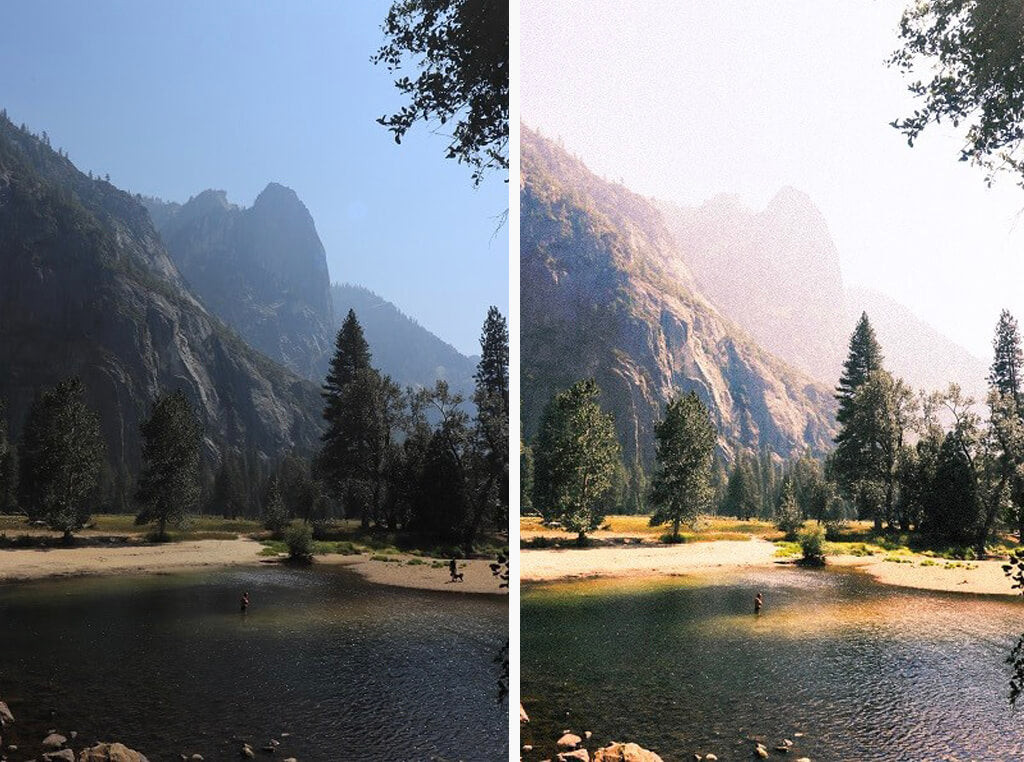
Let’s take this photo captured in the breathtaking Yosemite National Park as an example. It depicts a man enjoying the cool water against a backdrop of majestic mountains. The scene felt inherently peaceful and almost dreamlike.
Remember that each photograph is unique. The degree of adjustments needed for exposure and contrast will vary depending on the specific image. However, the Lightroom Mobile settings outlined below provide a solid foundation. You can save these settings as a preset for future use and fine-tune them further to suit individual photos.
 Original digital photo before film effect editing in Lightroom Mobile
Step 1: Mastering the Light for a Film Look
The initial step in achieving a film effect is adjusting the photo’s lighting. Film photographs often exhibit a slightly brighter appearance compared to standard digital photos, contributing to their ethereal and somewhat mysterious quality.
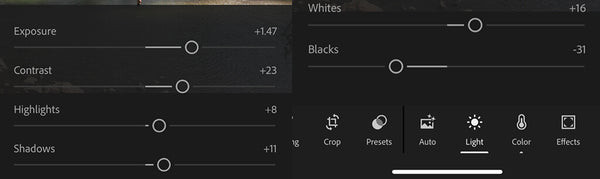
To replicate this, navigate to the “Light” section in Lightroom Mobile. For my Yosemite image, I subtly increased the exposure, contrast, highlights, whites, and shadows. Crucially, I also reduced the blacks slightly to maintain depth within the image. This delicate balance is key to film-like lighting.
 Lightroom Mobile light settings adjusted to mimic film exposure
 Screenshot in Lightroom Mobile showing step 1 lighting adjustments for film look
Step 2: Embracing Grain for Film Texture
Adding grain is the next crucial step. In contemporary digital photography, achieving razor-sharp images is often the ultimate goal. Film photography, however, often embraces grain. This inherent characteristic of film softens sharpness and introduces a desirable element of imperfection. This imperfection is vital because it shifts the viewer’s focus to the emotion of the moment and the story the image tells, rather than the technical perfection of the photograph itself.
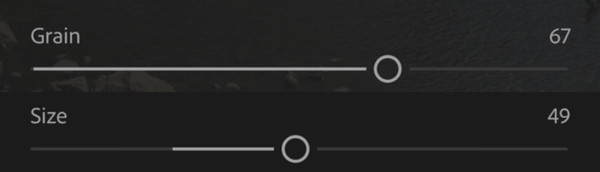
The amount of grain you introduce is a matter of personal taste. However, remember that excessive grain can obscure image details. Here are the Lightroom settings I typically apply for grain to get that filmic texture:
 Lightroom Mobile effect settings showing grain adjustment for film effect
 Screenshot in Lightroom Mobile showing step 2 grain adjustment for film look
Step 3: Fine-Tuning Colors for a Warm Film Vibe
The third step involves color adjustments. Even when aiming for a film look, my digital photography background encourages me to subtly manipulate colors to enhance specific elements within the photo. This is a stylistic choice that allows for personal expression while maintaining the filmic essence.
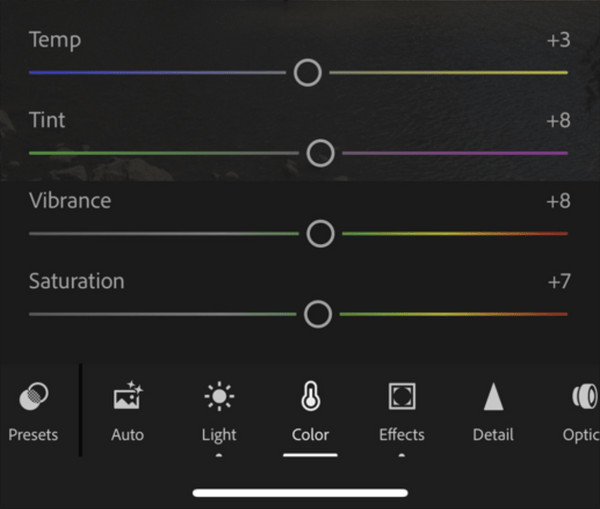
I generally prefer warmer tones in my photographs, so I slightly increase the temperature. To prevent the image from becoming overly orange, I introduce a touch of purple tint. A useful color theory tip: when you want to reduce a specific color cast in an image, consult a color wheel to identify its opposite color and subtly increase that opposing color in Lightroom.
I also gently boost the vibrance and saturation to inject a hint of color vibrancy without overpowering the film aesthetic.
 Lightroom Mobile color settings adjusted for a warm film tone
 Screenshot in Lightroom Mobile showing step 3 color adjustments for film look
Step 4: Layering Film-Like Colors for Depth
The preceding edits accomplish the majority of the transformation. YOU COULD STOP HERE, but for images that truly stand out with a nuanced film aesthetic, further color refinement is beneficial. This involves individually adjusting specific colors within the photo.
In my Yosemite image, I wanted to accentuate the sunlight illuminating the person in the water and make the blues of the mountains and water more prominent. I achieved this primarily by increasing the saturation of blue, red, orange, and yellow tones, making minor adjustments to hue and luminance as well (refer to the settings shown in the image below).
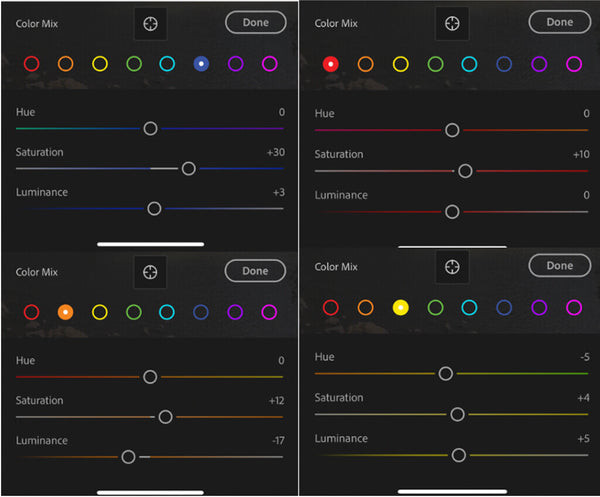 Lightroom Mobile color mix settings for advanced film color grading
 Screenshot in Lightroom Mobile showing step 4 advanced color adjustments for film look
Film photos typically exhibit less dynamic range than digital images. Reducing contrast is the most effective way to simulate this effect. Revisit the “Light” section and raise the shadows within the tone curve (S-Curve) to further soften the contrast.
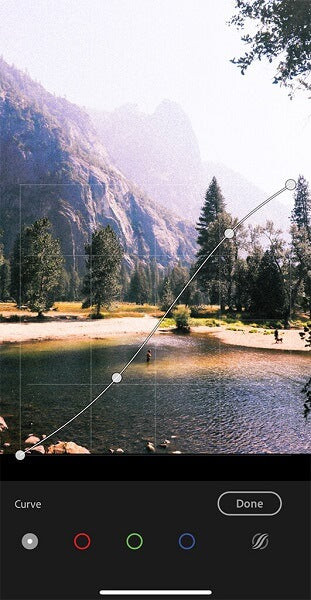 Lightroom Mobile tone curve adjustment for reduced contrast film effect
Finally, I applied adjustments within the “Color Grading” panel. My aim was to infuse reds, oranges, and yellows into the shadows and highlights to mirror the warm sunlight in the scene. I also saturated the midtones with a green-blue hue to enhance the vibrancy of the water and foliage.
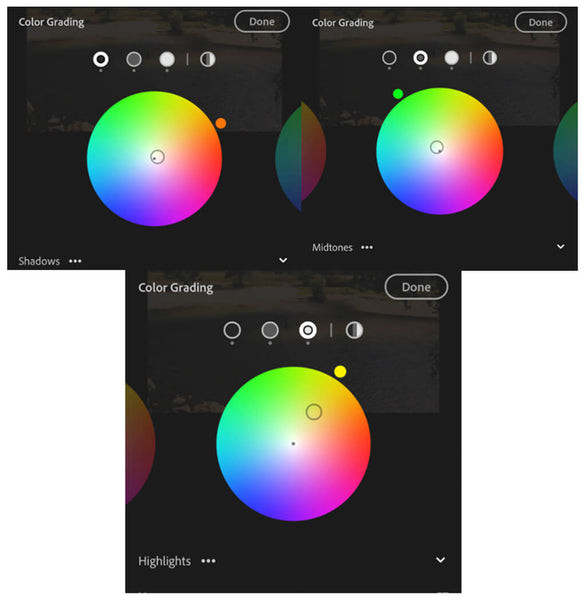 Lightroom Mobile color grading settings for final film look adjustments
 Screenshot in Lightroom Mobile showing step 6 color grading adjustments for film look
Optional Step: Refining Composition with the Healing Brush
As an optional refinement, I decided to remove a second person and a dog from the photo to ensure the viewer’s focus remains solely on the main subject. This is easily accomplished using the Healing Brush tool in Lightroom Mobile.
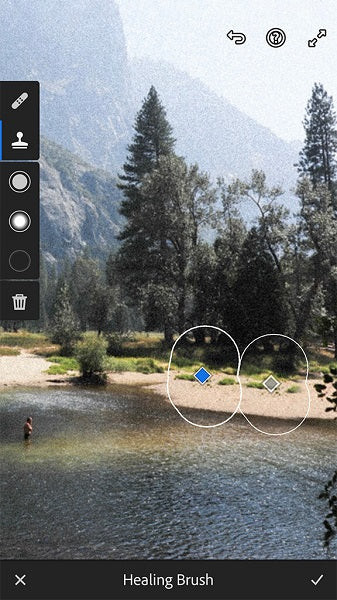 Lightroom Mobile healing brush tool used to remove distractions for cleaner film aesthetic
The Final Film-Inspired Image:
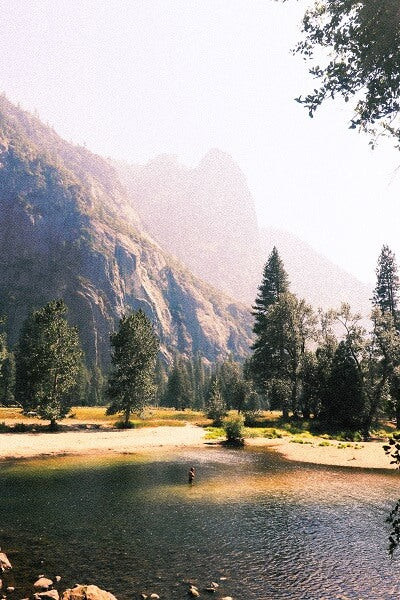 Final edited photo showcasing the film look achieved in Lightroom Mobile
Conclusion
As demonstrated by this before-and-after comparison, the edited film-style photo evokes a stronger sense of immediacy, appears brighter, and more effectively conveys the story of the man immersed in the tranquil water.
If you are intrigued by film photography but hesitant to invest in film cameras or manage the costs of film, the capabilities of Lightroom Mobile offer a compelling alternative. It empowers you to transform your everyday digital or smartphone photos into captivating film-inspired images that narrate stories and capture that cherished nostalgic essence.