Creating visually appealing photo collages often involves more than just arranging images together. Softening the edges of your photos can significantly enhance the overall aesthetic, making your collages look more professional and polished. If you’re looking to learn how to make a photo collage with soft edges in Canva, you’ve come to the right place. Canva, a user-friendly online design tool, provides an easy way to achieve this effect without needing advanced photo editing skills.
This guide will walk you through the simple steps to soften edges in your Canva photo collages, ensuring your images blend seamlessly for a beautiful finish. Let’s dive in and explore how you can transform your photo collages with this subtle yet impactful technique.
Part 1. Step-by-Step Guide to Softening Photo Edges in Canva
Pixelated or harsh edges can detract from the visual appeal of your photo collage. Softening these edges helps to create a smooth transition between images and backgrounds, resulting in a more harmonious and professional look. Canva simplifies this process, allowing you to achieve soft edges quickly and efficiently.
Canva stands out as a versatile and accessible design platform, renowned for its ease of use and powerful features. Softening photo edges is just one of the many editing capabilities Canva offers to elevate your visual content.
Fading Photo Edges in Canva: A Detailed Tutorial
Here’s a step-by-step guide to learn how to soften the edges of your photos in Canva, perfect for creating stunning photo collages.
-
Launch Canva and Log In: Start by opening Canva in your web browser or launching the Canva app. Log in to your existing Canva account or create a new one if you’re a first-time user.
-
Create a New Design: Click on the “Create a design” button located on the Canva homepage. This will allow you to start a new project from scratch.
-
Choose a Template or Custom Size: Select a suitable template for your photo collage or opt for a custom size by clicking on “Custom size”. For this example, we’ll choose a “Poster” template.
-
Upload Your Photos: To add photos to your collage, navigate to the left-hand toolbar and click on “Uploads”. Then, click the “Upload files” button to import the photos you want to use in your collage from your computer.
-
Add a Blur Element: Go to the left toolbar and click on “Elements”. In the search bar, type “blur” and press Enter. Canva will display various blur elements. Select a blur shape that suits your needs, typically a circular or square blur works well for softening edges.
-
Adjust Blur Intensity: Once you’ve added a blur element to your design, you can customize its intensity. Select the blur element, and you’ll see a toolbar appear at the top. Use the “Transparency” slider to adjust the blur effect’s intensity. Lower transparency will result in a more intense blur, while higher transparency will make the blur more subtle.
-
Position Blur Around Photo Edges: Drag and resize the blur element to position it around the edges of the photo you want to soften. You may need to duplicate the blur element to cover all edges or corners of your photo. Ensure the blur effect gently fades the edges of your photo into the background or adjacent images in your collage.
-
Review and Refine: After applying the blur to all desired photo edges, take a moment to preview your collage. Check if the edges are softened to your liking. If needed, readjust the blur intensity or reposition the blur elements for optimal results.
Once you are satisfied with the soft edges effect, click on the “Share” button in the top right corner. Then, select “Download” to save your photo collage to your computer in your preferred format.
Part 2. Alternative Photo Enhancers for Professional Results
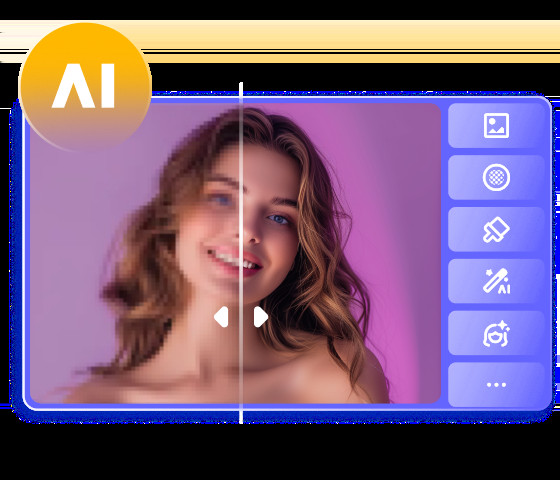
While Canva is excellent for quick and easy photo editing, dedicated photo enhancement software can offer more advanced features and control, especially if you’re aiming for professional-level results. For users seeking a more robust alternative, HitPaw Photo AI stands out as a powerful tool to further enhance your photos before creating collages in Canva or other platforms.
HitPaw Photo AI utilizes advanced artificial intelligence to enhance image quality, reduce noise, upscale resolution, and much more. It’s designed to make your photos look their absolute best with minimal effort, offering a range of AI models tailored to different enhancement needs.
Key Features of HitPaw Photo AI
HitPaw Photo AI – Your Go-To Tool for AI-Powered Photo Enhancement
TRY IT FREE BUY NOW
- AI-Driven Enhancements: Automatically improve photo resolution and quality using cutting-edge AI algorithms.
- Upscaling Without Quality Loss: Enlarge images while preserving detail and clarity, perfect for high-resolution collages.
- Noise Reduction: Effectively remove noise from photos taken in low-light conditions, ensuring cleaner and smoother images.
- Batch Processing: Enhance multiple images simultaneously, saving time and effort when preparing photos for a large collage project.
- Specialized AI Models: Offers various AI models including General Model, Denoise Model, Face Model, and Color Calibration Model to cater to different photo types and enhancement goals.
Enhancing Your Image with HitPaw Photo AI: A Quick Guide
Here’s how to quickly enhance your images using HitPaw Photo AI before incorporating them into your Canva photo collage.
-
Step 1: Install and Import: Visit the official HitPaw website and download HitPaw Photo AI for Windows or Mac. Install the software and launch it. Click the “Choose Files” button to import the photos you want to enhance. HitPaw supports a wide range of image formats, including JPG, PNG, TIFF, and WEBP, and allows batch import for efficient workflow.
-
Step 2: Select AI Model: Choose the appropriate AI model based on your photo type and desired enhancement. For general photo enhancement, the “General Model” works effectively for landscapes, animals, and buildings. For portraits, the “Face Model” is ideal for smoothing skin and enhancing facial features. If your photos have noise issues, the “Denoise Model” is the perfect choice.
-
Step 3: Preview and Export: Click the “Preview” button to see the enhanced result. If you are satisfied with the preview, click “Export” to save the enhanced image. You can then use this enhanced image in your Canva photo collage for even better visual quality.
Part 3. FAQs about Softening Edges in Canva
Q1. Can I create a blend effect on photo collage edges in Canva?
A1. Yes, creating a blend effect on photo collage edges in Canva is achievable. You can use the “Fade to transparent gradient” element for a seamless blend.
- Open Canva and start with “Create a Design”. Import your photos and arrange them for your collage.
- Choose a background color that complements your photos.
- Go to “Elements” and search for “Fade to transparent gradient”. Select a gradient style from the “Graphics” tab.
- Position and adjust the gradient elements at the edges of your photos where you want to create a blend. Experiment with rotating and resizing the gradient to achieve the desired blending effect. Once satisfied, download your blended edge photo collage.
Q2. Is it possible to make photo edges transparent in Canva for a collage?
A2. Yes, making photo edges transparent in Canva is a straightforward process, which is perfect for collages where you want images to subtly overlap or blend into the background. Using gradients or blur elements can help achieve this transparent edge effect.
Launch Canva and upload the photo you intend to edit. To make edges transparent, you can use gradient elements to fade the edges into transparency, or strategically use blur elements to create a softer, semi-transparent edge effect that blends with the background.
In Summary
Softening edges is a simple yet effective technique to enhance the visual appeal of your photo collages. By following this guide, you can easily learn how to make a photo collage with soft edges in Canva, transforming ordinary images into beautifully blended compositions. Canva’s user-friendly interface makes the process accessible to everyone, regardless of their design experience.
For those seeking to further enhance their photos before creating collages, HitPaw Photo AI offers a powerful alternative. Its AI-driven features can significantly improve your image quality, ensuring your collages look their absolute best. Whether you choose to solely use Canva or combine it with HitPaw Photo AI, softening edges is a valuable skill to add to your photo editing toolkit.
Share this article:
Select the product rating:
 Daniel Walker HitPaw Editor-in-ChiefDaniel Walker
Editor-in-Chief
My passion lies in bridging the gap between cutting-edge technology and everyday creativity. With years of hands-on experience, I create content that not only informs but inspires our audience to embrace digital tools confidently.
View all Articles
Join the discussion and share your voice here
Leave a Comment
Create your review for HitPaw articles
HitPaw Photo AI
 HitPaw FotorPea Side Banner Best All-In-One AI Photo Editor for All Your Needs
Download Now BUY NOW
Download Now BUY NOW