iCloud Photos is a fantastic service for keeping your precious memories safe and accessible across all your Apple devices. But what if you want to download those photos from iCloud back to your iPhone? Whether you need to free up iCloud storage, want offline access, or simply prefer having your photos directly on your device, getting your photos from iCloud to your iPhone is easier than you might think.
This guide will walk you through several straightforward methods to download your photos from iCloud directly to your iPhone, ensuring you have your cherished memories right at your fingertips.
Method 1: Downloading via iPhone Settings
The most direct way to get your photos from iCloud back onto your iPhone is through the Settings app. This method is ideal for ensuring all your original photos are downloaded and kept on your device.
Here’s how to do it:
- Open the Settings App: Locate and tap the Settings app icon on your iPhone’s home screen.
- Tap on Your Name: At the top of the Settings menu, tap on your name to access your Apple ID settings.
- Select iCloud: Tap on “iCloud” to manage your iCloud settings.
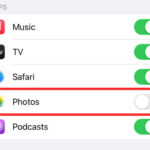
- Go to Photos: Within the iCloud settings, find and tap on “Photos”.
- Choose “Download and Keep Originals”: Under the “iCloud Photos” section, you will see an option that likely says “Optimize iPhone Storage” is checked. To download all your iCloud photos to your iPhone, select “Download and Keep Originals”.
 Download and Keep Originals in iCloud Photos settings to get photos on iCloud from iPhone
By selecting “Download and Keep Originals,” your iPhone will begin downloading the original, full-resolution versions of your photos and videos from iCloud. Keep in mind that this process can take a while depending on the size of your iCloud Photo Library and the speed of your internet connection. Ensure you have enough storage space on your iPhone for all your photos and videos.
Method 2: Saving Photos from Shared Albums
If you’re looking to download specific photos or videos, especially those from Shared Albums, the Photos app itself offers a handy way to save them to your iPhone.
Follow these steps to save images from Shared Albums:
- Open the Photos App: Launch the Photos app on your iPhone.
- Navigate to Shared Albums: Scroll down to the bottom of the “Albums” tab until you find “Shared Albums”.
- Select a Shared Album: Tap on the Shared Album from which you want to download photos.
- Choose Photos or Videos: Tap on the specific photo or video you wish to download.
- Use the Share Button: Tap the Share button (the square icon with an arrow pointing upwards) located at the bottom-left corner of the photo or video.
- Save the Image or Video: From the Share Sheet, choose “Save Image” or “Save Video” to download the selected item directly to your iPhone’s Camera Roll.
This method is perfect for selectively downloading photos and videos, especially when you only need a few items from Shared Albums without downloading your entire iCloud Photo Library.
Method 3: Downloading via iCloud.com
For more control over download options and accessing your iCloud Photos from any browser, iCloud.com provides a web interface to manage and download your photos. This method can be particularly useful if you want to download photos in specific formats or need to access your iCloud Photos from a device other than your iPhone.
Here’s how to download photos from iCloud to your iPhone using iCloud.com:
- Go to iCloud.com: Open Safari or your preferred web browser on your iPhone and go to iCloud.com/photos.
- Sign in to Your Apple Account: Log in using your Apple ID and password associated with your iCloud account.
- Select Photos: Once logged in, click on the “Photos” icon to access your iCloud Photo Library.
- Select Photos and Videos: Tap “Select” in the top right corner, then tap on each photo or video you want to download. To select multiple items, you can tap and drag or tap “Select All” if you wish to download everything (though this is generally not recommended for large libraries on a mobile browser).
- Tap the More Button: After selecting your photos, tap the “More” button represented by three dots in a circle, usually located at the bottom-right corner.
- Choose Download: Select “Download” from the options. You might also see “More Download Options” which allows you to choose between “Unmodified Originals,” “Highest Resolution,” or “Most Compatible” formats.
- Confirm Download: Tap “Download” again to confirm and start the download process. The photos or videos will be downloaded to your browser’s download location, from where you can typically share them to your Photos app or other locations on your iPhone.
Using iCloud.com gives you flexibility in managing and downloading your iCloud photos, especially when you need specific formats or are working across different devices.
Conclusion
Getting photos from iCloud to your iPhone is a straightforward process, thanks to Apple’s user-friendly ecosystem. Whether you choose to download directly through your iPhone settings, save from Shared Albums, or utilize iCloud.com, you have multiple options to ensure your photos are accessible on your device. Choose the method that best suits your needs and enjoy having your memories readily available on your iPhone.