Overexposed photos can be frustrating, washing out details and leaving you with a less-than-ideal image. While preventing overexposure is the best approach, there are effective ways to fix these photos in post-processing. This guide will explore various techniques using photo editing software like Lightroom, along with tips to avoid overexposure in the first place.
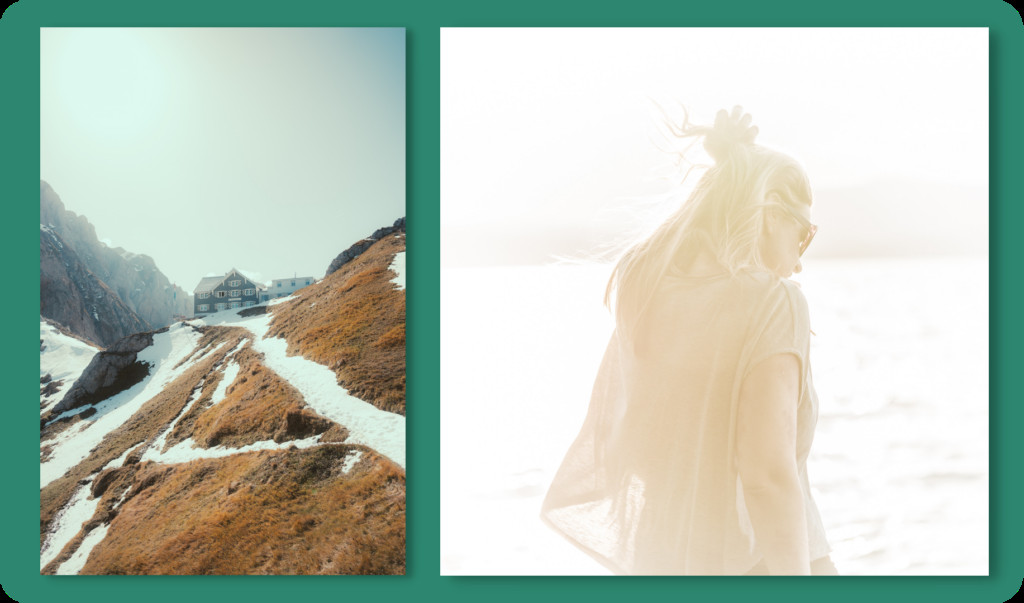 Initial Images Overexposed
Three Methods to Fix Overexposed Photos
1. Utilizing Adjustment Sliders
The most straightforward method involves adjusting sliders in your editing software.
- Analyze the Histogram: The histogram visually represents the tonal distribution in your image. A spike on the right indicates overexposed highlights. Enable clipping warnings (press “J” in Lightroom) to highlight completely white areas lacking detail.
- Adjust Exposure and Related Sliders: Lower the exposure slider to darken the image overall. Fine-tune highlights, whites, shadows, and blacks to recover detail in specific tonal ranges. The dehaze slider can help restore contrast and clarity lost due to overexposure.
- Monitor the Histogram and Clipping: Continuously refer to the histogram while adjusting sliders. Aim to reduce clipping in the highlights without crushing the shadows.
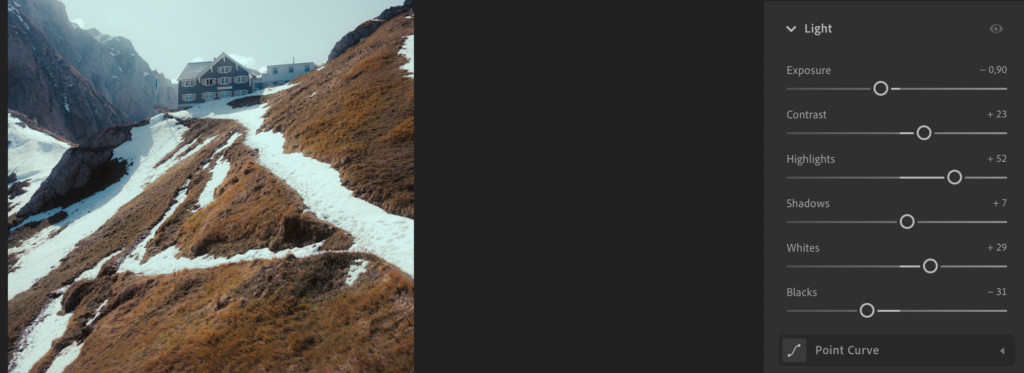 Modifying Light and Exposure Settings in Lightroom
2. Applying Radial Gradient Filters
Radial gradients allow you to selectively adjust specific areas of your photo.
- Create a Radial Gradient Mask: Place the gradient over the most overexposed area, often the brightest part of the image. Feather the edges for a smooth transition.
- Adjust Sliders within the Mask: Similar to the previous method, adjust exposure, highlights, and other relevant sliders within the masked area.
- Refine Mask and Amount: Adjust the mask’s size, position, and feathering for precise control. The “Amount” slider controls the strength of the adjustments applied within the mask.
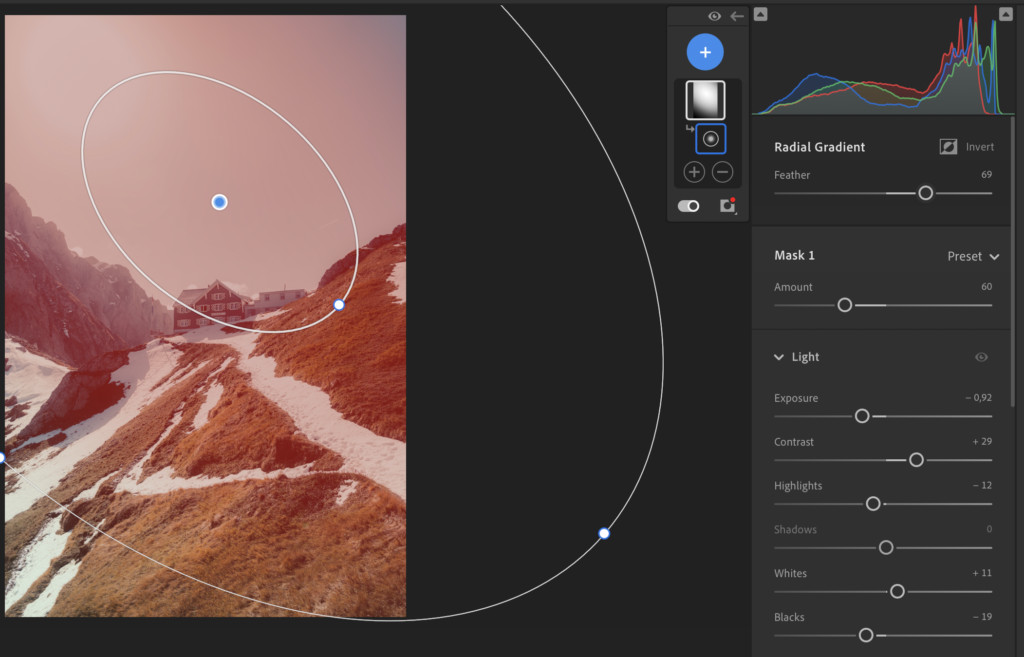 Applying a Radial Gradient Filter
3. Using the Adjustment Brush
For more intricate adjustments, the adjustment brush offers precise control.
- Brush Over Affected Areas: Use the brush tool to paint over specific areas needing correction. Use the overlay view (press “O” in Lightroom) to visualize the masked area.
- Leverage AI-Powered Selection Tools: Modern editing software often includes AI features that can automatically select subjects or backgrounds, simplifying the masking process.
- Fine-Tune Adjustments: Adjust exposure and other sliders within the brushed area.
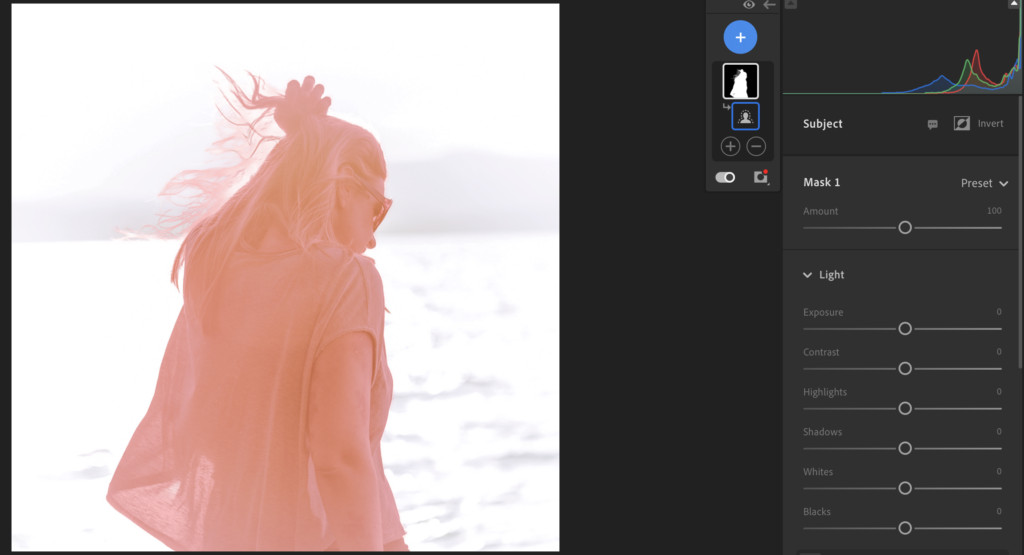 Select Subject Adjustment Brush Mask Lightroom AI
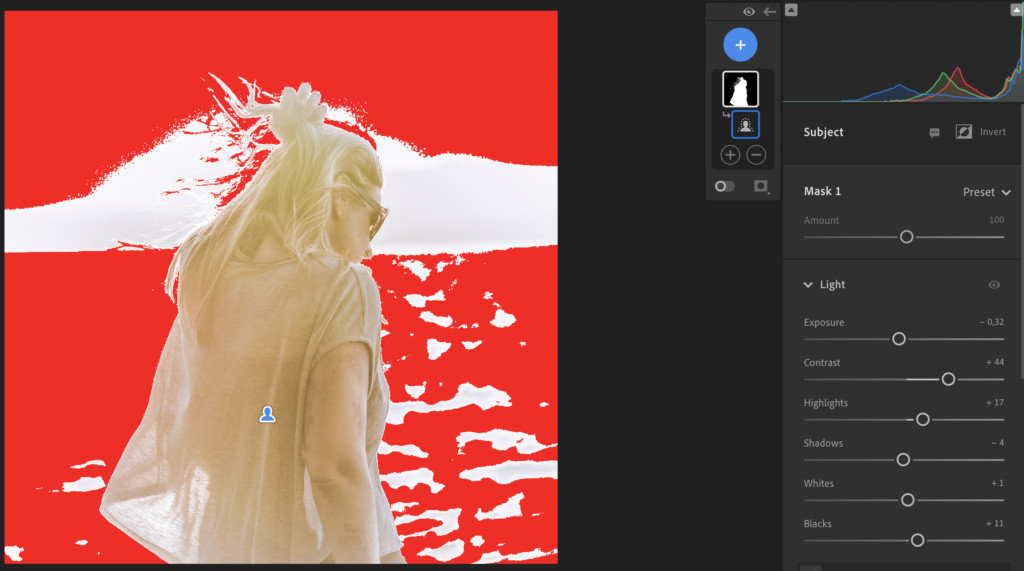 Adjusting light subject background lightroom
Understanding and Preventing Overexposure
Overexposure occurs when too much light hits the camera sensor. Factors contributing to overexposure include bright lighting conditions, incorrect camera settings, and relying solely on the camera’s metering system.
- Shoot in RAW Format: RAW files retain more image data, providing greater flexibility for editing overexposed images.
- Master Metering Modes: Understand and utilize different metering modes (evaluative, center-weighted, spot) to ensure accurate exposure in various lighting scenarios.
- Utilize Exposure Bracketing: Capture multiple shots at different exposure levels to ensure at least one well-exposed image.
- Underexpose Slightly: It’s generally easier to recover detail from shadows than highlights, so err on the side of slight underexposure.
- Calibrate Your Monitor: A properly calibrated monitor ensures accurate representation of colors and tones, crucial for judging and correcting exposure.
Conclusion: Recovering Detail and Preventing Overexposure
By understanding the causes of overexposure and employing the techniques outlined above, you can effectively recover detail and improve your overexposed photos. Remember that prevention is key, so mastering your camera settings and utilizing proper exposure techniques will minimize the need for extensive post-processing. Practice and experimentation will lead to consistently well-exposed and visually compelling images.
 before and after fix overexposure
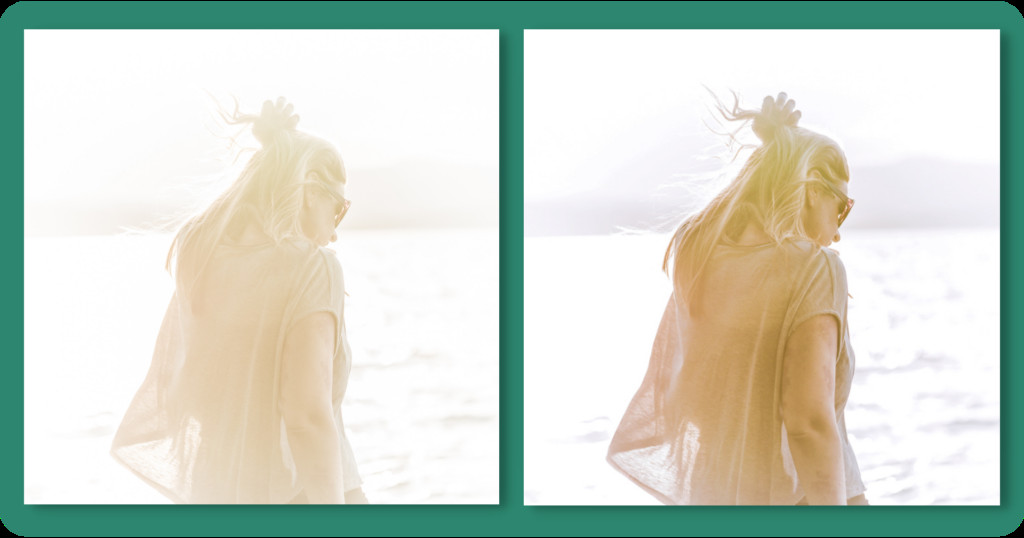 before and after fix overexposure 2