It’s a scenario every photographer dreads. You arrive at a stunning location, capture what you believe to be the perfect shot, only to discover later that your key image is disappointingly out of focus. Whether it’s due to rushing, incorrect camera settings, or simply a momentary lapse in concentration, blurry photos can be heartbreaking, especially when they capture irreplaceable moments.
I recently experienced this frustration during a trip to Hungary, while photographing the intriguing “Little Noisy” Army Barracks. In my haste, or perhaps due to shooting handheld, one crucial photo suffered from unwanted blur. Determined to rescue the image, I developed a 3-step Photoshop technique to address out-of-focus issues. Given the interest I’ve received in Photoshop tutorials, I’m excited to share this method, hoping it can breathe new life into your own less-than-perfect photographs.
Take a look at the before-and-after comparison below. While not a flawless restoration, I believe the improved image is now perfectly usable for social media and online sharing. Of course, opinions on the degree of acceptable sharpness may vary!
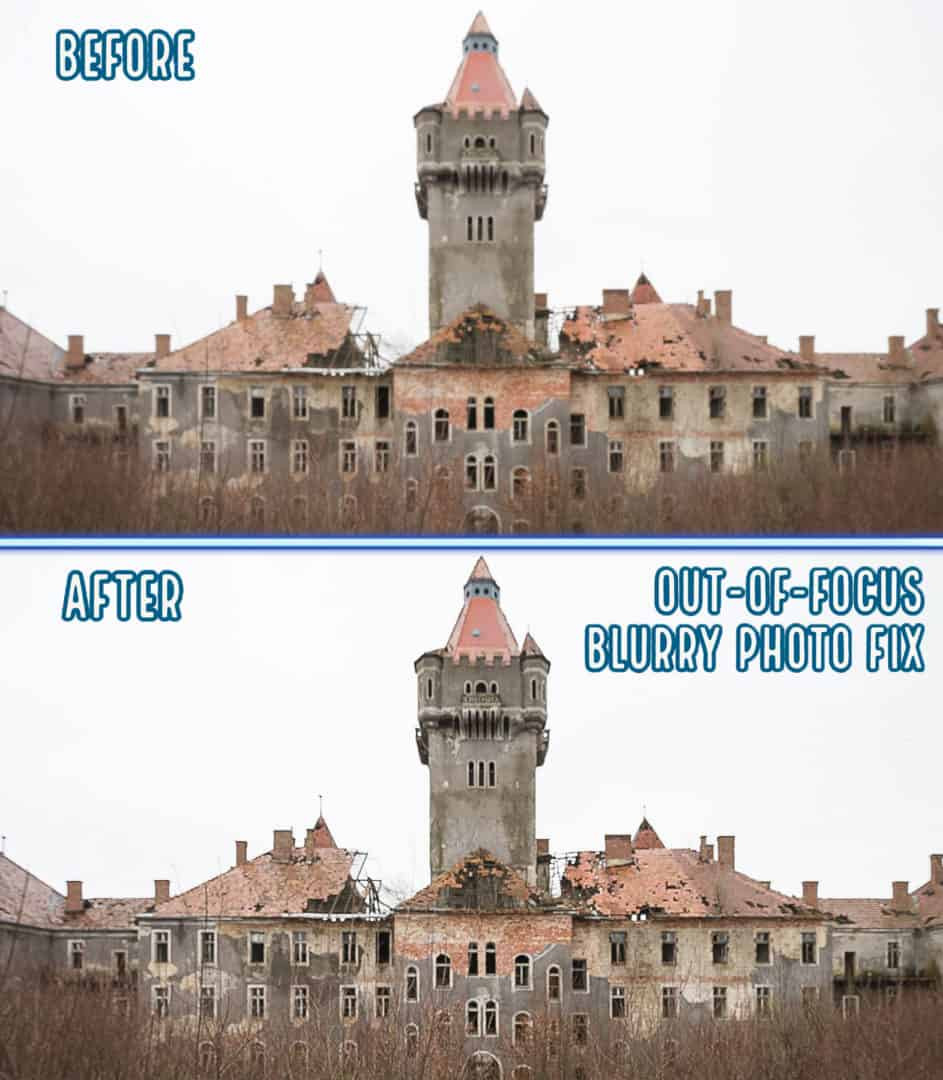 Before and After comparison of fixing blurry photo using Photoshop
Ready to jump into Photoshop and salvage your blurry photos? Let’s begin!
Step 1: Initial Adjustments in Camera Raw
My first approach to sharpening blurry images begins with subtle tweaks in Camera Raw. This is typically done during the initial import of your RAW files into Photoshop, but JPEG shooters can also access these powerful tools. To do this with a JPEG, simply navigate to Filter > Camera Raw Filter in the Photoshop menu. This will open the Camera Raw dialog, providing a range of adjustments to enhance your image before deeper editing.
Here are the specific Camera Raw settings I recommend for starting to fix out-of-focus photos:
-
Clarity Boost: Begin by gently increasing the Clarity slider. This adjustment enhances mid-tone contrast, which can help to make the image appear sharper. I suggest starting with a modest value, around +10, and adjusting based on your image.
-
Sharpening Enhancements: Next, move to the Sharpening panel for more targeted adjustments.
- Masking Slider: This is a crucial tool for refining sharpening. By using the Masking slider, you can restrict the sharpening effect to edges and details, minimizing artifacts and noise in smoother areas of the image. For this particular image, I used a Masking value of 50, effectively protecting areas without prominent edges.
- Amount, Radius, and Detail Sliders: These sliders work together to control the intensity and refinement of the sharpening effect. The optimal settings will depend on the severity of the blur in your photo. In my example, I used Amount: 125, Radius: 2.5, and Detail: 50. Experiment with these sliders to find the sweet spot that enhances sharpness without introducing unwanted artifacts.
Pro Tip: Noise can become more pronounced as you sharpen an image. Therefore, addressing noise reduction early in the process is beneficial. Camera Raw offers excellent noise reduction tools. Applying a touch of noise reduction at this stage can prevent headaches later on by mitigating the amplification of noise during subsequent sharpening steps.
Step 2: Sharpening with the High Pass Filter
The second stage in our sharpening process utilizes Photoshop’s High Pass Filter, a powerful tool for edge enhancement.
-
Blending Mode: Change the Layer Blend Mode of your image layer to Hard Light. This blending mode intensifies contrast and makes the sharpening effect of the High Pass filter more pronounced.
-
Apply High Pass Filter: Access the High Pass Filter by navigating to Filter > Other > High Pass in the Photoshop menu.
-
Radius Adjustment: In the High Pass dialog box, you’ll see a Radius slider. Adjust this slider to control the strength of the sharpening effect. For this image, a Radius of 8 pixels worked well. The ideal radius will depend on the resolution and the amount of blur in your image, so experiment to find what looks best.
-
Opacity Adjustment: I found the initial effect a bit too intense, so I reduced the layer Opacity to 55%. This subtle reduction helps to blend the sharpening effect more naturally with the original image.
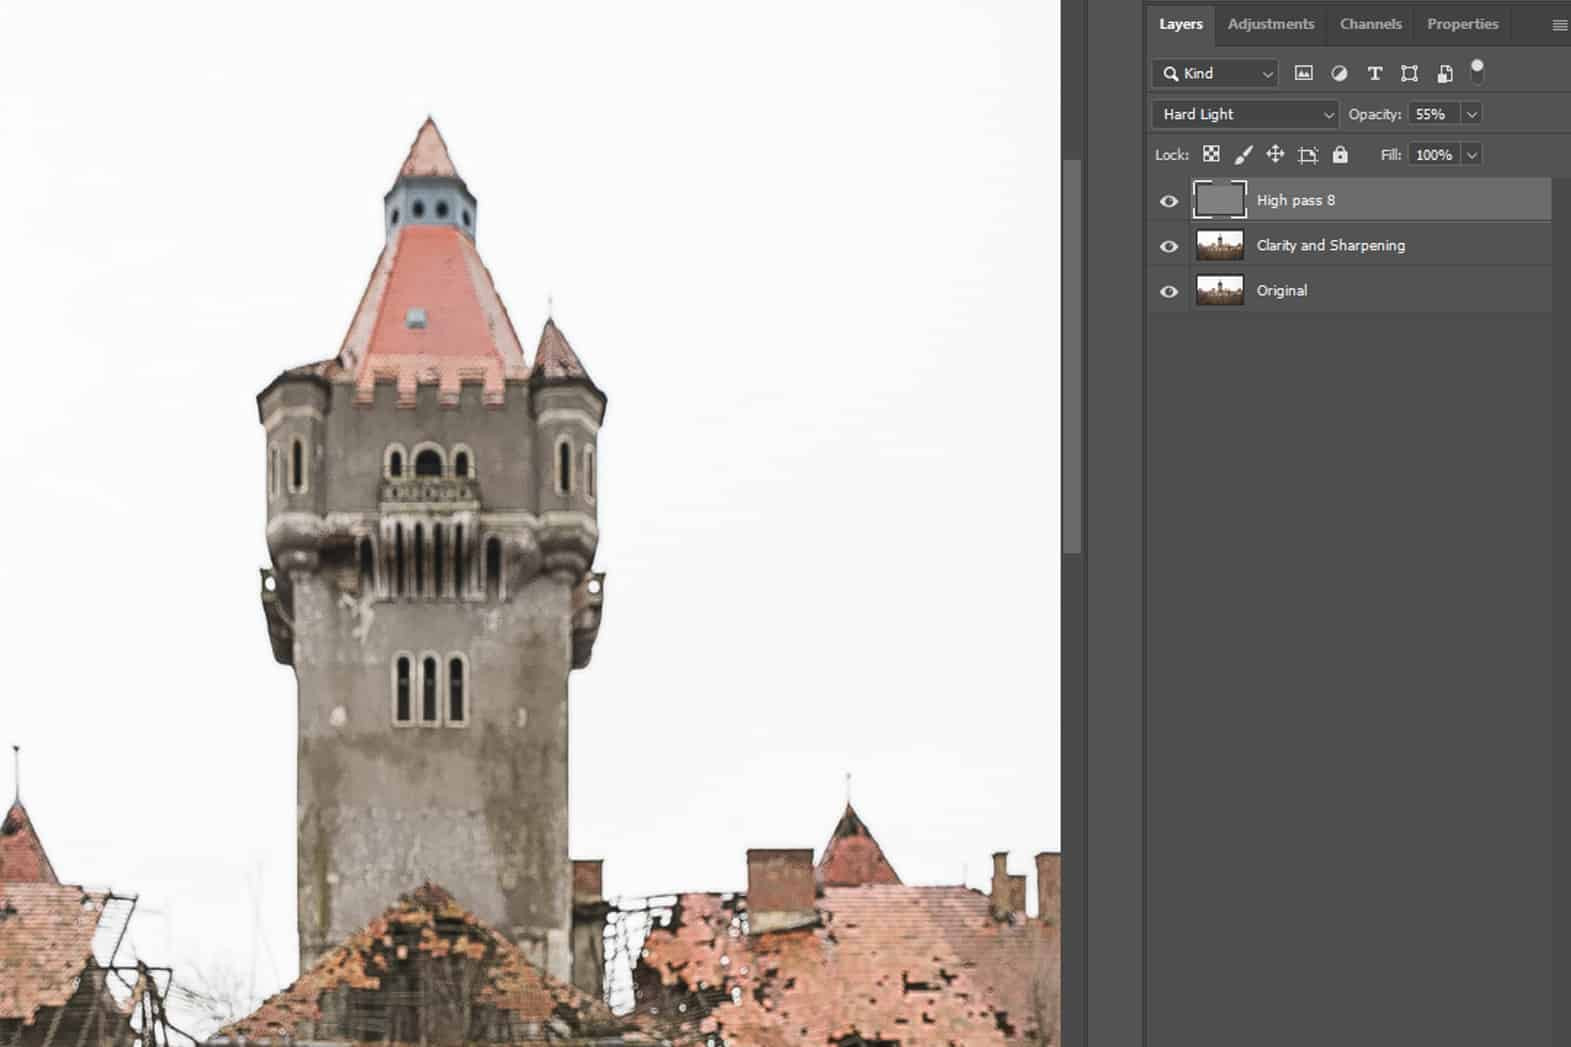 Step 2 High Pass Filter applied to out of focus photo in Photoshop
Step 3: Advanced Sharpening with Gaussian Blur
At this stage, your image should already be showing significant improvement. Now, for a slightly counterintuitive technique: we’re going to use blur to further sharpen our photo. This method might sound strange, but it’s a powerful way to refine detail and reduce blur artifacts.
-
Preparation is Key: To implement this Gaussian Blur sharpening technique, we need to organize our layers.
- Create a New Group: Start by creating a New Group in your Layers panel. Name it something descriptive like “Gaussian Sharpening”. This helps to keep your layers organized.
- Duplicate Original Image Layer Twice: Select your original image layer and duplicate it twice. You can do this quickly by pressing CTRL+J (Windows) or Command+J (Mac) twice.
- Move Duplicates into the Group: Drag both of the duplicated layers into the “Gaussian Sharpening” group you just created.
- Set Group Blending Mode to Overlay: Change the Blending Mode of the group (the “Gaussian Sharpening” group) to Overlay. This blend mode enhances contrast and will make the sharpening effect more impactful.
- Set Top Layer Blending Mode to Vivid Light: Select the topmost layer within the group and change its Blending Mode to Vivid Light. This mode further intensifies contrast and sharpness.
- Invert the Top Layer: With the top layer still selected, invert it by pressing CTRL+I (Windows) or Command+I (Mac). This inversion is crucial for the Gaussian Blur sharpening technique to work effectively.
-
Apply Gaussian Blur: Now we can apply the Gaussian Blur.
- Navigate to Filter > Blur > Gaussian Blur.
- In the Gaussian Blur dialog box, adjust the Radius slider. For my image, a setting of 6 pixels worked well. The ideal radius will vary depending on the amount of blur and image resolution. Experiment until you achieve the desired level of sharpness without introducing unwanted artifacts. The goal is to subtly refine the details and reduce the perception of blur.
Final Touches and Image Completion
With these three sharpening steps, you should have successfully improved your out-of-focus photo. From here, you can proceed with any further edits, such as noise reduction if it’s still noticeable. Then, continue with your regular Photoshop workflow to finalize the image. In my case, I opted for a slight sky enhancement to add a bit more drama to the scene.
Personally, I find the resulting image quality more than acceptable for sharing on social media platforms or including in blog posts and online portfolios, like the rest of my shots from this location which you can see here.
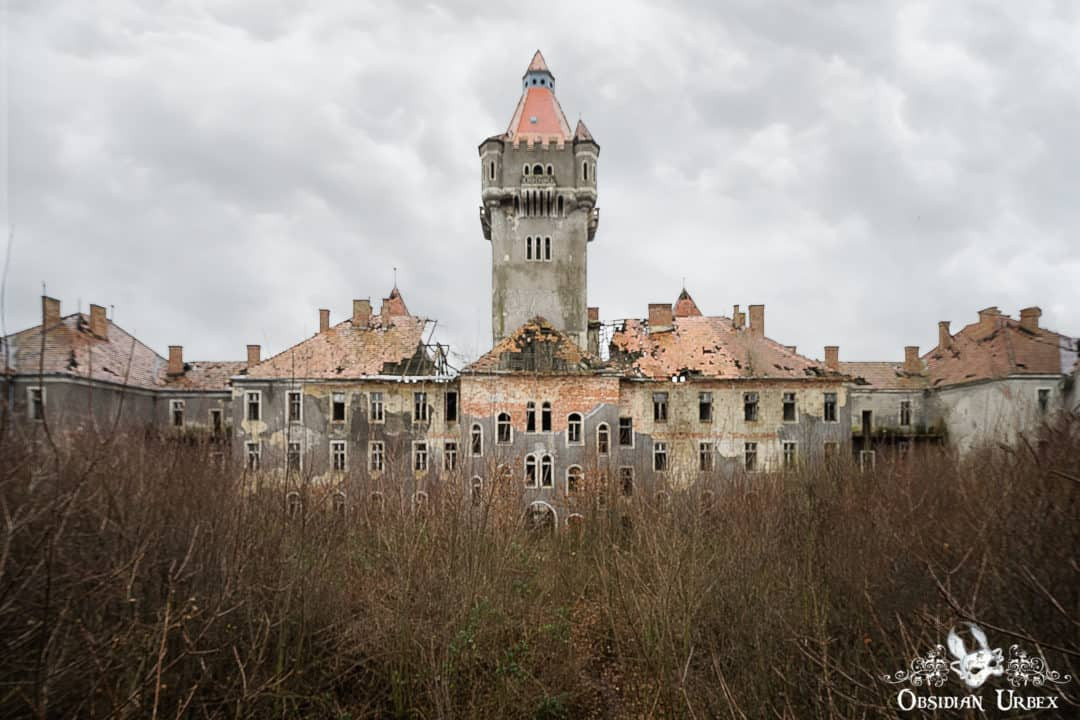 Little Noisy Army Barracks Hungary Main Castle Tower and Courtyard
Bonus Resource
For those who want to delve deeper and examine these techniques firsthand, I’m offering a downloadable layered TIFF file. This demo file allows you to inspect each adjustment layer and setting on a medium-resolution example image, providing a hands-on learning experience.
Download Layered TIFF Demo File