Google Photos is a fantastic tool for managing and safeguarding your precious memories, offering a seamless way to back up and organize your photos and videos. However, in today’s digital age, privacy is paramount. That’s where Google Photos’ Locked Folder comes in, providing an extra layer of security for your sensitive media. This feature ensures that your private photos and videos remain hidden from casual viewers, adding peace of mind to your digital life.
But what happens when you need to revisit those private moments? Finding your Locked Folder in Google Photos is a simple process across all platforms. Whether you are using an Android device, an iPhone, or accessing Google Photos through a web browser, here’s your comprehensive guide on how to access your Locked Folder and manage your private media effectively.
Accessing Locked Folder on Android Devices
If you are an Android user, accessing your Locked Folder is just a few taps away within the Google Photos app. Here’s how to find it:
- Open Google Photos App: Launch the Google Photos application on your Android smartphone or tablet.
- Navigate to the Library Tab: At the bottom of your screen, you’ll see a navigation bar. Tap on the “Library” tab, typically located on the bottom right.
- Find the Utilities Section: Once in the Library, scroll down the screen until you see the “Utilities” section. This section houses various helpful tools within Google Photos.
- Locate Locked Folder: Within the Utilities section, you will find the “Locked Folder” option. The icon might resemble a padlock or a folder with a lock symbol.
- Authentication is Required: Tap on “Locked Folder”. Google Photos will prompt you to authenticate your identity to ensure only you can access these private files.
- Unlock and Access: Use your device’s screen lock method – this could be your PIN, pattern, fingerprint, or facial recognition – to unlock the Locked Folder and view its contents.
 Access Locked Folder Google Photos Android
Accessing Locked Folder on iOS Devices (iPhone and iPad)
For users within the Apple ecosystem, accessing the Locked Folder on iPhones and iPads is equally straightforward using the Google Photos app for iOS. Follow these steps:
- Open Google Photos App: Start by opening the Google Photos application on your iPhone or iPad.
- Go to the Library Tab: Similar to Android, navigate to the “Library” tab located at the bottom of the app interface.
- Scroll to Utilities: In the Library, scroll down until you find the “Utilities” section, which is organized with other Google Photos tools.
- Find Locked Folder Option: Look for and tap on the “Locked Folder” option within the Utilities.
- Authenticate with Face ID or Touch ID: Google Photos will ask you to verify your identity. Use Face ID or Touch ID, depending on your device’s security settings, to proceed.
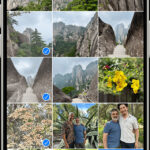
- View Your Private Media: Once authenticated, the Locked Folder will unlock, and you can browse the photos and videos you’ve securely stored there.
Accessing Locked Folder on the Web (Desktop)
You can also access your Locked Folder directly from your computer via a web browser. This is particularly useful for managing your photos on a larger screen. Here’s how:
- Open a Web Browser: Use your preferred web browser (like Chrome, Firefox, Safari, or Edge) and navigate to the Google Photos website: photos.google.com.
- Sign into Your Google Account: Ensure you are signed in to the Google Account that you use for Google Photos and where your Locked Folder is set up.
- Locate Locked Folder in the Menu: On the left-hand side of the Google Photos web interface, you will see a menu. Scroll through this menu and click on the “Locked Folder” option. It might be listed under “Utilities” or directly in the main menu depending on updates to the interface.
- Enter Your Google Account Password: To ensure security, Google will prompt you to enter your Google Account password to unlock and access the Locked Folder online.
- Access Your Locked Content: After entering your password, the Locked Folder will open, allowing you to view and manage your private photos and videos from your desktop.
 Access Google Photos Locked Folder on Web Browser
Enabling Cloud Backup for Your Locked Folder
For enhanced accessibility and security, Google Photos allows you to back up your Locked Folder to the cloud. This means you can access your private photos from any device where you are logged into your Google Account. Here’s how to enable cloud backup for your Locked Folder:
- Open Google Photos App: Launch the Google Photos app on your Android or iOS device.
- Navigate to Locked Folder Settings: Go to Library > Utilities > Locked Folder, as described in the previous sections for accessing the Locked Folder.
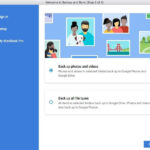
- Find Backup Option: Once you are in the Locked Folder (you might need to unlock it first), look for a setting or prompt related to backup. It’s often labeled as “Back up Locked Folder” or something similar.
- Enable Backup: Tap on “Back up Locked Folder” and follow any on-screen instructions to complete the setup process. You might need to confirm your Google Account and backup preferences.
Important Considerations for Using Locked Folder:
- Local Storage vs. Cloud Backup: By default, items in Locked Folder are stored only on your device. Enabling cloud backup ensures your private photos are also safely stored in the cloud and accessible across devices.
- Manual Backup: Even without full cloud backup enabled, you can manually back up individual photos and videos to your Locked Folder.
- Direct Save from Pixel Camera (Pixel 3 and later): If you use a Pixel 3 or newer Pixel phone, you have the convenience of saving photos directly from your Pixel camera app right into the Locked Folder.
- Moving Items to Locked Folder: To move existing photos or videos into Locked Folder, select the items in the Photos app, tap “More” (often represented by three dots), and then choose “Move to Locked Folder.”
By following these steps, you can easily find and access your Locked Folder in Google Photos across Android, iOS, and web platforms, and manage your private photos with confidence. Utilizing the Locked Folder feature is a proactive step in safeguarding your personal memories and maintaining your digital privacy within Google Photos.