Are you struggling to find photos you’ve hidden on your Android device? It’s a common issue. You might have tucked away sensitive images for privacy, only to later forget where to access them. Don’t worry, you’re not alone, and your photos are likely still there. This guide will walk you through five effective methods on How To Find Hidden Photos On Android, ensuring you can retrieve your private images quickly and easily.
Many Android users utilize built-in features or third-party apps to hide photos for various reasons, from maintaining privacy to decluttering their photo gallery. However, accessing these hidden photos later can sometimes be confusing if you’re not familiar with the process. This article provides comprehensive solutions to help you locate your hidden images, regardless of the method you used to conceal them.
Method 1: Using an Android Data Recovery Toolkit (DroidKit)
One of the most efficient and user-friendly ways to find hidden photos on your Android is by using a specialized Android data recovery tool like DroidKit. DroidKit is a comprehensive software suite designed to solve various Android issues, including data recovery. Its “Deep Recovery” mode is particularly effective at scanning your device at a deeper level to find all types of data, including hidden photos that might not be visible through standard methods.
DroidKit stands out because of its ease of use and powerful recovery capabilities. It supports a wide range of Android devices from all major brands like Samsung, Google Pixel, Huawei, Xiaomi, and more. Whether your photos are hidden in system folders, private albums, or even if you’ve forgotten where you placed them, DroidKit can help you uncover them.
Free Download
Free Download
* 100% Clean & Safe
Free Download * 100% Clean & Safe
Key features of DroidKit for finding hidden photos:
- Deep Scan Recovery: Performs a thorough scan of your Android device’s internal storage and SD card to locate hidden and even deleted photos.
- Wide Data Type Support: Not only recovers photos but also supports recovery of contacts, messages, videos, WhatsApp data, and 13+ other data types.
- Multiple Recovery Modes: Offers various recovery modes, including Quick Recovery (no root required) and Deep Recovery (for more thorough scanning).
- Preview Before Recovery: Allows you to preview all found photos before recovery, ensuring you only restore the images you need.
- Selective Recovery: You can choose to recover all hidden photos or select specific ones based on your needs.
- User-Friendly Interface: Designed with a simple and intuitive interface, making the recovery process easy for even non-technical users.
Here’s a step-by-step guide on how to find hidden photos on Android using DroidKit:
Step 1: Launch DroidKit and Select Recovery Mode.
Open DroidKit on your computer. In the main interface, navigate to the “Data Recovery” section and choose “Deep Recovery from Device”. This mode is designed for comprehensive data retrieval, including hidden files.
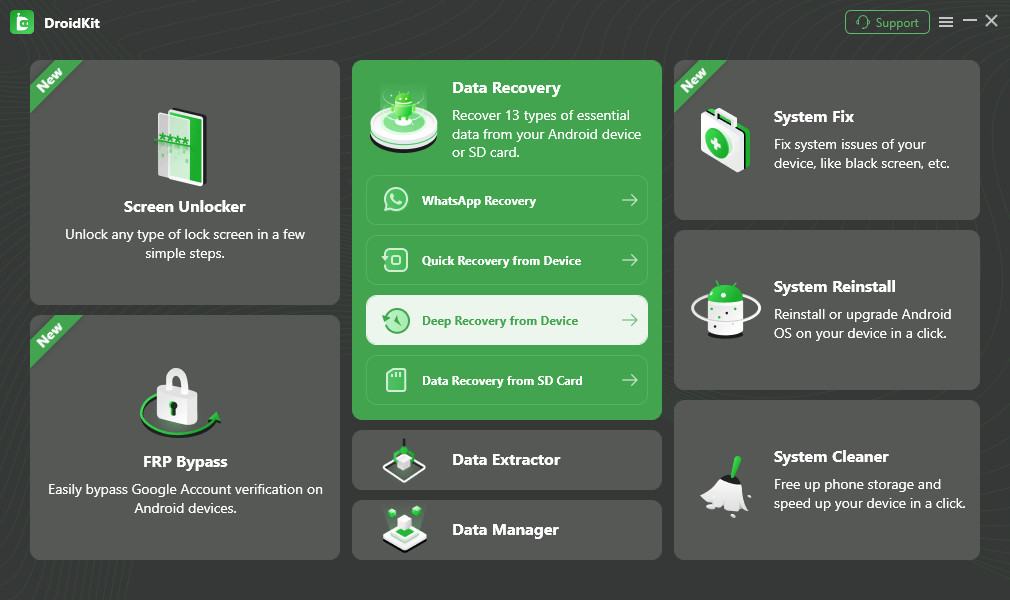 Choose Deep Recovery from Device under Data Recovery
Step 2: Select “Photos” to Scan.
On the data selection screen, check the box next to “Photos”. You can choose other data types as well if needed, but for finding hidden photos, “Photos” is the primary category. Click the “Start” button to proceed.
 Select the Data Type You Need to Recover
Step 3: Connect Your Android Device and Root (If Necessary).
Connect your Android phone to your computer using a USB cable. Click “Start” once your device is detected. For Deep Recovery to work effectively, rooting your device might be required for deeper access. DroidKit provides a “Root Now” option to simplify this process. If you prefer not to root, you can explore the “Quick Recovery” mode (link provided in the software interface), though Deep Recovery is generally more effective for finding hidden photos.
 Tap on Root Now to Continue
Step 4: Preview and Recover Hidden Photos.
Once the scan is complete, DroidKit will display all the photos it found, including hidden ones. You can preview each photo to ensure it’s the one you’re looking for. Select the hidden photos you wish to recover and click “To Device” to save them back to your phone or “To PC” to save them to your computer.
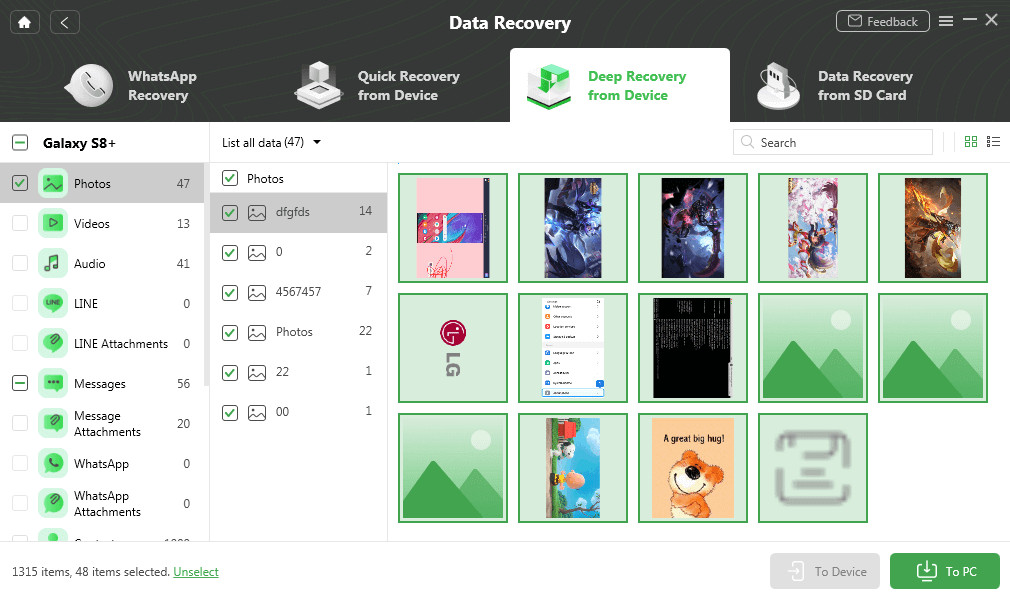 Select Android Photos to Recover
Method 2: Unhide Photos Through Android Gallery Settings
The simplest way to find hidden photos, if they were hidden using your phone’s built-in Gallery app, is through the Gallery settings. Most Android Gallery apps offer a feature to hide albums or photos, and they also provide an option to unhide them just as easily. This method is quick and doesn’t require any additional software.
Steps to view hidden photos in Gallery:
Step 1: Open the Gallery App.
Locate and open the default Gallery application on your Android device. This is usually represented by an icon that looks like a photo or a collection of photos.
Step 2: Access Gallery Settings.
Look for the menu icon within the Gallery app. This is often represented by three vertical dots (hamburger menu) usually located in the top right or bottom right corner of the screen. Tap on this menu icon to open the options. From the menu, select “Settings”.
 Select Settings from the Options Pop up
Step 3: Find and Enable “View Hidden Albums” or Similar Option.
Within the Gallery settings, look for an option related to hidden albums or files. The exact wording may vary depending on your Android device manufacturer and Gallery app version. Common options include “View hidden albums”, “Show hidden files”, or “Hidden albums”. Toggle this option to the “On” or “Enabled” position.
After enabling this setting, go back to your main Gallery view. Hidden albums or photos should now be visible alongside your regular photos. They might be slightly greyed out or indicated with a different icon to distinguish them from non-hidden photos.
Method 3: Using a File Manager App to Show Hidden Files
Another common method for hiding photos on Android involves renaming folders or files to make them hidden from standard gallery views. This is often done by adding a period (.) at the beginning of the folder or file name. To find these types of hidden photos, you need to use a File Manager app and enable the option to show hidden files. Most Android devices come with a pre-installed File Manager, often called “Files” or “File Manager”. If not, you can download a free file manager app from the Google Play Store.
Steps to find hidden photos using File Manager:
Step 1: Open File Manager.
Locate and open the File Manager app on your Android device.
Step 2: Access File Manager Settings.
Similar to the Gallery app, look for the menu icon (usually three horizontal lines or vertical dots) within the File Manager app. Tap on it to open the menu and select “Settings”.
Step 3: Enable “Show Hidden Files” or “Show Hidden Folders”.
In the File Manager settings, find the option to “Show hidden files”, “Show hidden folders”, or “Display hidden files”. Enable this option. The location of this setting might be under “Advanced settings” or “View options” depending on your File Manager app.
Once enabled, navigate back to the main file browsing interface of the File Manager. You should now be able to see folders and files that were previously hidden (often indicated by a greyed-out appearance or a period at the beginning of their name). Browse through your device’s storage, particularly the “DCIM” (Digital Camera Images) folder, “Pictures” folder, and any other folders where you might have stored photos. Look for folders or files that appear faded or have a period at the beginning of their name – these are likely your hidden photos.
Method 4: Checking Google Photos Archive
If you use Google Photos to back up your images, you might have accidentally archived some photos, which effectively hides them from the main Photos view. Archiving in Google Photos is designed to declutter your main photo stream without deleting the images. It’s worth checking your Google Photos Archive to see if your “hidden” photos are located there.
 Go to Google Photos
Steps to find photos in Google Photos Archive:
Step 1: Open Google Photos App.
Launch the Google Photos application on your Android device and ensure you are logged in to the correct Google account where your photos are backed up.
Step 2: Access the “Library” Section.
At the bottom of the Google Photos app, tap on the “Library” icon.
Step 3: Open the “Archive” Folder.
In the Library section, you will see an “Archive” option. Tap on “Archive” to view all the photos you have archived.
Browse through the photos in the Archive. If your “hidden” photos are there, you can select them and tap the “Unarchive” option (usually represented by three dots menu and then “Unarchive”) to move them back to your main Google Photos library.
Method 5: Exploring Google Drive for Synced Photos
If you use Google Drive to back up various files, including photos, and you suspect your hidden photos might be stored there, Google Drive is another place to check. This method is relevant if you manually uploaded photos to Google Drive or used a sync service to back up folders containing photos to Drive.
Steps to find photos in Google Drive:
Step 1: Open Google Drive App.
Open the Google Drive application on your Android device and log in to your Google account.
Step 2: Navigate to “Files”.
At the bottom of the Google Drive app, tap on the “Files” button. This will display all the files and folders stored in your Google Drive.
Step 3: Search for Hidden Photos.
Browse through your folders and files in Google Drive. If you remember the folder where you might have stored your hidden photos, navigate to that folder. Alternatively, you can use the search function in Google Drive to search for photo file types (e.g., .jpg, .png) or specific file names if you remember them.
If you find your hidden photos in Google Drive, you can download them to your Android device. To do this, tap the three dots menu next to the photo and select “Download”. The photo will be downloaded to your device’s local storage, usually in the “Downloads” folder.
 Click on Download to Export Photos
Conclusion
Finding hidden photos on Android doesn’t have to be a daunting task. By using these five methods, you should be able to locate your private images effectively. For a quick and comprehensive solution, DroidKit offers a powerful data recovery option. If your photos were hidden using simpler methods, checking your Gallery settings, File Manager, Google Photos Archive, or Google Drive might be all you need.
Remember to choose the method that best suits how you initially hid your photos. And if you’re still having trouble, consider using DroidKit for its deep scanning capabilities to ensure no hidden photo is left undiscovered.
Free Download
Free Download
* 100% Clean & Safe
Free Download * 100% Clean & Safe
Senior writer of the iMobie team as well as an Apple fan, love to help more users solve various types of iOS & Android-related issues.
Product-related questions? Contact Our Support Team to Get Quick Solution >