Creating a soft, faded background in your iPhone photos, also known as background blur, is a fantastic way to make your subject stand out and add a professional touch to your images. You might think achieving this dreamy effect requires a fancy DSLR camera, but your iPhone is more than capable! In this guide, we’ll explore several easy and effective methods to fade the background in your photos directly on your iPhone, helping you capture stunning, eye-catching images.
1. Leverage Portrait Mode for Instant Background Fade
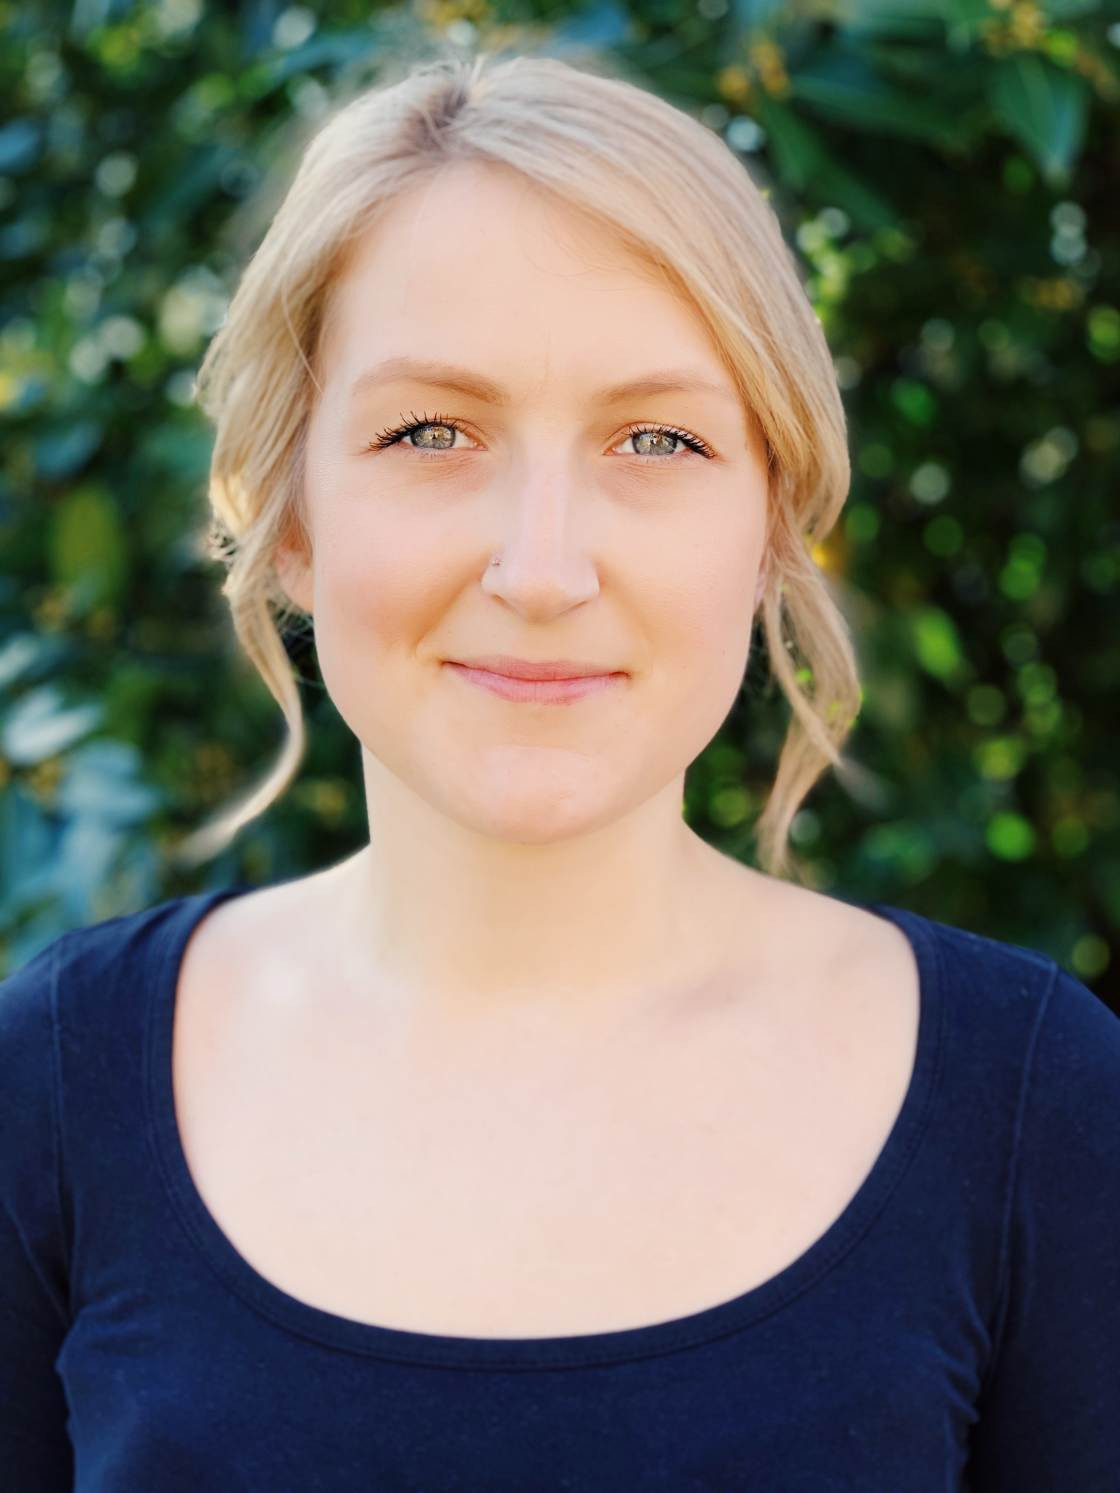
Want to capture professional-looking portraits with beautifully faded backgrounds right as you shoot? iPhone’s built-in Camera app offers an incredible feature specifically designed for this purpose: Portrait mode.
 Using iPhone Portrait Mode to fade background in photo
Portrait mode utilizes sophisticated depth-effect software to automatically fade the background of your photos while keeping your subject sharp and in focus. This is ideal for portrait photography, but also works wonders for highlighting any subject against a distracting background. By fading the background, you draw the viewer’s attention directly to what matters most in your frame.
Portrait mode is available on a wide range of iPhone models, including: iPhone 15, iPhone 14, iPhone 13, iPhone 12, iPhone 12 Mini, iPhone 12 Pro, 12 Pro Max, iPhone 11, iPhone 11 Pro, iPhone 11 Pro Max, iPhone XS, iPhone XS Max, iPhone XR, iPhone X, iPhone 8 Plus, and iPhone 7 Plus.
If you’re using an older iPhone model without Portrait mode, don’t worry! You can still achieve a faded background using other techniques we’ll discuss in the sections below.
1.1 Step-by-Step Guide to Fading Backgrounds with Portrait Mode
Using Portrait mode to fade the background in your iPhone photos is incredibly straightforward:
-
Open the Camera app on your iPhone.
-
Select “Portrait” from the mode options located at the bottom of your screen. You might need to swipe left or right to find it.
 Selecting Portrait Mode in iPhone Camera app to fade photo background
 -
Position your subject within the frame. For Portrait mode to work effectively, ensure your subject is between approximately two and eight feet away from the camera. Also, make sure there’s sufficient light in your scene, as Portrait mode can be less effective in low light conditions.
-
Compose your shot. As you frame your subject, you’ll notice a yellow focus box appearing around their face or main subject. This indicates the area that will remain in sharp focus, while the background will be faded.
-
Look for the “Natural Light” or “Depth Effect” indicator. When you see the words “Natural Light” (or “Depth Effect” on iPhone 7 Plus) highlighted in yellow on your screen, it means your iPhone is ready to capture a portrait with a faded background.
-
Press the shutter button to take your photo. Your iPhone will automatically apply the background blur effect.
iPhone photo with faded background using Portrait Mode
1.2 Adjusting Background Fade Intensity in Portrait Photos
A fantastic feature of Portrait mode on newer iPhones is the ability to adjust the intensity of the background fade after you’ve already taken the photo. This gives you creative control to fine-tune the blur effect to your liking.
This post-capture depth adjustment is available on: iPhone 15, iPhone 14, iPhone 13, iPhone 12, 12 Mini, 12 Pro, 12 Pro Max, 11, 11 Pro, 11 Pro Max, XS, XS Max, and XR.
Here’s how to adjust the background fade in your portrait photos:
-
Open the Photos app and select the portrait photo you wish to edit.
-
Tap “Edit” located in the top right corner of the screen.
Tapping Edit on iPhone photo to adjust background fade -
Tap the “f/number” icon at the top left of the screen. This icon represents aperture, a key concept in photography related to depth of field and background blur.
-
Use the “Depth” slider that appears beneath your photo to adjust the fade strength. Sliding to the left (lower f/number) increases the background blur, creating a more pronounced fade. Sliding to the right (higher f/number) decreases the blur, revealing more background detail.
Using Depth slider to control background fade on iPhone portrait photo
Experiment with the Depth slider to find the perfect level of background fade for your photo. A lower f/number is ideal for emphasizing your subject and creating a very soft background, while a higher f/number can be used for a more subtle fade, keeping some context in the background visible.
If you’re using an older iPhone that doesn’t support the Depth slider, you can still remove the Portrait mode effect entirely if you prefer the original, unfaded image. Simply tap the yellow “Portrait” option at the top of the screen in the editing interface to toggle the depth effect on or off.
While you’re exploring Portrait mode editing, you’ll also notice the Portrait Lighting feature (not available on iPhone 7 Plus). Portrait Lighting allows you to apply various studio-style lighting effects to your portrait photos, further enhancing your images. You can access these options by tapping the hexagon icon at the top left of the editing screen and experimenting with different lighting styles like “Studio Light,” “Contour Light,” or “Stage Light” to dramatically alter the look of your portraits.
Exploring Portrait Lighting options to enhance iPhone portrait photos
Remember to tap “Done” to save your edits after adjusting the background fade and Portrait Lighting to finalize your stunning portrait photo.
2. Get Closer to Your Subject for Natural Background Fade
Even if your iPhone doesn’t have Portrait mode, you can still achieve a beautiful background fade by understanding a fundamental photography principle: depth of field. Depth of field refers to the area in your photo that appears sharp and in focus. A shallow depth of field, where only a small portion of the image is in focus, naturally creates background blur.
One of the simplest ways to achieve a shallow depth of field with your iPhone is to physically move closer to your subject.
Getting closer to subject to create natural background fade on iPhone
When you shoot from a close distance, the area behind your subject naturally falls out of focus, resulting in a beautifully faded background. The closer you get, the more pronounced the background blur will be. This technique works effectively for various subjects, from close-up portraits to detailed shots of objects.
However, there’s a limit to how close you can get. If you get too close, your iPhone camera may struggle to focus, and your subject itself might become blurry. Always ensure your subject is sharp and in focus. If it’s not, slightly increase the distance until focus is achieved, then recompose your shot to maximize the background fade.
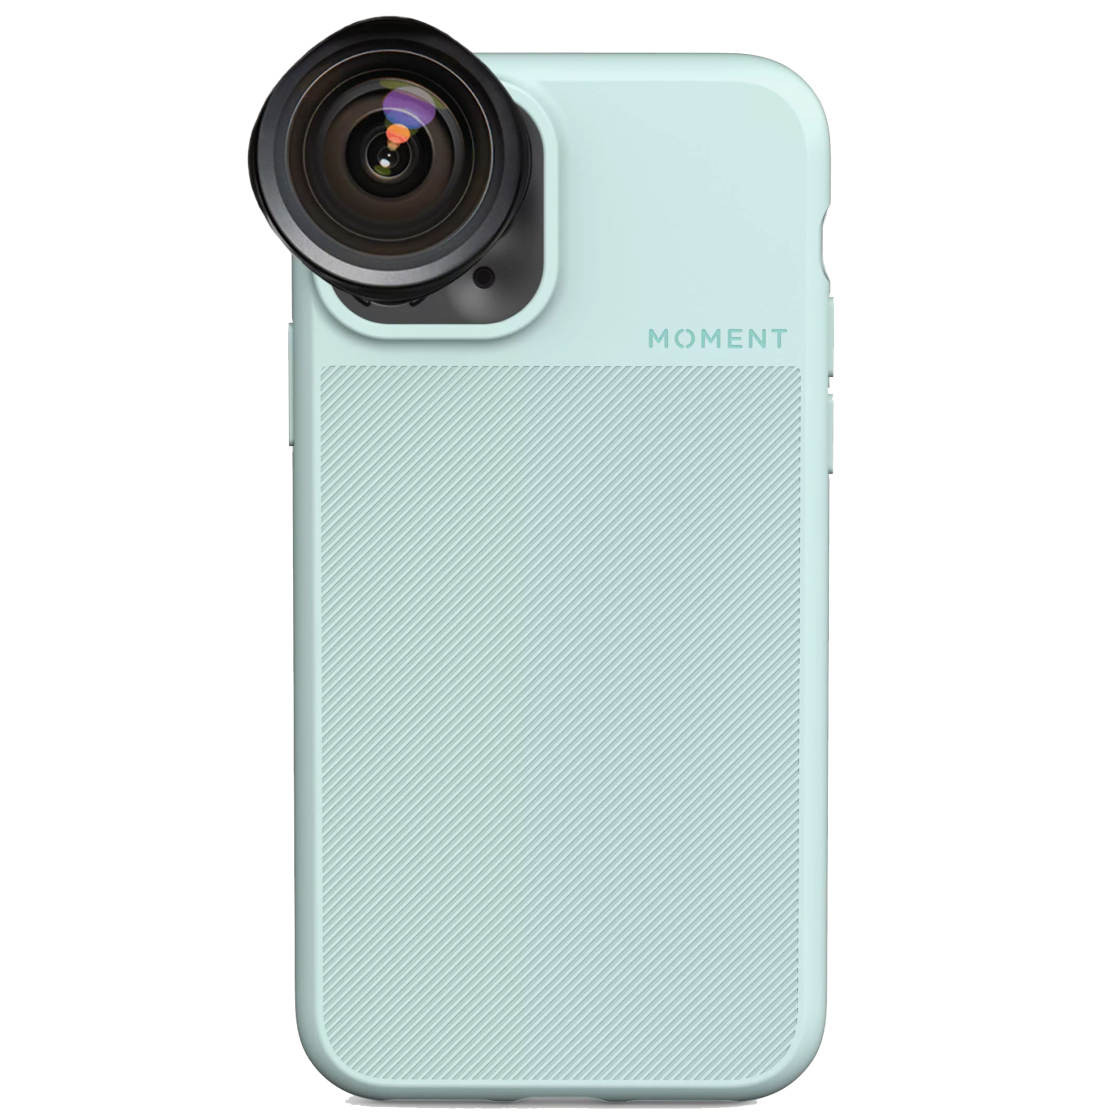
For extreme close-up photography and even more dramatic background fade, consider using an add-on macro lens, such as the Moment Macro Lens.
 Using macro lens to enhance background fade in iPhone nature photography
A macro lens allows your iPhone camera to focus at extremely close distances, enabling you to capture incredible detail in small subjects like flowers, insects, and textures while creating a very shallow depth of field and intensely faded backgrounds.
When shooting up close, precise focus is crucial. To ensure your subject is sharp and the background is faded, utilize your iPhone’s tap to focus feature. In the Camera app, simply tap on the screen where you want the focus to be set. A yellow box will appear, indicating your focus point. Make sure to tap on your subject to ensure it’s in sharp focus before taking the photo.
Tapping to focus on iPhone screen to control background fade
Experiment with moving closer to your subject and using tap to focus to see how proximity and focus point influence the degree of background fade in your iPhone photos. You’ll be surprised at the beautiful blurred backgrounds you can achieve without relying on Portrait mode.
iPhone photo with natural background fade achieved by getting closer to subject
3. Fade Background in Photo During Editing
Sometimes, you might take a photo without intentionally creating a faded background, or perhaps you want to enhance the blur effect after capturing the image. Fortunately, there are numerous editing apps available that allow you to fade the background of a picture on your iPhone after it has been taken.
Editing iPhone photo to fade background using AfterFocus app
In this section, we’ll explore how to use the AfterFocus app (available on the App Store) to selectively fade backgrounds in your iPhone photos. AfterFocus is a user-friendly app specifically designed for creating depth-of-field effects and background blur in post-processing.
3.1 Selecting Foreground and Background in AfterFocus
To begin fading the background using AfterFocus, follow these steps:
-
Open the AfterFocus app on your iPhone.
-
Tap “Select Photo” at the bottom of the screen and choose the photo you want to edit from your photo library.
Upon opening your image, helpful tips might appear. Swipe through them to learn quick app features, then tap the “X” at the top left to close the tips.
-
Use the “Smart Selection” tools to initially define your subject (foreground) and the background. Tap the “Focus” icon at the bottom of the screen. Then, use your finger to draw a line inside the area you want to keep in sharp focus (your subject).
Using Smart Selection tool in AfterFocus app to define focus areaDon’t worry about being perfectly precise at this stage; a rough outline of your subject is sufficient for the initial selection.
-
Tap the “Background” icon. Now, draw a line over the background area that you want to fade. When you release your finger, you’ll see a red mask highlighting the foreground area that the app has automatically selected to remain in focus. The black line indicates the background area that will be blurred.
Review the selection. Check if the app accurately identified your subject and background. If parts of your subject aren’t masked in red, or if background areas are incorrectly masked, you’ll need to refine the selection for accurate background fading.
Reviewing Smart Selection in AfterFocus – refinement needed for helmet -
Refine selection using “Manual Selection” tools if needed. If the Smart Selection isn’t perfect, tap the “Pencil” icon at the top of the screen to switch to Manual Selection mode.
Zoom in on the image by pinching with two fingers to carefully examine the edges of your selection. Use two fingers to drag the image while zoomed in for navigation. Adjust the brush size by tapping the “Brush Size” icon and choosing an appropriate size for detailed work.
Select either the “Focus” or “Background” icon and carefully brush over areas of your subject or background to correct the mask. Remember, in Manual Selection, any area you brush over will be directly included or excluded from the focus area.
Using Manual Selection tools in AfterFocus to refine focus maskFor precise manual selection, take your time and carefully trace the edges of your subject. If you make a mistake, tap the “Undo” icon (curved arrow) to revert your last action. You can also switch between “Focus” and “Background” modes to correct over- or under-selected areas.
-
Tap the arrow icon at the top right when your selection is complete and accurate. This will apply the initial background blur effect based on your selection.
If you notice any selection errors after applying the blur, tap the single left arrow at the top to go back and refine your selection using the manual tools. Repeat until you are satisfied with the foreground and background separation. Then, tap the right arrow to return to the blur effects screen.
3.2 Customizing the Fade Effect in AfterFocus
AfterFocus offers various tools to customize the background fade effect to achieve your desired look. The icons at the bottom of the app provide control over blur type and intensity.
-
Tap the “Blur” icon at the bottom of the screen. Ensure “Lens Blur” is selected, which simulates a natural lens-like blur.
-
Adjust the “Blur” slider to control the strength of the background fade. Dragging the slider to the right increases the blur intensity, creating a stronger faded background effect.
Adjusting Lens Blur intensity in AfterFocus appCompare the edited photo with a faded background to the original image where the background is in focus. Notice how the faded background in the edited version effectively directs attention to the main subject, enhancing the visual impact.
Comparison of photo with and without background fade using AfterFocus -
Experiment with “Motion Blur” for a dynamic effect. Instead of “Lens Blur,” you can choose “Motion Blur” to create a sense of movement in the faded background. This can be particularly effective for subjects that imply motion or action.
Applying Motion Blur to background in AfterFocus appMotion blur can add a creative and energetic feel to your photos, even if the subject itself is stationary, by suggesting movement in the surrounding environment.
-
Save your edited photo. Once you’re satisfied with the background fade effect, tap the “down arrow” icon at the top of the screen, then tap “Yes” to save your edited image to your iPhone’s photo library.
4. Create a Dreamy Blurred Vignette to Frame Your Subject
For a slightly different approach to background fading, consider creating a blurred vignette. Instead of blurring the entire background, a vignette applies blur selectively around the edges of the photo, drawing focus to the central area.
Blurred vignette effect to fade background around edges of iPhone photo
A blurred vignette can act as a visual frame, naturally guiding the viewer’s eye towards your subject in the center of the image. It also adds a subtle, dreamy aesthetic to your photos. You can easily create a blurred vignette using the free Snapseed app (available on the App Store).
Here’s how to fade the background around the edges of your photos using Snapseed:
-
Open the Snapseed app on your iPhone.
-
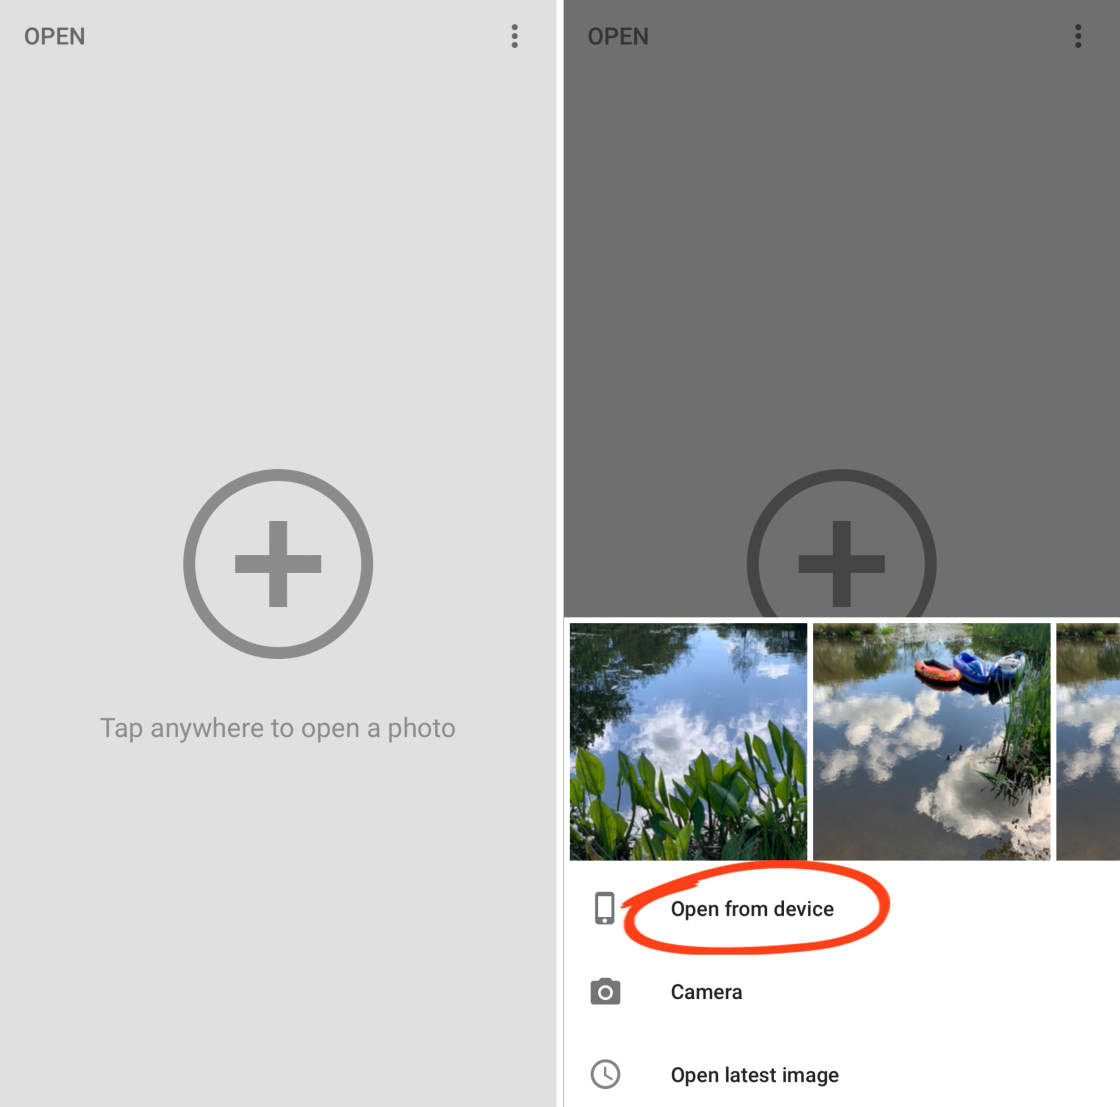
Tap the screen to open your photo library. Select “Open From Device” and choose the photo you want to edit.
Opening photo in Snapseed app for blurred vignette effect -
Tap “Tools” at the bottom of the screen. Scroll down and select the “Lens Blur” tool.
Two white circles will appear overlaid on your image. The area inside the inner circle will remain in sharp focus, while the area outside the outer circle will be blurred. The space between the circles represents the transition zone from sharp to blurred.
Lens Blur tool interface in Snapseed app for creating vignette -
Adjust the vignette placement and size. You can drag the center of the circles to reposition the focused area. Resize the vignette by pinching in or out with two fingers on the circles. Position and size the vignette to frame your subject effectively.
-
Customize the blur intensity and vignette transition. Swipe vertically on the image to access editing options. Select “Blur Strength” and swipe horizontally to adjust the intensity of the blur around the edges. Similarly, adjust “Transition” to control how gradual the blur effect transitions from the focused center to the blurred edges. “Vignette Strength” allows you to darken the edges of the photo along with the blur, enhancing the vignette effect.
-
Tap the checkmark icon at the bottom right to apply the blurred vignette effect.
-
Save your edited image. Tap “Export”, then “Save a copy” to save the vignetted photo to your photo library, preserving the original.
Saving photo with blurred vignette effect in SnapseedCompare the image with the blurred vignette to the original, unedited photo. Notice how the subtle blurring around the edges effectively draws the eye towards the center of the frame, highlighting the subject.
Comparison of photo with and without blurred vignette effect
Keep in mind that blurred vignettes work best on photos where the subject is relatively centrally positioned and there’s enough space around the subject to accommodate the blurred edges. While not suitable for every photo, a well-applied blurred vignette can be a powerful tool for enhancing focus and adding a touch of dreamy atmosphere to your iPhone photography.
