Recreating the nostalgic and timeless look of film in digital photography is a popular trend. Many photographers are drawn to the aesthetic of film photos, seeking to emulate this style for their social media and portfolios. This appeal largely stems from the sense of history, nostalgia, and unique character that film photography evokes.
While traditional film cameras and film rolls offer authentic results, they can be expensive and less practical for digital photographers. Disposable cameras contribute to environmental waste. Investing in new film equipment might not be a viable option for photographers already equipped for digital work who simply want to explore the film aesthetic.
This is where the power of Lightroom Mobile comes in. It provides a convenient and cost-effective solution to achieve a film-like look with your existing digital photos.
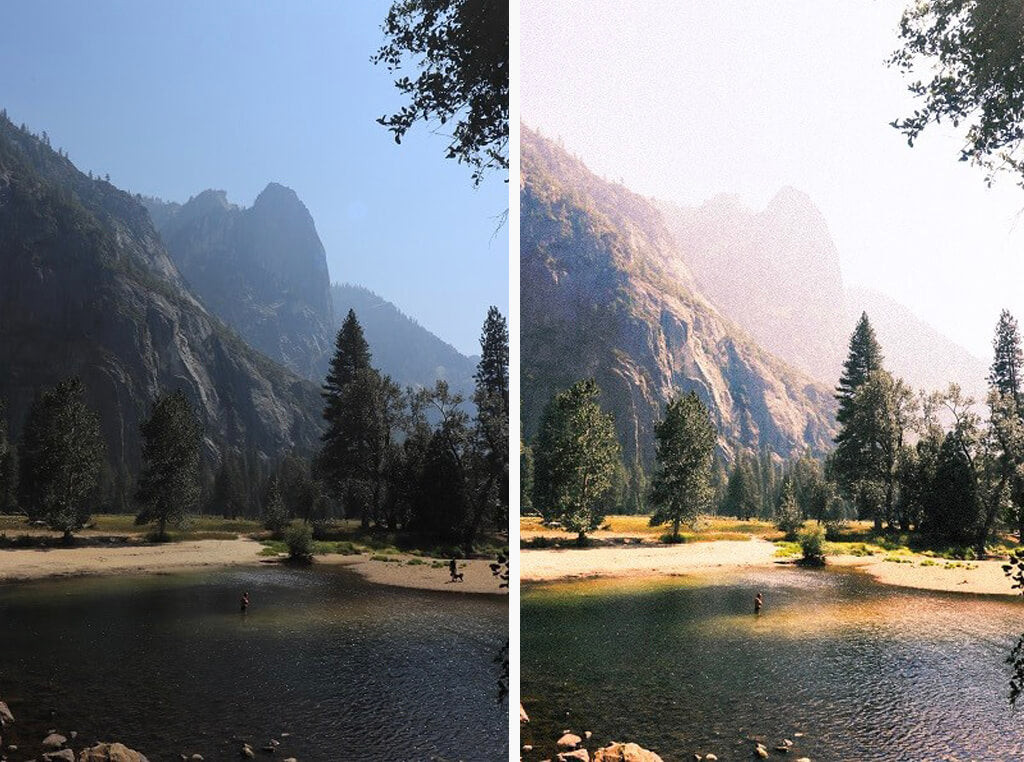 Transform your digital photos into film-like images with Lightroom Mobile editing techniques
As a digital photographer myself, I’ve always been captivated by the film look and wondered how my digital images would appear with that classic style. Since acquiring a film camera wasn’t immediately feasible, I explored editing techniques within Lightroom to replicate the film aesthetic digitally.
One of the key aspects of film photography is its inherent limitations. Typically, a roll of film provides only 24 or 36 exposures. This constraint encourages photographers to be more deliberate and focused on capturing the essence of a moment. With fewer shots available, the emphasis shifts towards storytelling, composition, and emotional connection, rather than technical perfection like sharpness and color accuracy.
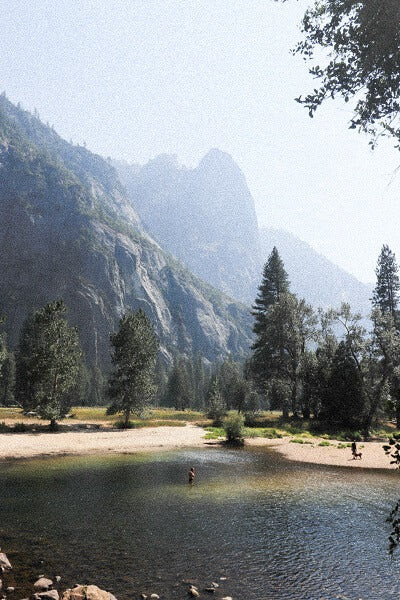
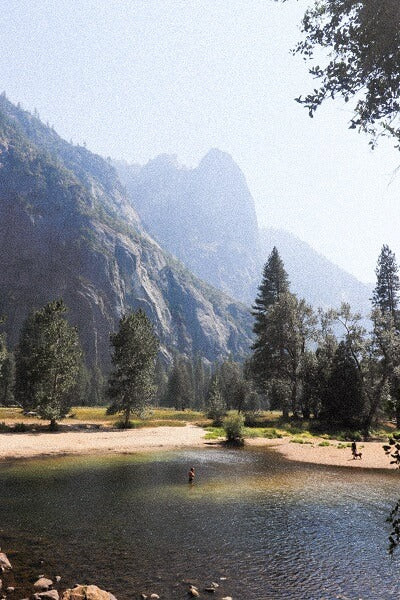
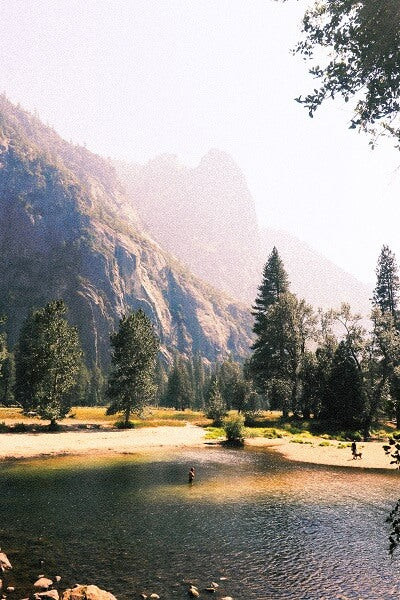
Let’s use a photo I captured in Yosemite National Park as an example. It depicts a man enjoying the cool water against a backdrop of stunning mountains. The scene felt serene and almost dreamlike, a perfect candidate for a film-inspired edit.
Remember that every photograph is unique, and the extent of adjustments needed for exposure and contrast will vary depending on the image. However, the Lightroom Mobile settings outlined below offer a solid starting point. You can even save these settings as a preset for future use and fine-tune them further for individual photos.
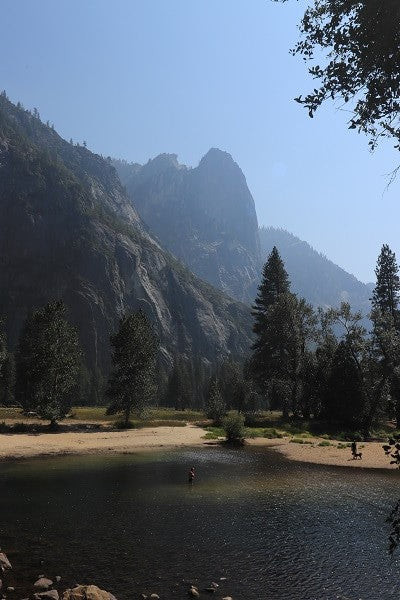 Example of original digital photo ready for film-like editing in Lightroom Mobile
Step 1: Adjusting the Lighting for a Film Look
The initial step in achieving a film look is to adjust the lighting. Film photos often exhibit a slightly higher exposure compared to standard digital photos, contributing to their airy, ethereal, and sometimes slightly mysterious quality.
To make these adjustments in Lightroom Mobile, navigate to the “Light” panel. For my Yosemite image, I made subtle increases to Exposure, Contrast, Highlights, Whites, and Shadows. I also slightly decreased the Blacks to maintain some depth and dimension within the photo.
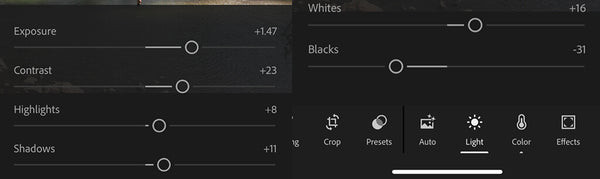 Lightroom Mobile Light Panel adjustments for film effect: Exposure, Contrast, Highlights, Whites, Shadows, and Blacks
 Step-by-step Lightroom Mobile lighting adjustments to mimic film exposure and contrast
Step 2: Adding Film Grain for Texture and Nostalgia
The next crucial step is adding grain. In contemporary digital photography, achieving sharp, crystal-clear images is often prioritized. However, film photography embraces imperfection, and grain is a signature characteristic. The presence of grain softens sharpness and introduces a subtle texture. This imperfection is actually beneficial, drawing the viewer’s attention to the story and emotion of the image, rather than being distracted by technical perfection.
The amount of grain you add is a matter of personal preference. Keep in mind that excessive grain can obscure details within the photo. Here are the Lightroom settings I typically use for adding grain to mimic film:
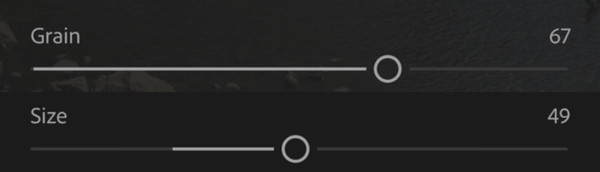 Lightroom Mobile Effect Panel settings for adding film grain: Grain Amount, Size, and Roughness
 Applying film grain in Lightroom Mobile to achieve a classic film texture
Step 3: Making Color Adjustments for Warmth and Tone
Step three involves adjusting the colors. Even when aiming for a film aesthetic, my digital photography background influences my approach. I enjoy manipulating colors to emphasize specific elements within a photo, which is a personal stylistic choice.
I generally prefer warmer tones in my images, so I usually increase the Temperature slider slightly. To prevent the image from becoming overly orange, I introduce a touch of purple tint. A helpful color theory tip: To reduce the prominence of a specific color in an image, use a color wheel to identify its opposite color and increase that opposing color in Lightroom. This balances the color palette effectively.
I also subtly increase Vibrance and Saturation to enhance the colors without making them appear overly artificial.
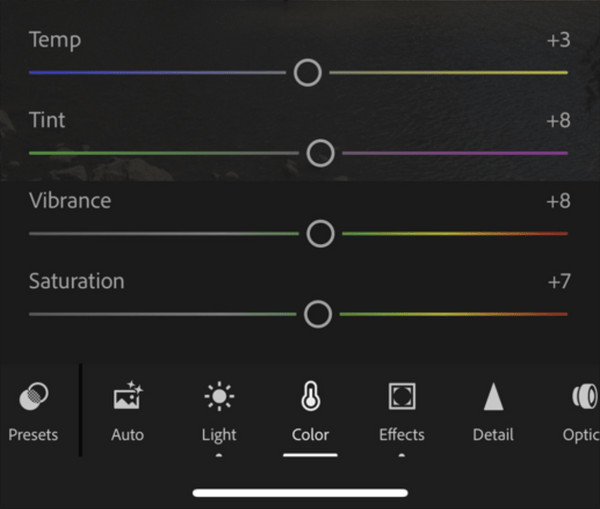 Lightroom Mobile Color Panel adjustments for Temperature, Tint, Vibrance, and Saturation to enhance warmth and color
 Step-by-step color adjustments in Lightroom Mobile for a film-inspired color palette
Step 4: Fine-Tuning with Film-Like Color Grading
The previous steps lay the foundation for the film look. At this point, you could consider your edit complete. However, for a more refined and distinctive film aesthetic, I recommend additional color adjustments. Specifically, I like to manipulate individual colors within the image to make certain elements pop and enhance the overall mood.
In my Yosemite photo, I wanted to accentuate the sunlight illuminating the person in the water and make the blues of the mountains and water more vibrant. I achieved this primarily by increasing the Saturation of blue, red, orange, and yellow colors. I also made minor adjustments to Hue and Luminance for these colors, as shown in the settings below.
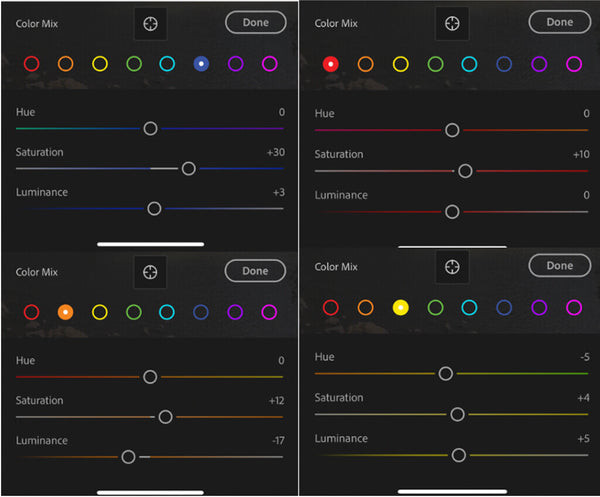 Lightroom Mobile Mix Panel adjustments for individual color channels: Hue, Saturation, and Luminance for targeted color enhancement
 Detailed color channel adjustments in Lightroom Mobile to achieve nuanced film-like colors
Film photos often exhibit less dynamic range and dimension compared to digital images. Reducing contrast is an effective way to emulate this characteristic. To achieve this, return to the “Light” panel and increase the Shadows within the Tone Curve (S-Curve). This flattens the contrast and contributes to the filmic appearance.
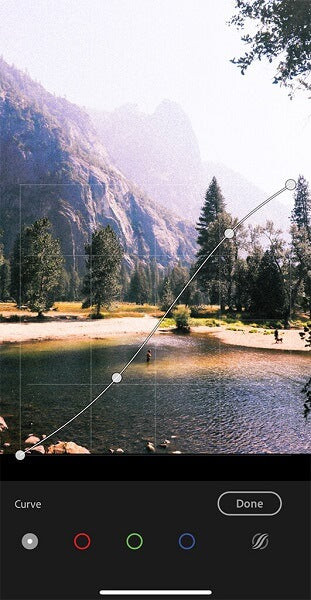 Lightroom Mobile Tone Curve adjustments to reduce contrast and enhance shadow detail for a film look
Finally, I utilize the Color Grading panel for subtle but impactful color shifts. I aimed to introduce more reds, oranges, and yellows into the shadows and highlights to emphasize the warm sunlight in the scene. I also added a green-blue hue to the mid-tones and increased its saturation to brighten the water and foliage, adding a final touch of filmic color grading.
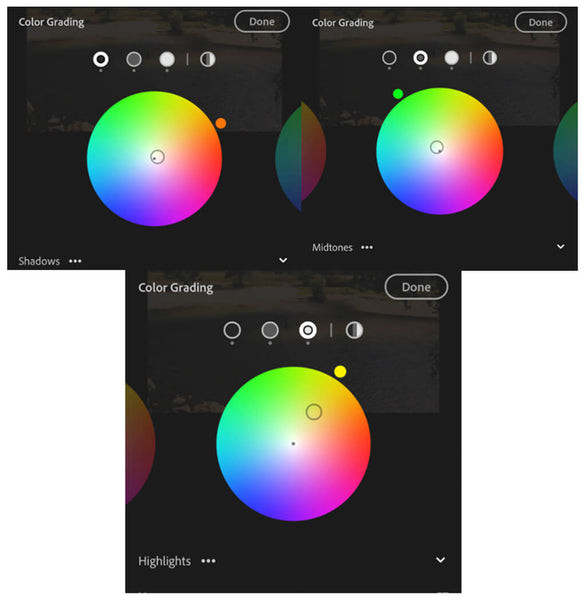 Lightroom Mobile Color Grading panel adjustments for Shadows, Midtones, and Highlights to introduce film-inspired color casts
 Final color grading adjustments in Lightroom Mobile to refine the film-inspired color palette
Optional Step: Using the Healing Brush for Refinements
As an optional finishing touch, I decided to remove a second person and a dog from the photo using the Healing Brush tool in Lightroom Mobile. This ensures that the viewer’s attention is solely focused on the main subject, the man in the water, enhancing the image’s narrative.
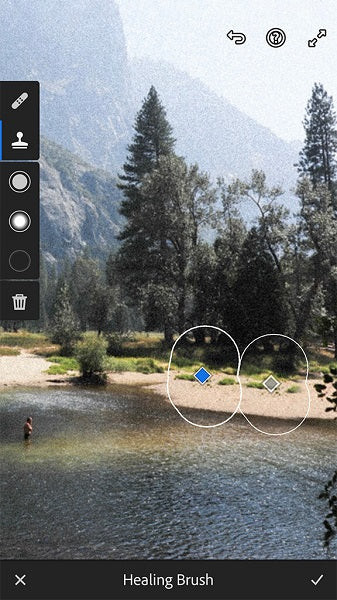 Lightroom Mobile Healing Brush tool used to remove distractions and focus on the main subject
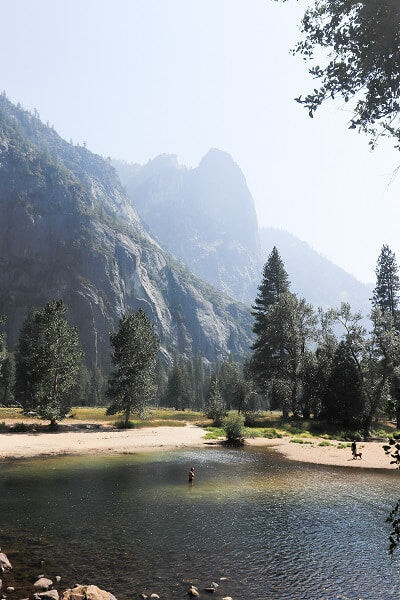
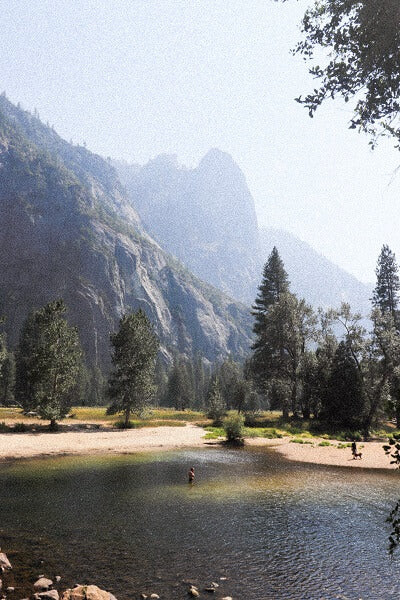
Final Edited Film Image:
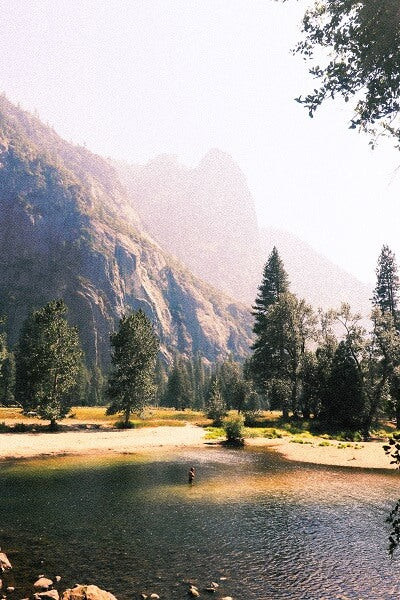 Final film-edited image in Lightroom Mobile showcasing the nostalgic and timeless aesthetic
Conclusion
Comparing the before and after images clearly demonstrates the transformation. The film-edited photo appears more evocative, brighter, and effectively conveys the story of a peaceful moment in nature.
If you’re intrigued by the idea of exploring film photography but don’t have access to a film camera or prefer to avoid the costs and complexities of film, Lightroom Mobile provides a powerful alternative. It empowers you to convert your regular digital or phone photos into captivating film-inspired images, imbued with a nostalgic charm and compelling storytelling potential.
Transform your digital photos into film-like images with Lightroom Mobile editing techniques
Explore More Lightroom Mobile Tutorials:
How to Install Presets in Lightroom Mobile
Lightroom Mobile Preset Collections
Using Presets in Lightroom Mobile
How to Edit in Lightroom Mobile
Lightroom Mobile Sync: How to Sync Photos & Edits to LR Mobile
Batch Editing in Lightroom Mobile
How to Smooth Skin in Lightroom Mobile
How to Add a Watermark in Lightroom Mobile
How to Export from Lightroom Mobile