Chromebooks are known for their simplicity and speed, especially when browsing the internet. Saving photos you find online is a basic task, and thankfully, Chromebooks make it incredibly straightforward. Whether you’re a new Chromebook user or just want a refresher, this guide will walk you through the simple steps to download photos and easily locate them afterwards.
Saving Photos from the Web on Your Chromebook
The process to save images from the internet on your Chromebook is similar to other computers, focusing on ease of use. Here’s how you can quickly download your favorite pictures:
- Initiate the Download with a Right-Click: Find the photo you wish to download. To begin, perform a right-click on the image. On a Chromebook, this is easily done by tapping the trackpad with two fingers simultaneously. This action will open up a context menu with various options.
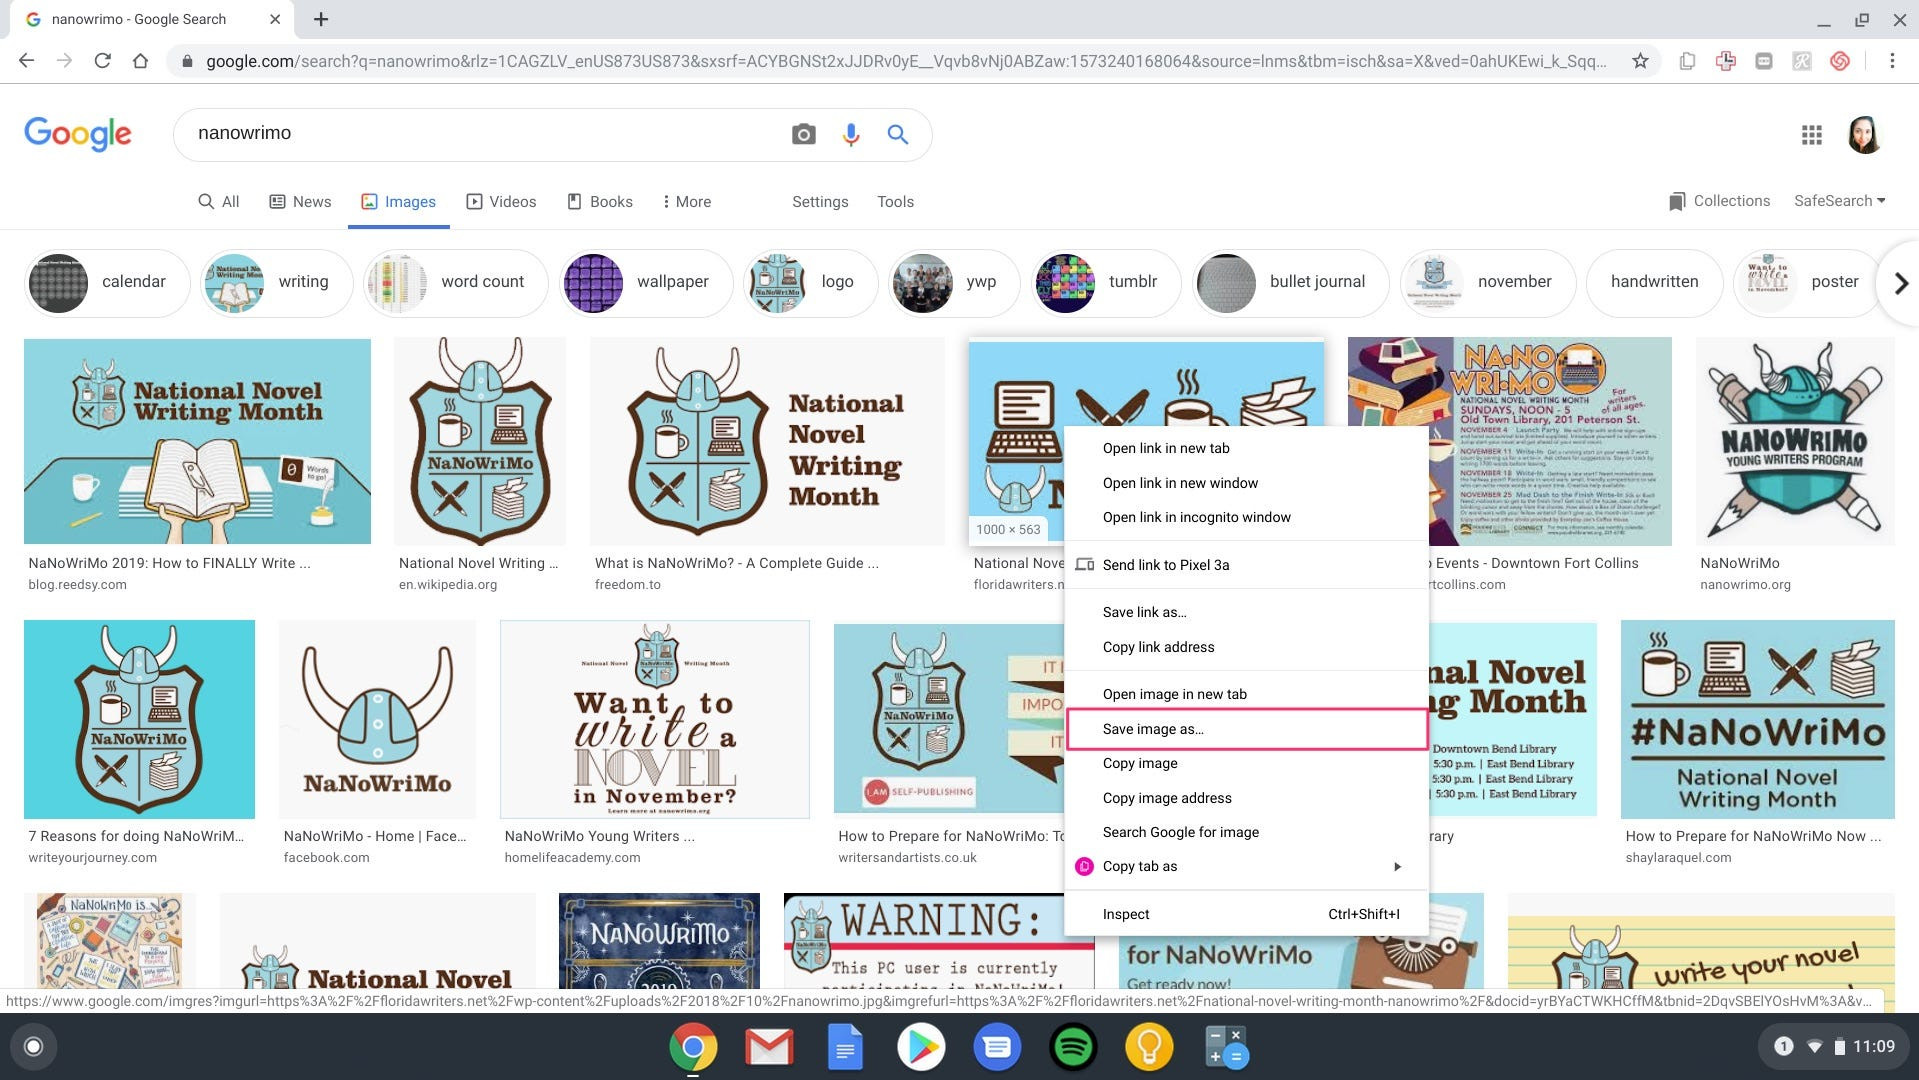 Right-click on an image on Chromebook to see options
- Select “Save image as”: From the menu that appears after your right-click, choose the option labeled “Save image as.” Clicking this will prompt your Chromebook to prepare for the image download, allowing you to specify where and how you want to save the file.
 Choose 'Save image as' from the right-click menu on a Chromebook
-
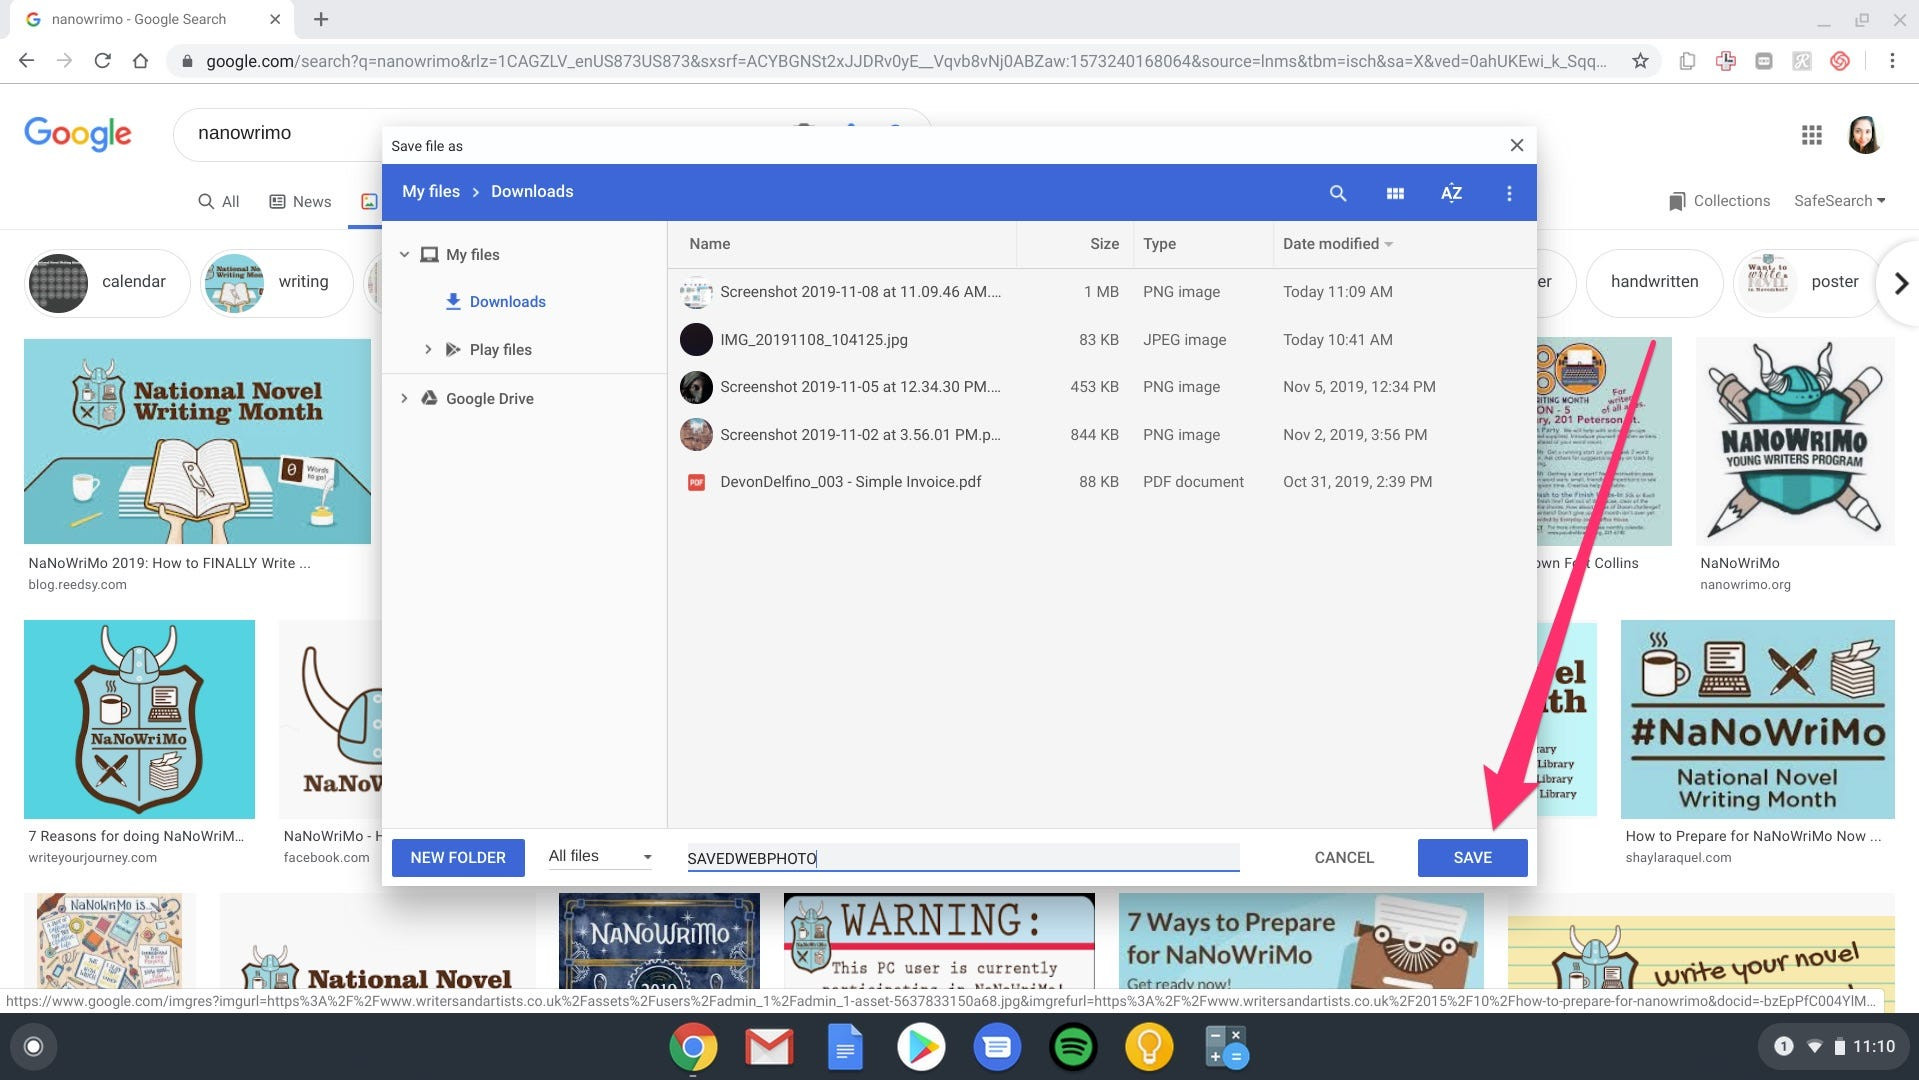
Customize the Image Name and Save Location (Optional): A dialog box will appear, giving you the option to rename the image file and choose where to save it on your Chromebook. By default, Chromebooks save downloaded files to the “Downloads” folder, but you can select other locations like Google Drive or connected external drives if you prefer.
-
Finalize the Download by Clicking “Save”: After you’ve confirmed or changed the image name and selected your desired save location, click the “Save” button in the dialog box. Your Chromebook will then download the image to the specified location.
 Click the 'Save' button to download image on Chromebook after selecting folder
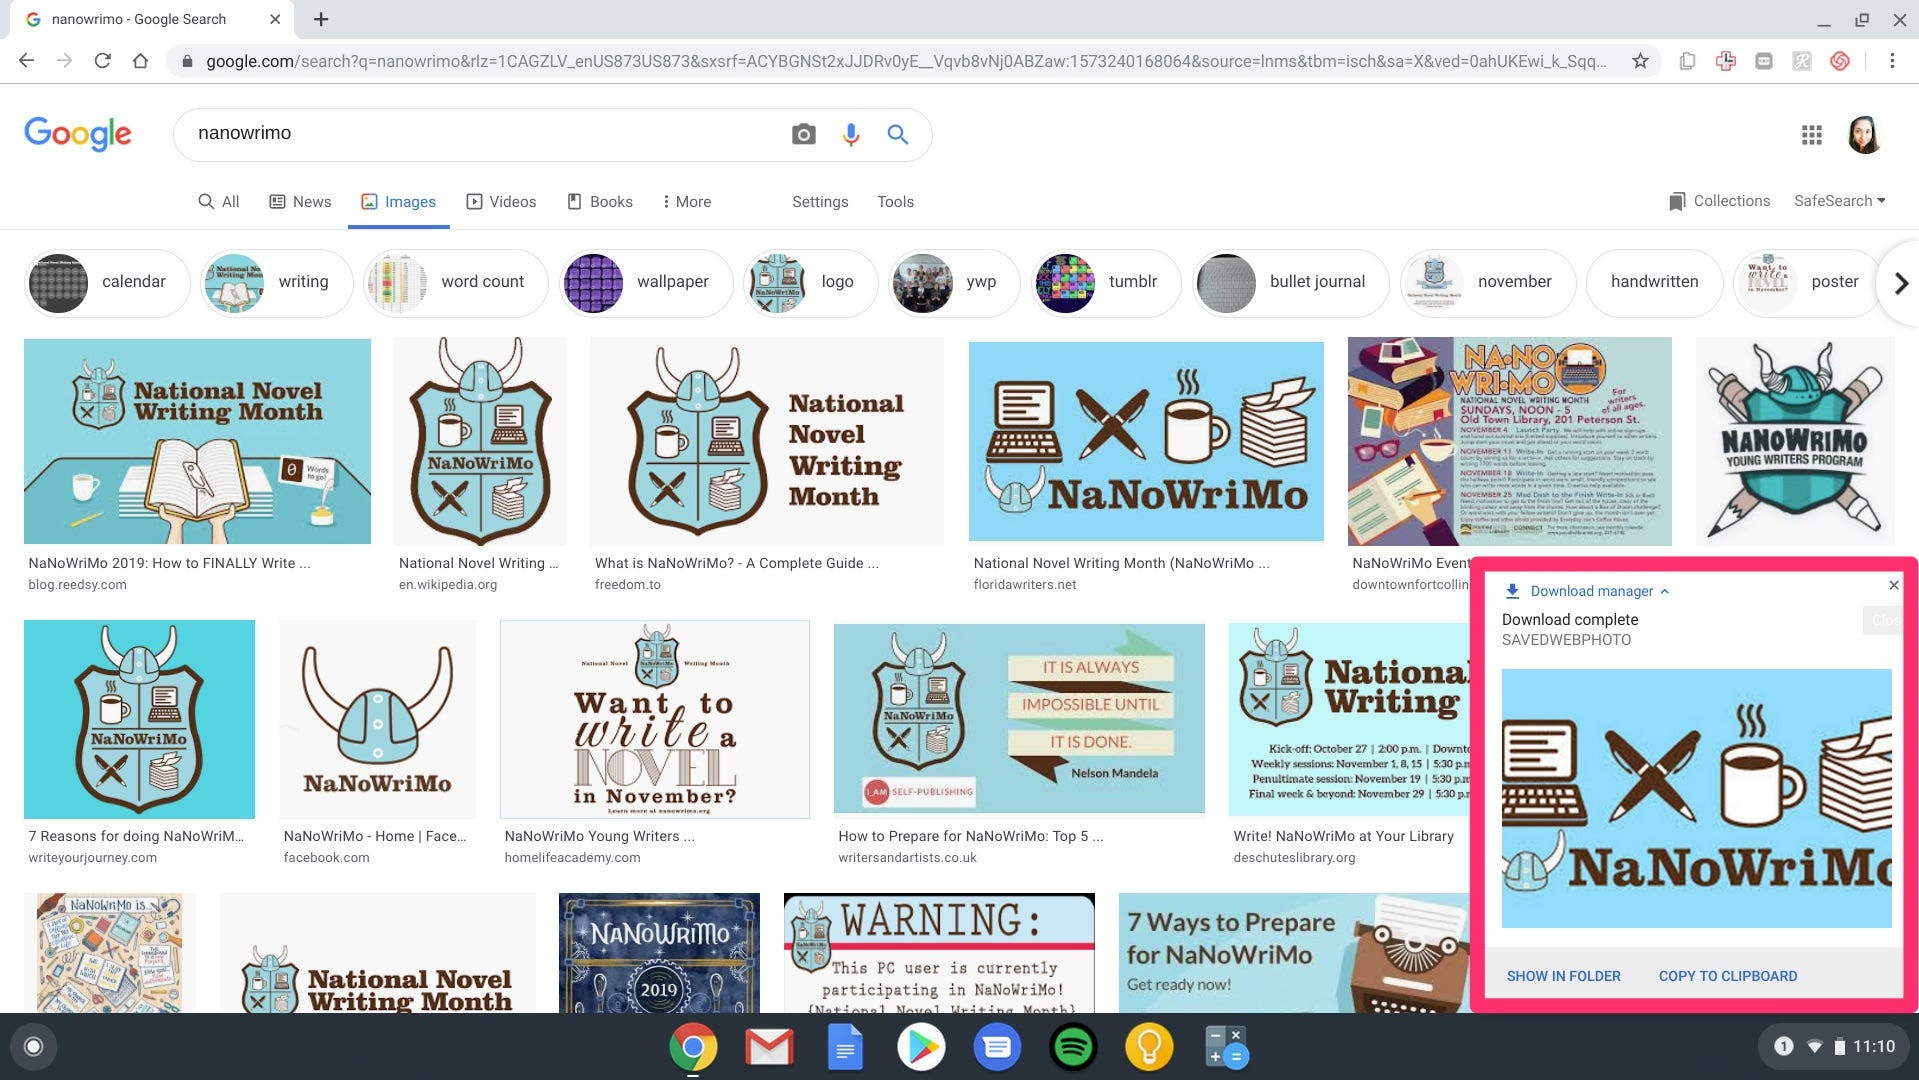
Once the download is complete, a small preview of the image will briefly appear in the bottom-right corner of your screen, accompanied by a “Download Complete” message. This confirms that your photo has been successfully saved to your Chromebook.
Finding Your Downloaded Photos on a Chromebook
Now that you’ve downloaded your photos, locating them on your Chromebook is just as simple. Here’s how to access your saved images:
-
Quick Access via “Show in folder”: If you see the download preview in the bottom-right corner, the quickest way to find your photo is to click “Show in folder” directly on that preview. This will immediately open the “Files” app and take you to the folder containing your newly downloaded image.
-
Access via the “Files” App: If the preview has disappeared, or if you want to find previously downloaded photos, you can access them through the “Files” app. Click on the Launcher icon (the circle) in the bottom-left corner of your screen. Then, look for the upward-pointing arrow icon to access “All Apps,” and from there, find and select “Files.”
Within the “Files” app, you will see a sidebar on the left. Click on “Downloads.” Unless you specified a different location when saving, your downloaded photos will be located in this “Downloads” folder. You can then double-click on any image file to open and view it.
Chromebooks are designed for straightforward use, and managing your downloaded photos is no exception. With these simple steps, you can easily save and find any images you need.