Think your dimly lit photos are beyond saving? Think again! With the right tools, you can easily rescue those precious memories trapped in the shadows. The PicMonkey mobile app is packed with features that can transform your dark photos into bright, vibrant images you’ll be proud to share. Stop deleting those almost-perfect shots and start learning How To Brighten Photos right on your phone or iPad. Let’s dive into four easy methods to bring your dark photos to life!
Quick Fix for Dark Photos:
1. Open your photo in the PicMonkey app.
2. Tap Adjust in the bottom menu, then select Levels.
3. Simply drag the slider to brighten your photo. Done!
For those who want to explore more options and fine-tune their photo brightening skills, PicMonkey offers a range of tools to achieve the perfect lighting. If you’re new to photo editing and worried about making your photos look washed out, don’t fret. We’ll guide you through using Levels, Brightness, Saturation, and the Lush effect to brighten your photos while maintaining rich, beautiful colors.
1. Brighten Photos Using Levels Adjustment
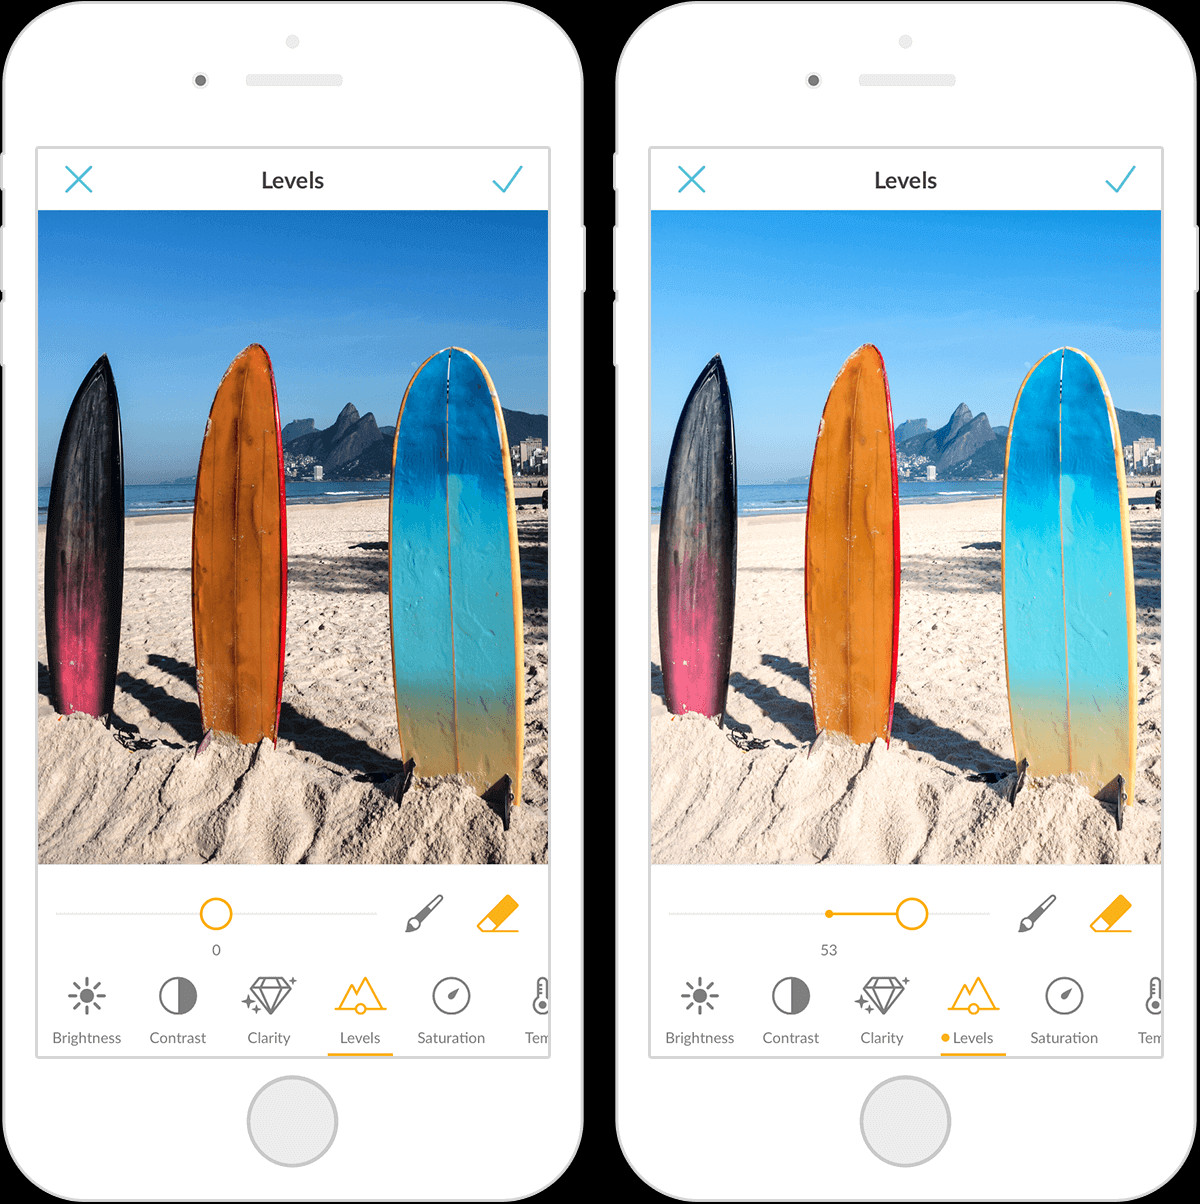
Elevate your photo lighting with Levels! This adjustment is your go-to starting point and often all you need to brighten a photo effectively. The mobile version of PicMonkey focuses on adjusting the midtones in your image. By moving the Levels slider, you lighten the middle grays, which intelligently brightens the overall picture without sacrificing color vibrancy.
Levels is a powerful tool for brightening dark images because it adjusts the tonal range in a balanced way. To use it in the PicMonkey mobile app, navigate to Adjust > Levels and experiment with the slider until you achieve your desired brightness.
Once you’ve brightened your photo with Levels, consider using it in eye-catching designs. Try placing your enhanced image into one of PicMonkey’s ready-made Instagram post templates, Facebook templates, or branding templates. Share your newly brightened photos on social media to boost engagement and showcase your visual creations!
2. Instantly Brighten a Photo with Brightness
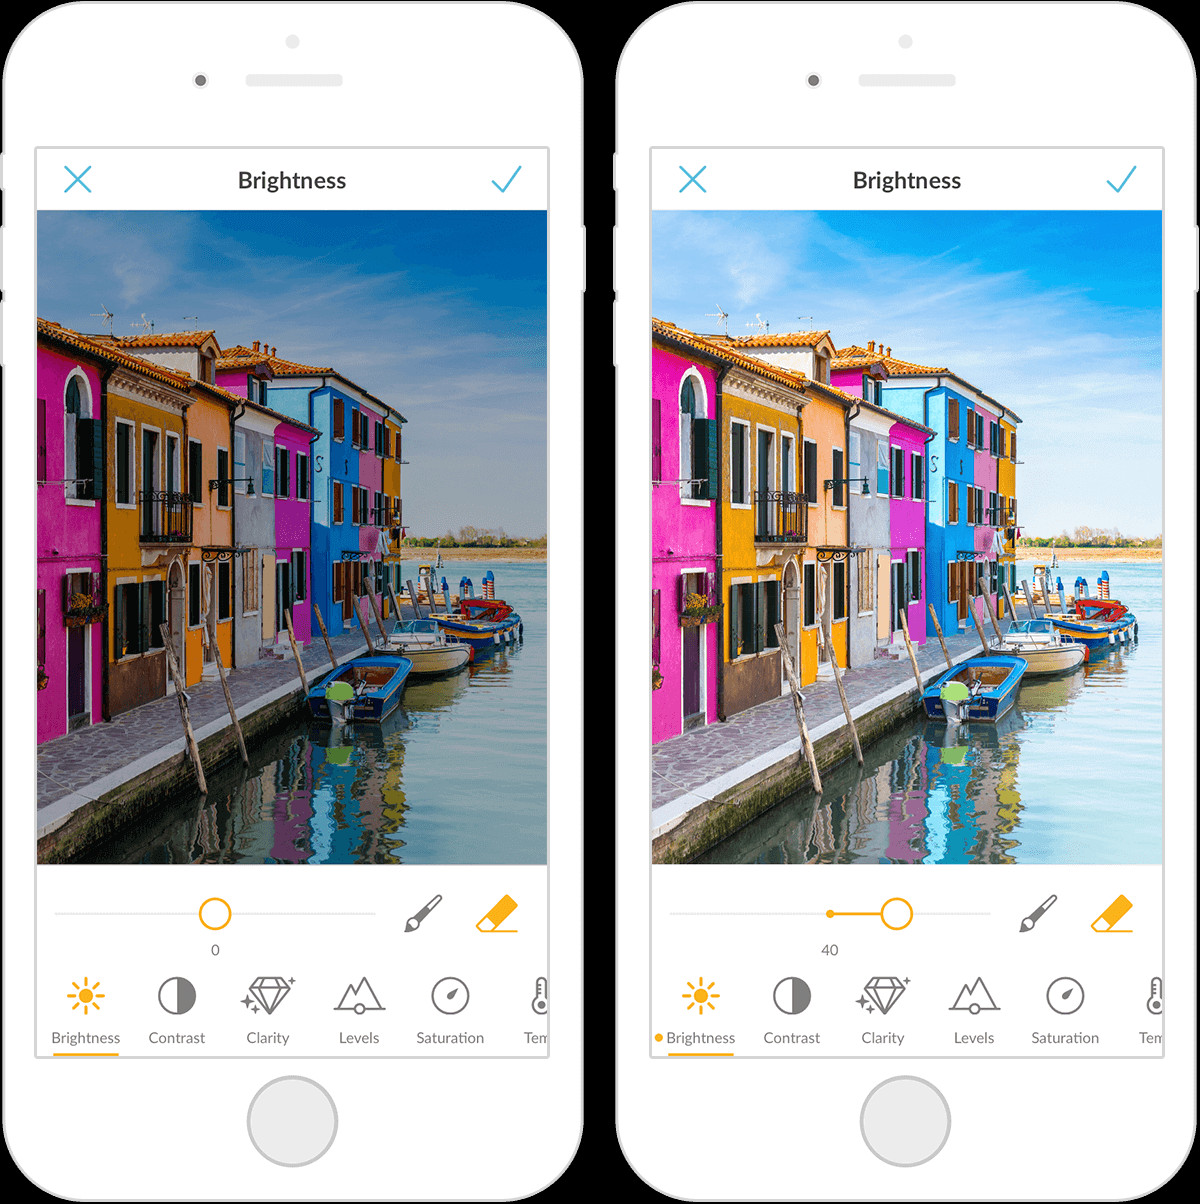
The Brightness tool is your straightforward solution for how to make a dark picture lighter. It’s incredibly intuitive and offers a quick, one-tap fix for underexposed photos. If you didn’t get the perfect lighting when you captured the moment, Brightness is here to help.
PicMonkey’s Brightness adjustment directly adds light to your entire image. Simply tap the Brightness button and watch your photo instantly become lighter. Unlike Levels, Brightness uniformly lightens the photo without automatically adjusting other tones. After perfecting your photo’s brightness, why not use it to personalize your device by making it your phone’s wallpaper? Or, create engaging content by using your brightened photo as a Pinterest pin, Facebook cover, or YouTube thumbnail!
Pro Tip: Don’t wait until you have a problem photo to learn how to brighten photos. Mastering these techniques beforehand allows you to make quick adjustments whenever inspiration strikes – whether you’re creating a social media post, designing a vision board, or putting together a heartfelt scrapbook for a special occasion. The ability to brighten a picture is a valuable skill that will benefit you in countless creative projects.
3. Enhance Lighting with Saturation for Vivid Photos
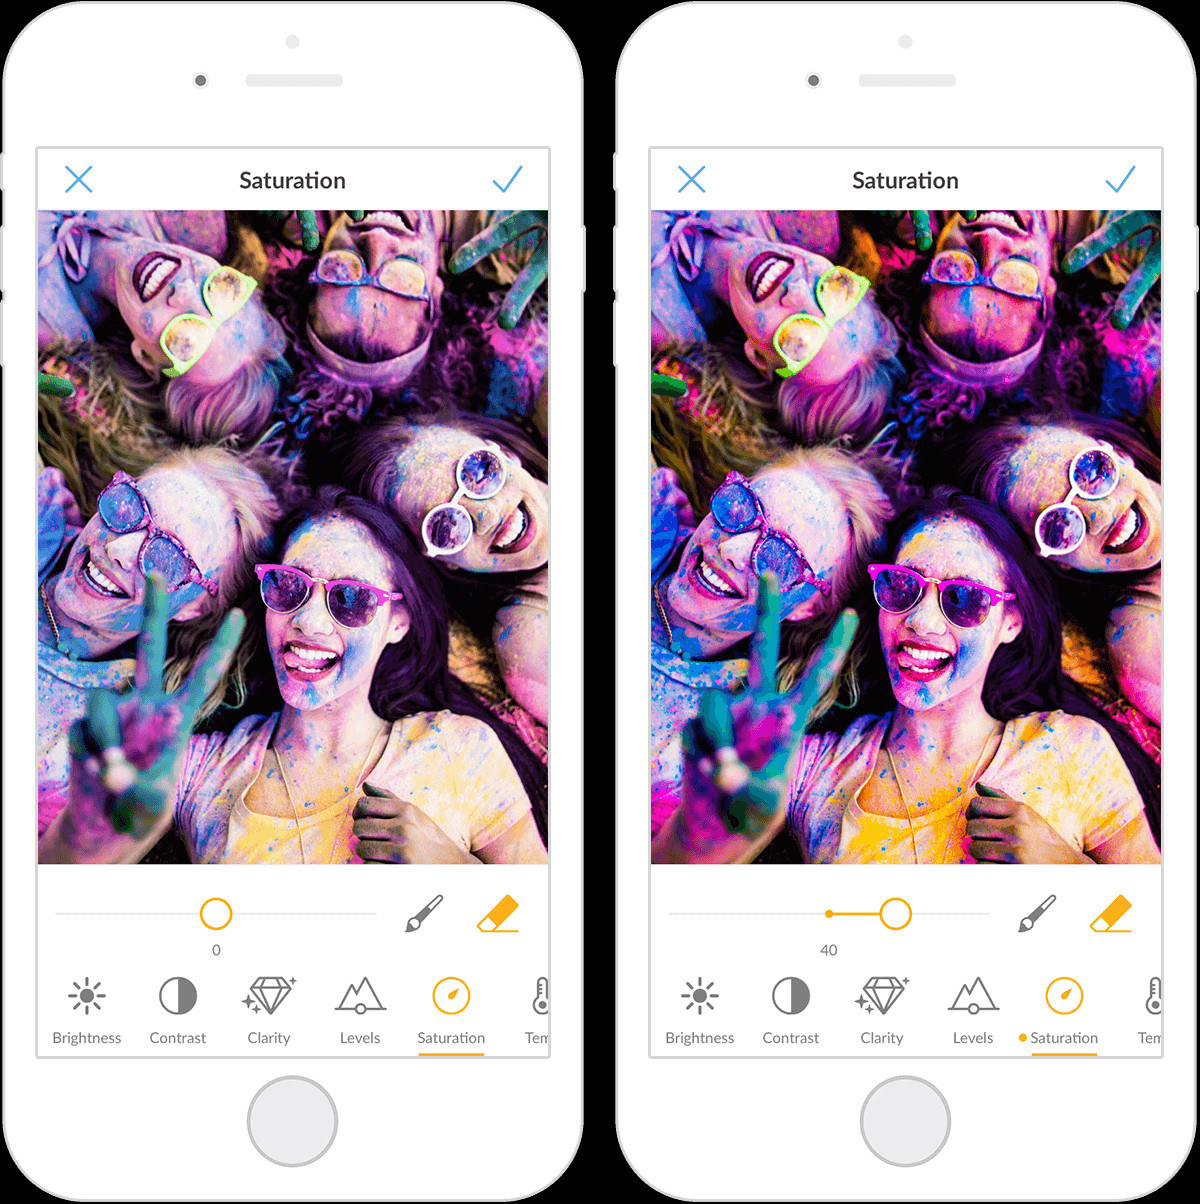
Remember that incredible concert you photographed last night? If the pictures seem a bit dull despite your brightening efforts, Saturation can be the answer. Saturation works by adjusting the intensity of colors in your photo, adding a different kind of vibrancy and energy. It’s particularly useful if your photo looks a bit washed out after brightening it, or if you want to enhance the colors to match the vivid memory you have.
You can use saturation to both brighten and enrich your photos. Experiment with different saturation levels to find the perfect balance. Consider creating a photo collage or personalized photo cards to share those concert memories with friends who were there.
To adjust saturation, simply tap Saturation and use the slider. Moving it left will mute the colors, creating a cooler, softer look, while moving it right will intensify the colors, making them more vibrant and warmer. Once your colors are just right, protect your work and share your creative ownership by adding a watermark to your pic.
4. Use the Lush Effect to Brighten and Add Depth
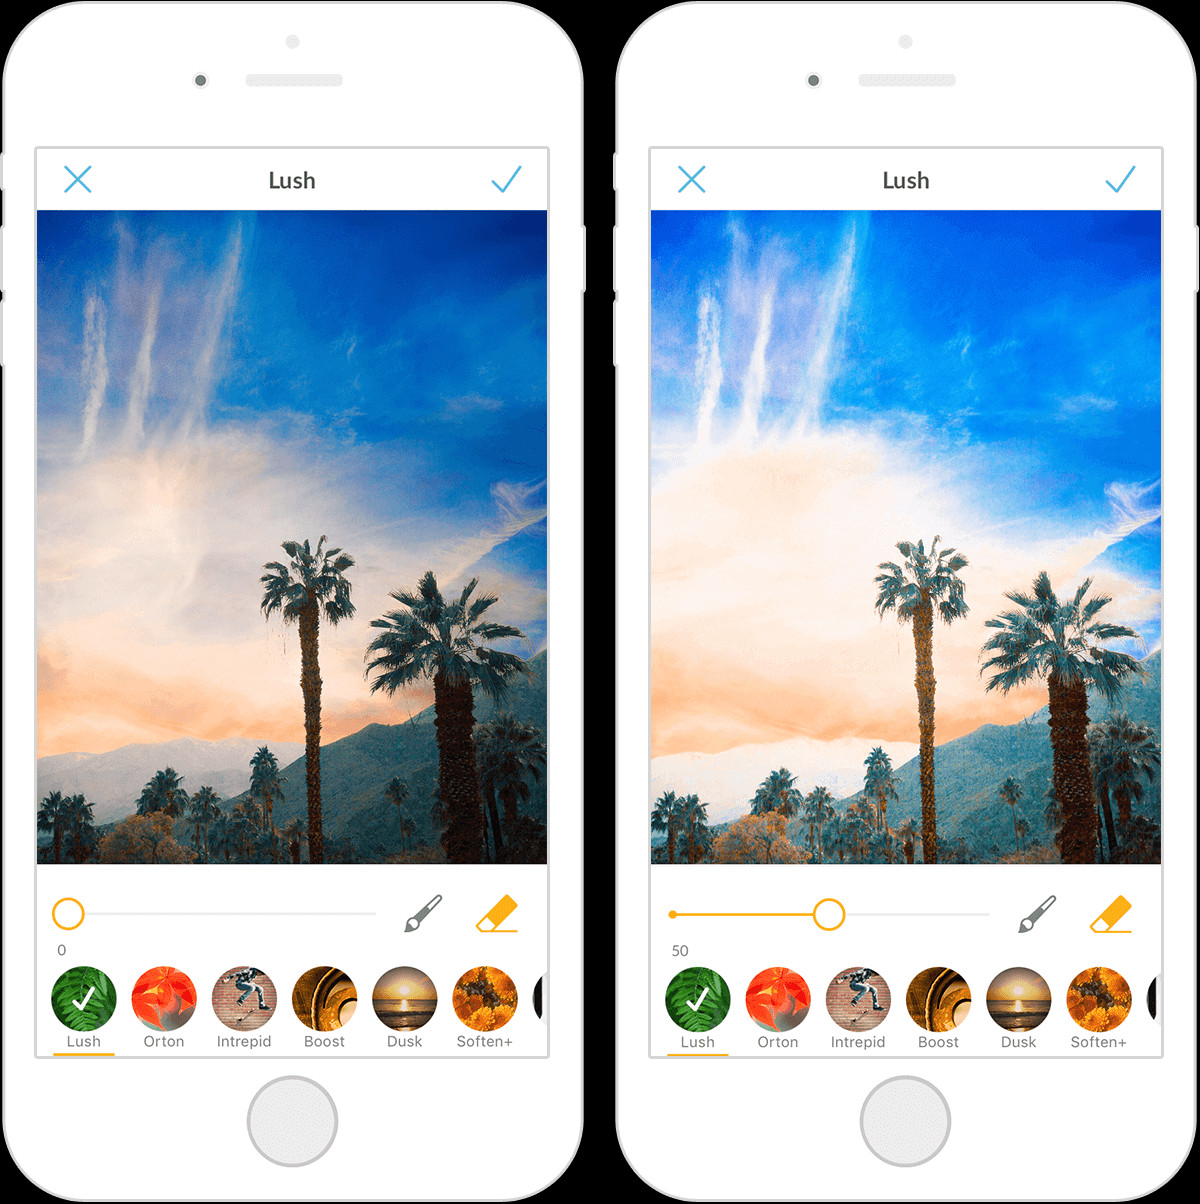
If you’re looking for an effect that not only brightens but also adds richness and depth, Lush is the answer. There are countless reasons to appreciate the Lush effect, especially its ability to make the richest colors in your image truly pop. It’s also surprisingly effective as a dark photo fixer, especially for photos with uneven lighting.
Lush excels at enhancing contrast, making it ideal for photos that are dark in some areas and light in others. The moment you tap Effects > Lush, you’ll likely experience that “aha!” moment. It adds a unique richness and depth to photos, providing that extra oomph that can transform an ordinary image into something captivating.
Pro Tip: Even professional photographers sometimes need to brighten photos. Learning how to make a dark picture lighter is a universally valuable skill for anyone working with images. As the creator, you have complete control and creative freedom. Explore these different methods to find what works best for your photos – there’s no single “right” way to brighten a photo, so experiment and discover your personal style!
Secondary Adjustments to Further Lighten Your Photos
While the methods above are fantastic for brightening photos, you can further refine your images using classic adjustments like contrast, shadows, and highlights. If you have extra time, combining these with the primary methods can lead to even more polished results. These aren’t primary brightening tools, but they are excellent secondary options to enhance your photos after you’ve used Levels, Brightness, Saturation, or Lush.
Contrast
Adjusting Contrast changes the range of tones in your photo, impacting the difference between the darkest and brightest areas. Go to Adjust > Contrast and experiment with the slider. Increasing contrast will make the light areas lighter and the dark areas darker, while decreasing it will reduce the tonal difference.
Shadows
You might wonder, “How can shadows help when I want to brighten a photo taken at night?” Adjusting Shadows is most effective after you’ve already brightened the overall image. It allows you to fine-tune the darker areas, adding nuance, dimension, and balance to your photos.
It’s easy to dismiss dark photos as poor quality and only value bright photos. However, a balance of light and shadow is essential for visual depth. Adding Shadow adjustment in certain areas can complement the light parts of your image and create a more visually appealing result.
Highlights
Highlights naturally enhance the lightest parts of your photo. Often used in conjunction with Shadows, the Highlights effect allows you to control the intensity of the bright areas. Simply click Highlights and adjust the slider to find the perfect balance for your image.
How to Lighten a Photo Like a Pro with Selective Adjustments
Every dark photo is unique, so experiment with different editing combinations to find what works best. If specific parts of your image need extra brightening or color correction, use the paint-on tool to apply adjustments precisely where you need them.
Paint adjustments onto your photo in these simple steps:
- Choose your preferred brightening method (Levels, Brightness, Saturation, or Lush) and zoom into the specific area you want to adjust, or work on the entire image.
- Tap the Paintbrush icon, then use the plus (+) or minus (-) signs to adjust the brush size.
- Use your finger to paint the effect or adjustment onto the desired area.
- To correct mistakes, tap the Eraser icon to remove the adjustment from specific spots, or tap the X in the upper-left corner to undo all unapplied paint edits.
For particularly challenging photos, try applying an adjustment or effect multiple times. Tap the checkmark to apply your changes, then re-enter the same adjustment tool and apply it again for a stronger effect.
Once your photo looks perfect, press and hold on the image to see the before-and-after transformation and appreciate your newfound mobile photo editing skills.
Unlock on-the-go photo editing power by downloading the PicMonkey mobile app: