Sending emails from your iPhone is a breeze, and attaching photos, videos, documents, and even scans to your emails is just as simple. Whether you’re sharing vacation photos with family, sending important documents for work, or adding a personal touch with a hand-drawn sketch, your iPhone’s Mail app has you covered. This guide will walk you through the steps to effortlessly attach various file types to your emails, ensuring your messages are informative and visually engaging.
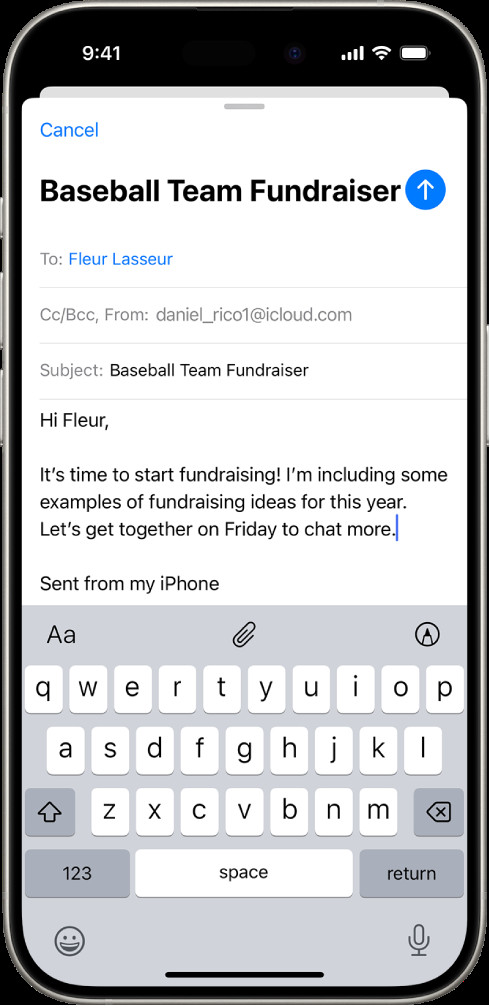 A draft email being composed with the attachment options above the keyboard.
Attaching Photos and Videos: Share Your Memories Visually
Photos and videos often speak louder than words. Attaching them to your emails allows you to share experiences and moments directly with your contacts. Here’s how to attach photos and videos to your iPhone emails:
- Open the Mail App: Start by launching the Mail app on your iPhone’s home screen.
- Compose or Reply to an Email: Begin writing a new email by tapping the compose button, or open an existing email and tap reply. Position the cursor in the body of the email where you want to insert your photo or video.
- Access Attachment Options: Look above the keyboard for the toolbar. If it’s collapsed, tap the “Expand Toolbar” button (it looks like an upwards-pointing arrow) to reveal more options. Then, tap the “Insert Photo or Video” icon (it resembles a photo).
- Select Media: You will now see your Photos library. Navigate through your albums or Recents to find the photo or video you wish to attach. Tap on your desired photo or video to select it. You can select multiple items if needed.
- Finalize Attachment: Once you’ve chosen your media, tap “Done” in the top right corner of the screen. The selected photos or videos will be attached to your email. They may appear inline or at the end of your message depending on their file size and your email settings.
Attaching Documents: Sending Files Seamlessly
Need to send a document, spreadsheet, or presentation? The Mail app integrates seamlessly with the Files app, making it easy to attach any document stored on your iPhone or in your iCloud Drive. Follow these steps:
- Start in the Mail App: Open the Mail app and begin composing or replying to an email as you normally would. Place your cursor where you want to insert the document.
- Expand Toolbar and Choose Attach File: Tap the “Expand Toolbar” button above the keyboard and then tap the “Attach File” icon (it looks like a paperclip).
- Browse Files: This action opens the Files app interface within Mail. At the bottom of the screen, you’ll see options like “Recent,” “Browse,” or locations like “iCloud Drive” and “On My iPhone.”
- Locate and Select Your Document: Use the Files app interface to navigate to the folder where your document is saved. You can browse through folders, use the search bar, or select from recent files. Once you find the document, tap on it to select.
- Document Attached: The selected document will now be attached to your email. It will typically appear as an icon at the end of your email message.
Scanning Documents to PDF: Go Paperless
For physical documents, your iPhone offers a built-in scanner that directly integrates with the Mail app. This is perfect for sending contracts, receipts, or any paper document as a professional PDF. Here’s how to scan and attach a document:
- Open Mail and Start Composing: Open the Mail app and start a new email or reply to an existing one. Position the cursor in the email body.
- Expand Toolbar and Select Scan Document: Tap the “Expand Toolbar” button above the keyboard, and then tap the “Scan Document” icon (it resembles a document with a camera overlay).
- Scan Your Document: Your iPhone’s camera will activate, ready to scan. Position the document within the frame on your screen. The iPhone will automatically detect the document edges and capture the page. You can also manually take a photo by tapping the shutter button or a volume button. Use the flash icon to toggle flash settings if needed.
- Review and Save Scan: After scanning, you can review the scan. Tap “Retake” if you’re not satisfied, or “Keep Scan” to save the page. For multi-page documents, continue scanning additional pages. Once all pages are scanned, tap “Save.”
- Edit Scanned Document (Optional): Before saving, or after inserting, you can tap on the scanned document to edit it. Editing options include cropping, applying filters (like grayscale or black and white), rotating the image, or deleting the scan.
- Scanned PDF Attached: The scanned document is now attached to your email as a PDF file, ready to be sent.
Adding Drawings: Personalize Your Emails
Sometimes, a visual explanation or a personal touch is needed. The Markup feature allows you to create drawings directly within your email, perfect for quick sketches or annotations. Here’s how to add a drawing:
- Compose Your Email in Mail: Open the Mail app and start or reply to an email. Place the cursor where you want to insert your drawing.
- Expand Toolbar and Access Markup: Tap the “Expand Toolbar” button above the keyboard, then tap the Markup icon (it looks like a pen tip).
- Create Your Drawing: The Markup toolbar will appear at the bottom of the screen, offering various drawing tools and colors. Use your finger or an Apple Pencil to draw directly in the drawing area. Experiment with different tools to achieve your desired effect.
- Insert Drawing: Once you’re satisfied with your drawing, tap “Done” in the top corner, then tap “Insert Drawing.” Your drawing will be attached to the email.
- Edit Drawing (If Needed): If you need to make changes to your drawing, simply tap on the drawing attachment in your email and then tap the “Edit” button to re-enter the Markup interface.
Dealing with Large Attachments: Utilizing Mail Drop
Occasionally, you might encounter file size limitations when sending large attachments. Apple’s Mail Drop is a feature designed to handle this, allowing you to send files up to 5GB in size. If your attachment exceeds the standard email size limits, Mail will automatically offer to use Mail Drop. Simply follow the on-screen instructions to send your large files without hassle. Note that recipients will receive a link to download the attachment, which is typically available for 30 days.
Conclusion
Attaching photos, videos, documents, scans, and drawings to emails on your iPhone enhances your communication capabilities, making it easy to share a wide range of content directly from your mobile device. By following these simple steps, you can take full advantage of your iPhone’s features to send informative and engaging emails for both personal and professional use. Whether it’s a cherished photo, an important document, or a creative sketch, your iPhone makes email attachments straightforward and efficient.