Uploading photos to iCloud offers a secure backup for your cherished memories and ensures easy access across all your devices. This guide provides a step-by-step walkthrough on how to send photos to iCloud from iPhones, iPads, Macs, and even Windows PCs. We’ll also explore different storage options and troubleshoot common upload issues.
Sending Photos to iCloud from iPhone or iPad
iCloud Photo Library automatically backs up your photos to iCloud. Here’s how to enable it:
-
Open Settings: Tap the cogwheel icon on your home screen.
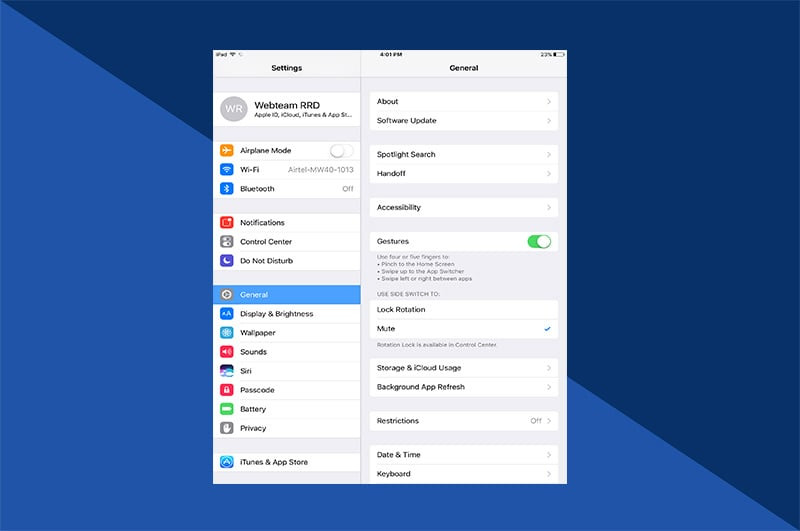 iPhone settings icon
 -
Select Your Name: Tap on your Apple ID at the top of the settings menu.
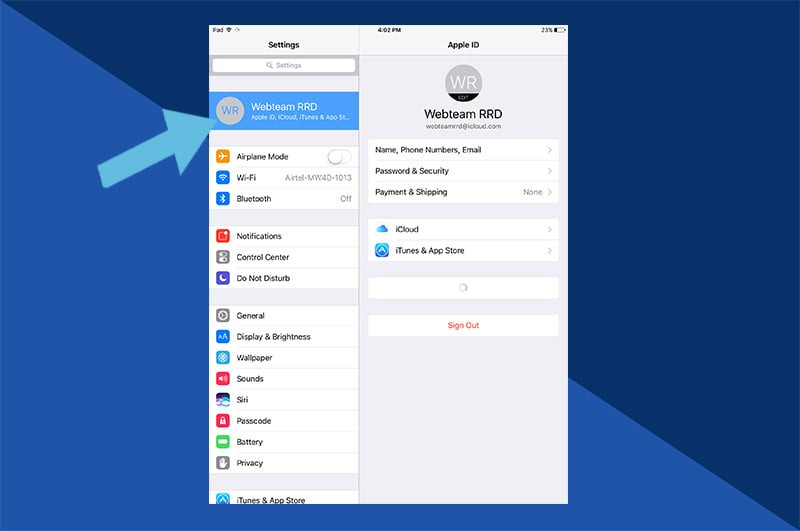 Apple ID selection in settings
 -
Tap iCloud: This will open the iCloud settings menu.
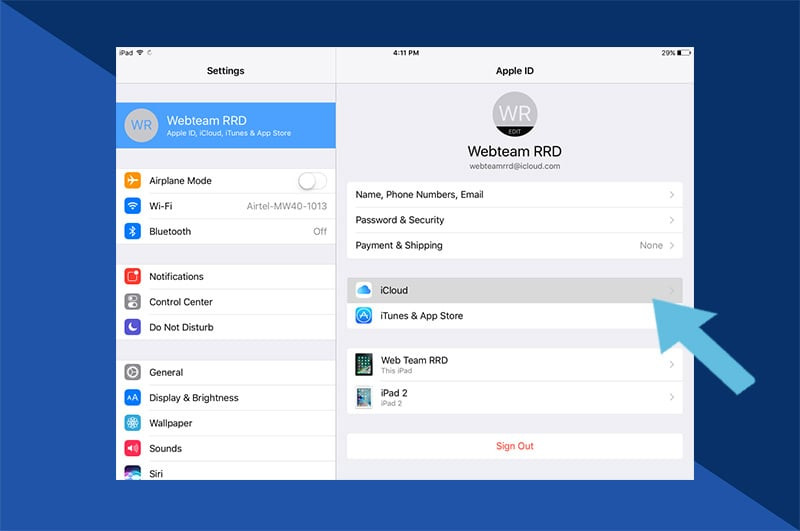 iCloud settings menu
 -
Tap Photos: Access the Photos settings within iCloud.
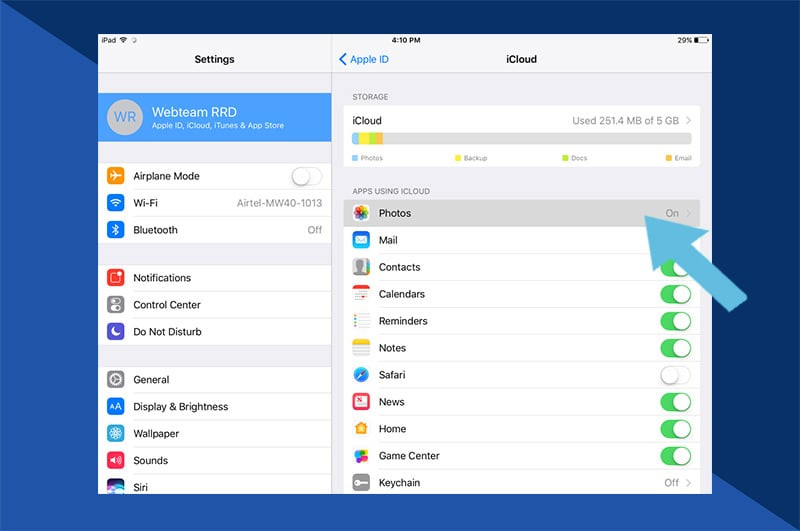 Photos settings in iCloud
 -
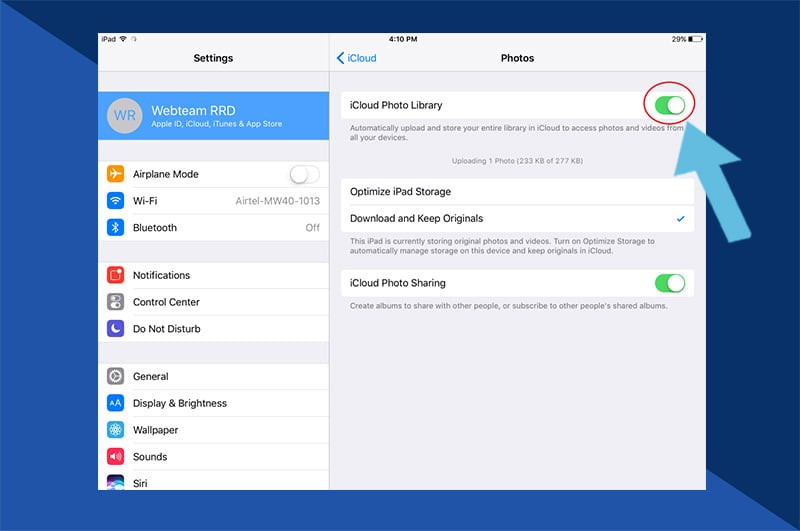
Enable iCloud Photos: Toggle the switch to green to activate iCloud Photos.
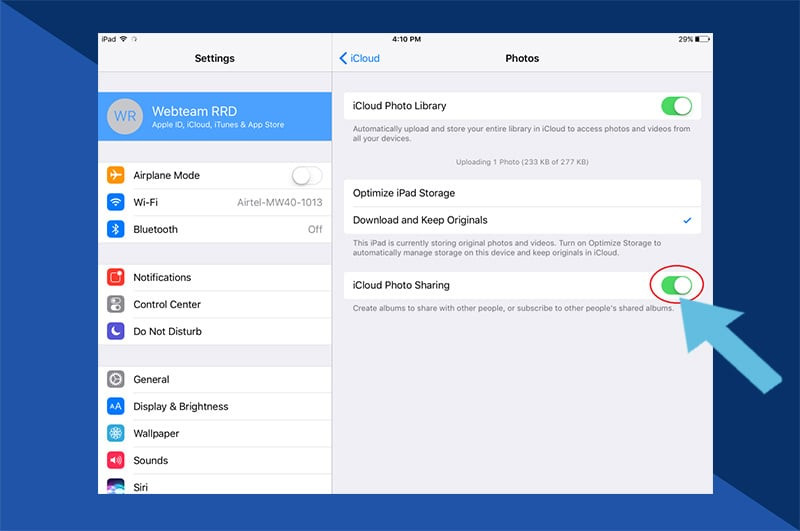 Enabling iCloud Photos
 -
Choose Your Storage Option: Select between “Optimize iPhone Storage” for smaller, space-saving versions on your device, or “Download and Keep Originals” for full-resolution images.
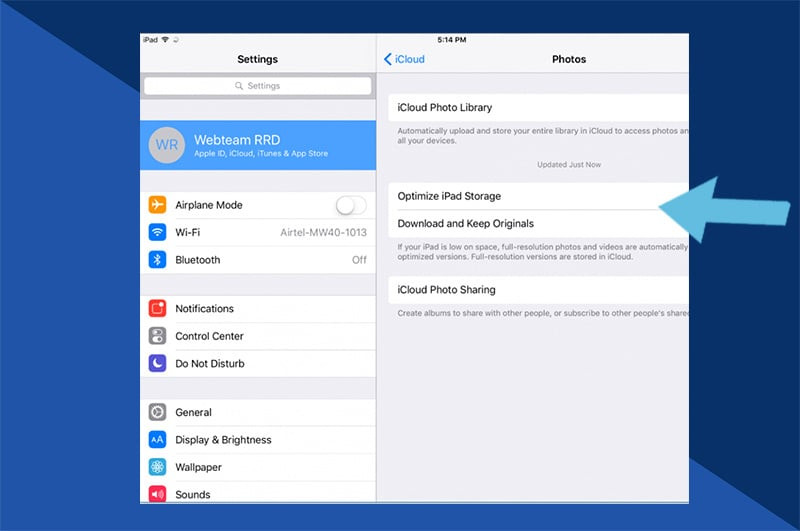 iCloud Photo storage options
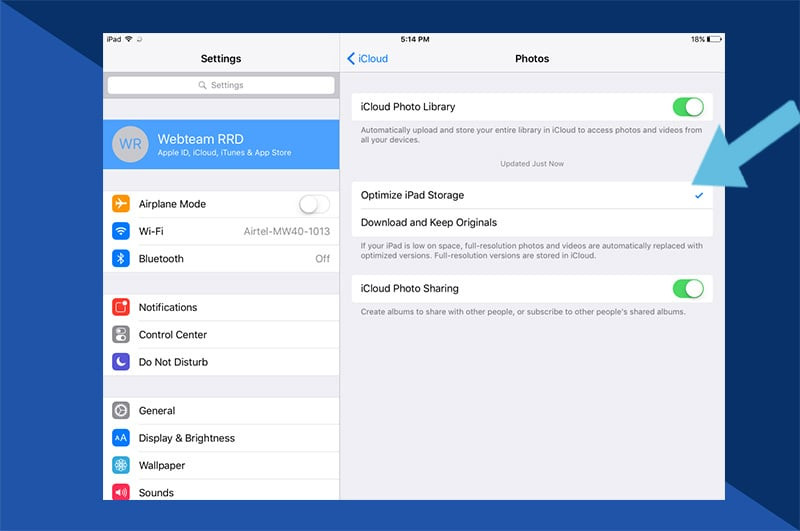 Optimize iPhone storage option
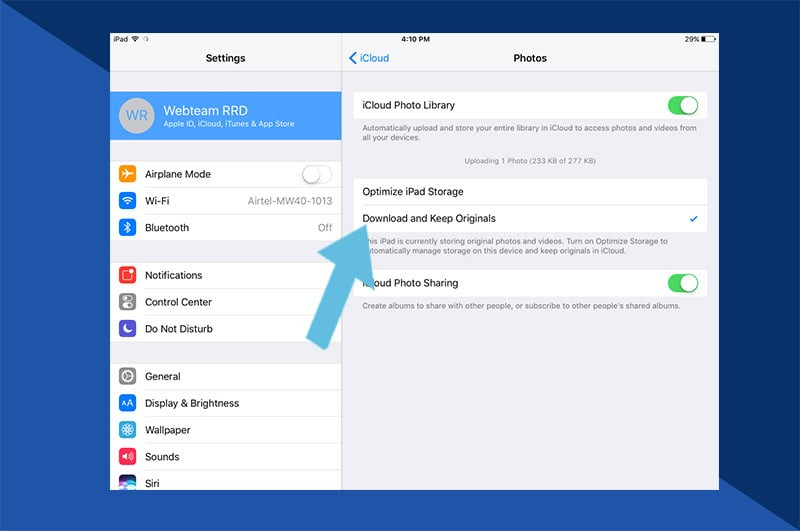 Download and Keep Originals option
 -
Enable Upload to My Photo Stream: Ensure this is toggled on (green) to automatically upload new photos and videos over Wi-Fi.
 Enable My Photo Stream
Uploading Photos to iCloud from Mac
After enabling iCloud Photos in your Mac’s System Preferences (System Preferences > Apple ID > iCloud > Photos), simply drag and drop photos into the Photos app.
-
Open Photos App: Launch the Photos application.
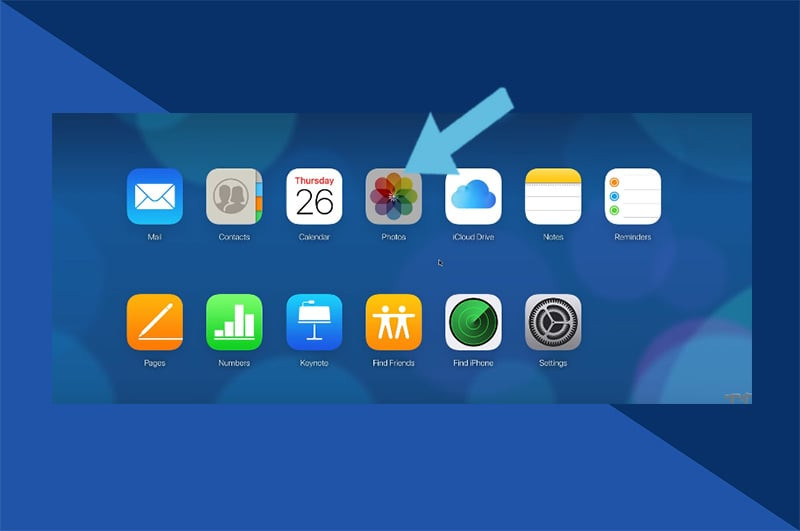 Mac Photos App icon
 -
Enable iCloud Photos: Navigate to Photos > Preferences > iCloud and select “iCloud Photos.”
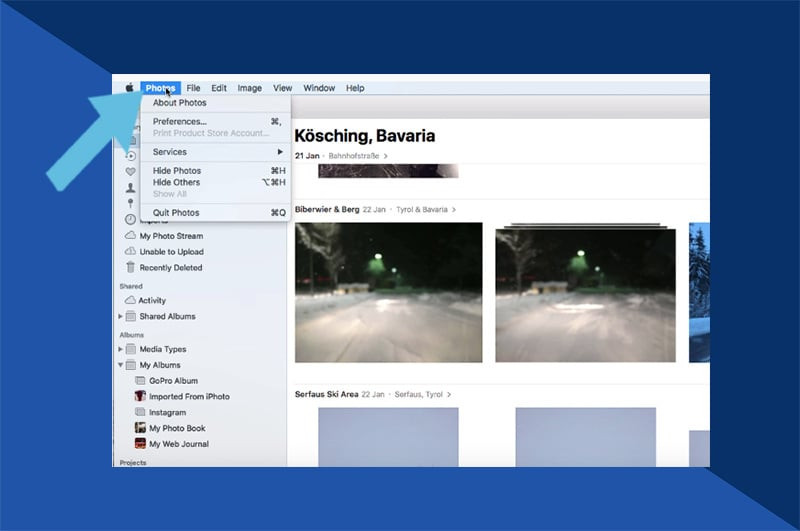 Photos menu bar
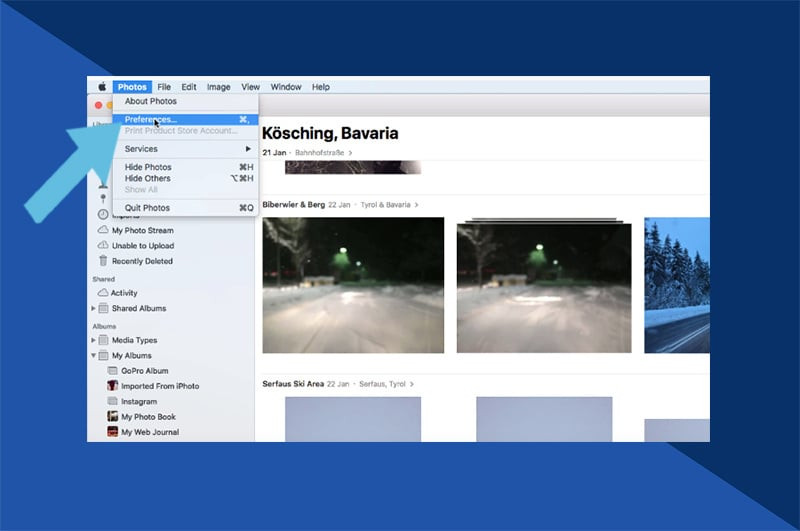 Photos preferences
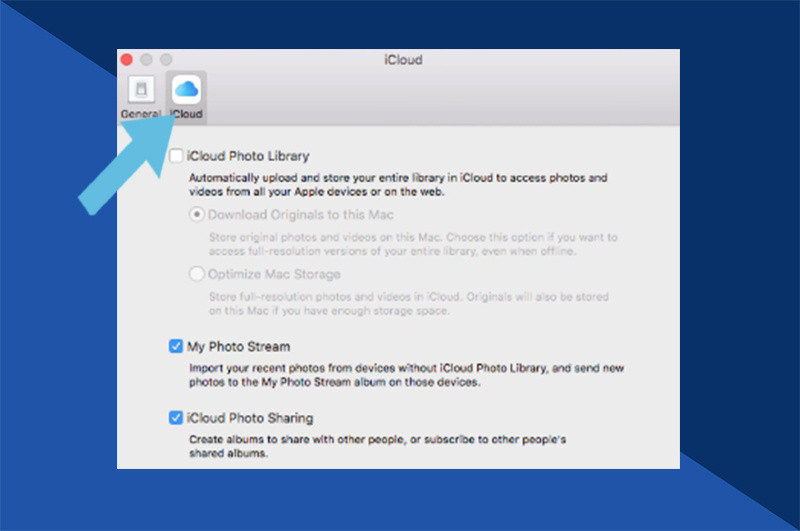 Selecting iCloud Photos on Mac
 -
Choose Storage Option: Similar to iOS, select your preferred storage optimization method.
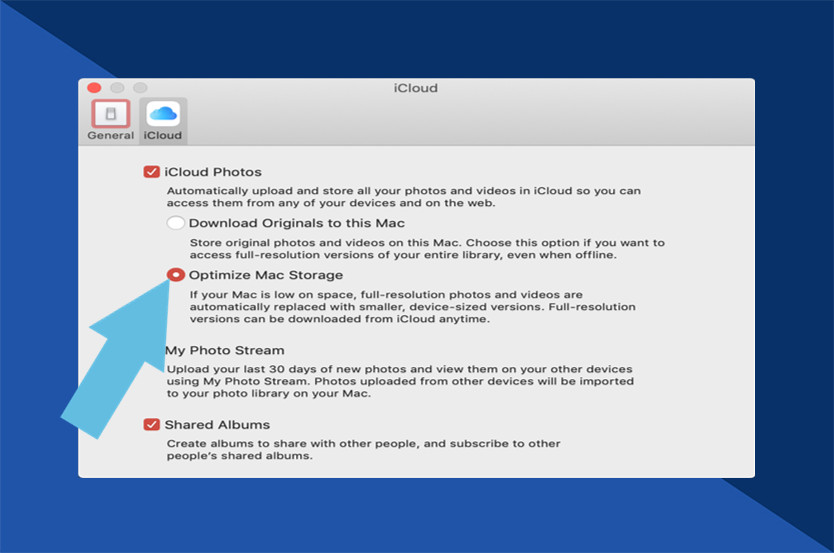 Optimize Mac Storage
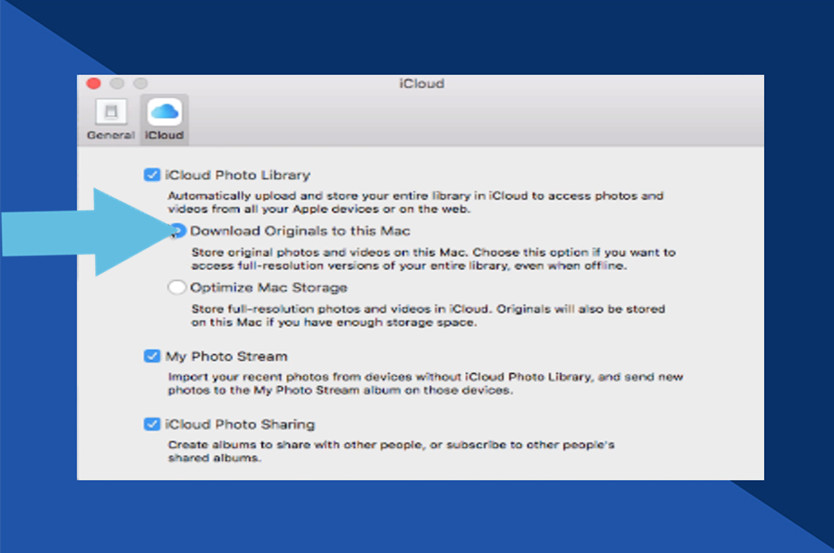 Download Originals to Mac
 -
Drag and Drop: Drag photos from Finder or other folders directly into the Photos window.
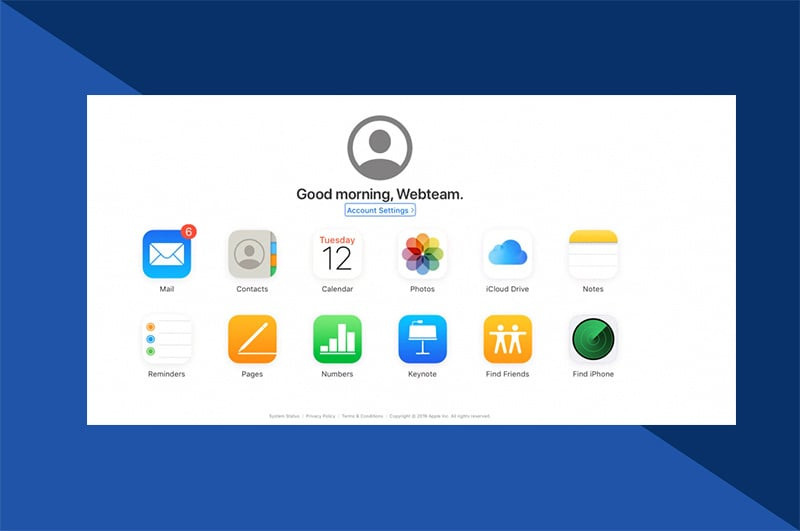 Dragging photos to iCloud on Mac
Sending Photos to iCloud from a Windows PC
-
Download iCloud for Windows: Install iCloud from the Apple Support website.
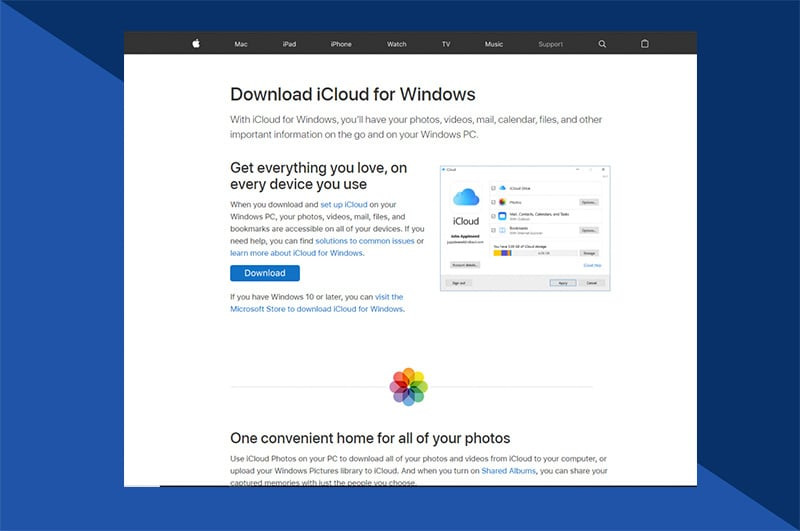 iCloud for Windows download page
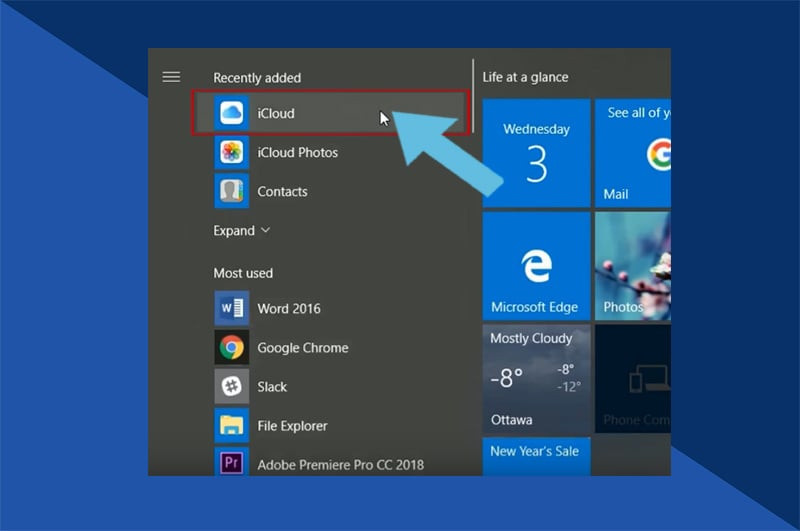 iCloud for Windows application
 -
Open iCloud for Windows and Select Options: Launch the application and choose “Options” next to “Photos.”
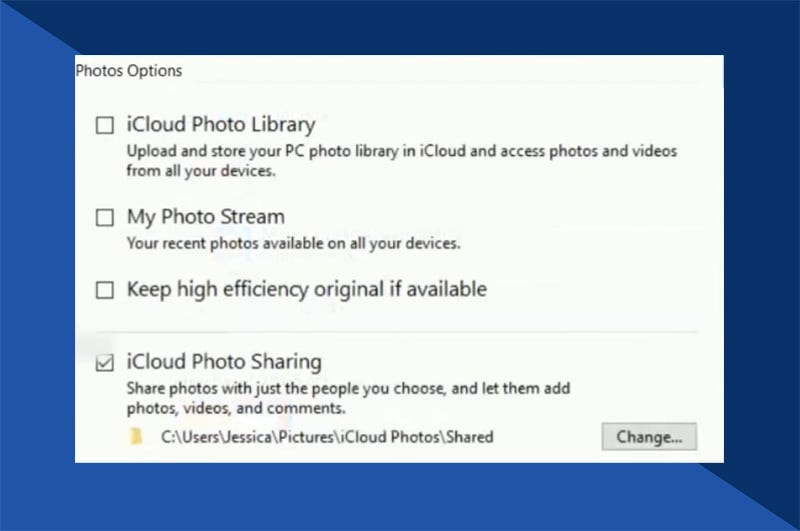 iCloud Photos Options
 -
Enable iCloud Photo Library: Check the box for “iCloud Photo Library.”
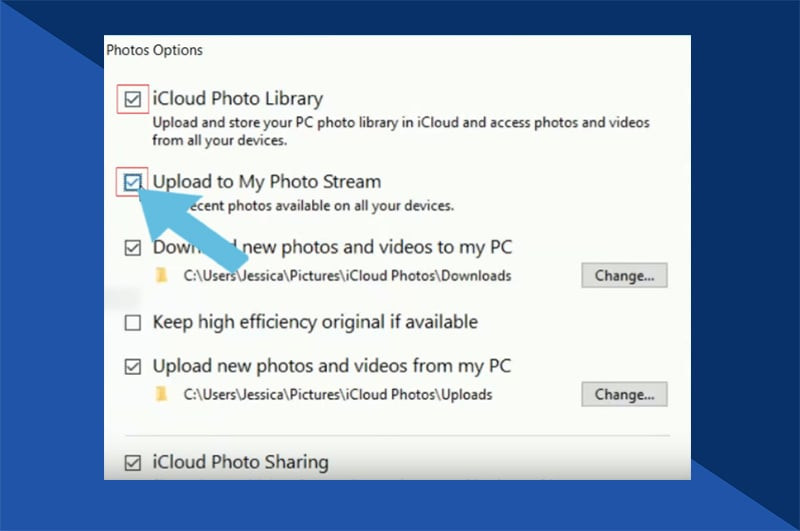 Selecting iCloud Photo Library
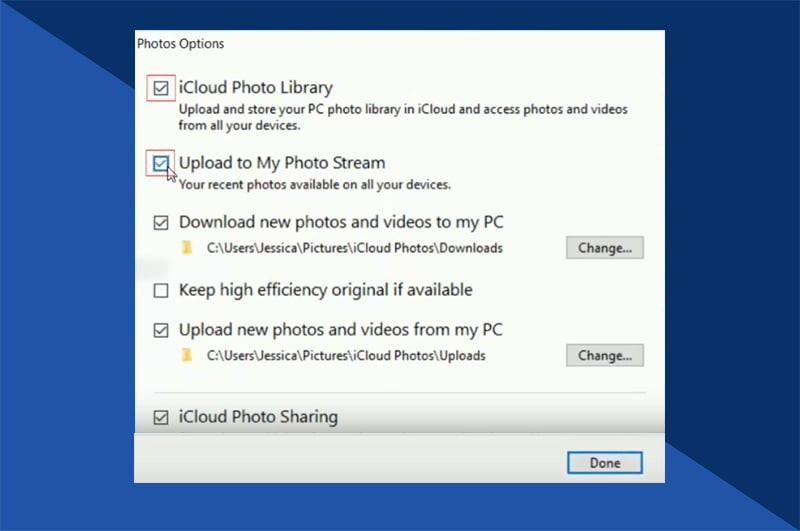 Clicking Done
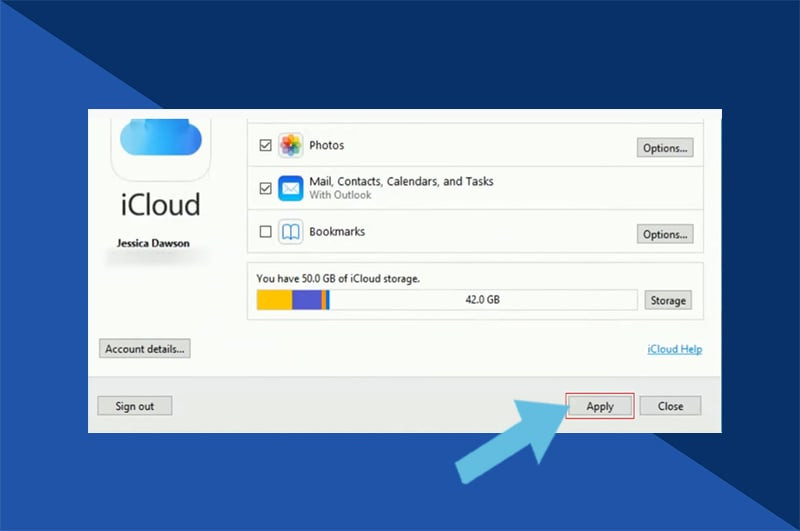 Clicking Apply
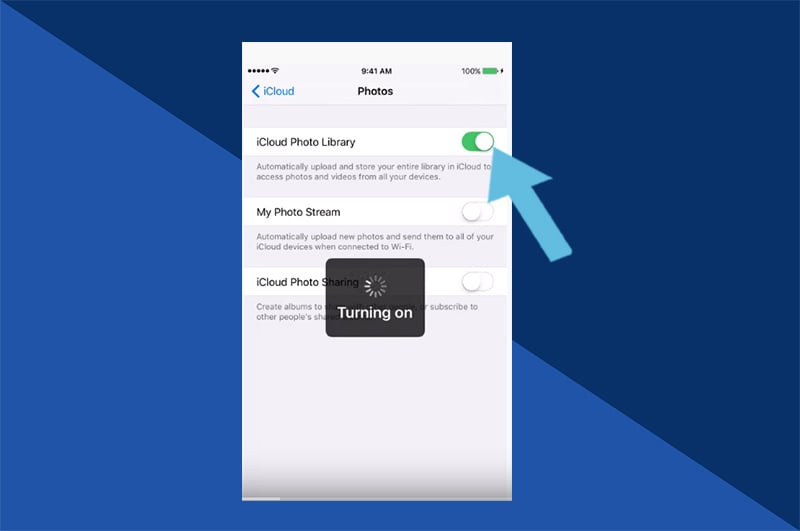 iCloud Photo Library Options
 -
Upload Photos: Either drag and drop photos into the designated iCloud Photos folder in File Explorer or use the “Upload Photos” button within the iCloud application.
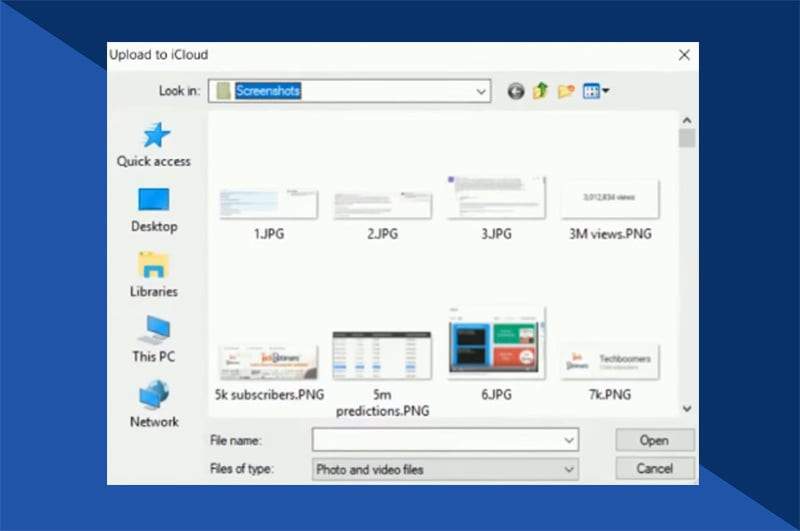 Windows Explorer with iCloud Photos
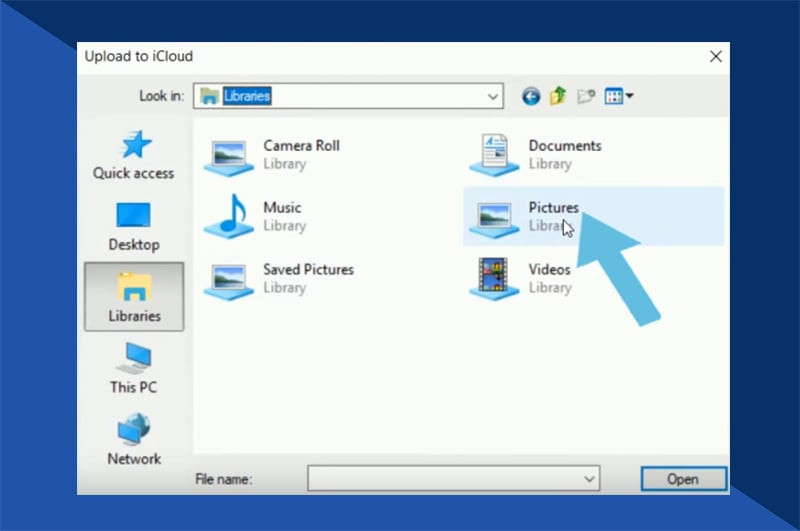 iCloud Photos in File Explorer
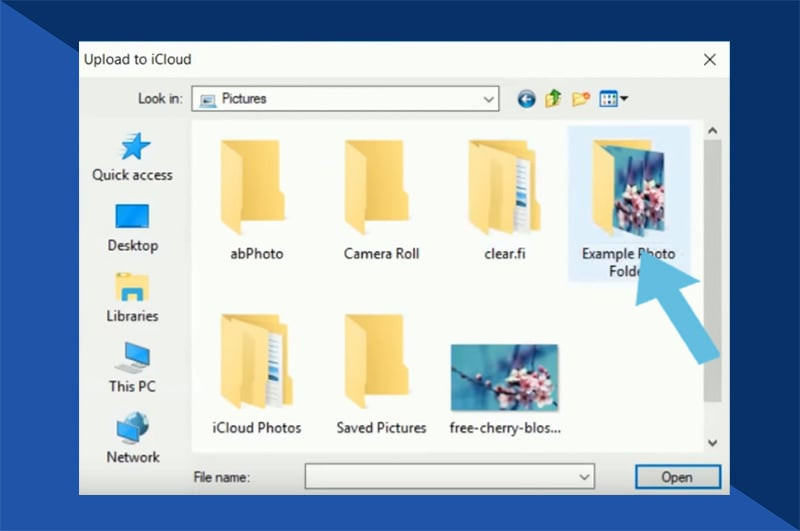 iCloud Photos upload option
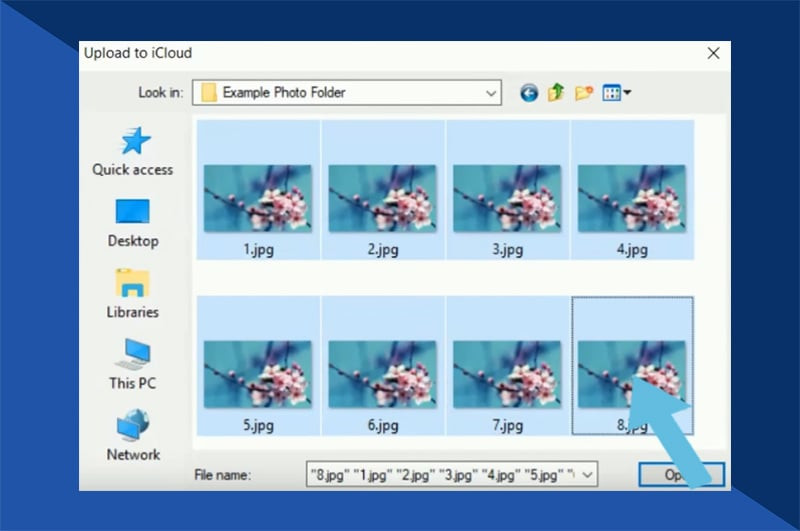 Selecting Photos to upload
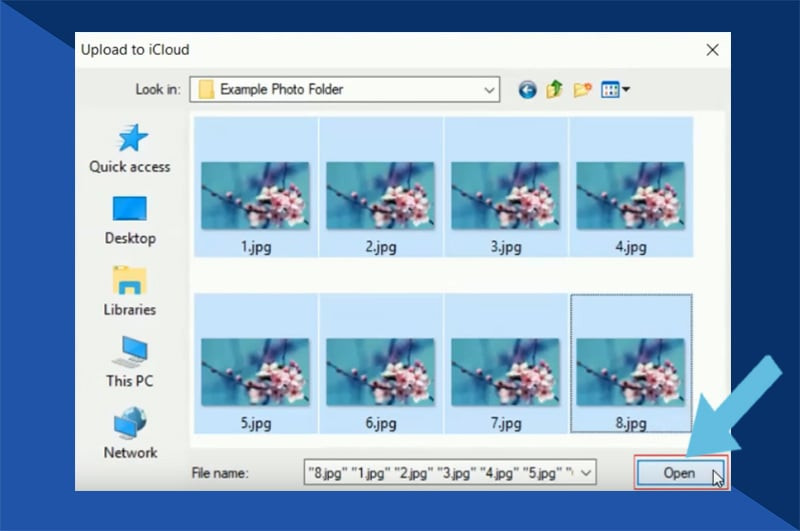 Click Open to upload
Troubleshooting iCloud Photo Uploads
Common Issues:
- iCloud Photo Library Not Enabled: Double-check your settings on all devices.
- Insufficient iCloud Storage: Upgrade your storage plan or delete unnecessary files.
- Network Connectivity Problems: Ensure a stable internet connection.
- iCloud Account Issues: Verify your Apple ID and password.
By following these instructions, you can efficiently utilize iCloud to safeguard and access your photo library across various devices.
