Reducing the file size of your photos is a crucial skill, especially in today’s digital world. Whether you’re uploading images to a website, sharing them on social media, or simply trying to save storage space, smaller file sizes mean faster loading times and more efficient storage. The primary method to achieve this is through image compression, a process that reduces the amount of data in your image file. This guide will explore how to effectively reduce photo file size while maintaining acceptable image quality, focusing on common image formats and techniques.
First, understanding the different image file formats is key. The three most common formats you’ll encounter are JPEG (or JPG), PNG, and GIF. The best choice depends on your image content and needs. For photographs with a wide range of colors and gradients where file size is a priority, JPEG is generally the most efficient option. If you need lossless compression or transparency, PNG-24 is necessary. For simple graphics with limited colors and solid areas, GIF or PNG-8 formats are suitable. Let’s delve into each format and how to optimize them for smaller file sizes.
Compressing JPEG Files: Balancing Quality and Size
JPEG compression is known as “lossy” compression, meaning that some image data is discarded during the process. This is how JPEGs achieve significantly smaller file sizes, especially beneficial for complex images like photographs. The key factor in JPEG compression is the quality setting you choose when saving or exporting your image.
When you save a photo as a JPEG in image editing software, you’ll typically encounter a quality setting. This might be presented as presets like “low,” “medium,” “high,” and “maximum,” a numerical scale (e.g., 0-12), or a percentage (0-100%). A lower quality setting results in more compression and a smaller file size, but also greater data loss and potentially visible artifacts. Conversely, a higher quality setting retains more image data, resulting in a larger file size and better image quality. The goal is to find the lowest quality setting that still provides acceptable visual quality for your intended purpose.
A practical approach to finding the optimal quality level is to start with a relatively high setting and gradually reduce it, observing the image quality at each step. Begin by saving your image at a high quality, then reduce the quality incrementally. After each reduction, carefully examine the image for any noticeable degradation, such as blockiness or loss of detail. When you reach a quality level where you start to see unacceptable visual artifacts, revert to the previous, higher quality setting. This iterative process helps you pinpoint the sweet spot where file size is minimized without sacrificing essential image quality.
Consider the purpose of your image when choosing the quality setting. For a photograph intended for detailed viewing, such as in a botanical encyclopedia, higher quality is paramount to preserve fine details. However, for a casual photo shared online or used as a decorative element, a lower quality setting is often perfectly adequate and significantly reduces file size.
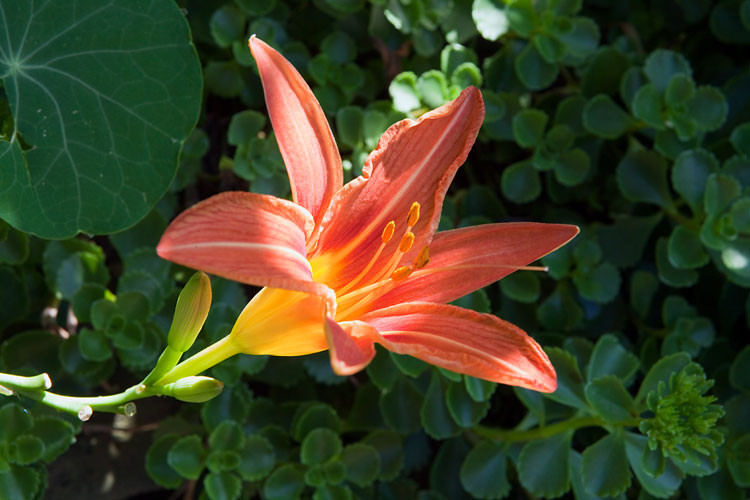
Let’s illustrate the impact of JPEG quality settings with an example using a flower photo.
100% Quality: File size: 103 KB. This setting retains maximum image quality but results in the largest file size for a JPEG. It’s often unnecessary for web use.
80% Quality: File size: 48 KB. Visually, there’s almost no discernible difference from the 100% quality image. Yet, the file size is reduced by more than half.
60% Quality: File size: 28 KB. Most viewers would still struggle to distinguish this from the 100% version. The file size is now a quarter of the original, leading to significantly faster loading times.
 Daylily flower and buds at 60% quality, achieving a 28 KB file size with minimal visual difference for most viewers.
40% Quality: File size: 17 KB. For many general online uses, this quality level remains acceptable and offers a substantial file size reduction.
 Daylily flower and buds at 40% quality, providing an acceptable 17 KB file size for many online applications.
20% Quality: File size: 12 KB. Image quality starts to noticeably degrade at this setting, showing visible artifacts.
 Daylily flower and buds at 20% quality, showing noticeable image degradation at a 12 KB file size.
0% Quality: File size: 7 KB. Extreme compression results in severe blockiness and poor image quality. This setting is generally unsuitable for most purposes.
 Daylily flower and buds at 0% quality, demonstrating extreme compression and poor quality at a 7 KB file size.
Sample photo from FCIT’s collection of stock plant photos on the ClipPix ETC website.
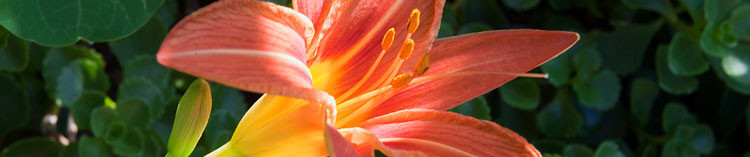
Another technique to reduce JPEG file size is blurring the image slightly before compression. Images with fewer sharp edges and fine details compress more efficiently. This is particularly effective for background images where subtle blurring is often unnoticeable or even desirable. You can selectively blur parts of an image, like the background, to further optimize file size while keeping the main subject sharp.
Consider this example: a daylily photo with a detailed background, compressed at 60% quality, results in a 77 KB file.
 Day lily with a sharp, detailed background resulting in a 77 KB file size at 60% JPEG quality.
By blurring the background in an image editor like Photoshop, and then re-exporting at the same 60% quality, the file size reduces to 54 KB – a significant reduction of about 30%. This technique not only reduces file size but can also enhance the image aesthetically by emphasizing the main subject.
 Day lily with a blurred background, achieving a smaller 54 KB file size at 60% JPEG quality and enhancing focus.
A crucial point to remember with JPEGs is their lossy nature. Each time you save a JPEG, you lose some image quality. To avoid cumulative quality loss, always keep your original image in a lossless format like TIFF or PSD. Export to JPEG only for final use, such as web display. Avoid repeatedly saving and re-saving a JPEG, as this will progressively degrade the image quality, similar to making copies of photocopies.
Compressing GIF Files: Optimizing Color Palettes
GIF (Graphics Interchange Format) is a file format traditionally favored for simple graphics with solid colors and limited color palettes. While PNG-8 now offers similar capabilities with often smaller file sizes, understanding GIF compression techniques remains useful.
GIF images are limited to a maximum of 256 colors. Reducing the number of colors in the palette is the primary way to reduce GIF file size. Significant file size savings can be achieved by targeting specific color depths: 256, 128, 64, 32, 16, 8, 4, or 2 colors. For instance, reducing a 33-color image to a 32-color palette will yield a noticeable size reduction, whereas reducing from 32 to 31 colors will have minimal impact.
When saving as a GIF, you’ll typically be prompted to select the number of colors. If you notice banding (visible steps in color gradients), GIF might not be the ideal format for that image. However, you can mitigate banding by applying a dither pattern. Dithering introduces a pattern of pixels to simulate colors that are not directly available in the reduced color palette, making gradients appear smoother. The “diffusion” dither pattern generally works best.
If your GIF image contains transparent areas, ensure you select the “transparency” option when saving. Other settings like “Web snap” and “Matte” are largely outdated and can generally be ignored in modern image editing. While GIF was historically popular for animations, PNG is increasingly becoming a viable alternative in this area as well.
 Animated dancing robot graphic in GIF format.
Sample graphic from FCIT’s collection of robot illustrations on the TIM website.
Compressing PNG Files: Versatility and Options
PNG (Portable Network Graphics) has gained significant popularity due to its versatility, combining features of both JPEG and GIF. It is now widely used across the web, sometimes even more than JPEG or GIF. Understanding PNG compression involves choosing between two main types: PNG-8 and PNG-24.
PNG-8 is analogous to GIF, best suited for graphics with few colors and solid areas like logos or illustrations. The key advantage of PNG-8 over GIF is often a smaller file size for comparable images. When exporting as PNG-8, you’ll encounter similar settings to GIF: color selection (2, 4, 8, 16, 32, 64, 128, or 256 colors), dithering options, and transparency.
Consider this cartoon graphic. Saved as a 32-color GIF, it results in a 13.6 KB file size.
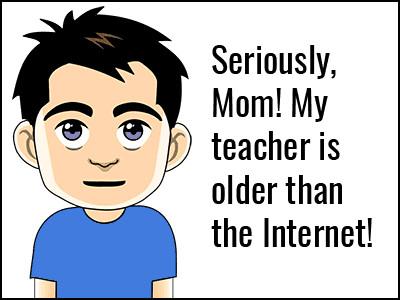 Cartoon graphic saved as a 32-color GIF with a file size of 13.6 KB.
The same cartoon, exported as a 32-color PNG with identical settings, produces a file size of only 10.2 KB. This represents a 25% reduction in file size compared to the GIF version, highlighting the efficiency of PNG-8 for this type of image.
Cartoon graphic saved as a 32-color PNG, achieving a smaller 10.2 KB file size compared to GIF.
Sample graphic from FCIT’s collection of tech cartoons on the TIM website.
PNG-24 is comparable to JPEG in its suitability for continuous-tone images like photographs or complex illustrations with more than 256 colors. However, unlike JPEG, PNG-24 is a lossless format. This means no image data is discarded during compression, preserving the original image quality perfectly. Consequently, PNG-24 file sizes are generally larger than JPEGs for similar images, but the image quality is superior, especially when avoiding compression artifacts.
Here’s a photo of macaws saved as a PNG-24, resulting in a large 400 KB file size due to its lossless nature.
 Photo of macaws saved as PNG-24, resulting in a large 400 KB file size.
The same photo, saved as a JPEG at maximum (100%) quality, yields a smaller 259 KB file size, but with some loss of quality.
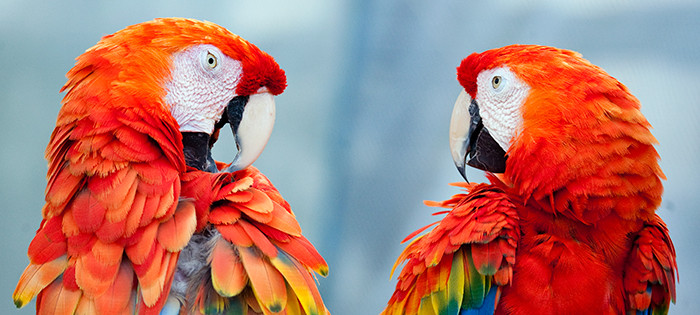 Photo of macaws saved as maximum quality (100%) JPEG, resulting in a 259 KB file size with some quality loss.
Reducing the JPEG quality to a “high” (60%) setting further reduces the file size to just 69 KB, but with increased compression artifacts and quality loss.
 Photo of macaws saved as high quality (60%) JPEG, achieving a small 69 KB file size with noticeable quality loss.
Sample photo from FCIT’s collection of stock animal photos on the ClipPix ETC website.
When should you choose PNG-24 over JPEG, despite the larger file size? There are several compelling reasons:
- Transparency: PNG-24 supports transparency, which JPEG does not. If your image needs transparent areas, PNG-24 is essential.
- Lossless Quality: For images where quality is paramount and any data loss is unacceptable, PNG-24’s lossless compression is crucial.
- Sharp Details and Text: PNG-24 excels at preserving sharp details and text, making it ideal for screenshots, graphics with fine lines, or images with small text where JPEG compression artifacts can cause blurring and readability issues.
Tools and Software for Image Compression
Numerous tools and software options are available to reduce photo file sizes. Popular image editing software like Adobe Photoshop, GIMP (free and open-source), and Affinity Photo offer comprehensive control over image compression settings for JPEG, PNG, and GIF formats.
Online image compression tools are also readily available, providing a quick and convenient way to reduce file sizes without installing software. Websites like TinyPNG, Compressor.io, and ImageOptim (macOS) are excellent choices for efficiently compressing images in various formats.
Best Practices for Image Optimization
Beyond format-specific compression techniques, consider these best practices for overall image optimization and file size reduction:
- Choose the Right Format: Select the image format (JPEG, PNG-8, PNG-24, GIF) that best suits your image content and requirements (quality, transparency, color complexity).
- Optimize Compression Level: Experiment with quality settings (for JPEG) and color palettes (for GIF/PNG-8) to find the optimal balance between file size and visual quality.
- Resize Images: Reduce the dimensions of your images to match their display size. Displaying a large image at a small size is inefficient.
- Remove Unnecessary Metadata: Image files often contain metadata (EXIF data) that can be removed to further reduce file size without affecting image quality. Many compression tools offer metadata removal options.
- Regularly Optimize Images: Make image optimization a routine part of your workflow, especially for web content, to ensure fast loading times and efficient resource usage.
Conclusion
Reducing photo file size is a vital aspect of image optimization, contributing to faster website loading, efficient storage, and smoother sharing. By understanding the characteristics of different image formats like JPEG, GIF, and PNG, and applying appropriate compression techniques, you can effectively minimize file sizes while preserving acceptable image quality. Whether you’re a web developer, photographer, or simply someone who shares photos online, mastering these techniques will significantly enhance your digital workflow and user experience.