Adding text to photos is a simple yet powerful way to enhance your images, whether for social media, marketing campaigns, or personal projects. This guide provides step-by-step instructions on how to add text to pictures using various built-in and third-party tools across different operating systems.
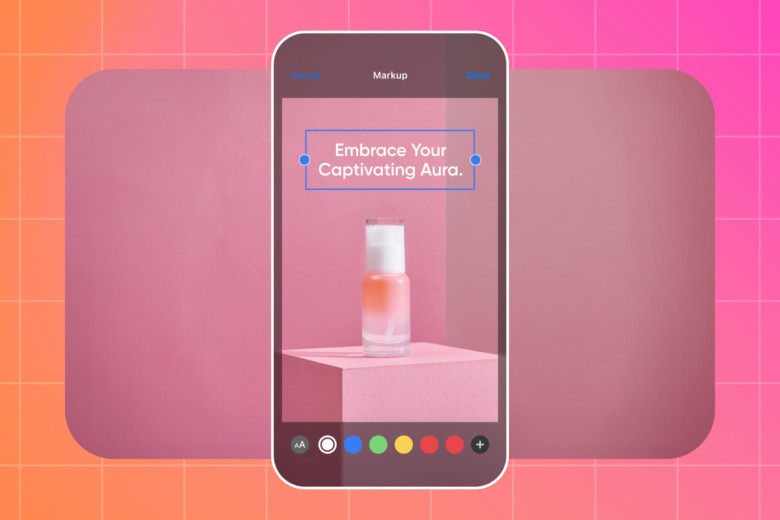 Adding text to a photo on a mobile device
Adding Text to Photos on iOS Devices (iPhone and iPad)
Apple’s built-in Markup app provides a convenient way to add text to photos directly within the Photos, Messenger, and Mail apps.
- Open the Photos app and select your image. Tap “Edit” in the top-right corner.
- Access Markup. Tap the “More” option (three dots) and select “Markup”.
- Insert Text. Tap the “+” button in the bottom-right corner and choose “Text”. Type your desired text.
- Customize the Text. Use the “aA” button to modify the font, size, color, and alignment of your text.
- Save Your Changes. Tap “Done” to save the edited photo.
On a Mac, the process is similar using the Markup tool within the Photos app.
Adding Text to Images on Android with Google Photos
Google Photos offers a Markup feature for Android users to easily add text to their images.
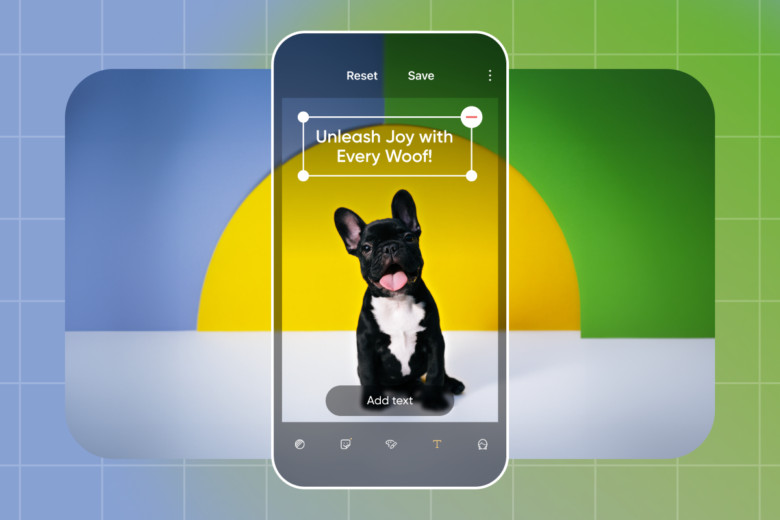 Adding text to an image using Google Photos on Android
- Open Google Photos and select your picture.
- Start Editing. Tap “Edit” (three horizontal lines) at the bottom and select the “Markup” icon (a squiggly line).
- Add Text. Tap “Text” and enter your desired text.
- Customize Your Text. Adjust font, size, color, opacity, and shadow effects.
- Save Your Photo. Tap “Done” to save your changes.
Adding Text to Pictures on Windows 10
Windows 10 users can utilize Paint 3D within the Microsoft Photos app to add and customize text on images.
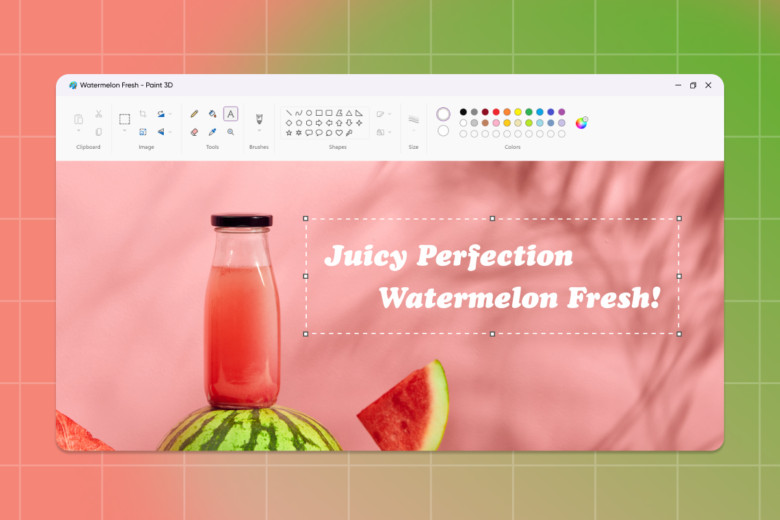 Using Paint 3D in Windows 10 to add text to an image
- Open the Photos app and select your photo. Click “Edit & Create” in the upper-right corner and choose “Edit with Paint 3D.”
- Select the Text Tool. Click “Text” at the top of the screen.
- Add Your Text. Click on your image to create a text box and type your text.
- Customize Your Text. Adjust font, size, color, and formatting options in the right panel.
- Save Your Image. Click “Menu” and then “Save as.”
Adding Text with Third-Party Apps: Picsart
For more advanced text editing features, consider using third-party apps like Picsart.
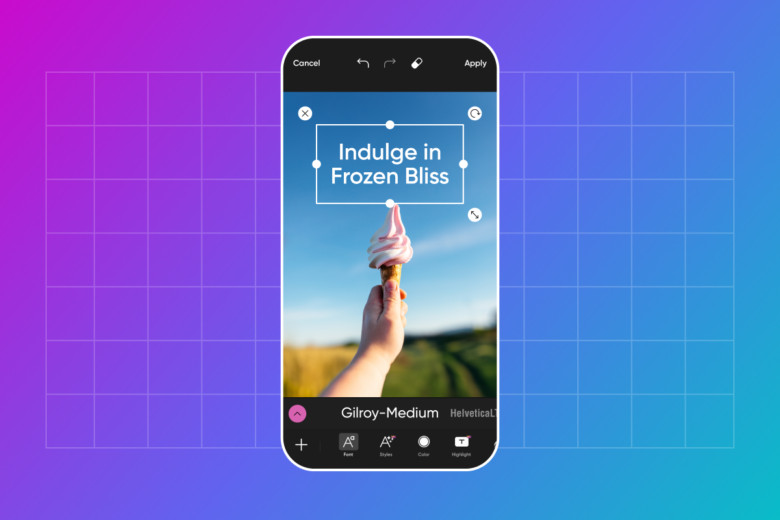 Example of adding stylized text to an image using Picsart
- Open the Picsart Text Editor. Choose a photo or template.
- Add Text. Click the “Text” tool and select a font. You can also upload your own fonts.
- Customize Your Text. Explore various font styles, effects, and customization options.
- Enhance Your Image. Use Picsart’s other editing tools like filters and stickers.
- Download Your Edit. Click “Export” to save your final image.
Picsart also offers free online Quicktools, including an Add Text to Photo tool and a Font Generator for quick and easy text editing without requiring an account. These tools allow you to add text, customize it, and download the edited image directly in your browser.
Conclusion
Adding text to photos is easily achievable with various tools available across different platforms. Whether you need a simple text overlay or a more stylized design, you can choose the method that best suits your needs and creative vision. From built-in apps to powerful editing software, the possibilities are endless.