Uploading photos to a website might seem straightforward, but sometimes you can encounter a few bumps along the way. This guide will walk you through the common methods and troubleshoot potential issues to ensure your photos get online without a hitch.
There are typically two main ways to upload photos to a website, depending on the site’s design and the options it offers. The most universal method is through your web browser. Many websites, especially forums, social media platforms, and content management systems, allow you to upload images directly using a button or link within the page itself.
To upload via your browser, you usually need to:
- Locate the upload button or link: Look for phrases like “Upload Image,” “Add Photo,” “Choose File,” or a similar call to action within the text input area or image section of the website.
- Click the button: This will open your computer’s file explorer or finder window.
- Navigate to your photo: Find the folder where your photo is saved. This is often in your “Pictures” library or “Desktop”.
- Select your photo and click “Open” or “Upload”: The website will then begin uploading your image. Wait for the upload to complete before proceeding.
Some systems, particularly those integrated with operating systems like macOS, might offer a “Media Browser” option when you click the upload button. This can provide a more direct access to your photo libraries.
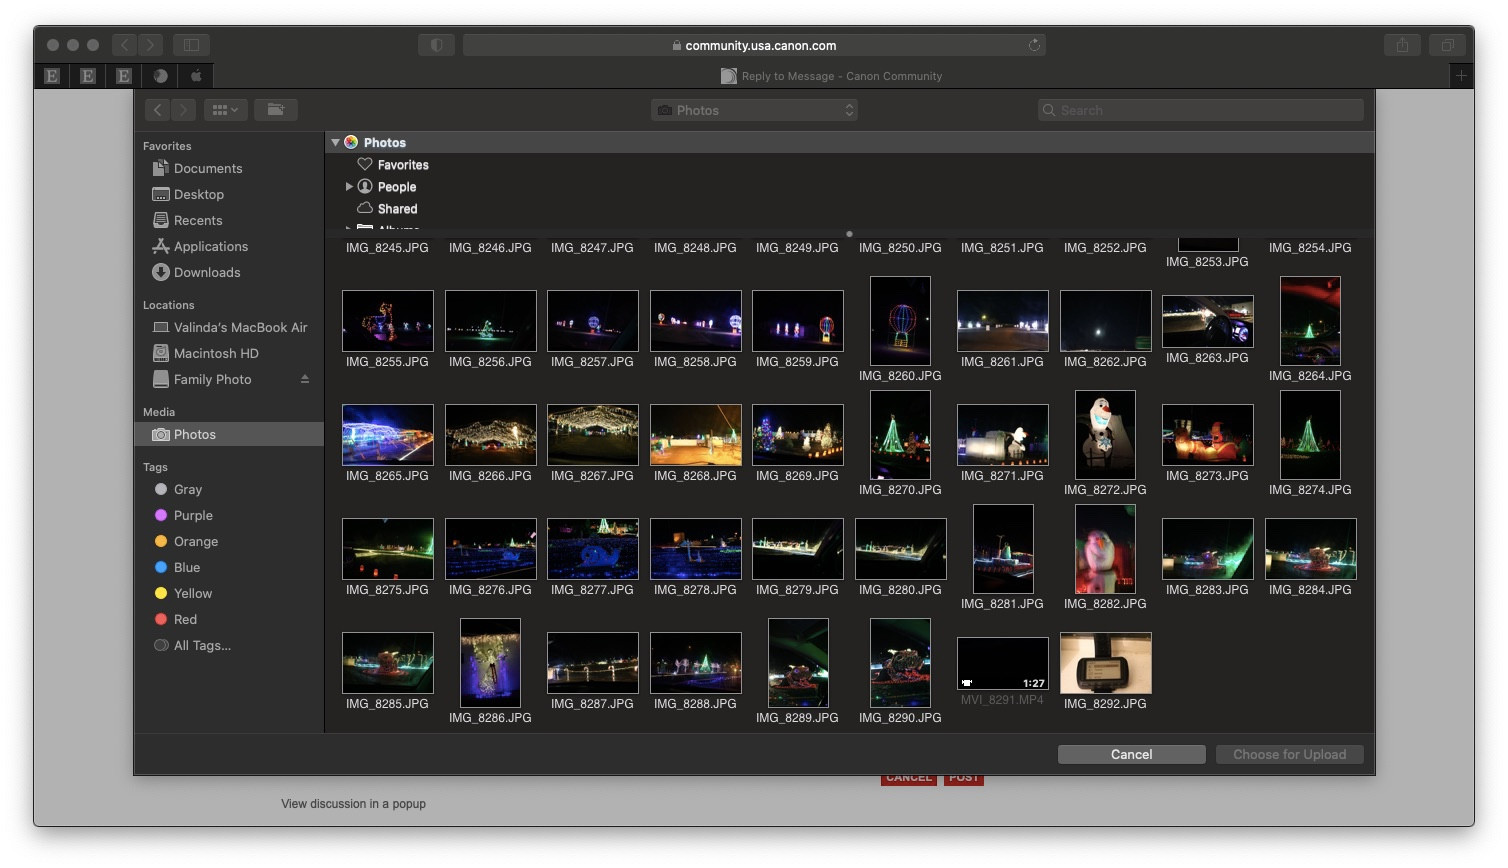 Media Browser option in the file chooser, with Photos highlighted
If you see a “Media” or “Photos” option in your file selection window:
- Click on “Media” or “Photos”: This should display your photo library.
- Select the photo you want to upload: Browse through your albums and choose the desired image.
- Click “Choose” or “Upload”: The website will upload the selected photo from your library.
However, you might encounter situations where your photos don’t appear in the Media Browser, or the upload fails. Here are a couple of common issues and how to address them:
-
File Format Compatibility: Websites typically support standard image formats like JPEG and PNG. If your photos are in HEIC format (common for iPhone photos), they might appear dimmed or not be supported directly. In this case, you may need to convert your HEIC files to JPEG before uploading. You can do this using online converters or your operating system’s built-in tools.
-
System Photo Library Issues: If you are using a Media Browser and your photos aren’t showing up, ensure you have a designated System Photo Library set up correctly. If your photo library is on an external drive, make sure the drive is connected to your computer and accessible. You can check and designate your System Photo Library within your Photos application settings.
If you are still facing difficulties or prefer a straightforward approach, exporting your photo to your desktop is a reliable workaround.
- Open your photo in your photo application: This could be Photos, Google Photos, or any other image management software.
- Export the photo: Look for an “Export” option in the File menu. Choose to export as JPEG format for best compatibility.
- Save to Desktop: Select your Desktop as the destination to easily find the file.
- Upload from Desktop: When you browse for files to upload on the website, navigate to your Desktop and select the exported JPEG file.
By understanding these methods and potential issues, you should be well-equipped to upload your photos to any website efficiently. Remember to check the website’s specific upload guidelines if you encounter persistent problems.