Photos are our visual diaries, capturing life’s most important moments. When you upgrade your Android phone, moving these treasured memories should be seamless, not stressful. Losing precious photos during a phone switch is a common fear, but it doesn’t have to be your reality.
Our team at dfphoto.net has rigorously tested and compiled this comprehensive guide on how to send photos to another phone, specifically focusing on Android devices. We aim to provide you with the knowledge and tools to confidently transfer your photos, ensuring no memory is left behind.
Key Considerations When Choosing a Photo Transfer Method
Before diving into the methods, it’s crucial to consider what matters most to you in a photo transfer solution:
- Photo Storage Preferences: Do you prefer keeping your photos directly on your Android device, utilizing cloud services, or having a local backup on your computer? Remember that local storage depends on your device’s capacity, and cloud storage might require subscriptions for larger libraries.
- Compatibility and Support: Not all methods work on every device or Android version. Ensure your chosen method is compatible with both your old and new phones.
- Transfer Scope: Are you only moving photos, or do you need to transfer other types of data like videos, music, or documents as well? Some methods are limited to photos, while others offer broader file transfer capabilities.
Quick Navigation to Photo Transfer Methods:
Method 1: Transfer Photos to Another Phone via PC Using Droid Transfer
For users who prefer managing their photo library on a computer’s larger screen and maintaining local control, using a PC as an intermediary is an excellent approach. Keeping photos locally ensures independence from cloud services and provides a secure backup.
Droid Transfer is a powerful software solution designed to facilitate Android photo transfer to PC and subsequently to another Android device. This method provides a secure and versatile way to manage your photos.
Droid Transfer works in conjunction with the free Transfer Companion app, available on the Google Play Store. This combination allows comprehensive access to your Android content beyond just photos, including music, contacts, call logs, and more, all manageable from your PC.
More information on Droid Transfer | Download Droid Transfer for Free
Here’s how to send photos to another phone using your PC and Droid Transfer:
-
Connect your old Android phone to your PC using Droid Transfer. You can choose to connect via Wi-Fi or USB cable based on your preference.
-
Open the “Photos” feature in Droid Transfer on your PC. Select all the photos you wish to transfer to your new phone.
-
Click “Save to PC**” and choose a location on your computer to store the photos temporarily.
-
Safely disconnect your old Android and connect your new Android phone to your PC.
-
Reopen the “Photos” feature in Droid Transfer. This time, click “Add Photos to Device“.
-
Select the photos you saved to your PC in step 3. You can choose to add individual photos or entire folders.
-
Click “Transfer” to send the photos to your new Android phone.
Droid Transfer also offers a valuable “Export New Photos” feature, simplifying photo backups to your PC. This feature automatically detects and backs up newly added photos on your Android, ensuring your photo library is consistently safe and up-to-date.
You can try Droid Transfer for free to transfer up to 100 photos. For unlimited transfers and full feature access, a Droid Transfer license is available for purchase. Regular updates and dedicated customer support ensure a smooth and reliable experience.
Advantages of Using Droid Transfer:
- Photo Storage Flexibility: Store photos locally on your Android devices and your PC, offering multiple backup locations.
- Secure and Offline Access: Local transfers are secure and private, allowing photo access without needing an internet connection.
- Broad Compatibility: Droid Transfer supports Windows 10 and higher and any Android device running Android 5 or later.
- Comprehensive Android Management: Beyond photo transfer, manage messages, contacts, music, call history, and more.
- Flexible Connection: Transfer via Wi-Fi or USB cable, catering to different user preferences.
- Excellent Value: A one-time purchase for a lifetime license offers significant value compared to subscription-based services.
Disadvantages of Using Droid Transfer:
- Indirect Transfer: Requires an intermediate step of transferring photos to a PC before sending them to the new Android phone.
Method 2: Send Photos to Another Phone Using Bluetooth
Bluetooth, a long-standing wireless technology since 1998, remains a viable option for directly sending files between devices, including photos. It’s a simple and readily available method for basic photo transfers.
Before initiating a transfer, ensure Bluetooth is enabled on both Android phones and that they are paired with each other.
To activate Bluetooth on Android, navigate to Settings > Bluetooth and toggle Bluetooth to ON. On either device, within Bluetooth settings, select “Pair new device” and choose the other Android phone to establish a connection.
Here’s how to send photos to another phone using Bluetooth:
- Open your photo gallery app on the Android phone containing the photos.
- Select the photos you wish to transfer. For multiple selections, touch and hold one photo, then tap on additional photos.
- Tap the “Share” icon, usually located at the bottom or top of the screen. Choose “Bluetooth” from the sharing options. Then, select the name of your destination Android device from the list of paired Bluetooth devices.
- Accept the transfer request on the receiving Android phone. The photo transfer will commence automatically.
It’s important to be aware of Bluetooth’s historical security vulnerabilities. To mitigate risks, practice safe Bluetooth usage, such as keeping your devices updated and disabling Bluetooth when not actively in use.
Advantages of Bluetooth Transfer:
- Wireless and Direct: Offers a cable-free, direct transfer between Android phones without needing a computer.
- Local Photo Storage: Photos remain stored directly on your Android devices, maintaining local control.
- Universal Compatibility: Bluetooth is a standard feature in virtually all modern smartphones, ensuring broad compatibility.
- Versatile File Transfer: Can transfer photos, videos, audio files, and other document types.
Disadvantages of Bluetooth Transfer:
- Slow Transfer Speeds: Significantly slower compared to Wi-Fi or USB cable transfers, especially for large photo collections.
- Low Bandwidth Limitations: Inefficient for transferring large numbers of photos or high-resolution images due to bandwidth constraints.
- Connection Instability: Susceptible to interference and pairing issues, which can lead to interrupted transfers.
- Security Concerns: Historically, Bluetooth has had security vulnerabilities, requiring cautious usage.
Method 3: How to Send Photos to Another Phone via Google Photos
Cloud storage services like Google Photos offer an efficient and modern approach to photo transfer and management. By storing your photo library in the cloud, you free up valuable space on your Android devices and gain access from any internet-connected device. Google Photos provides 15GB of free storage, shared across your Google account. For larger libraries, Google One subscriptions offer expanded storage options.
With Google Photos, you don’t strictly need to transfer and store photos directly on your Android devices. Instead, you can access your entire cloud-based library from any device. If needed, you can easily download specific photos from Google Photos to your Android phone.
-
Open the Google Photos app on your original Android phone. Ensure you are logged in with your Google account.
-
Tap your profile icon in the top-right corner of the app.
-
Check Backup status. If “Backup is off,” tap “Turn on backup“.
-
Select the Google account you will use on your new Android phone. Ensure it’s the same account across both devices for seamless access.
-
Tap “Turn on backup“. The initial backup duration depends on the size of your photo and video library and your internet connection speed.
-
Once backup is complete, open the Google Photos app on your new Android phone and sign in with the same Google account.
-
Your photos will be immediately accessible from the cloud. To download a photo to your device, select the photo, tap “More” (three dots icon), and then “Download“.
Advantages of Google Photos Transfer:
- Fast, Easy, and Wireless: Offers a quick and convenient wireless transfer method using your Google account.
- Flexible Photo Storage: Photos can be stored in the cloud, on your Android devices, or both, providing versatile storage options.
- Wide Compatibility: Google Photos is compatible with virtually all Android devices and accessible via web browsers on any platform.
Disadvantages of Google Photos Transfer:
- Limited Free Storage: The 15GB free storage might be insufficient for large photo and video libraries, potentially requiring a Google One subscription.
- Scope Limited to Media: Primarily designed for photos and videos. Transferring other file types requires Google One or Google Drive.
Method 4: Send Photos to Another Phone Using Quick Share (Nearby Share)
Building upon Bluetooth’s functionality, Google and Samsung developed Quick Share (formerly Nearby Share) to provide a faster and more efficient wireless file-sharing experience between Android devices. Quick Share intelligently utilizes both Bluetooth and Wi-Fi for optimal transfer speeds.
While Quick Share leverages Bluetooth for device discovery, remember to adhere to Bluetooth security best practices. Keep your devices updated and disable Bluetooth when not in use to minimize potential vulnerabilities.
Quick Share is supported on Android 6 and higher and comes pre-installed on most modern Android phones. For older devices, consider using Android Beam (Method 5), although Quick Share is the recommended and actively supported method.
Ensure both Android phones have Quick Share enabled and that both Bluetooth and Wi-Fi are turned on. Bluetooth is used to locate nearby devices, while Wi-Fi facilitates faster file transfers.
Steps to send photos to another phone using Quick Share:
-
Open the Photos app on your Android device.
-
Select the photos you want to transfer. Select multiple photos by tapping and holding one, then tapping others.
-
Tap “Share” and then choose “Quick Share” from the share menu.
-
Your phone will scan for nearby devices with Quick Share and Bluetooth enabled.
-
Select the recipient Android phone from the list of available devices.
-
On the receiving phone, accept the transfer request to begin receiving the photos.
Advantages of Quick Share:
- Wireless and Direct: Offers a direct, wireless transfer between Android phones, similar to Bluetooth but faster.
- Local Photo Storage: Photos are transferred directly to the recipient phone’s local storage.
- Broad Compatibility: Supported on most Android devices running Android 6 and later.
- Versatile File Transfer: Supports transferring photos, videos, audio files, and other file types.
- Fast Transfers: Utilizes Wi-Fi for significantly faster transfer speeds compared to Bluetooth alone, when Wi-Fi is available and both devices are on the same network.
Disadvantages of Quick Share:
- Bluetooth Security: Relies on Bluetooth for device discovery, inheriting potential Bluetooth security considerations.
Method 5: Transfer Pictures from Android to Android with Android Beam (NFC)
Before Quick Share, Android Beam was Google’s earlier attempt at simplified wireless file transfer. Introduced in Android 4, Android Beam has been deprecated since Android 10, with Quick Share taking its place as the preferred method.
Android Beam utilizes NFC (Near Field Communication), the same technology used for contactless payments. This necessitates physical proximity, requiring devices to be held very close or touching for data transfer to occur.
Before using Android Beam, verify that both Android phones have NFC and Android Beam enabled. Settings locations may vary across devices. Look for “Connected Devices” or “Wireless & Networks” in Settings, then find NFC and Android Beam options and ensure they are turned ON.
Steps to send photos to another phone using Android Beam:
-
Open the Photos app on the Android phone containing your photos.
-
Select the photos for transfer.
-
Unlock both Android phones and bring their backsides directly together, aligning the NFC areas (typically near the center or top back).
-
On the sending device, you’ll see “Tap to Beam**” option appear on the screen.
-
Tap “Tap to Beam**” to initiate the photo transfer to the other Android phone.
Advantages of Android Beam:
- Wireless and Direct: Provides a direct, wireless transfer between Android phones using NFC.
- Local Photo Storage: Photos are stored locally on the recipient Android phone.
- Versatile File Transfer: Can transfer photos, videos, audio, and other file types.
Disadvantages of Android Beam:
- Limited Compatibility: Supported only on Android devices running Android 4 through Android 9. Deprecated in Android 10 and later.
- Deprecated Technology: Becoming increasingly obsolete and unavailable on newer devices.
- Proximity Requirement: Requires devices to be in very close physical contact, making it less convenient than other wireless methods.
Method 6: Transfer Photos from Android to Android Using Smart Switch (Samsung)
Smart Switch offers a specialized solution for users transitioning to a new Samsung Galaxy device from an older Android phone. It streamlines the entire device migration process, making it particularly useful when upgrading to a new Samsung phone and retiring your old Android.
Device migration apps like Smart Switch simplify content transfer significantly. Samsung’s Smart Switch app is designed to facilitate seamless migration to new Samsung Galaxy devices.
-
Install the Smart Switch app from the Google Play Store on both Android devices (it’s pre-installed on new Samsung Galaxy phones).
-
Launch Smart Switch on your new Samsung Galaxy phone and tap “Receive data” and then “Galaxy/Android“.
-
Choose your connection method: “USB cable” or “Wi-Fi“. Follow the on-screen instructions to establish a connection between the two Android phones.
-
Select the content types you wish to transfer, including photos, videos, and more.
-
Tap “Transfer“. Once the transfer completes, tap “Done“.
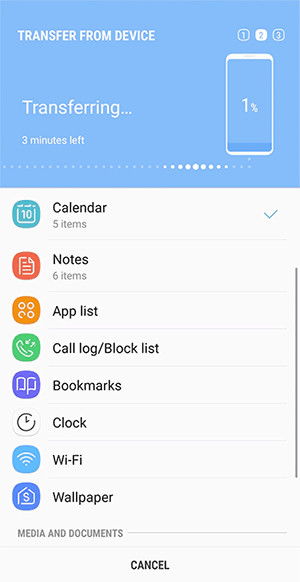 Samsung Smart Switch
Samsung Smart Switch (Image credit: Samsung)
Advantages of Smart Switch:
- Direct Android to Android Transfer: Designed for direct device-to-device transfer, simplifying the migration process.
- Multiple Connection Options: Supports transfer via Wi-Fi, USB cable, or even SD card, offering flexibility.
- Local Photo Storage: Photos are transferred directly to the new Samsung Galaxy device’s local storage.
- Comprehensive Data Transfer: Transfers photos, videos, music, messages, contacts, apps, and more, offering a complete device migration solution.
Disadvantages of Smart Switch:
- Limited Compatibility: While compatible with Android devices running 4.3 and later, it primarily transfers content to Samsung Galaxy devices. Not ideal for transferring from Samsung to another Android brand, or between two non-Samsung Android phones.
Conclusion
This comprehensive guide has explored six effective methods for how to send photos to another phone, specifically Android to Android transfers.
By understanding the advantages and disadvantages of each method, you can choose the best approach tailored to your specific needs, device compatibility, and photo library size. Whether you prioritize speed, wireless convenience, local storage, or comprehensive data migration, there’s a method here to ensure your precious photo memories safely make the journey to your new Android phone.
Publisher: dfphoto.net Content Team
 How to Transfer Data from Android to Android Read Next: How to Transfer Data from Android to Android >
[
Droid Transfer](/droidtransfer/transfer-photos-from-android-to-pc.php)
Transfer photos from Android to Android and easily back up your media to PC.
Related Articles
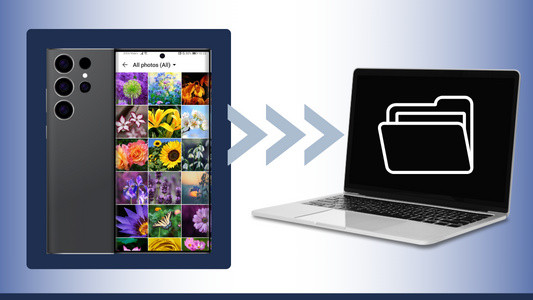 4 Easy Ways to Transfer Photos from Android to PC 4 Easy Ways to Transfer Photos from Android to PC
 6 Quick and Easy ways to transfer music from one Android to another 6 Quick and Easy ways to transfer music from one Android to another
 The Top 6 Methods to Transfer your Android Contacts to a New Phone The Top 6 Methods to Transfer your Android Contacts to a New Phone
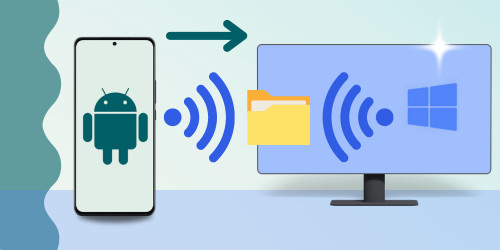 3 ways to transfer files from Android to PC using Wi-Fi 3 ways to transfer files from Android to PC using Wi-Fi
▷Free Download
Droid Transfer X
Easily transfer photos from Android to Android and regularly back up your media using your PC.
Find out more >
Try Droid Transfer free, today!
We use cookies to provide you the best experience on our website. To find out more, read our cookie policy. You may decline non-essential cookies if you prefer.
We use cookies to track usage and optimize your experience.