Watermarking your photos is a crucial step in protecting your intellectual property and branding your work. Whether you’re a professional photographer or just sharing images online, adding a watermark can prevent unauthorized use and ensure you get credit for your creations. If you’re a Mac user wondering “How Do I Put A Watermark On A Photo?”, you might be surprised that the built-in Photos app doesn’t offer this feature directly. But don’t worry, macOS provides several simple and effective alternatives to add watermarks to your images. Let’s explore some easy methods to get your photos watermarked quickly.
While Apple’s Photos application is excellent for organizing and basic editing, it lacks advanced features like layering and image overlay, which are necessary for directly adding watermarks. As mentioned in discussions by users like TonyCollinet, Photos is not a layered app, meaning there’s no built-in function to merge or combine images to create a watermark effect. Therefore, to add a watermark, you’ll need to utilize other tools available on your Mac or explore third-party applications.
However, adding a watermark on macOS is still straightforward using other native applications and readily available software. Here are a few user-friendly methods you can use to effectively watermark your photos:
Using Preview to Add a Watermark
Preview, the default image viewer on macOS, can surprisingly be used to overlay a watermark onto your photos. This method involves using Preview’s annotation tools to insert text or even another image as your watermark. While it might not be as sophisticated as dedicated watermarking software, it’s a quick and free solution for basic watermarking.
User léonie pointed out using Preview as a viable method for adding a watermark overlay. Here’s how you can do it:
-
Open your photo in Preview: Right-click on the image file and choose “Open with” > “Preview”.
-
Open the Markup Toolbar: Click the “Markup” button (it looks like a pen tip) in the Preview toolbar.
-
Add Text Watermark:
- Click the “Text” button (T in a square) in the Markup Toolbar. A text box will appear on your image.
- Type your watermark text (e.g., your name, website, or copyright info).
- Customize the text: Use the formatting tools in the Markup Toolbar to change the font, size, color, and style of your watermark text.
- Position the text: Drag the text box to place your watermark where you want it on the photo.
- Adjust opacity (optional): To make the watermark transparent, you can adjust the text color and reduce its opacity slightly.
 Text watermark in Preview
 -
Add Image Watermark (e.g., a logo):
- First, you need your logo or image watermark saved as a separate image file (preferably PNG with transparency).
- In Preview, click “File” > “Open” and open your watermark image file.
- Select all (Command+A) and copy (Command+C) your watermark image.
- Go back to your photo in Preview.
- Paste (Command+V) the watermark image. It will appear on your photo.
- Resize and reposition: Drag the handles of the pasted image to resize and move it to the desired location.
-
Save your watermarked photo: Go to “File” > “Export…” to save your watermarked image. Choose your desired format (JPEG, PNG, etc.) and save location. Exporting creates a new watermarked image file, leaving your original photo untouched.
Using iMovie for Watermarking
Another creative workaround, suggested by user Rich839, is to use iMovie, Apple’s free video editing software, to watermark images. iMovie’s picture-in-picture and opacity features can be cleverly used to overlay watermarks.
-
Import your photo into iMovie: Create a new project in iMovie and import your photo into the timeline. You can simply drag and drop the image into iMovie.
-
Import your watermark: Import your watermark image (logo or text-based watermark as a PNG file) into iMovie.
-
Overlay Watermark using Picture in Picture or Cutaway:
- Picture in Picture: Drag your watermark image above your photo in the timeline. Select the overlay style as “Picture in Picture” from the video overlay settings above the viewer. You can then resize and reposition the watermark image on top of your photo in the preview window. You can also use the dissolve option for transparency as Rich839 mentioned.
 Picture in Picture watermark in iMovie
- Cutaway: Alternatively, you can use the “Cutaway” overlay style. Drag your watermark image above your photo in the timeline and select “Cutaway”. With Cutaway, you can use the opacity slider in the video overlay settings to adjust the transparency of your watermark, creating a subtle overlay effect as shown by Rich839.
 Cutaway watermark with opacity in iMovie
 Transparent logo watermark in iMovie
 -
Export as an image: Since iMovie is a video editor, you’ll need to export a frame as an image. Position the playhead over your watermarked photo in the timeline. Then, take a screenshot (Shift + Command + 4, then select the preview window) of the iMovie preview screen to save your watermarked image. Alternatively, you might be able to export a single frame from iMovie, depending on your version.
Exploring Shortcuts and Third-Party Apps
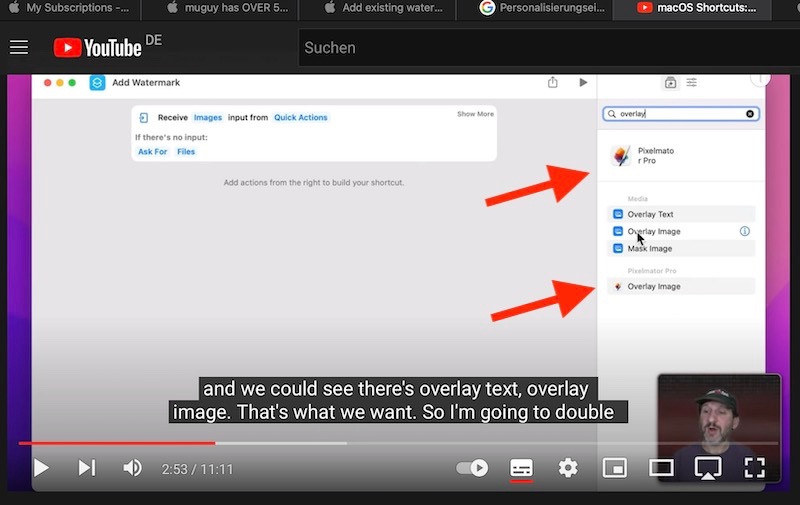
For more automated and potentially advanced watermarking options, you can explore macOS Shortcuts, as suggested by Ralf-F and léonie. Shortcuts can be configured to create workflows that automatically add watermarks. As léonie discovered, language settings can affect available actions, with “Overlay Image” and “Overlay Text” actions becoming accessible when the Shortcuts app language is set to English. You can find tutorials and pre-made shortcuts online that utilize these actions to streamline the watermarking process.
Furthermore, numerous third-party apps are available for macOS that specialize in watermarking. These applications, some of which are mentioned in the article linked by Ralf-F (https://www.maketecheasier.com/watermark-images-on-mac/), often offer batch watermarking capabilities, more customization options, and advanced features. Pixelmator Pro, as mentioned in the discussion, is one such powerful image editor that could be used for watermarking, although it might be more feature-rich than what’s needed for simple watermarking.
Conclusion
While the Photos app lacks a direct watermarking feature, Mac users have several accessible methods to protect their images. Preview offers a quick and free way to add basic text or image watermarks. iMovie provides a creative workaround using its video editing tools for more versatile watermark overlays. For users seeking automation or advanced features, macOS Shortcuts and dedicated third-party apps present powerful alternatives. Choose the method that best suits your needs and technical comfort level to effectively watermark your photos and safeguard your visual content.