Want to keep some photos on your iPhone private? Whether it’s for personal reasons or simply to declutter your main photo library, the iPhone offers a built-in feature to hide photos. This guide will show you exactly How Do I Hide Photos On Iphone, ensuring your sensitive images are tucked away from prying eyes. Apple’s Photos app provides a straightforward way to move photos and videos to a Hidden album, removing them from your main Library, other albums, and even the Photos widget on your Home Screen. For enhanced privacy, especially with iOS 14 and later, you can even make this Hidden album invisible. Furthermore, for users with iOS 16, iPadOS 16.1, and macOS Ventura or later, the Hidden album adds an extra layer of security by being locked by default, requiring authentication to access. Remember to keep your Apple devices updated to the latest software to ensure you have all the latest features and security enhancements for your Mac, iPhone and iPad, and Apple Vision Pro.
For those using iCloud Photos, hiding a photo on one Apple device will automatically hide it across all your devices synced with the same iCloud account. This ensures consistency in your photo privacy across your Apple ecosystem.
Step-by-Step Guide: Hiding Photos on iPhone and iPad
Hiding photos directly on your iPhone or iPad is a simple process. Follow these steps to safeguard your private images:
-
Open the Photos App: Locate and tap the Photos app icon on your home screen to launch it.
-
Select the Photo or Video: Navigate through your photo library to find the specific photo or video you wish to hide.
-
Initiate the Hide Feature: Tap and hold on the selected photo or video. This will bring up a quick actions menu.
-
Tap “Hide”: From the options presented in the menu, tap “Hide”.
-
Confirm Hiding: A confirmation prompt will appear at the bottom of your screen asking if you want to hide the photo or video. Tap “Hide Photo” to confirm your action.
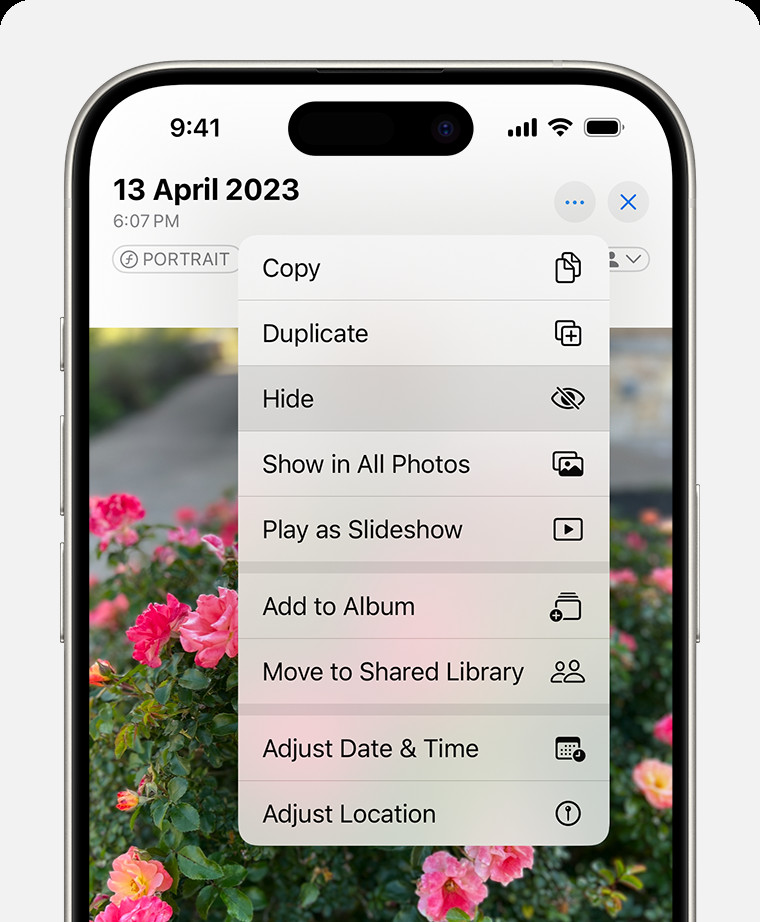 Tapping the hide option from the dropdown menu to hide a selected photo on an iPhone.
How to Unhide Photos on Your iPhone and iPad
If you decide to make your hidden photos visible again, the unhiding process is just as easy:
- Open Photos and Access Albums: Open the Photos app again. On an iPad, you might first need to tap the sidebar icon, usually located in the upper-left corner, to display your albums.
- Find the Hidden Album: Scroll down through your albums until you find the “Hidden” album listed under the “Utilities” section.
- Unlock the Hidden Album: Tap “Hidden”. You will then be prompted to “View Album”. Tap this, and use Face ID or Touch ID, or your passcode to unlock and access the album.
- Select Photo to Unhide: Once inside the Hidden album, tap and hold the photo or video you want to unhide.
- Tap “Unhide”: In the menu that appears, select “Unhide”. The photo or video will then be removed from the Hidden album and will reappear in your main Library and any relevant albums based on its date.
Locating the Hidden Album on iPhone and iPad
By default, the Hidden album is visible within the Photos app. Here’s how to find it:
-
Open the Photos App: Launch the Photos application on your iPhone or iPad.
-
Scroll to Utilities: Scroll down the Albums view until you see the “Utilities” section.
-
Hidden Album Location: Within Utilities, you will find the “Hidden” album.
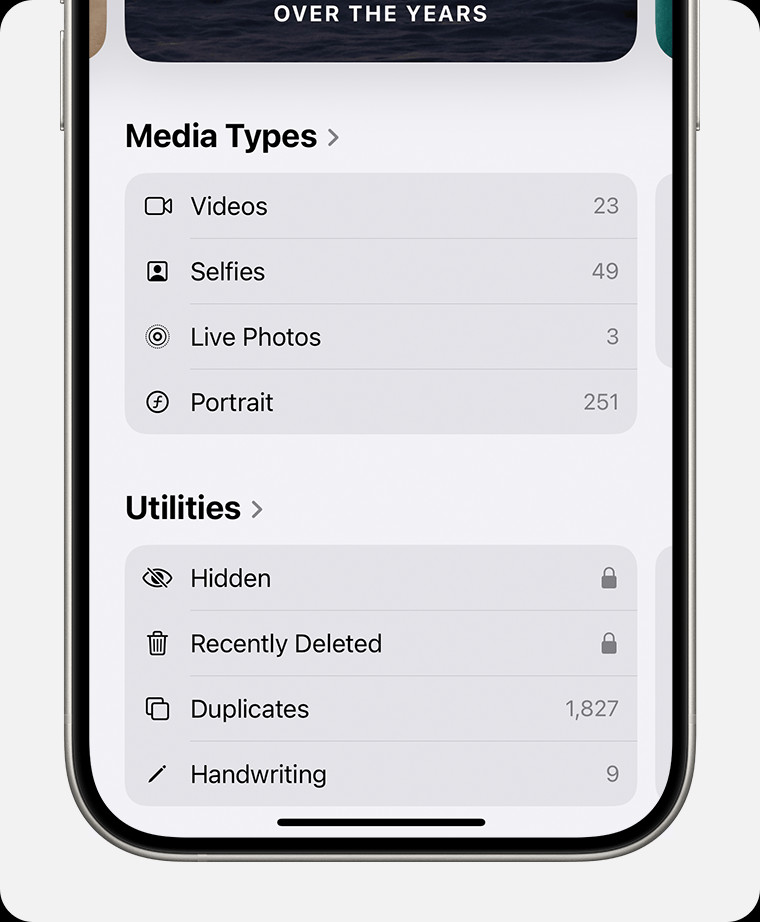 The Hidden album is highlighted under the Utilities section in the Albums view of the Photos app on an iPhone.
Making the Hidden Album Invisible for Extra Privacy
For those who want maximum privacy, you can actually turn off the visibility of the Hidden album itself. This means the album won’t even appear in the Utilities section of your Photos app. Here’s how to do it:
- Open Settings App: Go to the Settings app on your iPhone or iPad home screen.
- Navigate to Photos Settings: Scroll down and tap on “Photos”.
- Toggle off “Show Hidden Album”: Look for the option “Show Hidden Album” and toggle the switch to the off position (grey).
When “Show Hidden Album” is turned off, the Hidden album and any photos within it will be completely invisible within the Photos app. To access hidden photos again, you will need to return to Settings and toggle “Show Hidden Album” back on.
Hiding Photos on Your Mac
The process to hide photos on a Mac is slightly different but equally straightforward:
- Open Photos App on Mac: Open the Photos application on your Mac.
- Select Photo to Hide: Select the photo or video you wish to hide.
- Hide via Control-Click or Menu:
- Control-Click: Control-click (or right-click) on the selected photo. In the context menu, choose “Hide Photo”.
- Menu Bar: Alternatively, with the photo selected, go to “Image” in the menu bar at the top of your screen, then choose “Hide Photo”.
- Keyboard Shortcut: You can also use the keyboard shortcut Command + L to hide a selected photo.
- Confirm Hiding: A dialog box will appear asking you to confirm if you want to hide the selected photo. Click “Hide” to confirm.
Unhiding Photos on Mac
To unhide photos on your Mac:
- Show Hidden Photo Album: In the Photos app menu bar, click on “View”. Then, select “Show Hidden Photo Album”. This makes the Hidden album visible in the sidebar.
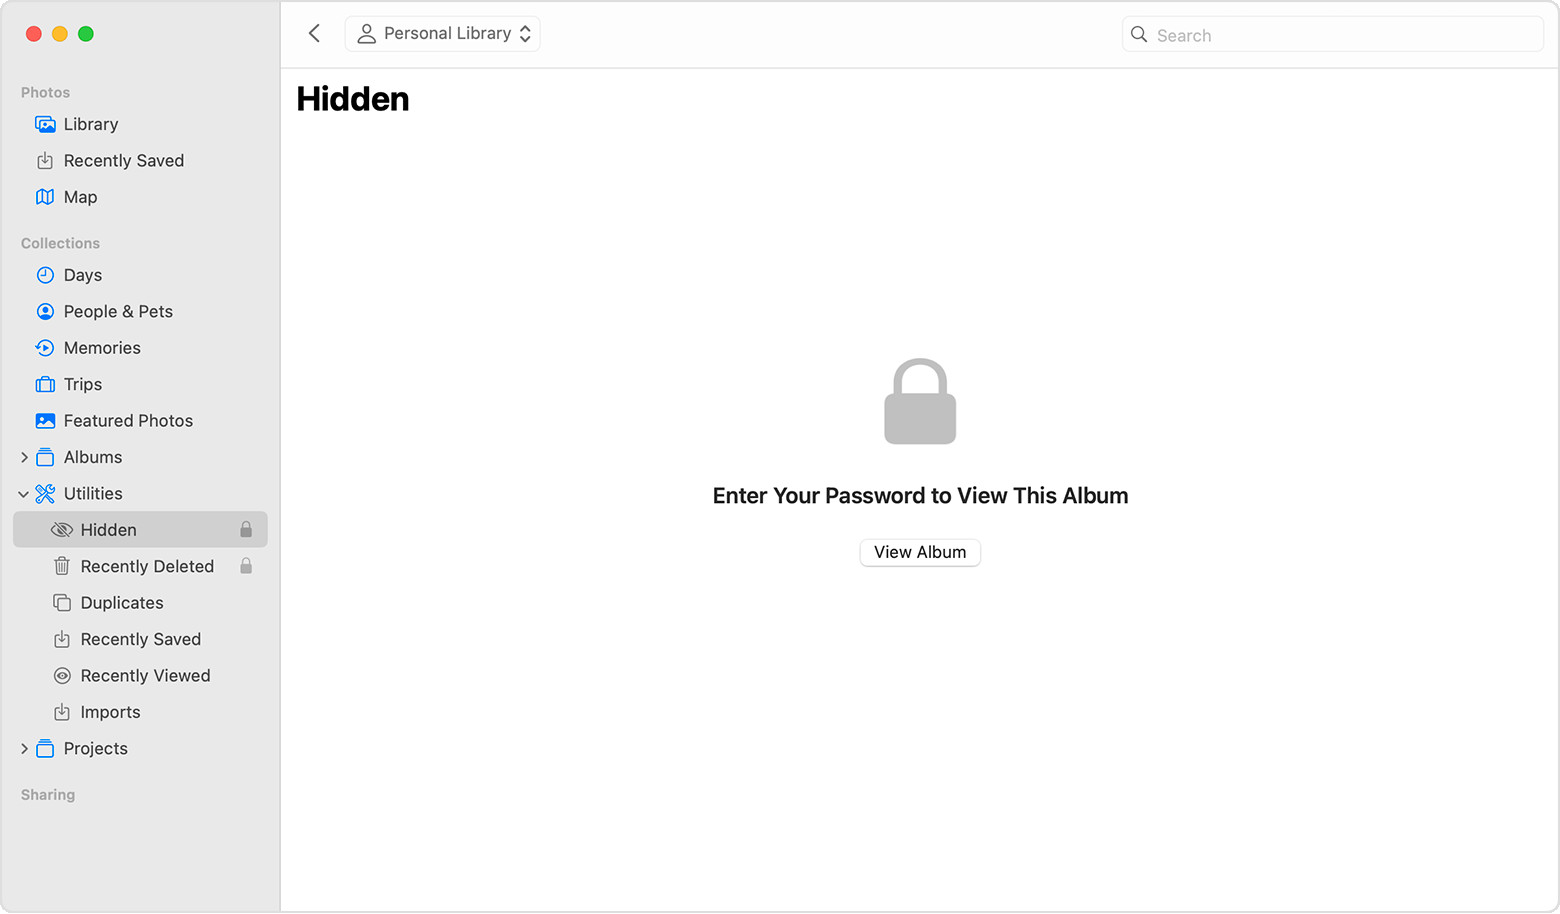
- Access the Hidden Album: In the sidebar of the Photos app, under Albums, select “Hidden”.
- Unlock if Locked: Click “View Album”. You may be prompted to use Touch ID or enter your login password to unlock the Hidden album.
- Select Photo to Unhide: Select the photo or video you want to unhide.
- Unhide via Control-Click or Menu:
- Control-Click: Control-click on the selected photo and choose “Unhide Photo”.
- Menu Bar: Go to “Image” in the menu bar and select “Unhide Photo”.
- Keyboard Shortcut: Use Command + L again to unhide the photo.
Finding the Hidden Album on Mac
On macOS, the Hidden album is hidden by default. You need to explicitly make it visible:
-
Open Photos App: Open the Photos app on your Mac.
-
Show Hidden Album Option: In the menu bar, click on “View”.
-
Select “Show Hidden Photo Album”: Choose “Show Hidden Photo Album” from the dropdown menu. This will make the “Hidden” album appear in the sidebar under Albums.
 The Show Hidden Photo Album option is selected under the View menu in the Photos app on macOS.
Hiding Photos on Apple Vision Pro
For Apple Vision Pro users, the steps are similar to iPhone and iPad:
- Open Photos App: Open the Photos app within visionOS.
- Select and Hide: Select and hold the photo or video you intend to hide. Then, tap “Hide” from the options.
- Confirm: Confirm that you want to hide the photo or video when prompted.
Unhiding Photos on Apple Vision Pro
To unhide photos on your Apple Vision Pro:
- Open Photos and Go to Collections: Open the Photos app. In the sidebar, tap “Collections”.
- Access Hidden Album: Scroll down in the sidebar and tap “Hidden” in the “Utilities” section.
- Select and Unhide: Tap and hold the photo or video you wish to unhide, then tap “Unhide”.
Finding the Hidden Album on Apple Vision Pro
Locating the Hidden album on Apple Vision Pro is also straightforward:
- Open Photos App: Open the Photos app.
- Go to Collections: Tap the “Collections” tab in the sidebar.
- Find Hidden Album in Utilities: Scroll down and look for the “Hidden” album under the “Utilities” section.
Similar to iPhones and iPads, you can also control the visibility of the Hidden Album on Apple Vision Pro through the Settings app under Photos, by toggling the “Show Hidden Album” option.
By utilizing these methods, you can effectively manage your photo privacy across all your Apple devices. Whether you’re using an iPhone, iPad, Mac, or Apple Vision Pro, Apple provides consistent and user-friendly tools to help you keep your personal photos hidden and secure.