Controlling your photo privacy is essential, and Apple’s Photos app offers a built-in feature to hide your sensitive images and videos. When you utilize the hide function, these media files are moved to a dedicated “Hidden” album, removing them from your main library, shared albums, and even the Photos widget on your home screen. For enhanced privacy, especially on devices running iOS 14 and later, you can even make this “Hidden” album invisible. Furthermore, with iOS 16, iPadOS 16.1, and macOS Ventura and later, this album is automatically locked, requiring authentication for access.
If you’re using iCloud Photos, hiding a photo on one Apple device will hide it across all your devices linked to the same iCloud account. This guide will walk you through exactly How Do I Find Hidden Photos on your iPhone, iPad, Mac, and Apple Vision Pro.
Finding Hidden Photos on iPhone or iPad
If you’ve hidden photos on your iPhone or iPad and now need to access them, here’s a step-by-step guide:
-
Open the Photos App: Locate and tap the Photos app icon on your home screen to launch the application.
-
Access Albums: In the Photos app, scroll down to the “Utilities” section. On iPad, you might first need to tap the sidebar icon typically located in the upper-left corner to display your albums and the Utilities section.
-
Locate the Hidden Album: Within the Utilities section, you will find the “Hidden” album. Tap on “Hidden”.
-
Unlock the Hidden Album: Upon selecting the “Hidden” album, you’ll likely be prompted to “View Album”. Tap this option and use Face ID or Touch ID, or your device passcode to unlock and access the album.
-
Unhide Photos (Optional): If you wish to unhide a photo or video and make it visible in your main library again, tap and hold the specific photo or video within the Hidden album. In the options that appear, select “Unhide”. The photo will then be moved back to your main photo library and other relevant albums.
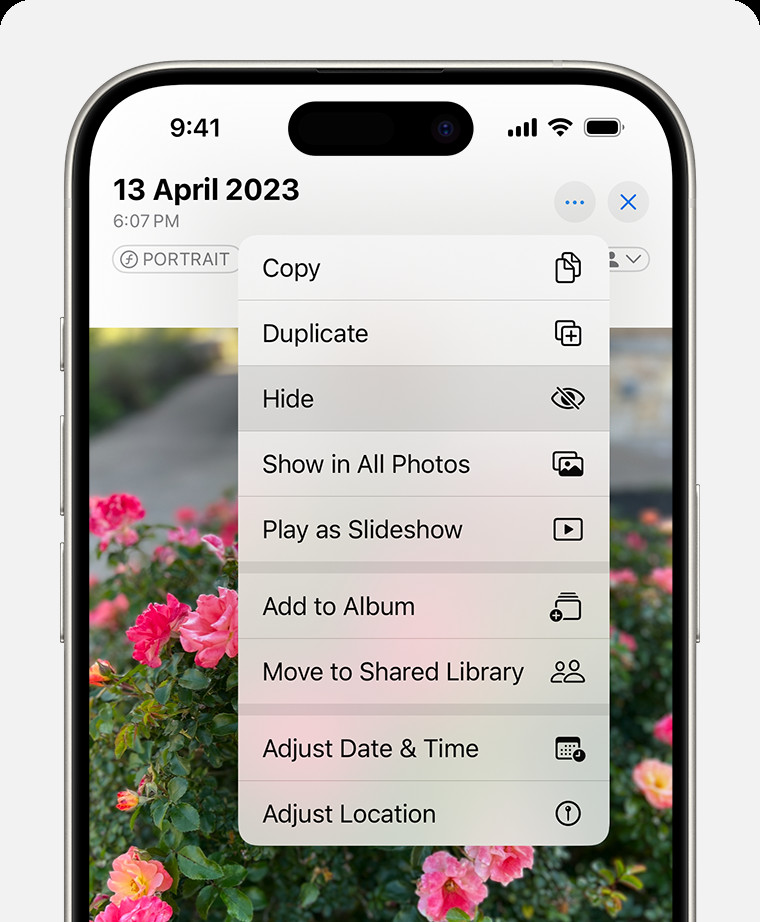 Accessing the Hide option from the photo options menu on an iPhone
Alt text: Dropdown menu showing the ‘Hide’ option, used to hide a photo on an iPhone, emphasizing photo management and privacy controls.
Making the Hidden Album Visible or Invisible on iPhone and iPad
By default, the Hidden album is visible within the Utilities section of the Photos app on iPhones and iPads. However, you can choose to hide the Hidden album itself for an extra layer of privacy. Here’s how to toggle its visibility:
-
Open Settings: Go to the Settings app on your iPhone or iPad.
-
Navigate to Photos Settings: Scroll down and tap on “Photos” to access the Photos app settings.
-
Toggle “Show Hidden Album”: Look for the option labeled “Show Hidden Album”. Toggle this switch to the “off” position (grey) to hide the Hidden album from the Utilities section in the Photos app. To make it visible again, toggle the switch to the “on” position (green).
When the “Show Hidden Album” option is turned off, the Hidden album and any photos or videos within it will not be visible in the Photos app at all, providing a completely hidden space for your private media.
Finding Hidden Photos on Your Mac
The process to find hidden photos on a Mac is slightly different, but still straightforward:
-
Open Photos App: Launch the Photos application on your Mac.
-
Show Hidden Photo Album: In the menu bar at the top of your screen, click on “View”. From the dropdown menu, select “Show Hidden Photo Album”.
-
Access the Hidden Album in Sidebar: Once you’ve selected “Show Hidden Photo Album”, a “Hidden” album will appear in the sidebar of the Photos app, usually under the “Photos” section. Click on “Hidden”.
-
Unlock if Locked: If you are using macOS Ventura or later, the Hidden album will be locked. Click “View Album” and use Touch ID or your Mac login password to unlock and view its contents.
-
Unhide Photos (Optional): To unhide photos on your Mac, select the photo or video within the Hidden album. Control-click (or right-click) on the image, and choose “Unhide Photo”. Alternatively, you can go to the menu bar, click “Image”, and select “Unhide Photo”, or use the keyboard shortcut Command-L.
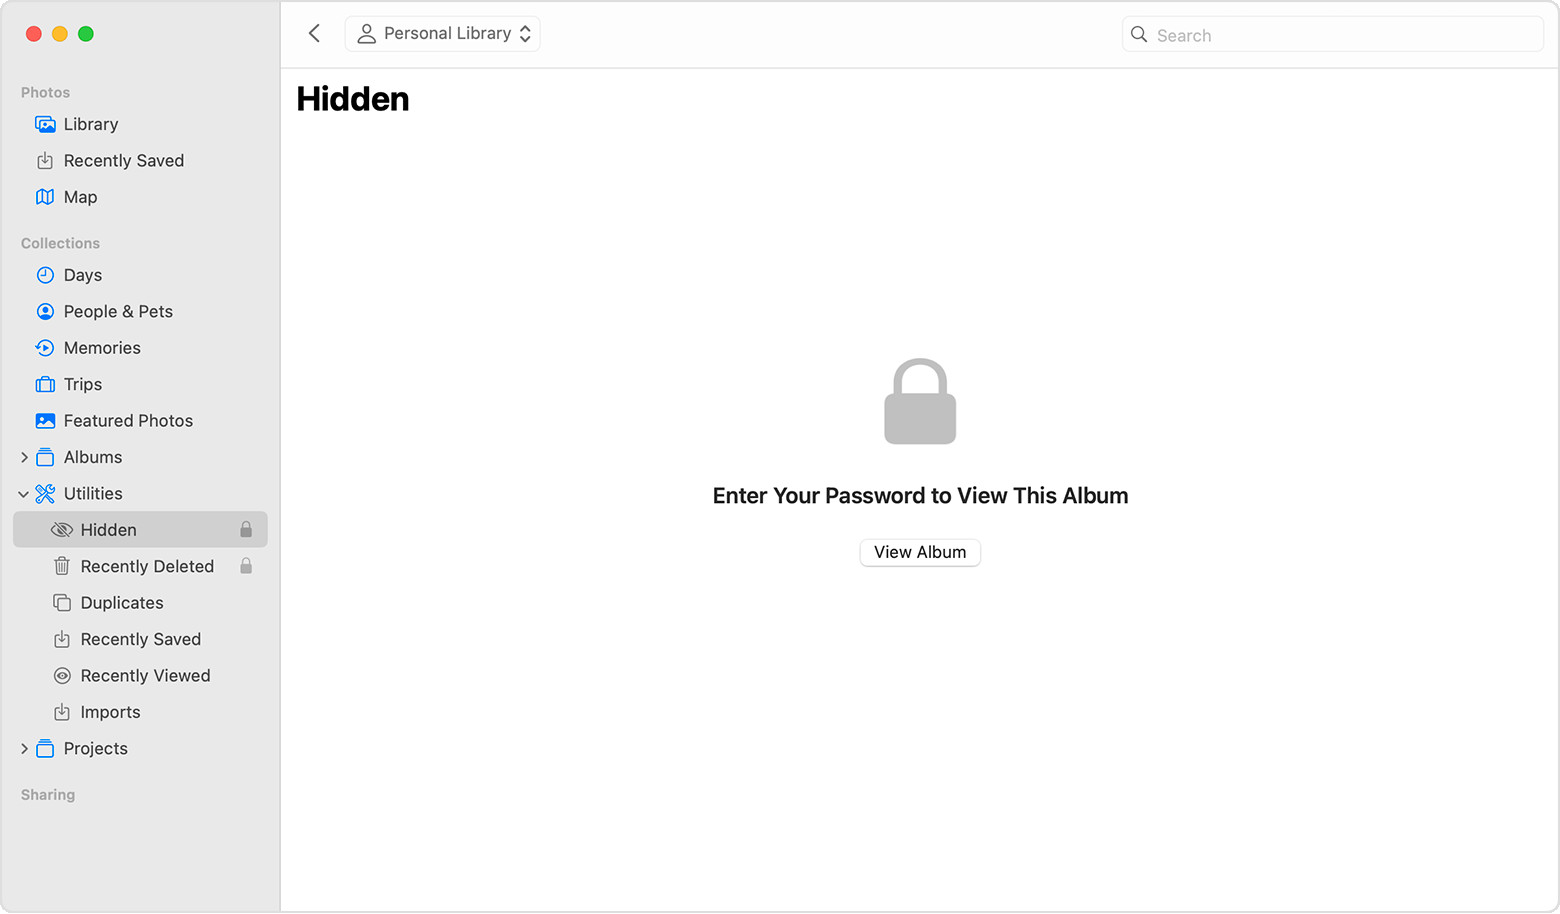 The Hidden album highlighted in the sidebar of the Photos app on macOS
Alt text: Screenshot of the macOS Photos app interface, with the ‘Hidden’ album clearly highlighted in the sidebar menu for easy navigation and access.
Making the Hidden Album Visible or Invisible on Mac
Unlike iPhone and iPad, the Hidden album on Mac is hidden by default. You need to actively choose to show it. To hide it again, simply go back to the “View” menu in the menu bar and uncheck “Show Hidden Photo Album”. This will remove the Hidden album from the sidebar until you choose to show it again.
Finding Hidden Photos on Apple Vision Pro
For Apple Vision Pro users, here’s how to find hidden photos:
-
Open Photos App: Open the Photos app on your Apple Vision Pro.
-
Go to Collections: In the Photos app, navigate to the sidebar and tap on “Collections”.
-
Scroll to Utilities: Scroll down within the Collections sidebar until you find the “Utilities” section.
-
Find the Hidden Album: In the Utilities section, tap on “Hidden”.
-
Unlock and Unhide (Optional): The Hidden album on Vision Pro will also be locked. Tap to view the album and authenticate using your Vision Pro credentials. To unhide a photo, tap and hold the photo or video, then select “Unhide”.
Making the Hidden Album Visible or Invisible on Apple Vision Pro
Similar to iPhones and iPads, you can control whether the Hidden album is visible in the Utilities section on Apple Vision Pro:
-
Open Settings: Go to the Settings app on your Apple Vision Pro.
-
Navigate to Photos Settings: Tap on “Apps”, and then select “Photos”.
-
Toggle “Show Hidden Album”: Scroll down and find the “Show Hidden Album” option. Toggle the switch to turn it on or off as desired.
By following these steps, you can confidently manage your hidden photos across all your Apple devices. Whether you needed to find hidden photos for rediscovering memories or to ensure your private images remain protected, Apple’s Photos app provides the tools you need.
