Shutterfly is a popular platform for creating personalized photo products like photo books, prints, and gifts. As you’re working on your projects, you might find yourself needing to remove some photos. Whether you’ve changed your mind about an image, or simply want to declutter your project, deleting photos from Shutterfly is a straightforward process. This guide will walk you through the steps and address common issues you might encounter.
Step-by-Step Guide to Deleting Photos on Shutterfly
Deleting photos within Shutterfly projects is generally simple. Here’s how to do it:
-
Open Your Shutterfly Project: First, navigate to the Shutterfly project you are working on. This could be a photo book, calendar, or any other customizable product. Ensure you have the project open in editing mode.
-
Locate the Photo to Delete: Browse through the pages of your project and find the specific photo you wish to remove. Photos are typically arranged on pages or in a photo tray at the bottom of your project view.
-
Select the Photo: Click on the photo you want to delete. A blue outline usually appears around the selected image, indicating it is active. Make sure you are selecting the photo itself and not just a surrounding frame or element.
-
Press the Delete Key: Once the photo is selected, simply press the “Delete” key on your keyboard. This key is often located in the upper right area of your keyboard, and may also be represented by an arrow.
-
Confirm Deletion (If Prompted): In some cases, Shutterfly might ask you to confirm that you want to delete the photo. If a confirmation window appears, click “Yes” or “Delete” to proceed with the removal.
By following these steps, the selected photo should be removed from your Shutterfly project.
Troubleshooting Common Photo Deletion Issues on Shutterfly
While deleting photos is usually easy, you might encounter some issues. Here are a few common problems and their solutions:
“Unable to delete page: covers and flaps cannot be removed from books” Error
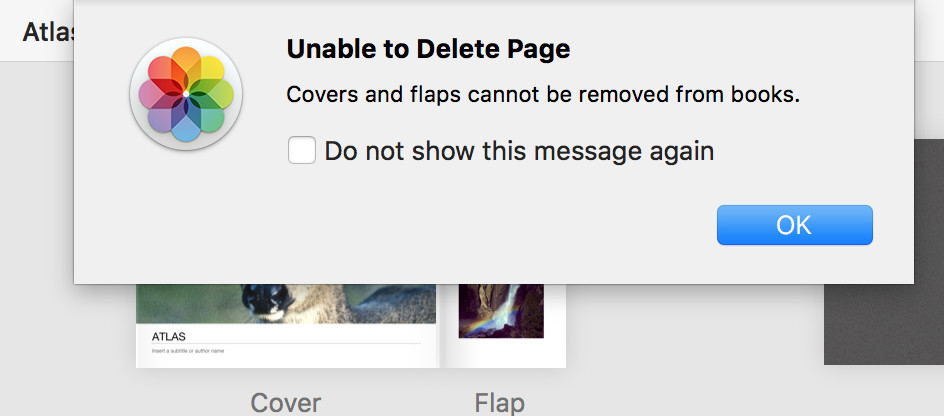 Error message "unable to delete page: covers and flaps cannot be removed from books" displayed in Shutterfly, appearing when attempting to delete a photo from the flap in "All Pages" view, highlighting the need to double-click the page for individual photo selection and deletion.
Some users, like in the original forum discussion, encounter an error message saying “unable to delete page: covers and flaps cannot be removed from books”. This often happens when trying to delete a photo from the cover or flap of a photo book while in the “All Pages” view.
Solution: This error typically occurs because you are in an overview mode where individual photo selection on flaps or covers is restricted. To fix this:
- Double-Click the Page: Navigate to the page containing the photo you want to delete (especially if it’s on a cover or flap). Double-click on that specific page to enlarge it and enter a detailed, single-page view.
- Select and Delete Again: In this enlarged view, select the photo again and press the Delete key. You should now be able to delete the photo without the error message.
This issue arises from Shutterfly’s interface, which sometimes requires you to be in a detailed page view to manipulate individual elements effectively, especially on special pages like covers.
No Delete Button Visible
Some users might look for a “Delete” button within the Shutterfly interface itself and not find one.
Solution: Shutterfly primarily uses the Delete key on your keyboard for photo removal. There isn’t a dedicated “Delete” button within the software interface for individual photos in the editing mode. Make sure you are using the Delete key on your keyboard after selecting the image.
Still Having Trouble? Check Your View Mode
Ensure you are in the correct editing mode where you can manipulate individual photos. If you are in a preview mode or a restricted view, you might not be able to delete photos. Usually, being in the project customization or editing section will allow photo deletion.
Conclusion
Deleting photos from Shutterfly projects is generally a simple process using the Delete key. By understanding the steps and troubleshooting common issues like the “flap error”, you can efficiently manage your photos and create your perfect Shutterfly project. Remember to always double-check before deleting to avoid accidentally removing a photo you intended to keep!