Do you want to easily add date stamps to your iPhone photos? Whether you’re documenting memories, tracking projects, or simply prefer having timestamps on your images, iOS offers a fantastic built-in solution. You can automate the process of date stamping your photos using the Shortcuts app, a powerful visual scripting tool that comes standard on every iPhone. Forget tedious manual editing – with Shortcuts, adding timestamps becomes a breeze.
This guide will walk you through a simple, step-by-step method to create your own “Date Stamp” shortcut. This shortcut will allow you to quickly and efficiently overlay the date taken directly onto your photos, saving you time and effort. Let’s dive in and learn how to effortlessly date stamp your iPhone photos!
-
Launch the Shortcuts App
The first step is to locate and open the Shortcuts app on your iPhone. It’s easily recognizable by its colorful, intertwined square icon. If you can’t find it on your home screen, swipe down to access Spotlight search and type “Shortcuts” to quickly locate and open the app.
 iOS Shortcuts app icon for automating photo timestamping
 -
Create a New Shortcut
Once you’re in the Shortcuts app, you’ll see a screen displaying any existing shortcuts you might have. To create a new one, look to the top right corner of the screen and tap the “+” button. This will initiate the creation of a brand new shortcut, ready for you to customize.
-
Name Your Shortcut
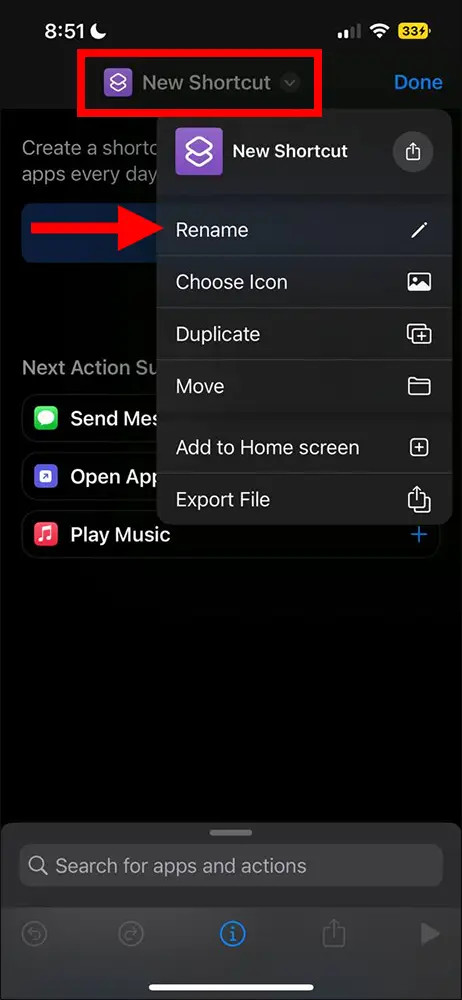
By default, your new shortcut will be named “New Shortcut”. Tap on this name at the top of the screen. From the menu that appears, select “Rename”. This is important for organization, especially if you plan to create more shortcuts in the future. A descriptive name will help you easily identify its function. For this tutorial, let’s name our shortcut “Timestamp”. This clearly indicates its purpose: to add timestamps to photos.
 Renaming the shortcut to "Timestamp" in the iOS Shortcuts app
 -
Add the “Select Photos” Action
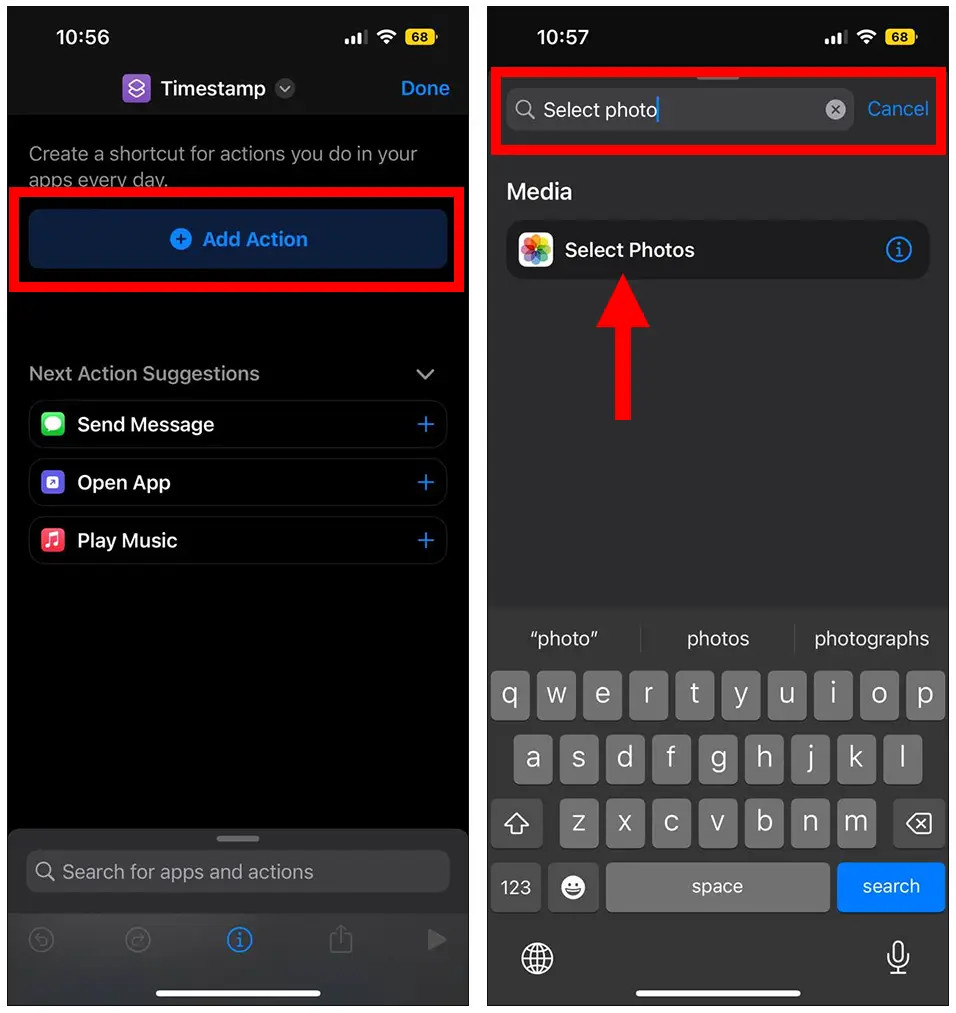
Now it’s time to start building the functionality of our shortcut. Tap the “Add Action” button. This opens up a search bar and a list of available actions. In the search bar at the top, type “Select Photos”. This will filter the actions to show the one we need. Tap on “Select Photos” to add it as the first step in our shortcut.
 Adding the "Select Photos" action in the Shortcuts app to choose photos for timestamping
After adding the action, you’ll see a down arrow on the “Select Photos” action box. Tap this arrow to reveal additional settings. For this shortcut, we only want to process photos, not videos. Therefore, untick the “Videos” option to ensure the shortcut only selects image files.
-
Incorporate the “Get Details of Images” Action
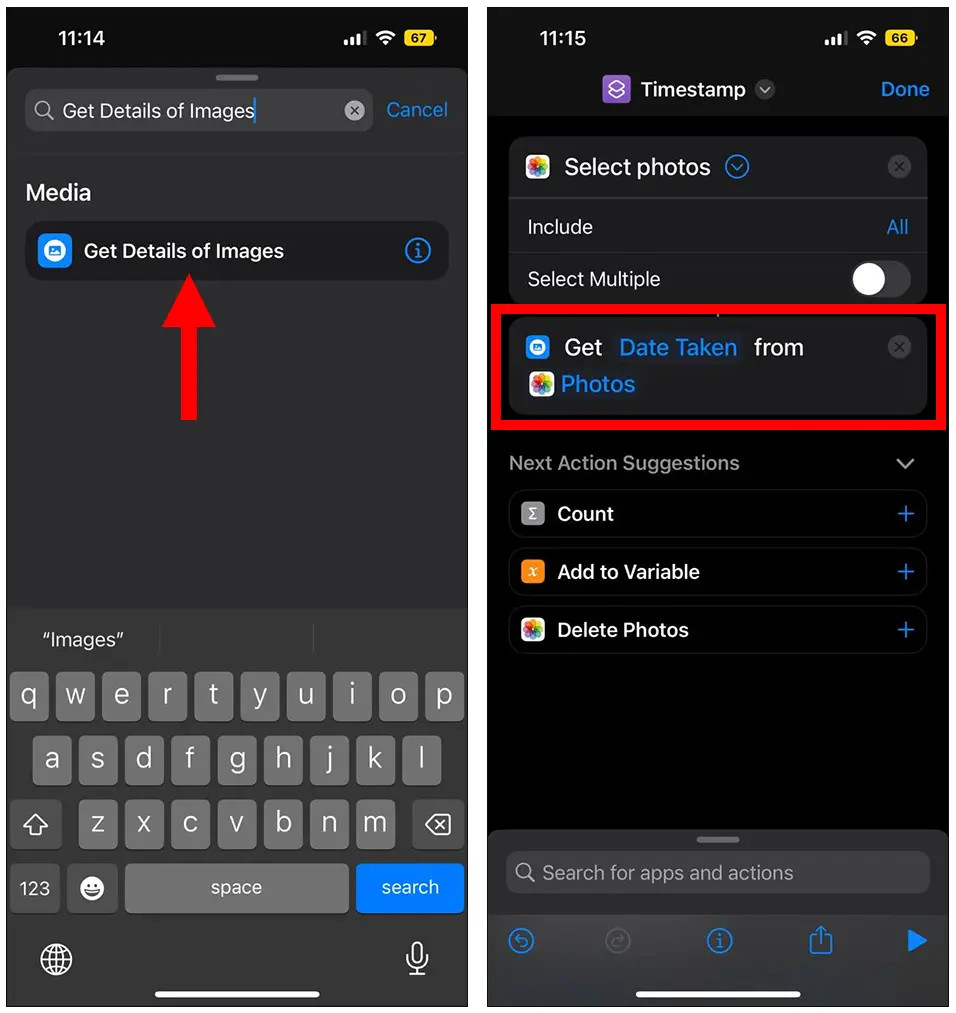
The next step is to retrieve the date information from the selected photos. Tap “Add Action” again and search for “Get Details of Images”. Select this action to add it to your shortcut workflow. This action extracts metadata from your photos, and we’re specifically interested in the date the photo was taken.
By default, the “Detail” variable in this action might be set to something else. Tap on the “Detail” variable. A list of metadata options will appear. Scroll through the list and select “Date Taken”. This tells the shortcut to extract the date and time the photo was captured.
 Using the "Get Details of Images" action to extract the date taken from iPhone photos
 -
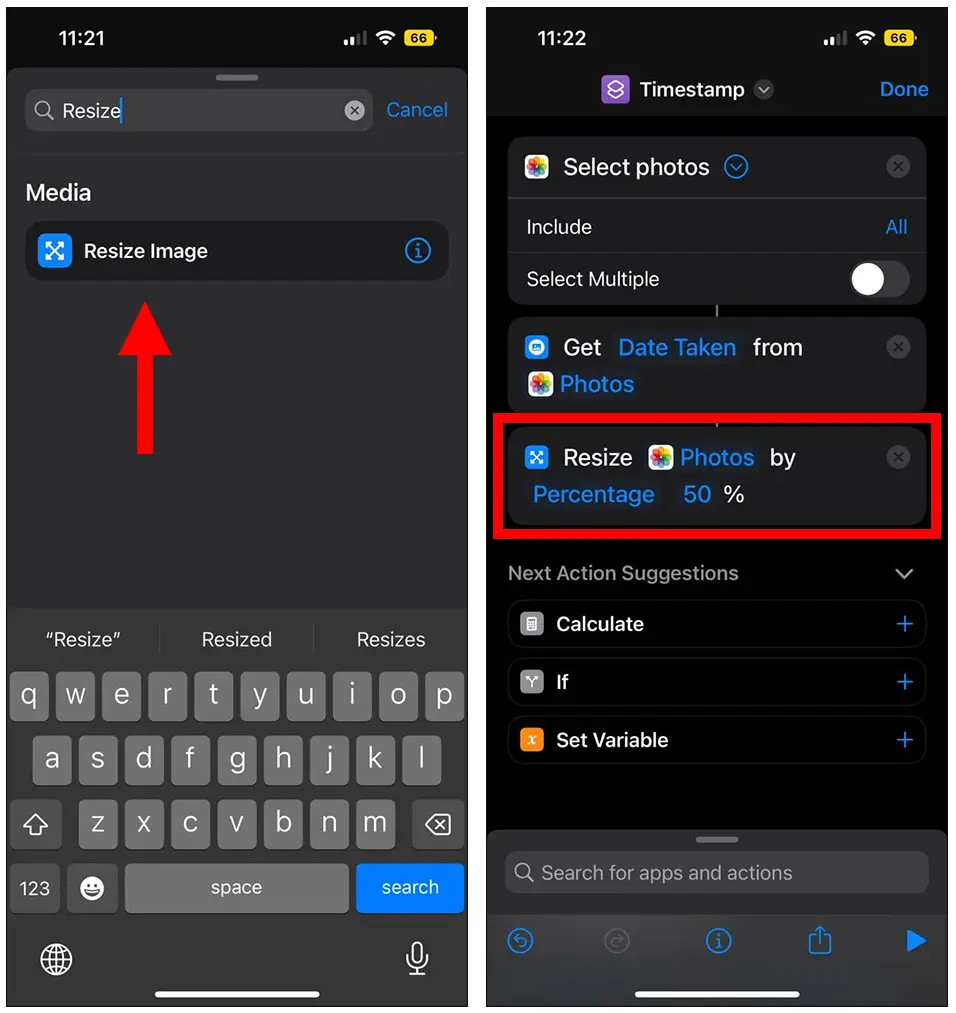
Add “Resize Image” Action (Important for Reliability)
This step might seem a little unusual, but it’s crucial for the shortcut to work reliably. Without resizing, you might encounter an error message saying, “There was a problem running the shortcut.” To avoid this, we’ll add a “Resize Image” action. Search for and add this action to your shortcut.
Ensure that the “Image” variable in the “Resize Image” action is set to “Photos”. Then, you need to specify a resize value. Reducing the image size slightly helps the shortcut process the image more efficiently. In this example, we’ll set the resize percentage to 50%. This will halve the dimensions of the photo while maintaining the aspect ratio.
 Adding the "Resize Image" action to ensure the shortcut runs smoothly when timestamping photos
 -
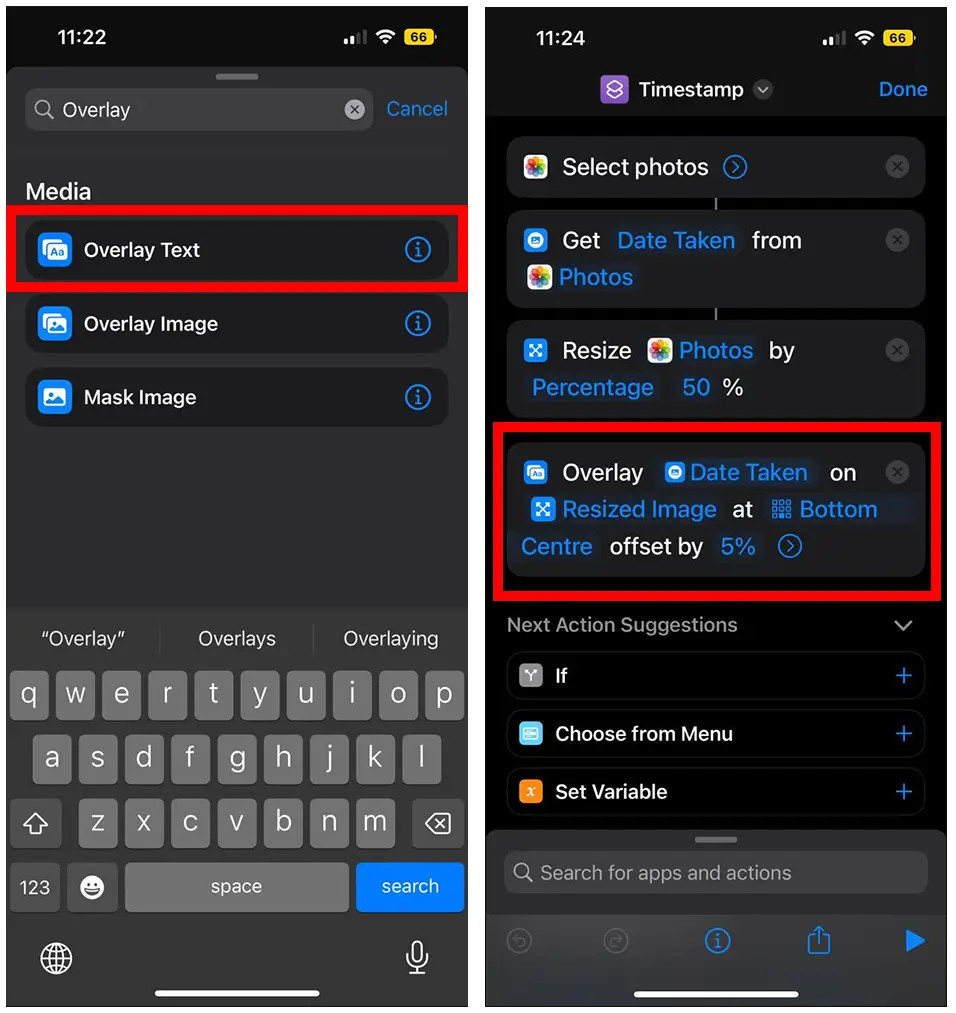
Overlay the Date with “Overlay Text” Action
Now for the core action: adding the timestamp to the photo. Add another action and search for “Overlay Text on Image” (or simply “Overlay Text”). Select this action. This action allows you to place text directly onto your image.
Tap on the “Text” variable in the “Overlay Text” action. Instead of typing in static text, we want to use the “Date Taken” metadata we extracted earlier. In the text input field, select “Date Taken” from the variable suggestions (it should appear above the keyboard). This dynamically inserts the date the photo was taken as the text overlay.
You can customize the appearance and placement of the timestamp. The “Overlay Text” action offers options to choose the position of the text on the image. In our example, we’ve chosen “Top Center” with an offset of 5%. This places the timestamp near the top center of the photo, slightly offset from the edge.
If you tap the down arrow on the “Overlay Text” action, you’ll reveal even more customization options. You can adjust the font, font size, font color, and text alignment to personalize the look of your timestamp. Experiment with these settings to achieve your preferred style.
 Using the "Overlay Text" action to add the extracted date as a timestamp on the photo
 -
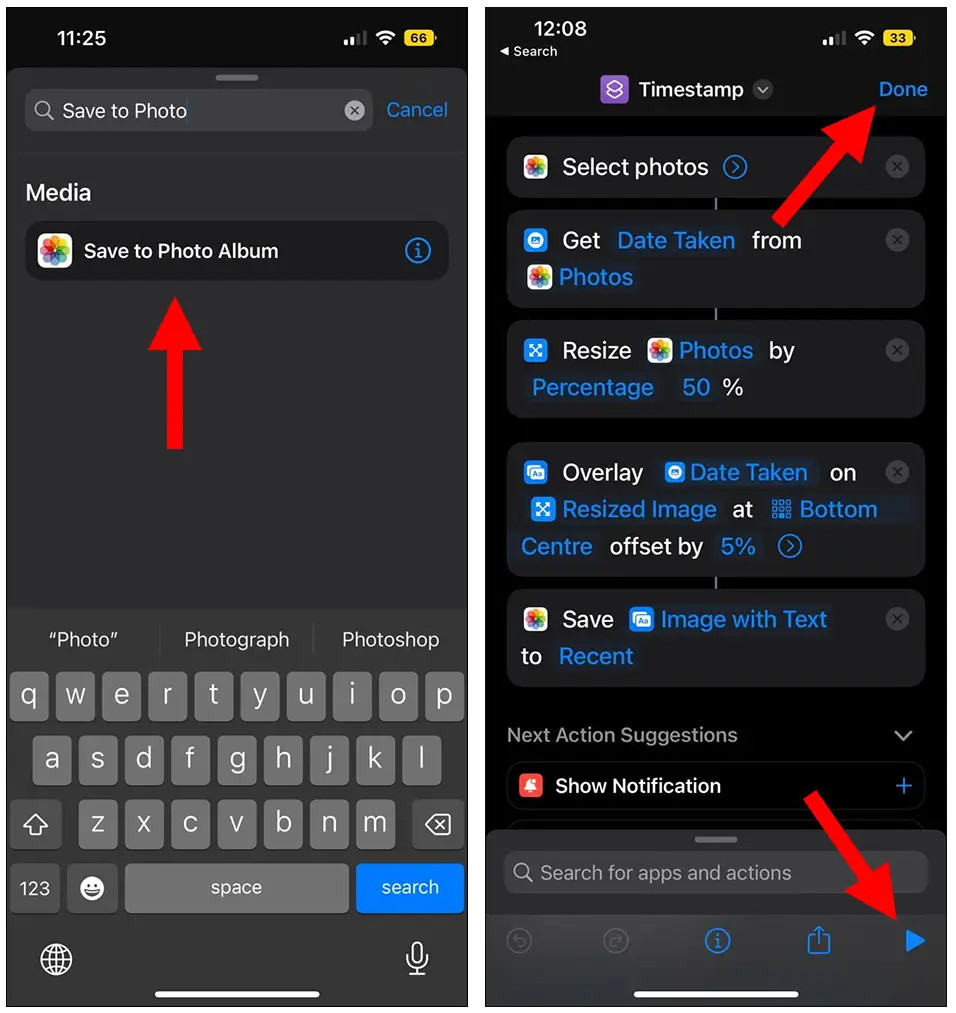
Save the Timestamped Photo
The final action is to save your newly timestamped photo. Add one last action: “Save Photo to Album”. Search for this action and add it to the end of your shortcut. This action saves the modified image to your Photos app.
By default, the “Save Photo to Album” action saves the new image to your “Recents” album. You can tap on “Recents” to choose a different album if you prefer to save your timestamped photos to a specific album.
 Adding the "Save to Photo Album" action to save the timestamped photo to the iPhone photo library
 -
Test and Save Your Shortcut
Your “Timestamp” shortcut is now complete! To test it out, press the Play icon located at the bottom right of the screen. The shortcut will run, prompting you to select a photo from your library. After you select a photo, the shortcut will process it, overlay the date, and save the timestamped version to your photo album.
If everything works as expected, tap the “Done” button at the top right of the screen to save your shortcut. The “Timestamp” shortcut will now appear in your main Shortcuts app screen, ready to use whenever you need to date stamp a photo.
Running Your Timestamp Shortcut
To use your shortcut, simply open the Shortcuts app and tap on the “Timestamp” shortcut. Alternatively, for even faster access, you can add the shortcut to your iPhone’s Home Screen. To do this, tap the three dots “…” on the “Timestamp” shortcut, then tap the share icon (the square with an arrow pointing upwards), and select “Add to Home Screen”. This creates an app-like icon on your home screen that directly runs your timestamp shortcut with a single tap.
Advanced Customization
This guide provides a basic date stamping shortcut. You can further customize it to meet your specific needs. For example, you could:
- Add GPS Coordinates: Incorporate the “Get Current Location” action and overlay GPS coordinates along with the date.
- Process Multiple Photos: Modify the “Select Photos” action to allow selecting multiple photos at once and loop through them to apply timestamps in batch.
- Customize Date Format: Adjust the date format displayed by using the “Format Date” action to change how the date appears on your photos.
- Different Timestamp Styles: Experiment with different fonts, colors, sizes, and positions for your timestamp to create a unique look.
With iOS Shortcuts, the possibilities are vast. Start with this simple date stamping shortcut and explore the app to discover even more ways to automate tasks and enhance your iPhone photography workflow!
