In today’s digital age, images are a crucial part of online content. However, large image file sizes can significantly slow down website loading times, impacting user experience and SEO rankings. Optimizing your images by reducing their file size is essential for website performance and efficiency. This guide will walk you through the various methods and best practices to effectively change the file size of your photos, ensuring they are web-friendly without compromising quality.
Understanding how to change the file size of a photo involves choosing the right file format and applying appropriate compression techniques. Different file formats are suited for different types of images and purposes, and understanding these differences is the first step towards effective image optimization. Let’s delve into the most common image file formats and how to compress them.
Understanding Image File Formats: JPEG, PNG, and GIF
When it comes to image file formats for the web, JPEG, PNG, and GIF are the most prevalent. Each format has its strengths and weaknesses regarding compression and image quality.
Compressing a JPG (JPEG)
JPEG (or JPG) is a popular format, especially for photographs and complex images with many colors. JPEG uses lossy compression, which means some image data is discarded during compression to reduce file size. The key factor in JPEG compression is quality.
When you save an image as a JPEG, you’re typically given a quality setting, often represented as a slider, percentage, or quality level (e.g., low, medium, high, maximum, or a numerical range from 0-100 or 0-12). A lower quality setting results in a smaller file size but more noticeable image degradation, while a higher quality setting retains more image detail but yields a larger file size.
The strategy for JPEG compression is to find the lowest acceptable quality that still meets your visual requirements. Start with a relatively high quality setting and gradually reduce it, checking the image for any undesirable artifacts or loss of detail.
For instance, consider these examples of a flower image saved at different JPEG quality settings:
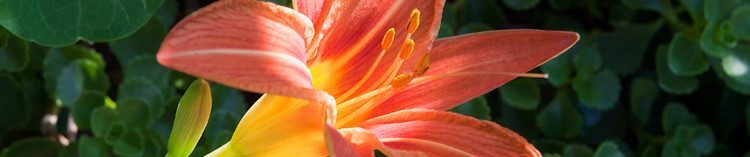
100% quality, 103 KB file size: Seldom necessary due to its large size with minimal visual improvement over lower settings.
 Day lily flower and buds at 100% quality
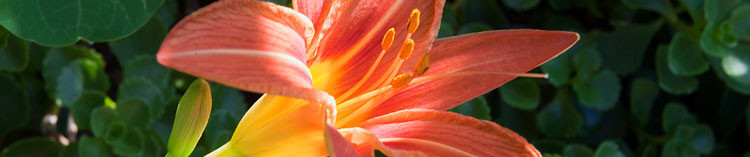
80% quality, 48 KB file size: Visually almost identical to 100% quality but with significant file size reduction.
 Day lily flower and buds at 80% quality
60% quality, 28 KB file size: Most viewers would struggle to distinguish this from the higher quality versions, yet it’s a quarter of the size of the 100% quality image.
 Day lily flower and buds at 60% quality
40% quality, 17 KB file size: Still acceptable for many general purposes, offering a substantial reduction in file size and faster loading times.
 Day lily flower and buds at 40% quality
20% quality, 12 KB file size: Noticeable degradation in image quality, becoming visibly pixelated and less appealing.
 Day lily flower and buds at 20% quality
0% quality, 7 KB file size: Extreme compression results in significant blockiness and poor image quality, generally unsuitable for most uses.
 Day lily flower and buds at 0% quality
Sample photo from FCIT’s collection of stock plant photos on the ClipPix ETC website.
Another technique to reduce JPEG file size is blurring. Images with fewer sharp details compress more effectively. Blurring parts of an image, especially backgrounds, can significantly decrease file size without detracting from the main subject, particularly useful for background images.
Consider this day lily photo with a detailed background, initially 77 KB at 60% JPEG quality:
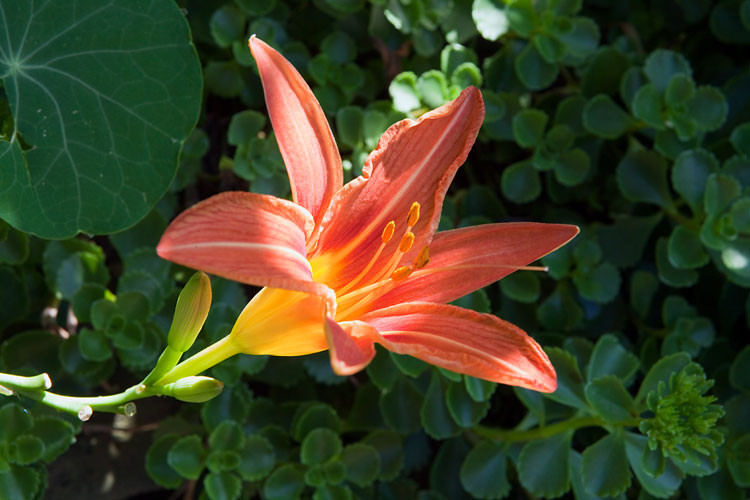 Day lily with sharp background
By selectively blurring the background and saving at the same 60% quality, the file size reduces to 54 KB, a 30% decrease, leading to faster loading times and a more aesthetically pleasing image with focus on the flower.
 Day lily with blurred background
It’s crucial to remember that JPEG is a lossy format. Each time you save a JPEG, you lose some quality. Always retain your original image in a lossless format like TIFF or PSD. Export to JPEG only for final web use to avoid cumulative quality degradation.
Compressing a GIF
GIF is traditionally used for simple graphics with limited colors and solid areas. GIFs are restricted to a palette of 256 colors. Reducing the number of colors in the palette is the primary way to decrease GIF file size.
For optimal GIF compression, aim for color counts close to powers of 2: 256, 128, 64, 32, 16, 8, 4, or 2. For example, reducing a 33-color image to a 32-color palette yields a significant file size reduction, whereas reducing from 32 to 31 colors offers minimal further compression.
When saving a GIF, you can also choose a dither pattern to minimize banding in gradients by simulating colors not in the reduced palette. “Diffusion” dither is often the most effective. Transparency is another GIF feature; ensure “transparency” is selected if needed. Settings like “Web snap” and “Matte” are largely obsolete in modern web design.
GIFs are also known for supporting animation, though PNG is increasingly becoming a viable alternative in this area as well.
 Dancing robot GIF example
Sample graphic from FCIT’s collection of robot illustrations on the TIM website.
Compressing a PNG
PNG (Portable Network Graphics) combines features of both JPEG and GIF and is gaining popularity for web graphics. It comes in two main types relevant to compression: PNG-8 and PNG-24.
PNG-8 is similar to GIF, best suited for graphics with few colors and solid colors like logos. PNG-8 generally offers smaller file sizes than GIFs for similar images. Like GIF, PNG-8 uses indexed color and supports transparency. When exporting to PNG-8, you’ll adjust settings similar to GIF: color reduction, dithering, and transparency.
Consider this cartoon graphic. Saved as a 32-color GIF, it’s 13.6 KB.
 Cartoon saved as GIF example
The same cartoon, saved as a 32-color PNG-8 with identical settings, is only 10.2 KB, achieving a 25% file size reduction.
Cartoon saved as PNG-8 example
Sample graphic from FCIT’s collection of tech cartoons on the TIM website.
PNG-24 is designed for continuous-tone images like photographs, similar to JPEG, but it uses lossless compression. This means PNG-24 retains all image data, resulting in higher quality but larger file sizes compared to JPEGs. There are no quality settings to adjust with PNG-24, as it’s inherently lossless.
For example, a photo of macaws as a PNG-24 is 400 KB, quite large.
 Macaws photo saved as PNG-24 example
The same photo as a maximum quality (100%) JPEG is 259 KB.
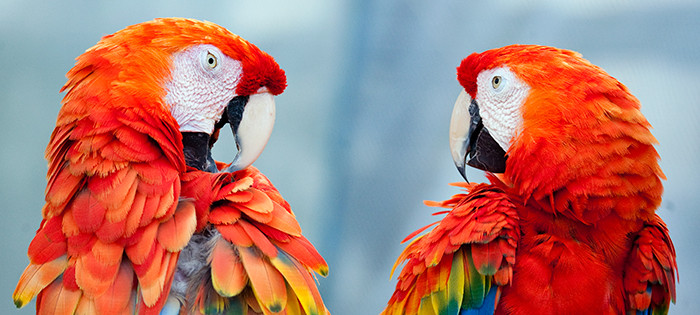 Macaws photo saved as maximum quality JPEG example
And at a high quality (60%) JPEG, it’s only 69 KB.
 Macaws photo saved as high quality JPEG example
Sample photo from FCIT’s collection of stock animal photos on the ClipPix ETC website.
While PNG-24 files can be significantly larger than JPEGs, there are compelling reasons to use them:
- Transparency: PNG-24 supports transparency, which JPEGs do not.
- Lossless Quality: For images where quality is paramount and no compression artifacts are acceptable.
- Sharp Lines and Text: PNG-24 excels at preserving sharp lines and text in screenshots or graphics, avoiding the “smudging” effect common with JPEG compression on text.
Step-by-Step Guide to Changing File Size
Changing the file size of a photo is generally straightforward and can be accomplished using various tools:
1. Using Image Editing Software:
Popular image editing software like Adobe Photoshop, GIMP (free), and online editors like Pixlr provide robust options for controlling image file size.
- For JPEG: When saving or exporting, adjust the “Quality” setting. Experiment with different quality levels to find the optimal balance between file size and visual quality.
- For GIF & PNG-8: Reduce the number of colors in the color palette. Most software offers options to select the number of colors (e.g., 256, 128, 64, etc.).
- For PNG-24: While PNG-24 is lossless, you can still reduce file size by cropping unnecessary areas or resizing the image dimensions.
2. Online Image Compression Tools:
Numerous online tools are designed specifically for image compression. Websites like TinyPNG, ImageOptim (for Mac), and Compressor.io allow you to upload images and compress them automatically. These tools often use smart compression techniques to reduce file size without significant quality loss. They support various formats, including JPEG, PNG, and sometimes GIF.
3. Batch Image Compression:
For optimizing multiple images at once, batch compression tools are highly efficient. Software like ImageOptim (Mac), Trimage (Linux), and online batch compressors can process multiple images simultaneously, saving considerable time.
Best Practices for Image File Size Reduction
- Choose the Right Format: Select JPEG for photographs and complex images, PNG-8 for simple graphics and logos, and PNG-24 when lossless quality or transparency is essential.
- Optimize Compression Settings: Experiment with quality settings for JPEGs and color palettes for GIFs and PNG-8s to find the best balance between file size and acceptable quality.
- Resize Images: Reduce image dimensions to match the display size needed on your website. Displaying a 2000px wide image in a 500px container is inefficient. Resize images to the intended display dimensions before uploading.
- Consider Progressive JPEGs: Progressive JPEGs load in stages, providing a preview of the image quickly, improving perceived loading speed, especially for larger images.
- Use CSS Sprites for Icons: Combine multiple small icons into a single image file and use CSS to display individual icons. This reduces HTTP requests and can improve loading times.
Conclusion
Changing the file size of a photo is a crucial step in web optimization and digital content creation. By understanding the characteristics of different image formats like JPEG, PNG, and GIF and applying appropriate compression techniques, you can significantly reduce file sizes, improve website loading times, and enhance user experience without sacrificing visual quality. Regularly optimizing your images ensures your website performs efficiently and effectively, contributing to better SEO and user engagement.
Related pages
What is the difference between bitmap and vector images?
What is bit depth?