Facebook, now known as Meta, remains a central platform for connecting with loved ones, staying informed, and engaging with communities. Many of us have been Facebook users for years, accumulating countless photos, some without backups. It’s a common scenario: you accidentally delete photos or a post containing precious memories, or even consider account deletion, and then wonder, “How Can I Recover Deleted Photos From Facebook?”
Don’t worry, it’s often possible to recover deleted Facebook photos, even those from years past. This guide will explore various methods to recover deleted Facebook photos on Windows & Mac computers, as well as on iPhones & Android devices.
Are Facebook Photos Really Gone Forever When Deleted?
The answer to whether your deleted Facebook photos are permanently gone depends on how you deleted them. Facebook’s system has different levels of deletion, offering chances for recovery at various stages.
If you delete photos directly from Profile > Your Photos or Albums, these Facebook photos are indeed permanently deleted from those sections. Deleting an album also removes the photos within it and the associated posts from your profile views.
Alt text: User navigating to the Photos section within their Facebook profile to manage albums.
However, if you deleted a post that included photos, the situation is different. Instead of permanent deletion, Facebook moves these posts to the Trash folder. Photos in the Trash are kept for 30 days. During this period, you can restore the post, effectively recovering your Facebook photos.
Alt text: Screenshot showing the Trash folder within Facebook’s Activity Log, where deleted posts are temporarily stored.
Account deletion also presents a nuanced scenario. Facebook offers two account cancellation options: temporary deactivation and permanent deletion.
- Temporarily deactivated account: Your profile is hidden, but your data is retained. Simply logging back into Facebook reactivates your account, and your photos become accessible again.
- Permanently deleted account: While you initiate permanent deletion, there’s a grace period. You can cancel the deletion within 30 days by logging back in. Even after 30 days, Facebook doesn’t instantly erase everything. Meta states it can take up to 90 days to fully delete all data from their systems. This extended period might offer a slim window for assistance from Facebook support in specific circumstances, although it’s not guaranteed.
Alt text: Facebook’s account deletion settings, highlighting the options for deactivation and permanent deletion.
Is Facebook Photo Recovery Possible?
Yes, generally, you can recover deleted Facebook pictures. The feasibility depends on how and when they were deleted.
For photos or posts in the Trash, restoration is straightforward, as described earlier. For photos linked to a deactivated or recently deleted account, reactivating or canceling deletion is the primary recovery method.
Even for permanently deleted photos from your Profile or Albums, recovery isn’t entirely impossible. If you have a backup of your device where you originally uploaded the photos, or if you saved copies of Facebook photos to your computer or phone (even if those local copies are now deleted), data recovery methods can often retrieve them.
Step-by-Step Guide: How to Recover Deleted Photos on Facebook
Let’s explore the practical methods for Facebook photo recovery, starting with Facebook’s built-in features, which are most effective for recently deleted items.
Method 1: Recover from the Facebook Trash Folder
The Trash folder is your first stop for recovering photos deleted within the last 30 days.
-
Access Settings & Privacy: Click your profile avatar in the top right corner of Facebook, then select “Settings & Privacy” from the dropdown menu.
-
Go to Activity Log: Expand “Settings & Privacy” and click on “Activity log”.
Alt text: Navigating to the Activity Log within Facebook settings to access deleted activity.
-
Open the Trash: In the Activity Log menu on the left, click “Trash”.
Alt text: The Trash option highlighted in the Facebook Activity Log menu.
-
Restore Photos: Locate the post containing the deleted photos. Click the three-dot icon (“…”) next to the post, and select “Restore to profile”.
Alt text: Restoring a deleted post from the Trash back to the Facebook profile.
-
Download Photos: The restored post and photos will reappear on your Facebook timeline. You can now access the photos, download them, and save them to your device.
Method 2: Retrieve Photos from Your Facebook Archive
Facebook allows users to archive their account information, including photos. If you’ve previously downloaded your Facebook archive, it might contain backups of your deleted photos. Facebook keeps archives available for download for a few days after creation.
How to Check for and Download Your Facebook Archive:
-
Log into Facebook: Access your Facebook account through a web browser.
-
Go to Your Information: Visit the Accounts Center at
https://accountscenter.facebook.com/. Navigate to “Account settings” > “Your information and permissions” > “Download your information”.Alt text: Accessing the Download Your Information section within Facebook’s Account Center settings.
-
Check Available Archives: Look for available downloads. If an archive containing your photo backups is listed, select it and click “Download”.
Alt text: Selecting an available Facebook archive to download from the list.
-
Enter Password: You’ll be prompted to enter your Facebook password for security verification.
Alt text: Password entry prompt before downloading a Facebook archive.
-
Access Photos: Once downloaded, the archive will be a zip file (usually named “facebook-“). Unzip the file and look for a “Media” or “Photos” subfolder. Your backed-up photos should be within these folders.
Alt text: Locating photos within the Media folder of a downloaded Facebook archive zip file.
Tip: Archiving Facebook Data for Future Backup:
To proactively back up your Facebook data, including photos, for future recovery:
-
Navigate to Download Your Information: Follow steps 1 & 2 above to reach the “Download your information” section.
-
Initiate Download: Click “Download or transfer information”.
Alt text: Starting the process to download or transfer Facebook information for backup.
-
Choose Information Type: Select the Facebook account/profile and the types of information to include in the archive (e.g., posts, photos, videos).
Alt text: Selecting the types of Facebook data to include in the archive download.
-
Select Download to Device: Choose “Download to device”.
-
Customize and Create File: Specify the date range and media quality. Click “Create files”. Facebook will prepare your archive for download.
Alt text: Customizing download settings like date range and media quality before creating the Facebook archive file.
Method 3: Cancel Facebook Account Deletion
If you’ve initiated account deletion within the last 30 days, you can cancel it to restore your account and photos.
- Log In: Simply log back into your Facebook account using your credentials.
- Cancel Deletion: Facebook should automatically prompt you with a “Cancel Deletion” option. Click this to reactivate your account and restore access to your photos.
Method 4: Contact Facebook Support
For account deletions older than 30 days but within 90 days, reaching out to Facebook support might offer a slim chance of recovery. While not guaranteed, it’s worth trying. Visit the Facebook Help Center and look for contact options or support forms related to account recovery or data restoration.
Alt text: The Facebook Help Center interface, suggesting options for seeking support and assistance.
Recovering Permanently Deleted Facebook Photos on Windows & Mac
What if your photos are permanently deleted from Facebook’s Trash, or you need to recover photos deleted years ago? The good news is that if you originally uploaded photos from your computer or saved copies locally, recovery is still possible using data recovery software or system backups.
Method 5: Use Data Recovery Software for Permanently Deleted Photos
For photos permanently deleted from your computer, or if you lack backups, data recovery software is a powerful solution. These programs scan your device at a deep level to find recoverable files, even those deleted long ago. Cisdem Data Recovery is a recommended tool for this purpose.
Cisdem Data Recovery stands out for several reasons:
- Extensive File Type Support: Recovers a wide range of image formats (JPG, PNG, TIFF, GIF, RAW formats from cameras, and more).
- Device Versatility: Works with internal and external drives, SSDs, HDDs, USB drives, SD cards, and other storage media on both Windows and Mac.
- Photo Repair: Can repair corrupted JPEG, PNG, and other image files.
- Efficient Search & Filtering: Offers filters and preview options to quickly locate and identify your Facebook photos.
- Additional Features: Includes disk backup, bootable drive creation, resume scanning, and recovery to cloud services.
How to Recover Facebook Photos with Cisdem Data Recovery:
-
Download and Install: Download and install Cisdem Data Recovery on your Windows or Mac computer.
Free Download Windows 11/10/8/7 Free Download macOS 10.15 or later
-
Select Disk and Scan: Launch Cisdem, choose “Hardware Disk” or “SD Card” based on where your photos were stored. Select the relevant drive or partition and click “Search for lost files”.
 recover facebook photo cisdem 01
 -
Filter and Preview Photos: Go to “Type > Picture”. Use format filters or keywords to refine your search for Facebook photos. Preview recoverable photos by double-clicking on them.
Alt text: Filtering recovered files by picture type and previewing photos in Cisdem Data Recovery.
-
Recover Photos: Select the photos you want to recover by checking their boxes. Click “Recover” and choose a safe location (different from the original drive) to save the recovered photos.
Alt text: Selecting photos for recovery and choosing a destination folder in Cisdem Data Recovery.
Method 6: Recover from System Backups (Windows & Mac)
If you utilize built-in backup features on Windows or Mac, restoring deleted Facebook photos can be straightforward.
Windows File History:
If you use Windows File History to back up to an external drive:
-
Connect Backup Drive: Connect your File History backup drive to your Windows PC.
-
Open File History: Search for “Restore your files with File History” in the Windows search bar and open the tool.
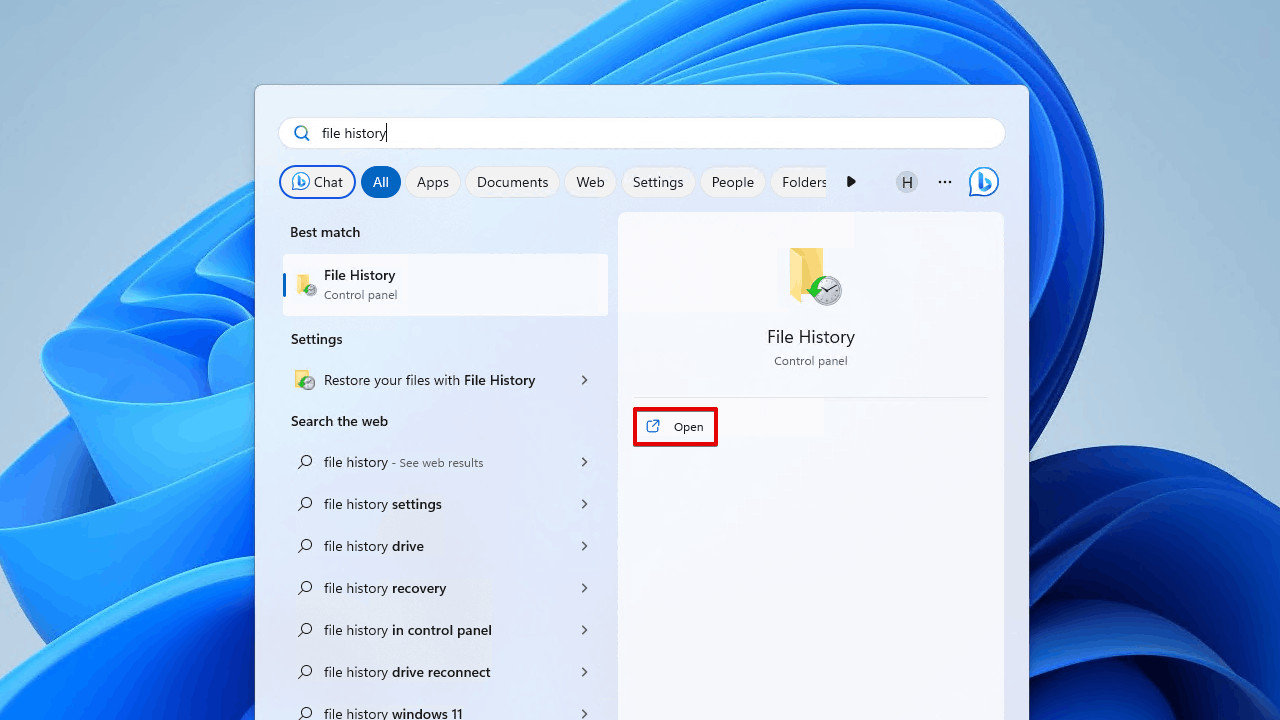 recover facebook photo file history 01
 -
Locate and Preview Photos: Browse through the backed-up folders to find your photos. Preview and select the desired photos.
-
Restore Photos: Click the “Restore” button to recover your deleted Facebook photos to their original location.
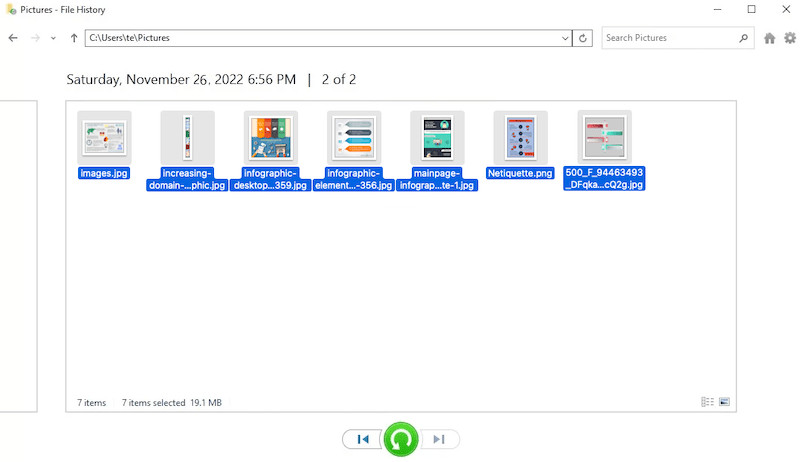 recover facebook photo file history 02
macOS Time Machine:
For Mac users using Time Machine:
-
Connect Backup Drive: Connect your Time Machine backup drive.
-
Enter Time Machine: Click the Time Machine icon in the menu bar and select “Enter Time Machine”.
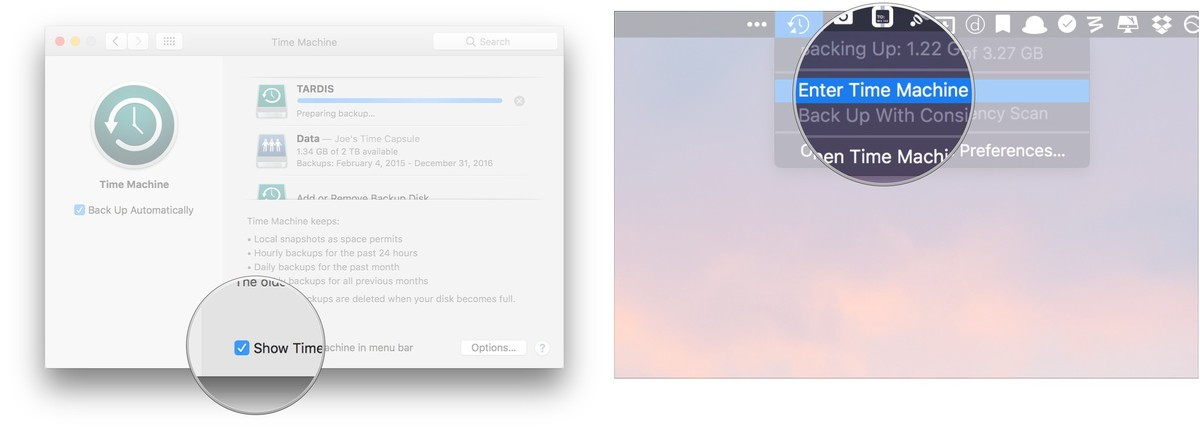 recover facebook photo time machine 01
 -
Browse and Preview: Navigate through Time Machine’s timeline to find backups from dates when your photos were present. Preview the photos you want to recover.
-
Restore Photos: Select the photos and click “Restore” to recover them to your Mac.
 recover facebook photo time machine 02
Cloud Backups:
If you use cloud storage services like iCloud, Dropbox, Google Drive, or OneDrive, check their respective web interfaces or desktop apps. Look for your photos in the main storage area or in their “Trash” or “Deleted files” folders, and restore them as needed.
Recovering Deleted Facebook Photos on iPhone or Android
If you primarily use the Facebook app on your phone, photos might still be recoverable from your phone itself, even after deletion from Facebook.
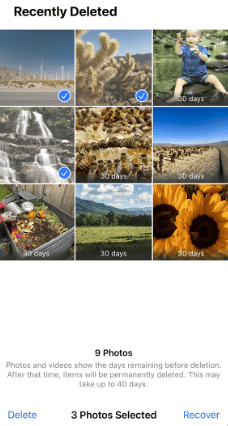
Method 7: Check the “Recently Deleted” Folder on Your Phone
Phones have “Recently Deleted” or “Trash” folders for photos, similar to Facebook’s Trash.
iPhone:
-
Open Photos App: Launch the “Photos” app on your iPhone.
-
Go to Recently Deleted: Tap “Albums” at the bottom, scroll down to “Other Albums,” and select “Recently Deleted”.
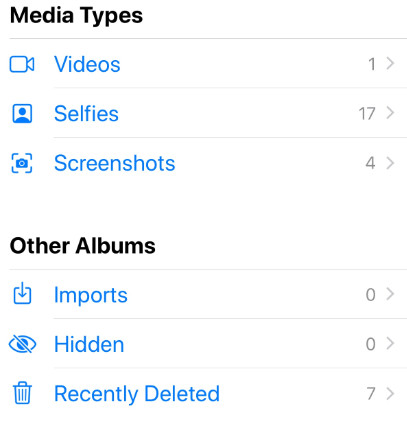 recover facebook photo iphone 1
 -
Recover Photos: Select the deleted photos and tap “Recover”.
 recover facebook photo iphone 02
Android:
-
Open Gallery App: Open your phone’s Gallery app (or Google Photos).
-
Check Trash/Bin: Look for a “Trash” or “Bin” folder within the app’s menus or albums. The location may vary by Android device. For example, in Google Photos, it’s in the “Library” tab, then “Trash”.
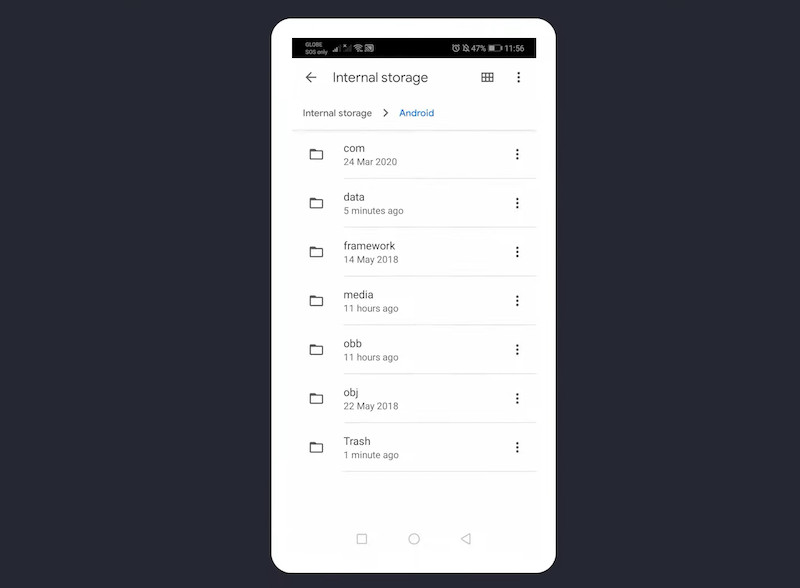 recover facebook photo android
 -
Restore Photos: Select the deleted photos and tap “Restore”.
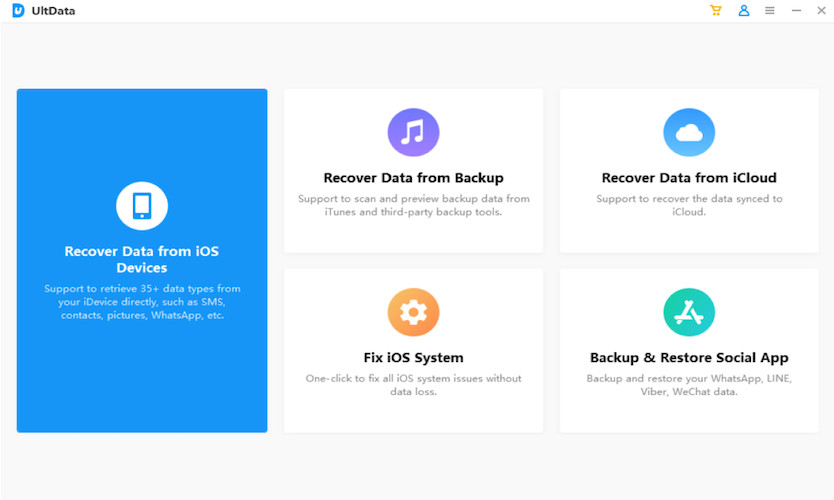
Method 8: Mobile Data Recovery Software (iPhone & Android)
For permanently deleted photos on your phone, or if the “Recently Deleted” folder is empty, mobile data recovery software can help. FoneLab iPhone Data Recovery (for iOS) and FoneLab Android Data Recovery are popular options.
Using FoneLab Data Recovery:
-
Download and Install: Download and install the appropriate FoneLab software for your phone (iOS or Android) on your computer.
Free Download Windows 11/10/8/7 Free Download macOS 10.10 or later
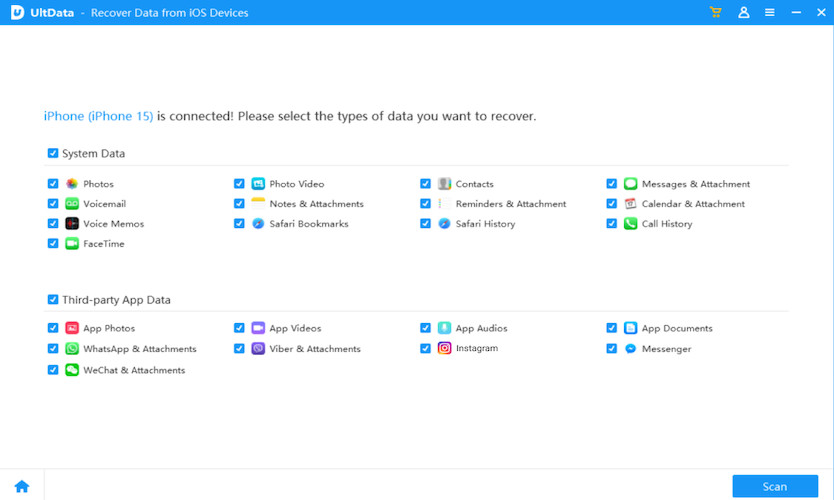
-
Run FoneLab and Connect Phone: Launch FoneLab and choose “Recover from iOS Device” or “Recover from Android Device”. Connect your phone to your computer via USB.
 recover facebook photo fonelab 1
 -
Start Scan: Click “Start Scan” to allow FoneLab to scan your phone for deleted data.
 recover facebook photo fonelab 2
 -
Preview and Recover: After scanning, preview recoverable photos. Select the photos you need and click “Recover” to save them to your computer.
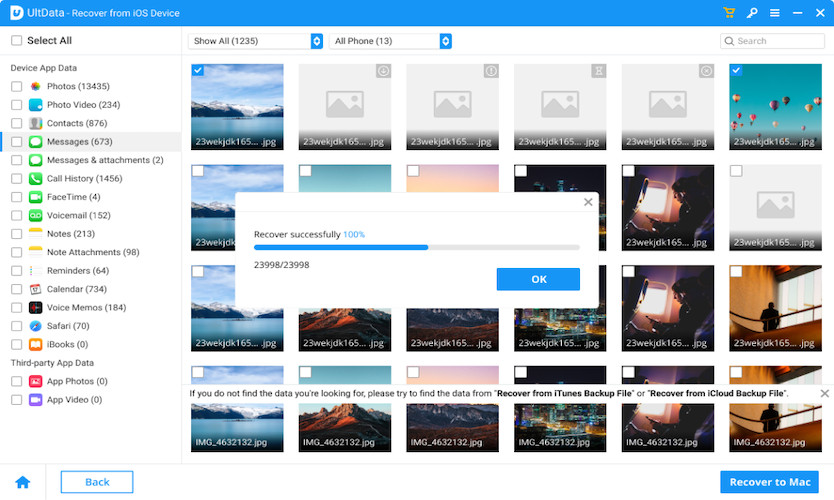 recover facebook photo fonelab 3
FAQs About Deleted Facebook Photos
1. How to permanently delete Facebook photos?
Method 1: Delete from Photos Section
-
Go to your Facebook profile > “Photos”.
-
Click the photo, then the three-dot “…” icon > “Delete photo”.
Alt text: Accessing the delete option for a photo within the Facebook Photos section.
-
Confirm deletion.
Alt text: Confirmation prompt for deleting a Facebook photo.
Method 2: Delete via Trash
-
For a post with photos, click the three-dot “…” icon > “Move to trash”.
Alt text: Moving a Facebook post to the Trash folder.
-
Go to “Settings & Privacy” > “Activity log” > “Trash”.
-
Find the post, click the three-dot “…” icon > “Delete” > “Delete” to permanently remove it and its photos.
Alt text: Permanently deleting a post from the Facebook Trash folder.
2. Why are deleted Facebook photos sometimes still viewable?
Even after deletion, Facebook retains copies of your data on its servers for a period. This is for potential recovery scenarios, like accidental deletions or account reactivation. This backup system is why recovery is often possible within a certain timeframe. Complete removal from Facebook’s servers can take up to 90 days after permanent account deletion.
3. Is there a free Facebook photo recovery app?
Directly recovering photos from Facebook using a free app is unlikely due to Facebook’s privacy and security policies. However, free data recovery software like PhotoRec or Recuva can be used to recover photos from your computer’s hard drive if you had local copies. Keep in mind that free tools may have lower recovery rates compared to paid software.
Conclusion: Recovering Your Facebook Memories
Recovering deleted photos from Facebook is often achievable using various methods, from Facebook’s own Trash and archive features to data recovery software and device backups. While Facebook provides some built-in recovery options for recent deletions, for older or permanently deleted photos, relying on backups and specialized data recovery tools becomes essential. Using a dedicated data recovery application simplifies the process and can effectively retrieve lost photos. Proactive data backup habits are always recommended to prevent data loss and ensure easy recovery of your precious memories in the future.