Instagram, boasting over a billion active users, stands out as a premier social media platform for businesses aiming to amplify their brand visibility, connect with new audiences, and foster brand recognition. If you’re looking to tap into this vast potential, integrating Instagram into your marketing strategy is a smart move.
Ready to start sharing captivating content on this dynamic channel? We’ve developed an easy-to-follow guide on how to post photos on Instagram. This guide is designed to help you effectively engage your audience and leverage the power of Instagram for your marketing endeavors.
Posting Photos on Instagram: Your Quick Guide
Here’s a detailed walkthrough of how to post photos on Instagram effectively:
- Tap the + icon to begin a new post.
- Select your photo or video from your device’s library or capture a new one directly within the app.
- Learn how to post multiple photos in a single Instagram post.
- Crop your photo to fit Instagram’s dimensions or use its original aspect ratio.
- Apply filters to enhance your photo’s aesthetic.
- Utilize Instagram’s editing tools for fine-tuning your image.
- Craft a compelling caption to accompany your photo.
- Boost discoverability by using relevant hashtags in your post.
- Tag friends or collaborators featured in your photo.
- Add your location to make your post discoverable geographically.
- Incorporate emojis to add personality to your captions.
- Share your Instagram posts across other social media platforms for wider reach.
- Master the art of editing your Instagram posts after they’re live.
Consistent posting on Instagram is key for businesses aiming to build a strong connection with their audience and achieve growth. However, knowing how to post effectively is equally crucial. Let’s dive into each step to ensure your Instagram presence is both engaging and impactful.
.png)
Unlock Instagram for Business Success
Discover the strategies to grow your followers, engage your audience, understand algorithm updates, and measure your success on Instagram with our Free Instagram for Business Kit.
This kit includes:
- Best Practices Guide
- Instagram Templates
- Expert Tips
- And Much More!
Learn more about growing your business on Instagram Get Your Free Instagram for Business Kit Now
.png)
You’re Set to Master Instagram!
Access your valuable Instagram resources anytime by clicking the link below.
Step 1. Initiate Your Post by Tapping the + Icon
Look for the plus sign [+] icon, typically located at the top of your Instagram feed. This is your gateway to creating a new post. Tapping this icon is the first step in sharing your photos on Instagram.
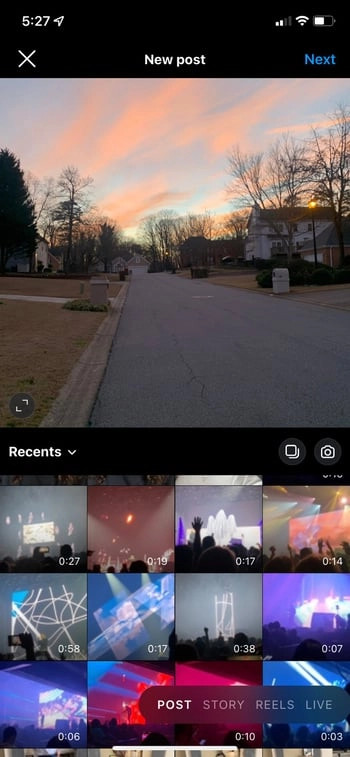
Step 2. Choose Your Photo or Video Source
 Choose photos and videos from library to post on Instagram
Once you tap the plus icon, Instagram will access your device’s photo library. Here, you can select an existing photo or video to post. Alternatively, if you want to capture something in the moment, tap the camera icon to take a new photo or record a video directly within the Instagram app. This is perfect for spontaneous content creation.
After selecting your image, you have the option to crop it and choose to post a single image or create a carousel of multiple images. Once you’re satisfied with your selection and initial adjustments, tap the “Next” button, usually found in the top right corner of the app, to proceed to the next stage of posting your photo on Instagram.
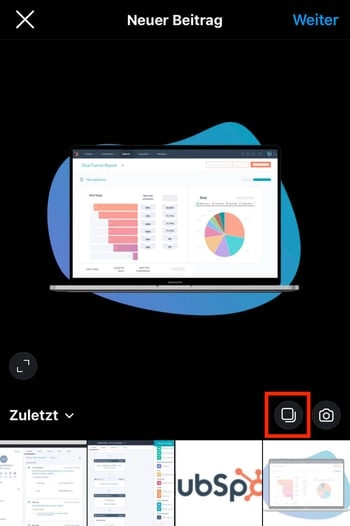
Step 3. Utilize the Carousel Feature to Post Multiple Photos
Want to share a series of photos that tell a story or showcase different aspects of a single event? Instagram’s carousel feature is your answer. It allows you to include multiple photos and videos in a single post, which users can swipe through.
 Choose multiple photos and videos for Instagram carousel post
To create a carousel, when you’re in your photo library selecting an image, first tap the icon of stacked squares located just above your photos on the right side. Once activated, this feature will allow you to select multiple images and videos. As you tap each image or video, a number will appear in the corner indicating its order in the carousel. This is a fantastic way to share comprehensive visual content without overwhelming your followers’ feeds with separate posts.
Step 4. Crop Your Photo to Perfection
While Instagram is famously known for its square format, it now supports both horizontal and vertical images, giving you more flexibility in how you present your photos. To maximize the visible area of your chosen image, you can pinch the screen when you select your photo from your library. This action allows you to fit more of your image into the frame, whether you prefer a vertical or horizontal orientation.
Despite this flexibility, Instagram still adheres to specific dimension ratios to ensure optimal display within the app. Therefore, you might need to slightly crop your photo to ensure it fits perfectly within these dimensions. Experiment with pinching and zooming to achieve the best composition for your post without losing crucial parts of your image.
Step 5. Enhance Your Photo with Filters
Instagram offers a diverse range of filters to instantly alter the mood and style of your photos. To explore these options, simply scroll right across the filter strip displayed at the bottom of your screen. Tapping on a filter will apply it to your photo, allowing you to preview the effect in real-time.
By default, filters are applied at full intensity. However, if you prefer a more subtle effect, you can adjust the filter strength. Just double-tap the filter tile after it has been applied. This action will reveal a slider, allowing you to scale back the intensity of the filter to your liking.
For further adjustments, you can also tap the magic wand icon, often located at the top of the screen. This opens up additional automatic enhancement options that can further refine your photo’s look.
(For a deeper dive, explore our Ultimate Guide to Instagram Filters to master the art of filter application.)
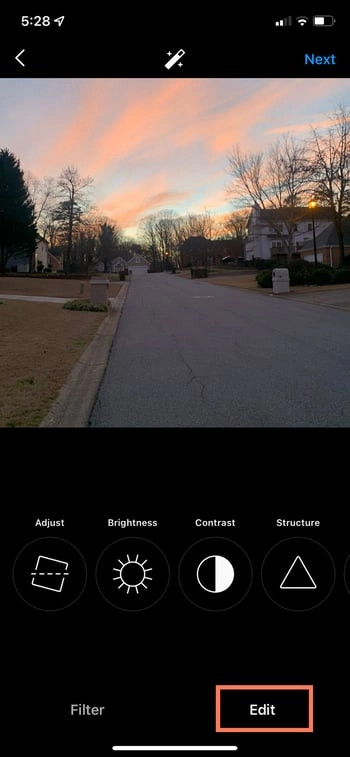
Step 6. Fine-Tune Your Image with Editing Tools
Beyond filters, Instagram provides a suite of editing tools to help you precisely adjust your photo. By tapping “Edit” at the bottom right corner of your screen, you can access these tools and customize various aspects of your image.
 Edit photo options on Instagram
Here’s a breakdown of the editing options available in Instagram:
- Adjust: Correct the perspective and straighten lines with subtle rotation along the center plane.
- Brightness: Lighten or darken your image to achieve the perfect exposure.
- Contrast: Increase or decrease color intensity to make your photo more vibrant or subdued.
- Structure: Enhance texture and details to make elements in your photo pop.
- Warmth: Modify the temperature of your photo, adding cooler or warmer tones.
- Saturation: Control the vibrancy of colors, from monochrome to highly saturated.
- Color: Overlay different color washes for creative effects.
- Fade: Soften blacks for a vintage, aged look.
- Highlights: Adjust the brightness of the lightest parts of your image.
- Shadows: Adjust the darkness of the shadows in your photo.
- Vignette: Darken the edges of your photo to focus attention on the center.
- Tilt Shift: Blur parts of your image to create depth of field effects, focusing on specific areas.
- Sharpen: Enhance the clarity and focus of details in your photo.
.png)
Free Instagram for Business Kit
Learn how to get followers, build your audience, navigate algorithm updates, and measure success with our comprehensive kit.
- Best Practices Guide
- Instagram Templates
- Expert Tips
- And More!
Learn More About Instagram for Business Get Your Free Kit Now
.png)
You’re All Set!
Access this valuable resource anytime by clicking the download link.
Step 7. Write an Engaging Caption
Captions are crucial for adding context and personality to your Instagram photos. Get creative and craft an interesting Instagram caption that complements your visual content. Text in captions can also improve your post’s visibility in Instagram search, making it beneficial for discoverability. Use this space to tell a story, ask a question, or simply share insights related to your photo.
Step 8. Optimize Discoverability with Hashtags
Hashtags are powerful tools for increasing the reach of your Instagram posts. Instagram’s search functionality allows users to search using hashtags. By including relevant hashtags in your caption, you make your post discoverable to users interested in those topics, even if they don’t follow you directly.
 Add hashtags to Instagram post for optimization
When choosing hashtags, aim for a mix of broad and niche terms that accurately describe your photo and its content. Research trending and relevant hashtags to maximize your post’s visibility and reach a wider audience.
Step 9. Tag People in Your Photo
If your photo features friends, collaborators, or other Instagram users, tagging them is a great way to ensure they and their followers see your post. On the new post page, tap “Tag People” to find and tag accounts directly in the photo. Alternatively, you can mention them by including their handle (username starting with @) in your caption. Tagging is excellent for giving credit, increasing engagement, and expanding your post’s reach to tagged users’ networks.
Step 10. Add Your Location for Local Discoverability
Adding a location to your Instagram post can significantly enhance its discoverability, especially for local audiences. If you’re at a specific place, like a café, event, or city, tapping “Add Location” on the new post page allows you to tag your current location.
When you add a location, it appears publicly between your username and the main content of your post in the feed. This feature is particularly useful for businesses wanting to attract local customers or for individuals sharing travel or event experiences. Users can also explore content based on location, making your post discoverable to those interested in the tagged place.
Step 11. Enhance Captions with Emojis
Emojis can inject fun and visual appeal into your Instagram captions, making them more engaging and expressive. If relevant emojis fit the tone and context of your post, consider adding them to your caption. For example, a vacation photo could be enhanced with emojis like 🌴 (palm tree) or ✈️ (airplane).
Popular Instagram emojis include: ❤️ 😍 😘 😂 😊 😎 💕 😉 💋 👍
However, use emojis judiciously. Overusing them or using irrelevant emojis can detract from your message and appear unprofessional. Ensure emojis enhance your caption without making it cluttered or confusing.
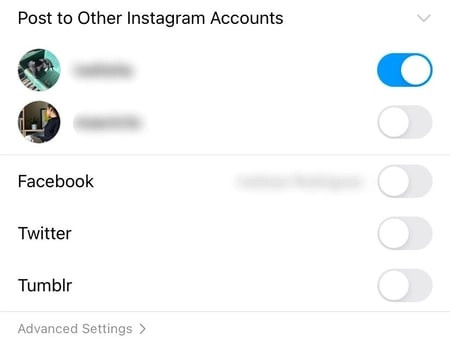
Step 12. Share to Other Social Media Platforms for Broader Reach
 Share Instagram post to other social media accounts
To extend the reach of your Instagram content, you can easily share your posts to other connected social media platforms like Facebook or Twitter. On the posting screen, simply toggle the buttons next to the social media icons to enable cross-posting. This feature saves time and ensures consistent branding and messaging across multiple platforms, maximizing your content’s impact.
Once you’ve finalized all aspects of your post, tap “Share” in the top right corner to publish it to your Instagram feed and any other selected platforms.
Instagram Saved Drafts
If you’re not quite ready to post immediately, Instagram offers a “Save Draft” feature. At any point during the filtering and editing process, you can tap the back arrow in the top left corner and select “Save Draft.” Your post will be saved, allowing you to return and complete it at a later time. This is perfect for preparing posts in advance or when you need to pause and refine your content before sharing.
Step 13. Edit Your Post After Publishing
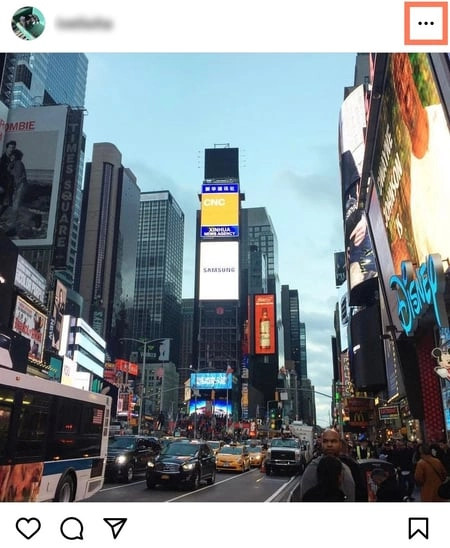 Access post settings to edit Instagram post
Mistakes happen! If you spot a typo or want to tweak something after posting, Instagram allows you to edit your posts. To do this, tap the three dots located to the right of your username on your post.
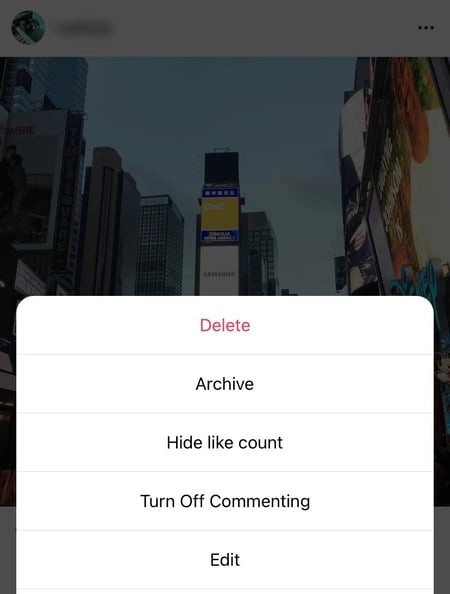 Click edit option in post settings menu
From the options that appear, select “Edit.” This will allow you to modify your caption, tags, location, and more. Make your necessary adjustments and tap “Done” (or the checkmark icon) to save your edits. This ensures your published content is always accurate and up-to-date.
Pro Tip: To optimize your content’s performance, consider researching the best times to post on Instagram to maximize engagement and reach.
Expand Your Instagram Audience Today
Now equipped with the knowledge of how to post photos on Instagram, you can begin creating and sharing content that resonates with your audience and grows your online presence. For businesses and brands, a strategic approach to content creation and audience engagement is essential for achieving marketing success on Instagram. Start posting and connecting with your audience to unlock the full potential of Instagram for your growth!
Editor’s note: This post was originally published in November 2019 and has been updated to include the most current information and best practices.