SD cards are a fantastic way to expand the storage of your digital devices, from cameras to smartphones, allowing you to capture and keep countless photos and videos. Their portability and ease of use make them indispensable for photographers and casual users alike. Imagine the convenience of swapping SD cards to maintain an extensive image library always at your fingertips, ready to relive precious moments. However, the ease with which we manage digital files can sometimes lead to accidental deletions. If you’ve experienced the sinking feeling of mistakenly deleting photos, or worse, losing access to them due to card errors, take heart. Recovering deleted photos from an SD card is indeed possible, offering a lifeline to safeguard your irreplaceable memories.
Why Photo Recovery from an SD Card Might Be Necessary
Just like any form of digital storage, SD cards are susceptible to data loss scenarios. Understanding why you might need to recover deleted photos is the first step in taking effective action. Here are common situations that necessitate SD card photo recovery:
- Accidental Deletion: In the rush of reviewing photos on your camera or phone, a slip of a finger can lead to the accidental deletion of cherished images. It’s a common mistake, but thankfully, not always a permanent one.
- Inadvertent Formatting: Formatting an SD card erases all data, including your photos. This might happen by mistake within your camera settings or when trying to troubleshoot card errors. Realizing you’ve formatted a card filled with important photos can be alarming.
- SD Card Corruption: SD cards can become corrupted due to various reasons, such as improper removal from devices, file system errors, or physical damage. A corrupted card may become inaccessible, locking you out of your photo collection.
- Software or Hardware Malfunctions: Sometimes, issues with the device reading the SD card or software glitches can lead to perceived data loss, even when the photos are still technically present on the card.
No matter the cause, the crucial point is that deleted photos are not immediately and permanently erased from your SD card. Instead, the space they occupy is marked as available for new data. This window of opportunity is what makes SD card photo recovery possible. Let’s explore effective methods to get your deleted photos back.
On Windows PC → On Mac → From Android SD card →
6 Proven Methods to Recover Deleted Photos From an SD Card
The good news is that you have several options for recovering deleted photos from your SD card. The best approach often depends on your operating system, the device you were using, and the circumstances of data loss. We’ve compiled six methods, ranging from user-friendly software solutions to built-in system features, to provide you with a comprehensive toolkit for SD card photo recovery.
Method 1: Utilizing Data Recovery Software for SD Cards
The most reliable and often most effective way to recover deleted photos from an SD card is by using dedicated data recovery software. These specialized tools are designed to delve deep into your storage media, identifying and reconstructing deleted files that are still recoverable. Software like Disk Drill SD Card Recovery stands out as a powerful and user-friendly option.
Disk Drill is a robust data recovery application capable of retrieving a wide array of file types, including all common photo formats and even RAW image files used by professional cameras. Its intuitive interface simplifies the recovery process, making it accessible to users of all technical levels.
Let’s walk through the steps of using Disk Drill to recover your deleted photos on both Windows and Mac operating systems.
Steps to Recover Deleted Photos on Windows Using Disk Drill
-
Download and Install Disk Drill: Begin by downloading Disk Drill from the official website and installing it on your Windows computer. The free version of Disk Drill is a great starting point, allowing you to scan your SD card and preview recoverable files. For actual data recovery up to 500MB, you can use the free version without immediate upgrade.
Alt Text: Disk Drill data recovery software advertisement sidebar.
Data recovery for free Your Companion for Deleted Files Recovery
-
Connect Your SD Card: Insert your SD card into your Windows PC using a compatible SD card reader. Many laptops come with built-in SD card slots, or you can use an external USB card reader. Ensure your computer recognizes the SD card as a removable drive.
-
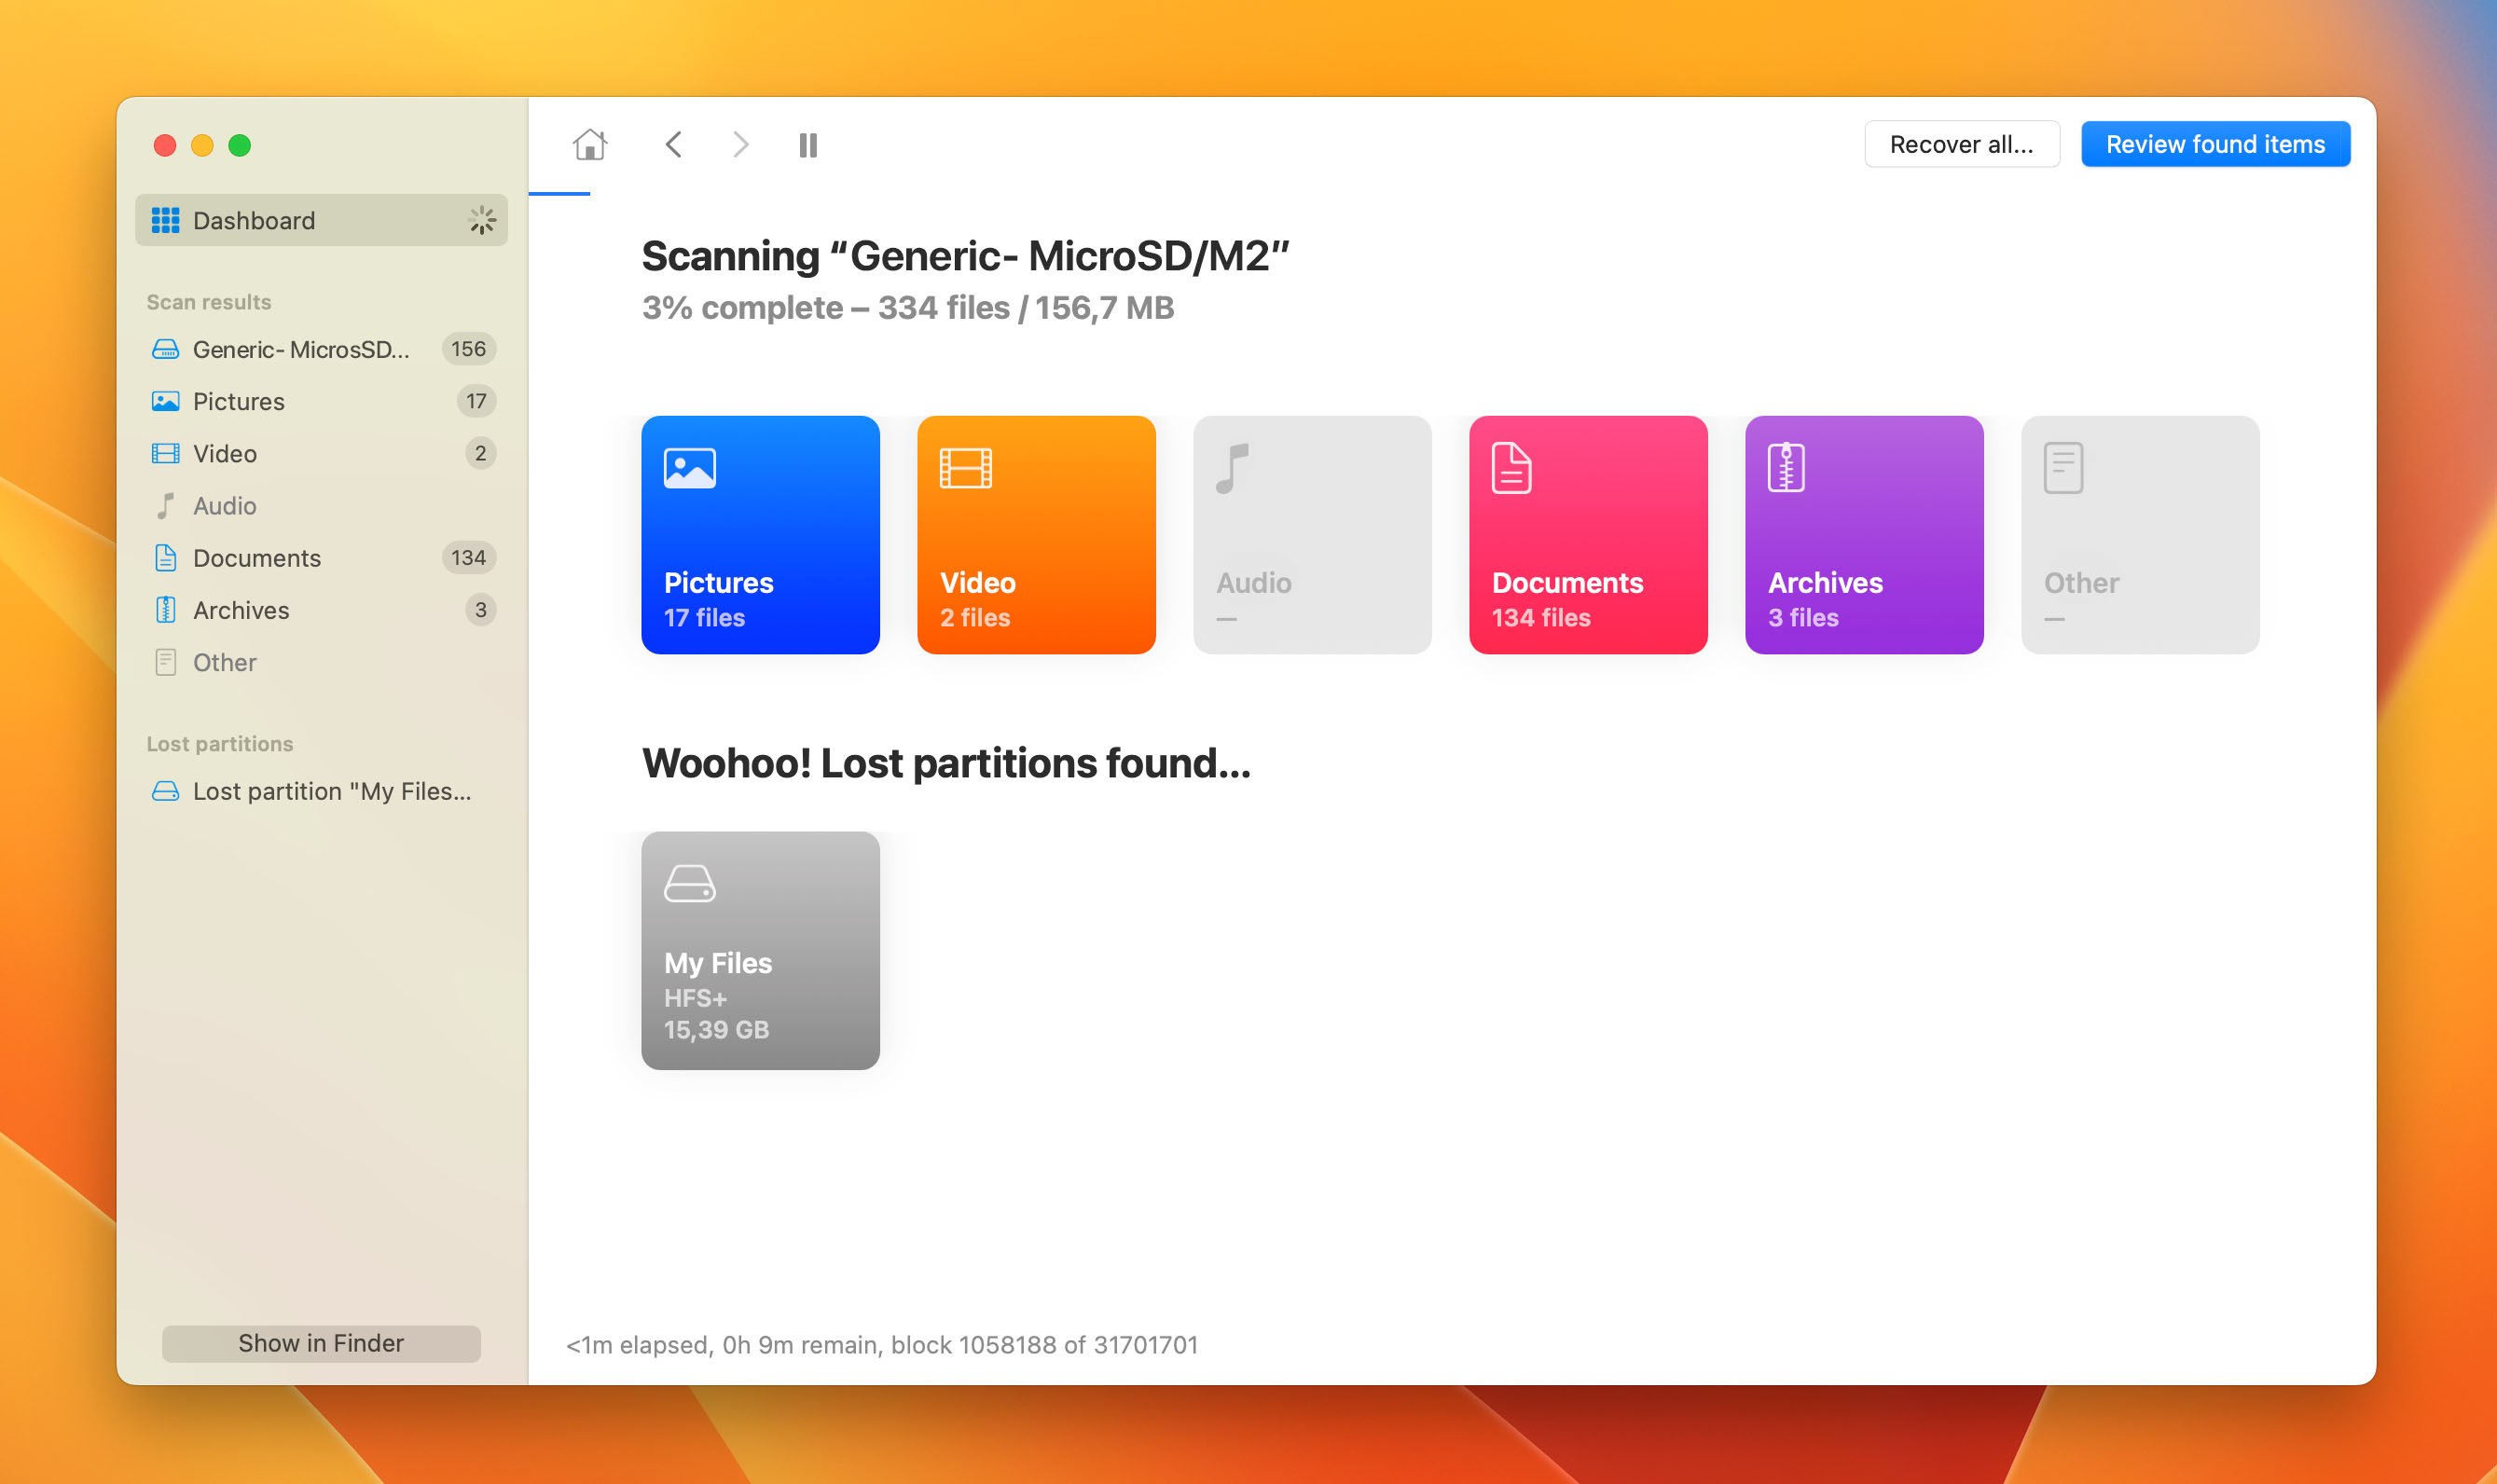
Launch Disk Drill and Select Your SD Card: Open Disk Drill, and you will see a list of available drives and storage devices connected to your computer. Locate and select your SD card from this list. Once selected, click the prominent Search for lost data button.
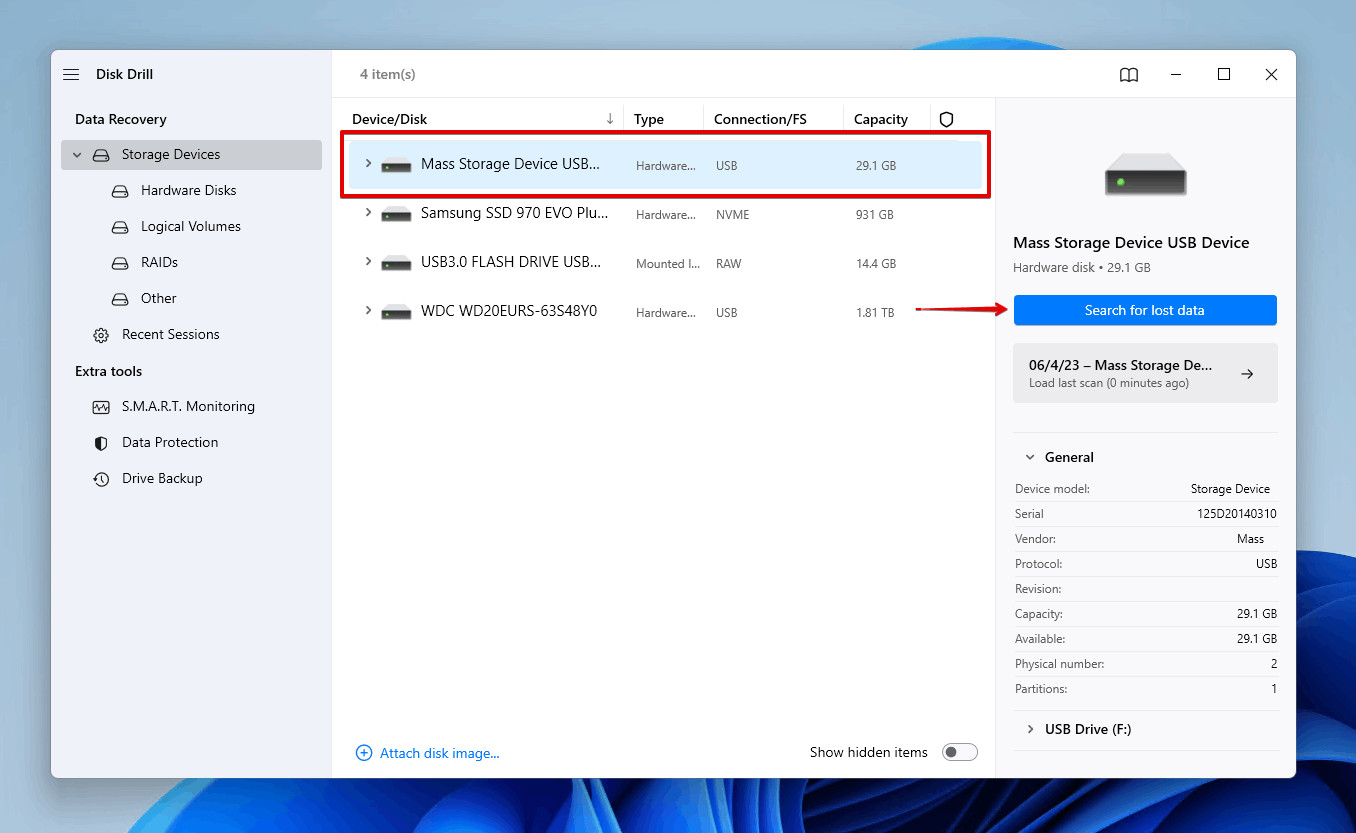 Scanning the SD card for deleted photos on Windows PC
 -
Initiate the Scan and Wait for Completion: Disk Drill will now begin scanning your SD card for recoverable files. The scan duration will depend on the size of your SD card and the amount of data to be analyzed. Allow the scan to complete fully to ensure comprehensive recovery.
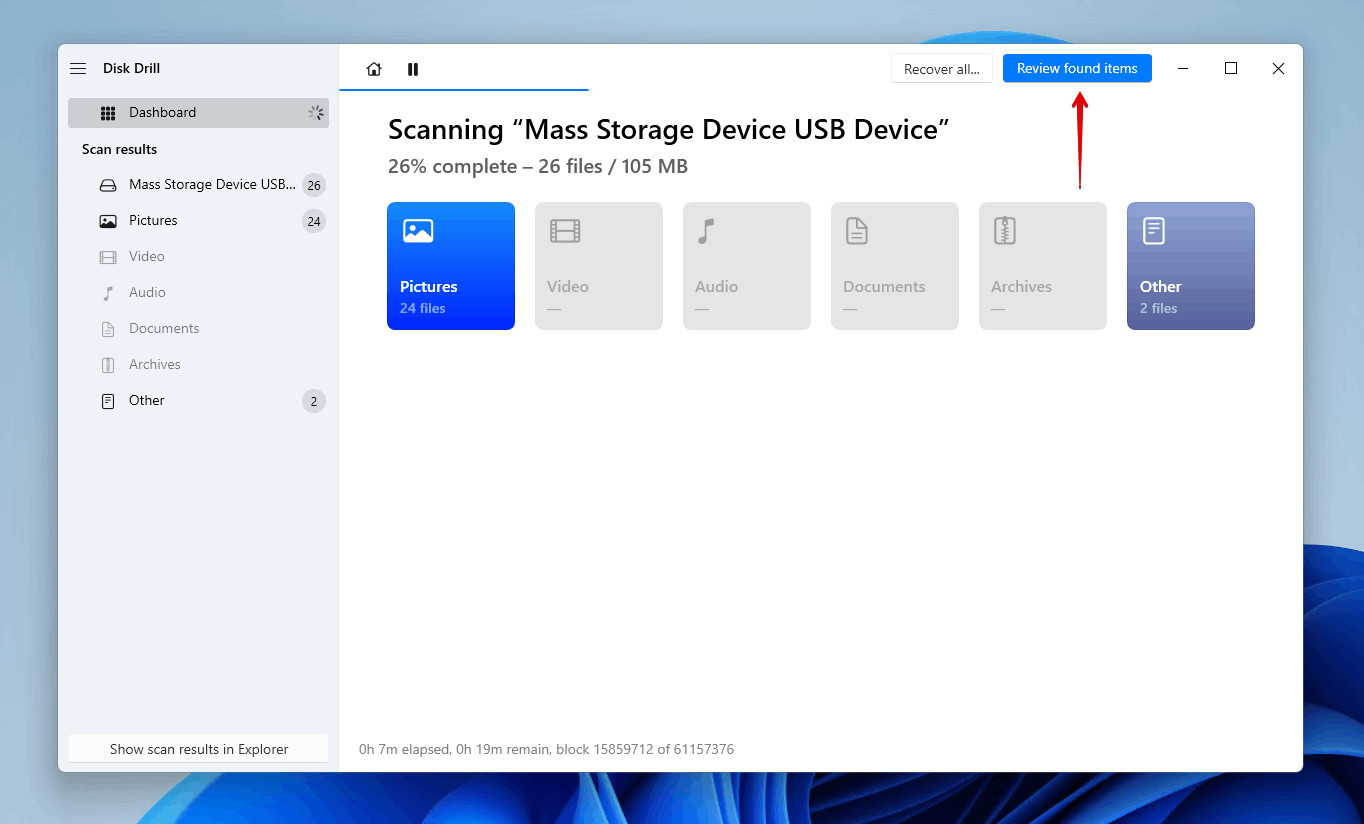 Scanning memory card using data recovery software
 -
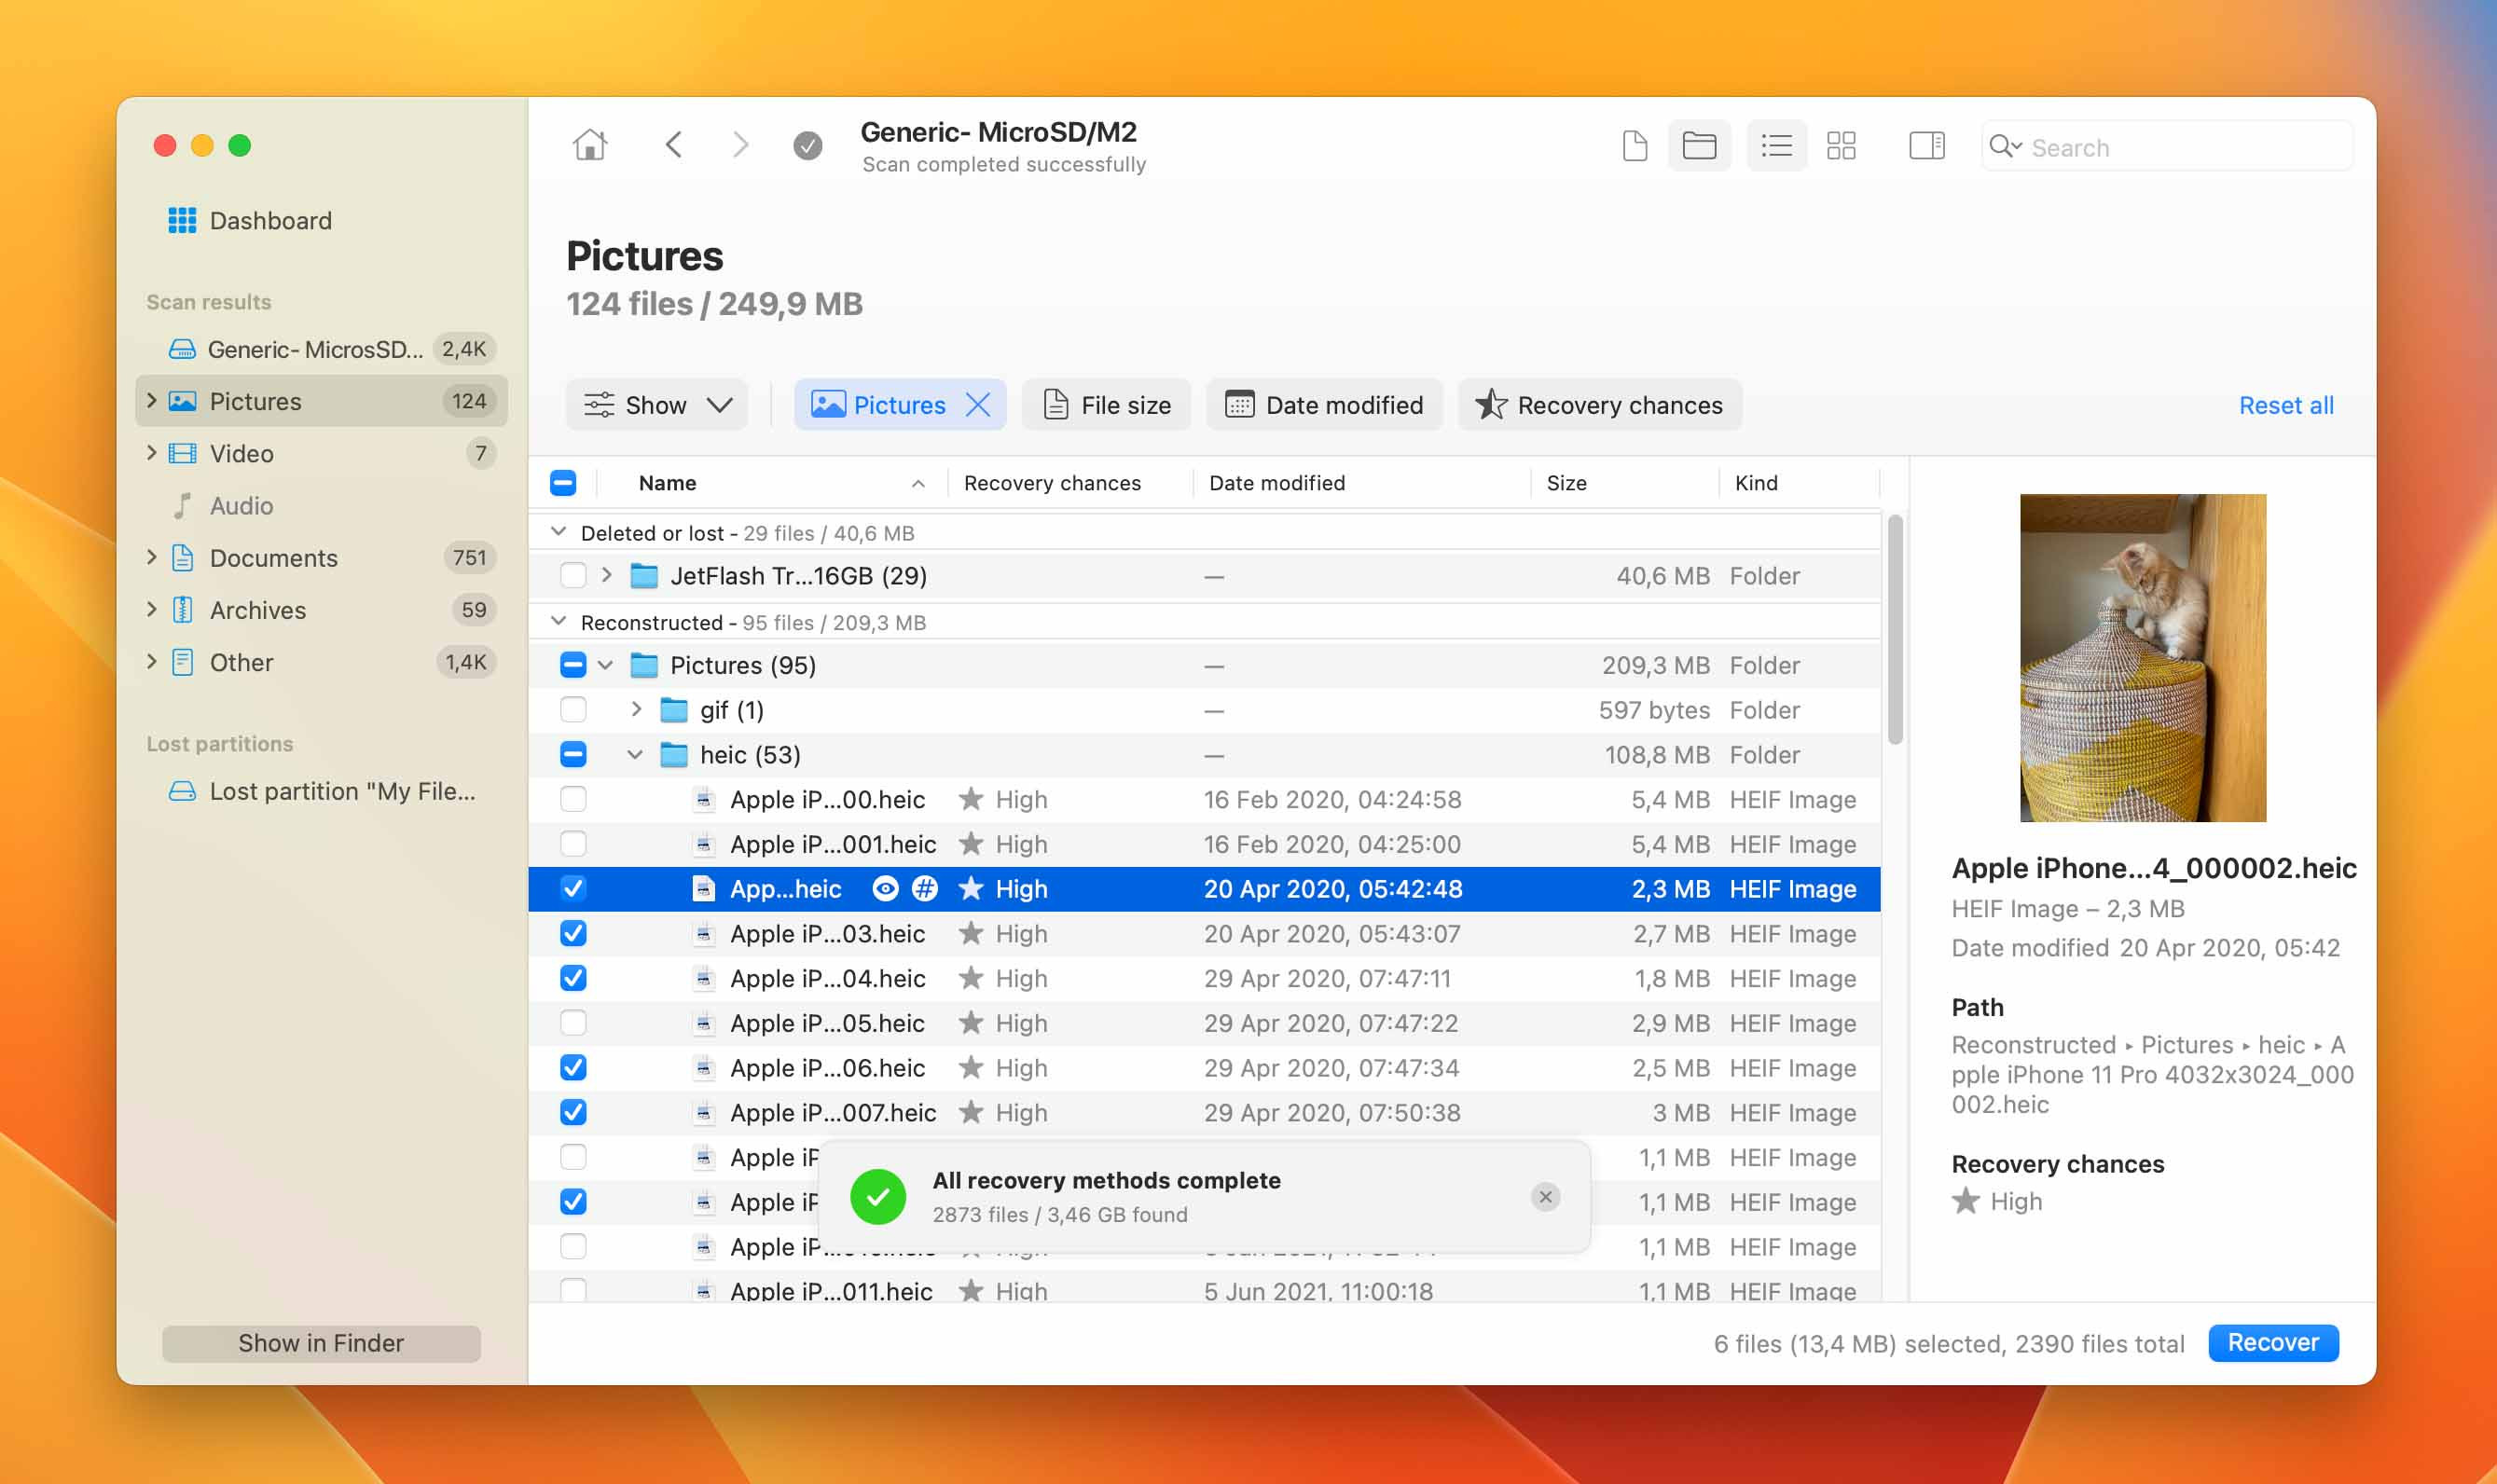
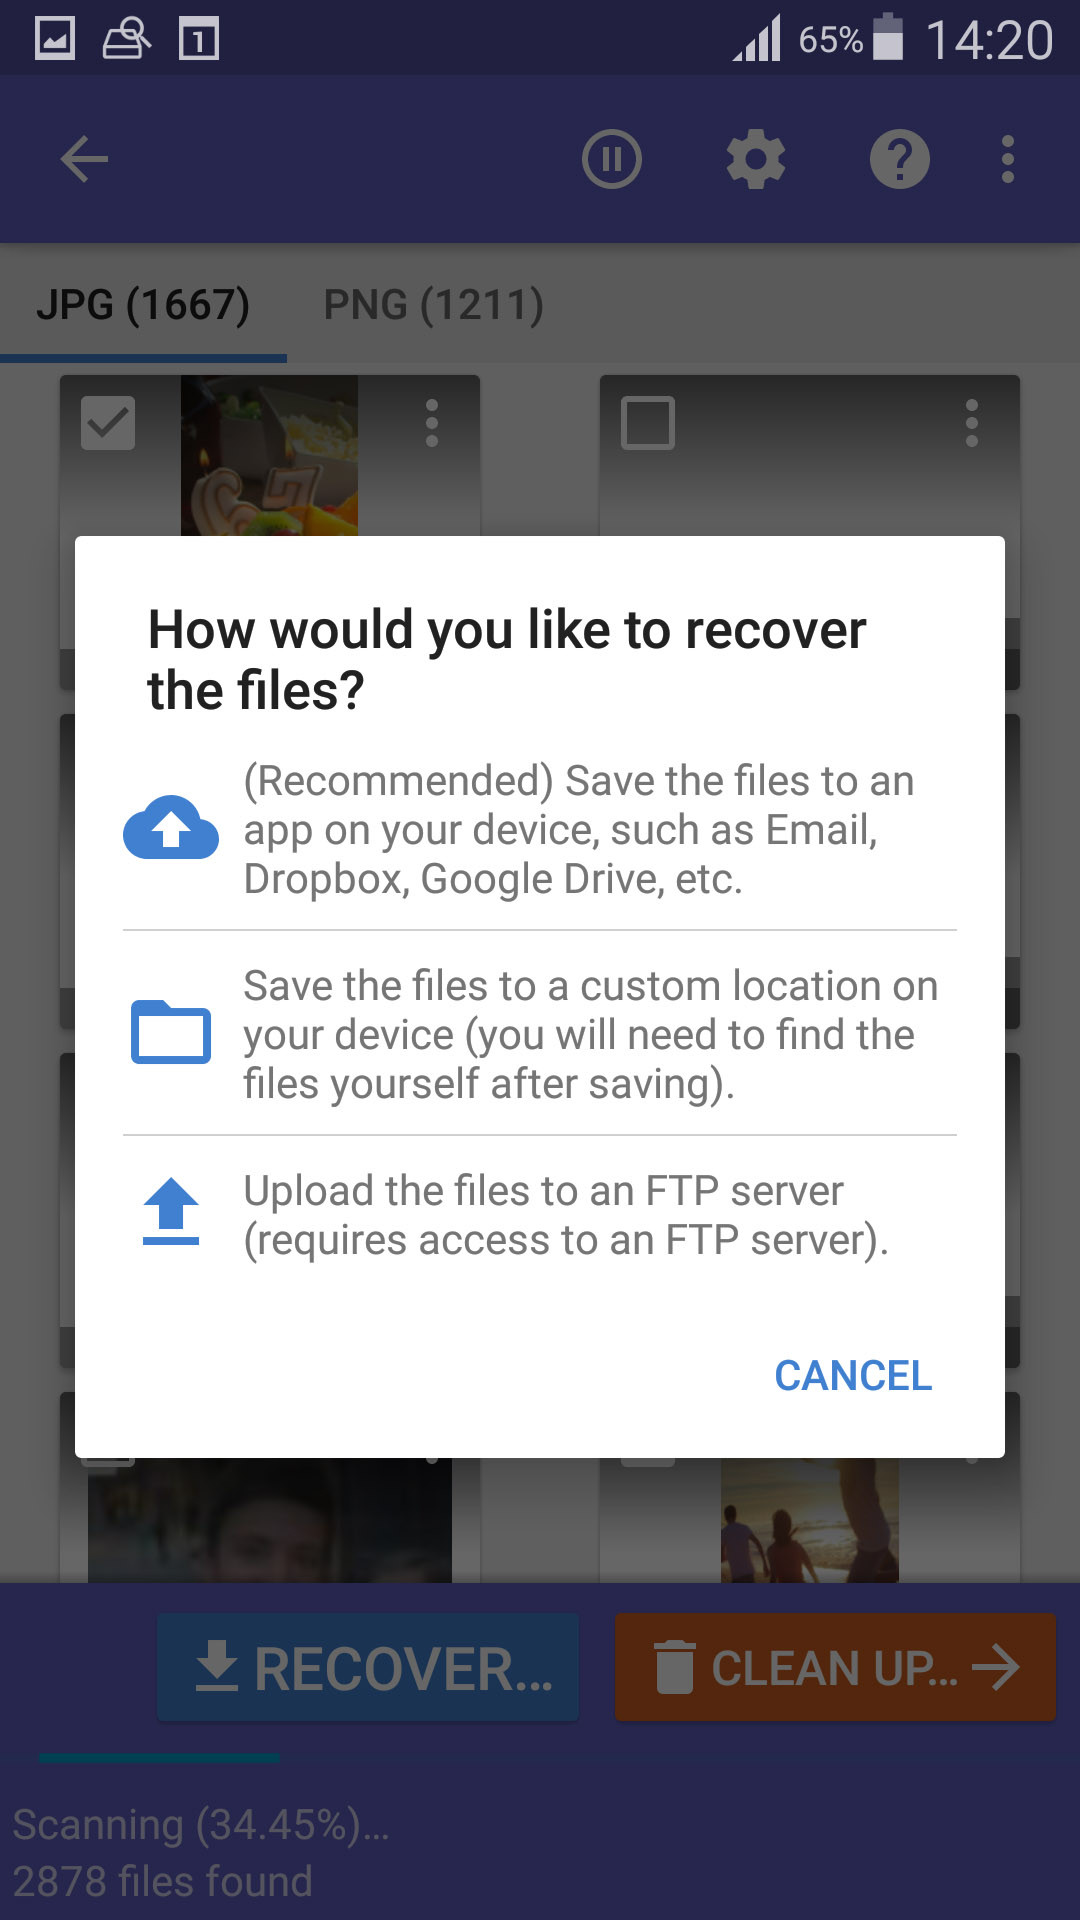
Preview Recoverable Photos: After the scan, Disk Drill will present a list of found files. You can filter and browse through these files to locate your deleted photos. Utilize the Preview function to view thumbnails or larger previews of the images before initiating recovery. This step is crucial to ensure you are recovering the correct photos.
-
Select Photos and Recover: Carefully select the photos you wish to recover by checking the boxes next to them. Once you have chosen all desired images, click the Recover button.
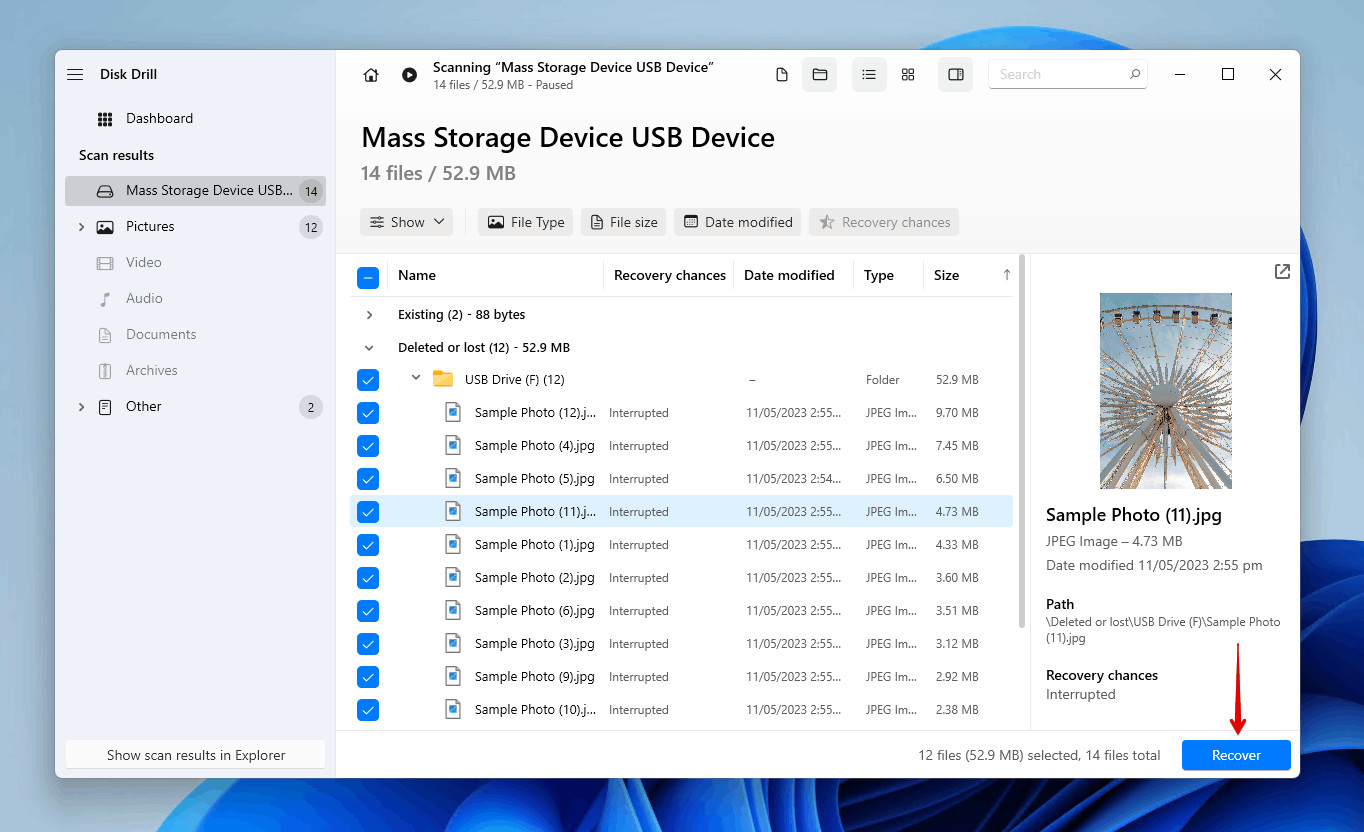 Selecting the SD card photos.
 -
Choose a Recovery Destination: Disk Drill will prompt you to choose a destination folder to save the recovered photos. Crucially, select a location on a different storage device than the SD card itself, such as your computer’s hard drive or an external drive. This prevents overwriting potentially recoverable data on the SD card. Click OK to begin the recovery process.
 Choosing a recovery destination.
Steps to Recover Deleted Photos on Mac Using Disk Drill
Disk Drill offers a similar streamlined recovery experience for Mac users. The free version for macOS allows you to preview recoverable files, and upgrading to the Pro version enables full data recovery capabilities.
-
Download and Install Disk Drill for Mac: Download the Mac version of Disk Drill from the official website and install it on your macOS system.
Data recovery for free Your Companion for Deleted Files Recovery
-
Connect Your SD Card to Your Mac: Connect the SD card containing your deleted photos to your Mac. Use a built-in SD card slot if available, or an external SD card reader.
-
Select the SD Card in Disk Drill: Launch Disk Drill. You will see a list of storage devices. Choose your SD card from the displayed list. It might be labeled with its name or as a generic removable disk. Select your SD card and click Search for lost data.
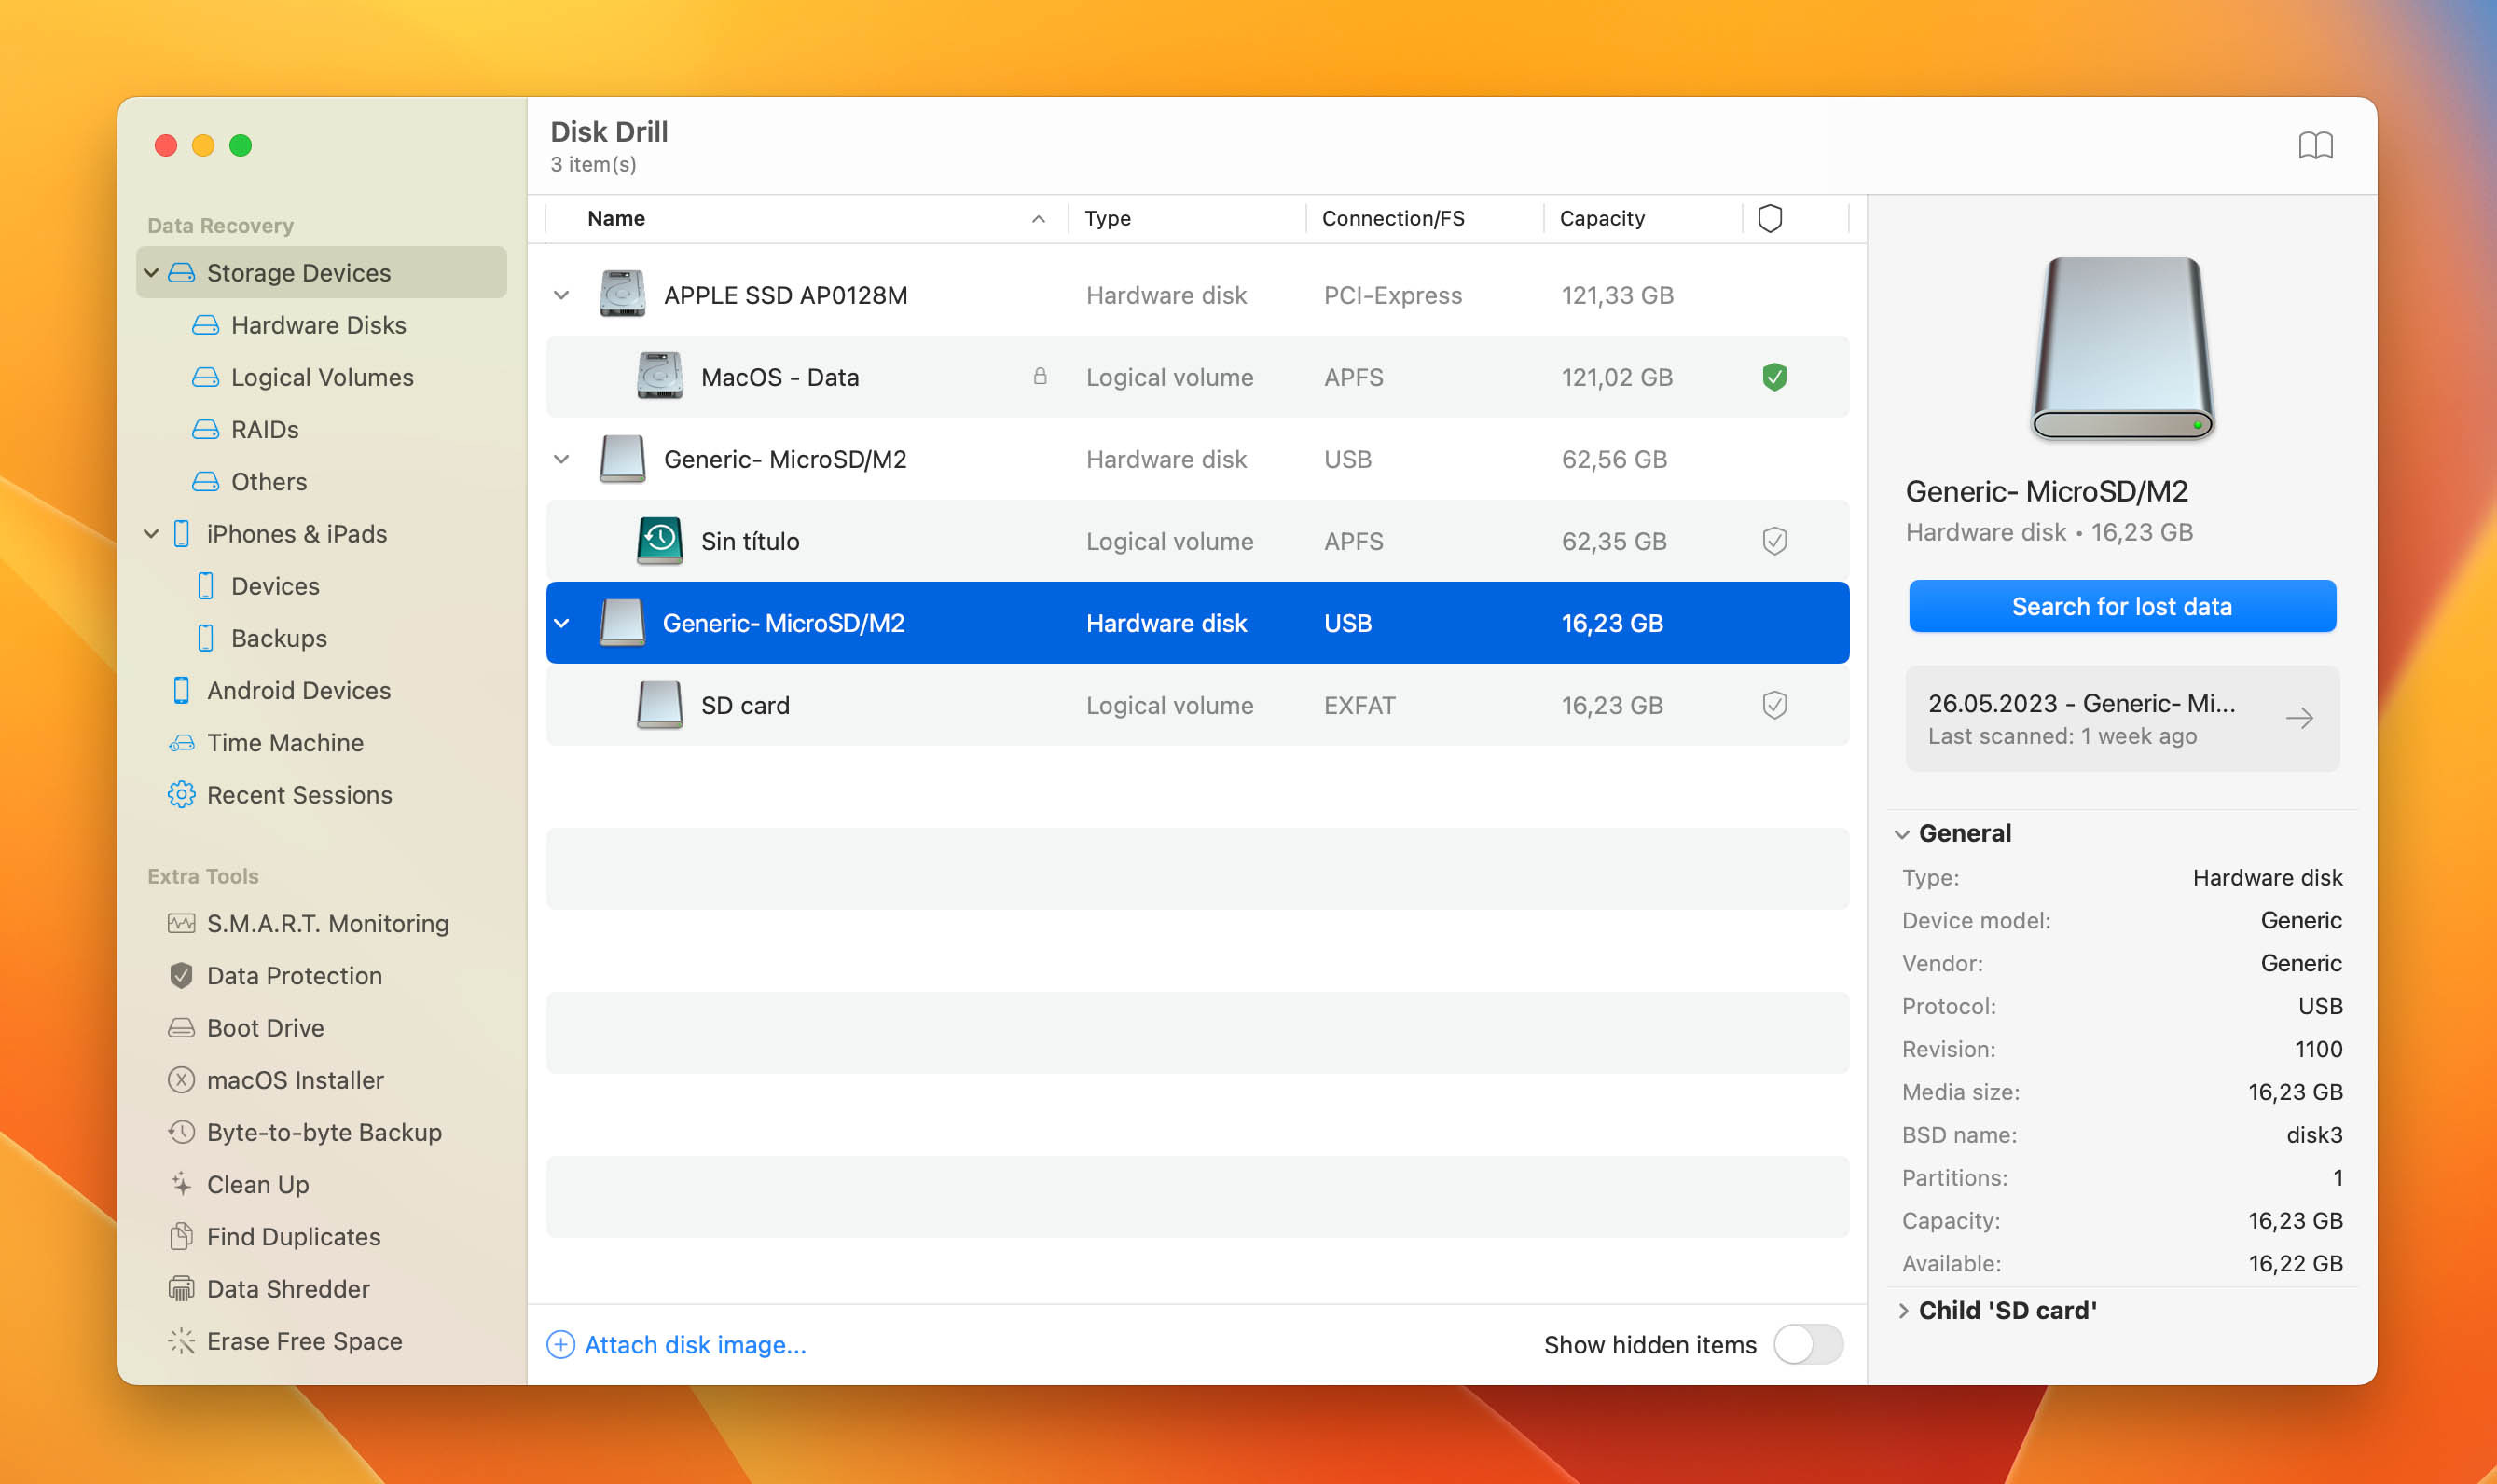 sd card in disk drill
 -
Wait for the Scan to Complete: Disk Drill will begin scanning your SD card for deleted files. The scan time will vary depending on the card’s size and data volume. Allow the scan to proceed without interruption until completion.
 scan in progress
 -
Review Recoverable Files: Once the scan is complete, Disk Drill will display a list of recoverable files. You can browse through folders, use the search bar to locate specific files, and utilize the Preview function to inspect photos before recovery.
-
Select Photos for Recovery: Go through the list of recoverable files, preview the photos, and select the ones you want to restore by checking the corresponding boxes. Click the blue Recover button to initiate the recovery process.
 selecting files for recovery in disk drill
 -
Choose a Recovery Location: Specify a safe recovery location for your photos. It is essential to choose a destination folder on a different drive than the SD card you are recovering from. Saving back to the same card could lead to data corruption or overwriting.
Method 2: Android Data Recovery Apps for SD Card Photos
If you need to recover deleted photos from an SD card that was used in your Android phone or tablet, you can leverage Android-specific data recovery apps. DiskDigger photo recovery is a popular and effective app available on the Google Play Store.
Steps to recover photos using DiskDigger on Android:
-
Download and Install DiskDigger: Install the DiskDigger photo recovery app directly from the Google Play Store on your Android device.
-
Launch DiskDigger and Scan Your SD Card: Open the DiskDigger app. You will be presented with options to perform either a “Basic scan” (no root required) or a “Full scan” (root required for deeper scan). Select the option appropriate for your device and needs. Choose your SD card as the target for scanning; it’s typically identified as “/mnt/sdcard” or similar.
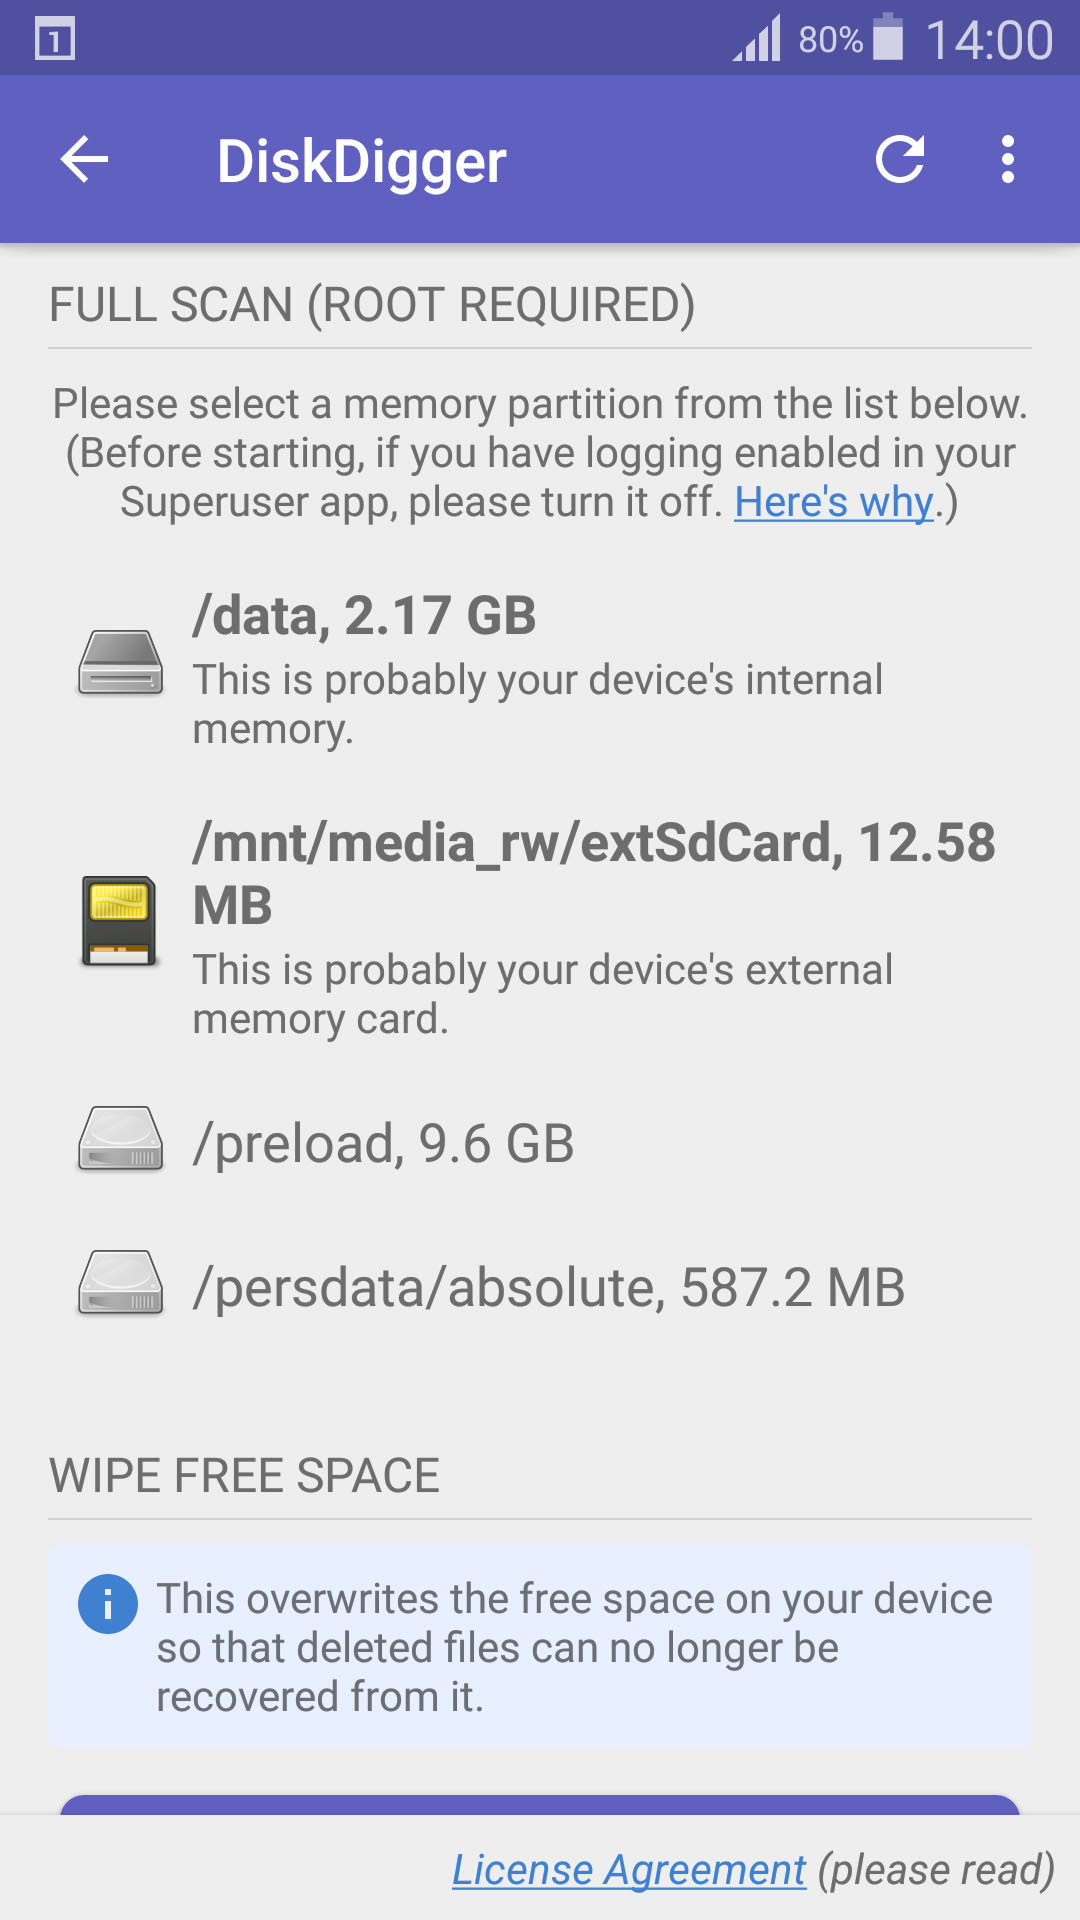 select storage device
 -
Specify File Types (Optional): To refine the scan and speed up the process, you can specify the types of files you are looking for. For photo recovery, select image file formats like JPG, PNG, etc., and tap OK.
 select file types
 -
Select and Recover Photos: After the scan, DiskDigger will display thumbnails of recoverable photos. Browse through the results, select the photos you want to recover by tapping the checkboxes, and tap the Recover button.
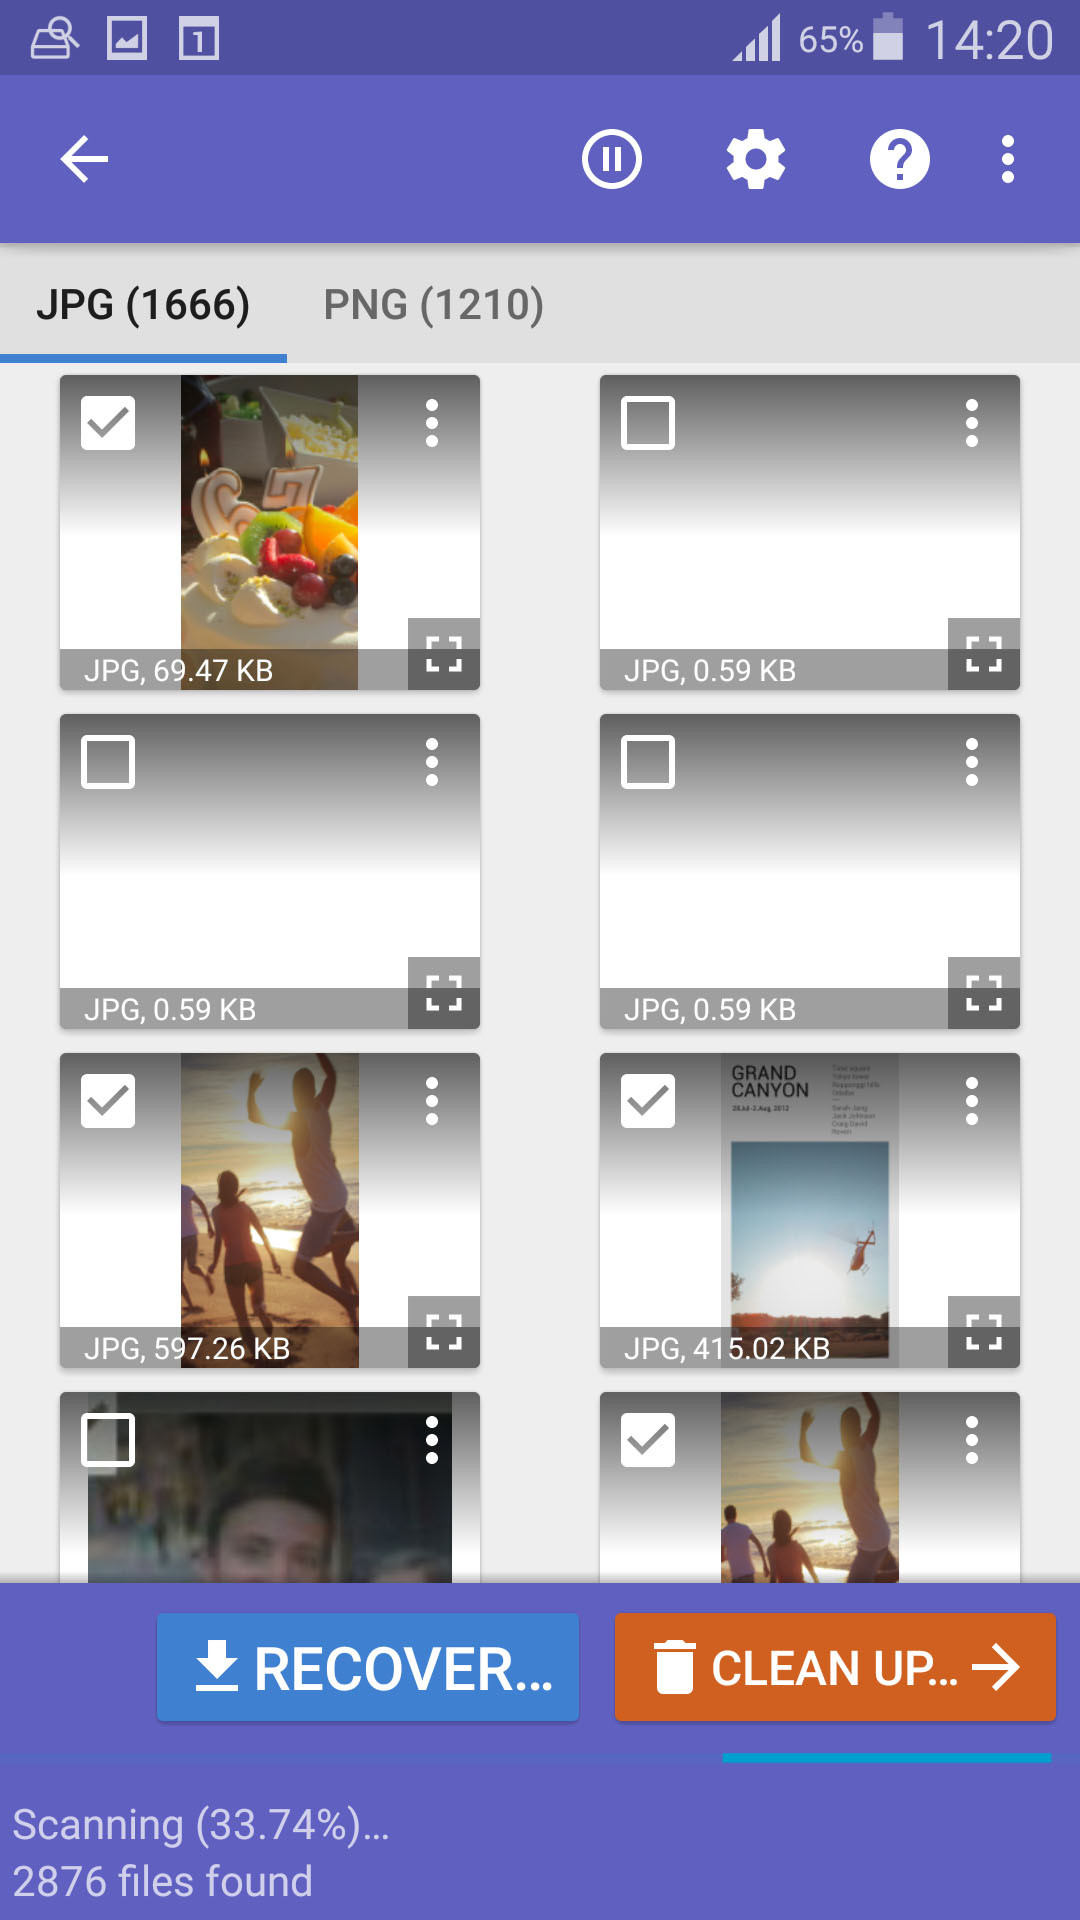 select files for recover
 -
Choose a Recovery Destination: You will be prompted to choose where to save the recovered photos. Select a location on your device’s internal storage or a different SD card, not the same SD card you are recovering from.
 select recover destination
For optimal results with DiskDigger, especially for deep scans, a rooted Android device and the Pro version of the app are recommended. However, the free version can still be quite effective for basic photo recovery needs. Keep in mind that Android data recovery apps might not be as powerful as desktop data recovery software like Disk Drill in some situations.
Method 3: Restoring Photos From a Backup System
Regular backups are your safety net against data loss. If you’ve been diligently backing up your photos, restoring deleted images from a backup is often the quickest and easiest recovery method. Consider backups especially crucial for SD cards used for long-term photo storage or as primary storage in photographic devices. If you just deleted a recently taken photo, a backup might not exist yet. However, for photos that have resided on your SD card for a while, a backup could be readily available.
Retrieving Photos from a Windows Backup
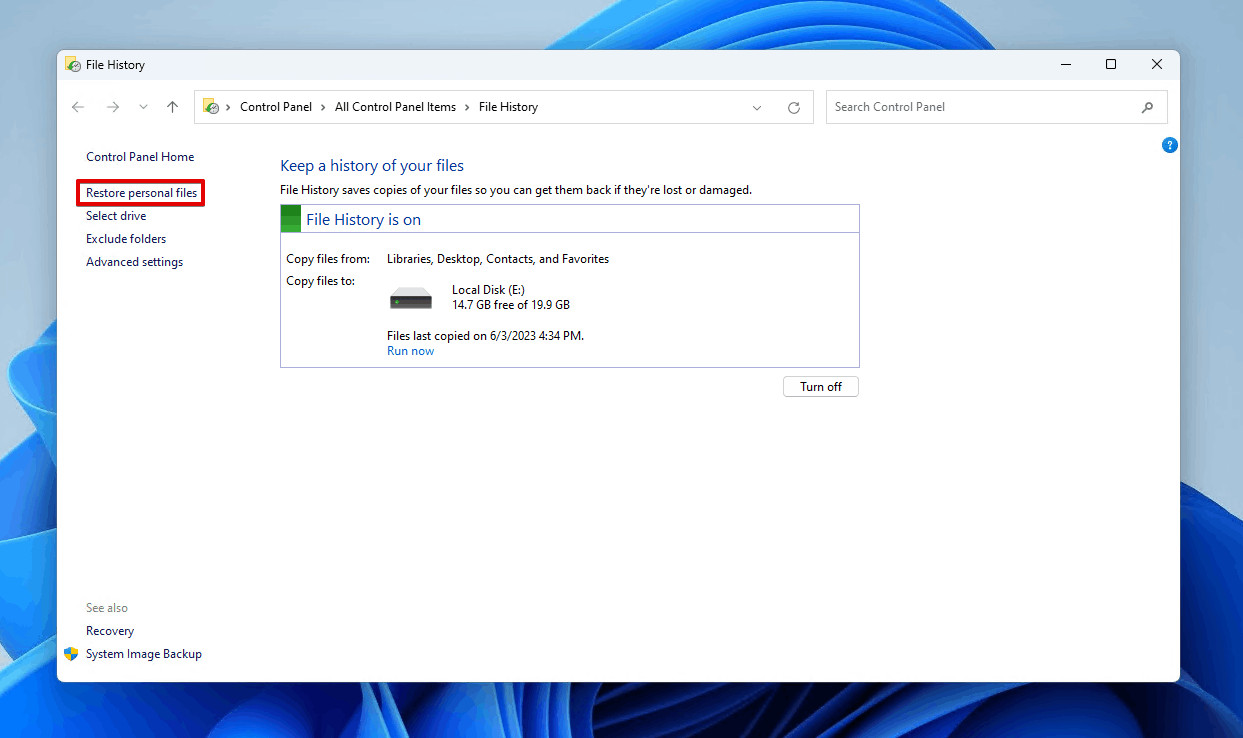
Windows 10 and 11 offer a built-in backup utility called File History. If you have enabled File History to back up your personal files, including data on external storage devices like your SD card, you can easily restore deleted photos. File History creates copies of your files on a designated backup drive.
Steps to restore photos from File History on Windows:
-
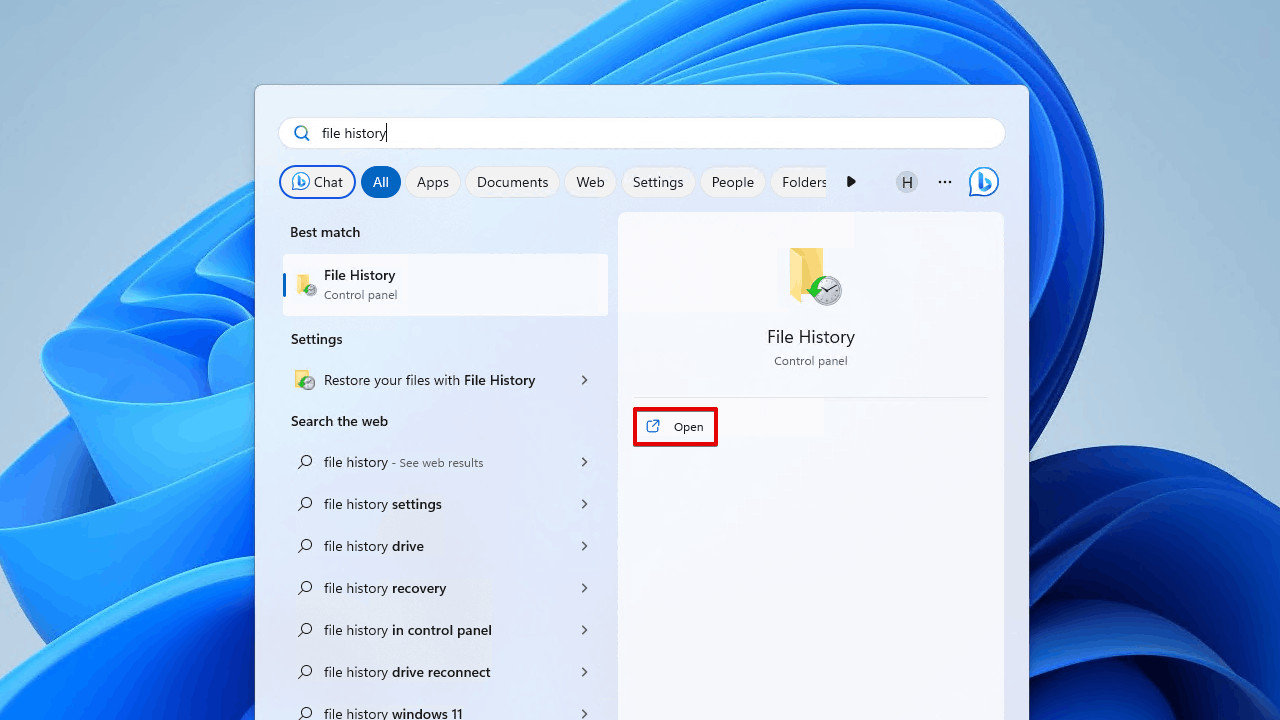
Open File History: Click the Start button, type File History, and select File History from the search results to open the utility.
 Opening File History.
 -
Restore Personal Files: In the File History window, click on Restore personal files in the left-hand menu.
 Restoring personal files.
 -
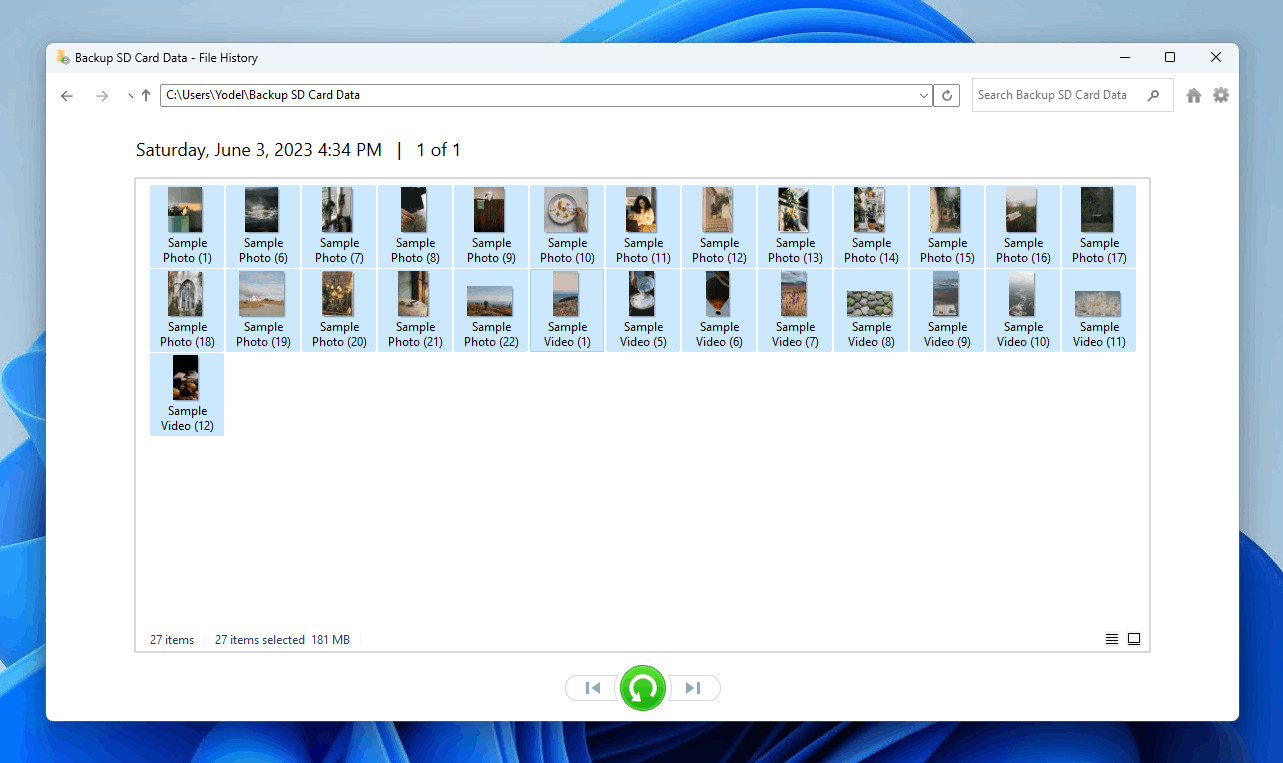
Locate and Select Photos: Navigate through the File History interface to find the backed-up photos you want to restore. You can use the navigation arrows to browse through different backup dates. Select the specific photos or folders containing the deleted images.
 Selecting the SD card photos.
 -
Choose Restore Options: Click the green Restore button. To restore the photos to their original location on the SD card, simply click Restore. If you want to restore them to a different location, right-click the Restore button and select Restore to… to choose a custom destination folder.
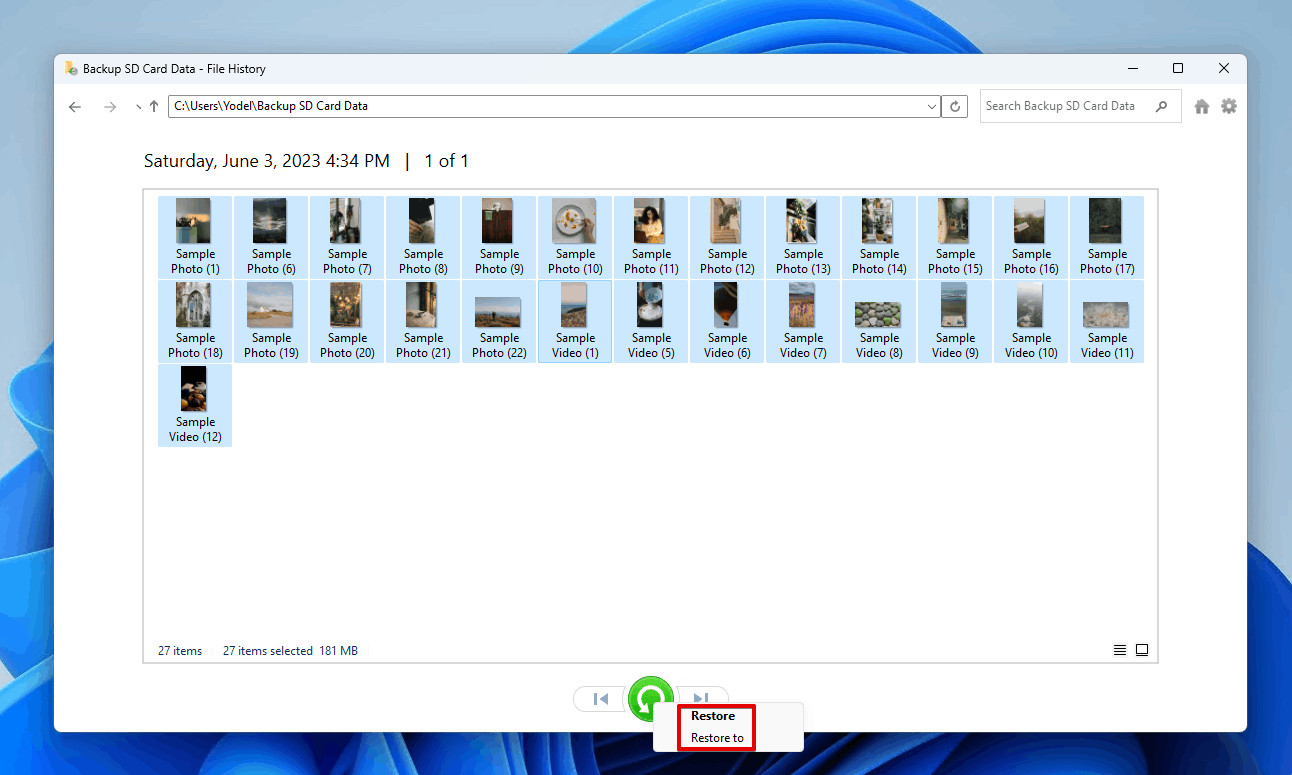 Choosing how to restore the photos.
Alternatively, if you have manually copied or moved photos from your SD card to your computer previously, you can try searching for them using File Explorer. Use the search box in File Explorer to look for the photo names or folder names. You can also filter by file type (e.g., “.jpg”, “.png”) to list all photos if you don’t recall specific names.
Restoring Photos from a Mac Backup
macOS has a powerful built-in backup feature called Time Machine. If you have Time Machine configured to back up your Mac, including external devices, you can use it to restore deleted photos from your SD card. This is possible only if you had connected the SD card to your Mac at least once while Time Machine backups were active.
For detailed instructions on using Time Machine, Apple provides a comprehensive guide here.
💡 Backup Importance: In situations where an SD card is lost or stolen, backups may be the only way to recover your photos. Proactive backups are highly recommended as data loss can happen unexpectedly.
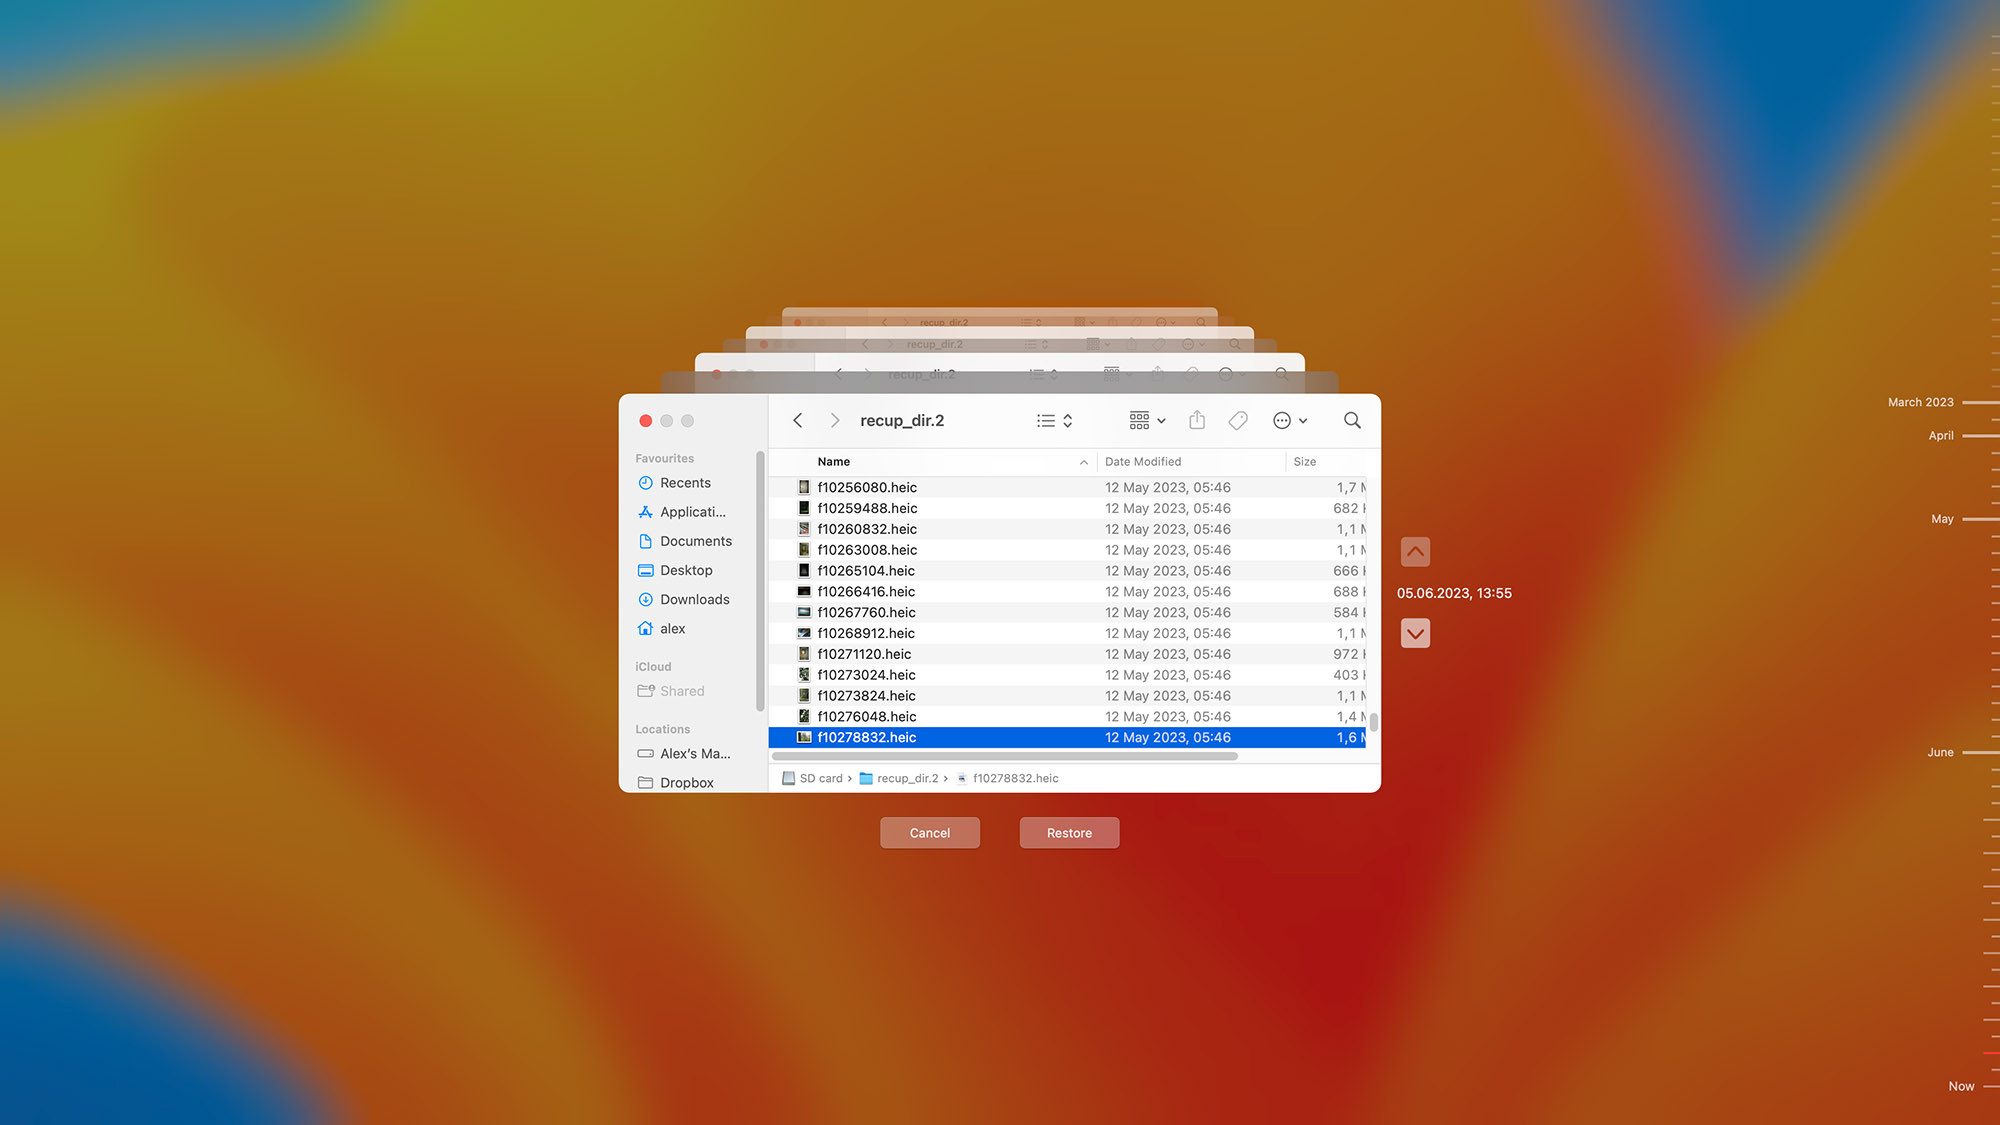 time machine
The specific steps for Time Machine recovery will depend on your backup setup. Whether you back up to an external hard drive or cloud storage, having a backup provides peace of mind and ensures you can recover precious memories in case of data loss.
Method 4: Recovering Photos From Cloud Backups
Cloud backup services offer another layer of protection for your photos. Android users, in particular, often utilize cloud backup apps like Google Photos, OneDrive, or Dropbox, which can automatically back up photos, including those stored on SD cards.
If you use cloud backup, recovering deleted photos is usually as simple as downloading them from your cloud storage account. The advantage of cloud backups is accessibility from any device and location, even if your original device is lost or damaged.
 Recovering from a Cloud Backup
Here are links to official guides for downloading files from popular cloud services:
- Google Photos: Google Photos Help
- OneDrive: Microsoft Support – Download files or folders from OneDrive
- Dropbox: Dropbox Help – Download files and folders
If you use a different cloud backup app, consult its help documentation or search online for guides on how to download and restore your photos.
Method 5: Checking Your Device’s Internal Memory or Storage
Before resorting to more complex recovery methods, it’s worth checking your device’s internal memory or temporary storage. When you delete a photo, it’s often logically deleted but not immediately physically erased. The space becomes available for overwriting, but the data might still be present temporarily.
❗ Stop Using Your Device Immediately: As soon as you realize you’ve deleted a photo you want to recover, stop using the device that was using the SD card. This maximizes the chances of successful recovery before the deleted photo’s storage space is overwritten by new data.
Many photo management apps, like Photos on macOS, import photos from SD cards and create copies in your device’s internal storage. If photos were imported to your computer or phone before deletion from the SD card, they might still be recoverable from within the app’s ecosystem. For example, macOS Photos app has a “Recently Deleted” folder where deleted photos are kept for 30 days before permanent deletion.
💡 Check “Recently Deleted” Folders: Explore photo gallery apps on your Mac, Windows PC, or Android device for “Recently Deleted,” “Trash,” or similar folders. Recovering photos from these folders is often a straightforward process.
Method 6: Recovering Photos From the Recycle Bin or Trash
Both Windows and macOS have a temporary holding area for deleted files: the Recycle Bin (Windows) and Trash (macOS). These act as a first line of defense against accidental deletions.
Recovering Photos from the Recycle Bin on Windows
Windows sends deleted files to the Recycle Bin unless they are permanently deleted (e.g., using Shift+Delete) or are too large for the Recycle Bin’s capacity.
❗ Recycle Bin Limitation: Files deleted from external storage devices like SD cards are typically not sent to the Recycle Bin. In most cases, you’ll need data recovery software to recover photos deleted directly from an SD card in Windows.
However, if you had copied photos from the SD card to your computer and then deleted them from your computer, they might be in the Recycle Bin.
Steps to restore photos from the Recycle Bin on Windows:
-
Open Recycle Bin: Double-click the Recycle Bin icon on your Desktop to open it.
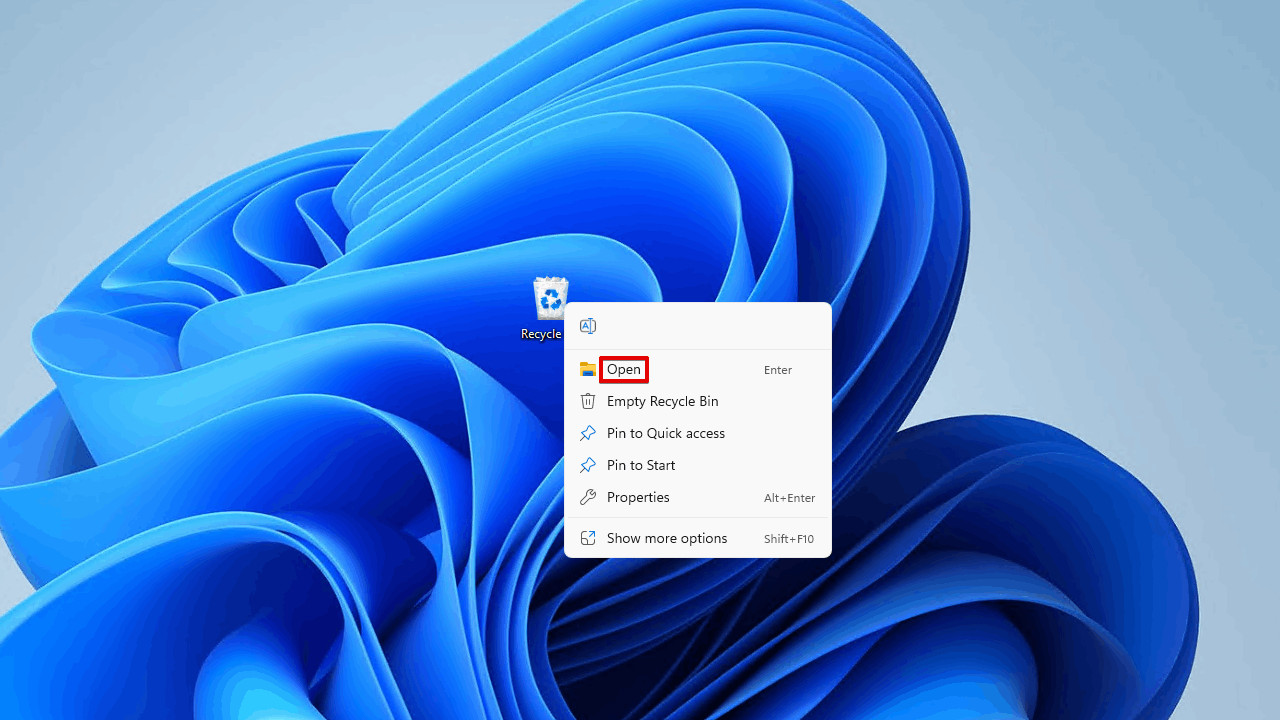 Opening Recycle Bin.
 -
Select and Restore Photos: Browse through the Recycle Bin to locate your deleted photos. Select the photos you want to restore and click Restore the selected items.
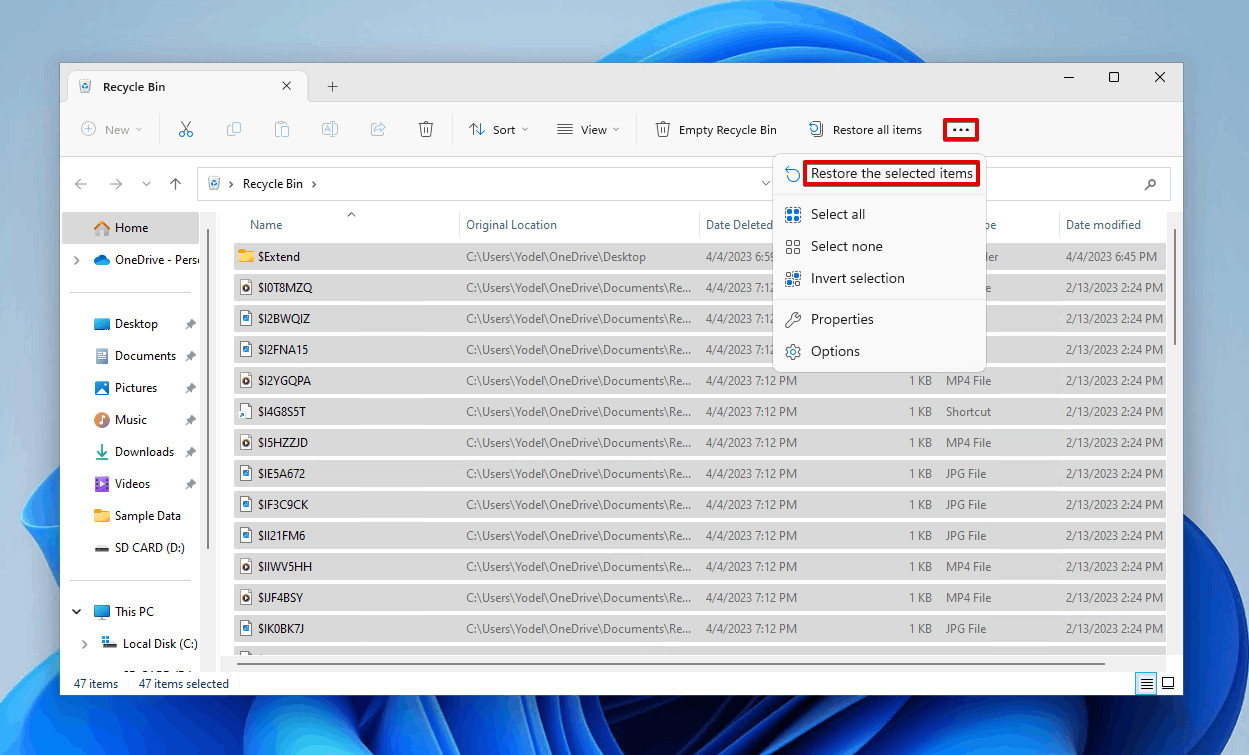 Restoring the selected files.
This will restore the photos to their original location on your computer. To restore them to a different location, drag and drop them from the Recycle Bin to your desired folder.
Recovering Photos from the Trash on Mac
macOS Trash works similarly to the Recycle Bin.
Steps to restore photos from Trash on Mac:
- Open Trash: Open Trash using Finder. You can find Trash icon in the Dock.
- Drag and Drop to Restore: Locate your deleted photos in the Trash. Drag and drop the files to a safe location on your Mac to restore them.
In older versions of macOS, deleting files from external drives created a hidden “.TRASHES” folder on the drive itself. To access it, you had to enable viewing hidden files (CMD + SHIFT + . in Finder). However, this functionality is no longer present in current macOS versions.
Conclusion: Recovering Deleted SD Card Photos Is Possible
As you’ve seen, recovering accidentally deleted photos from an SD card is definitely achievable using various methods on both Mac and Windows. The best approach depends on the specific circumstances of data loss, how quickly you act, and whether you have backups in place.
💡 Maximize Your Recovery Chances with Data Recovery Software: For the most comprehensive and effective SD card photo recovery, especially in cases of accidental deletion or card formatting, data recovery software like Disk Drill for Mac or Disk Drill for Windows is highly recommended. The free version allows you to preview recoverable files, and Windows users can recover up to 500MB of data for free. Download Disk Drill today to protect your valuable photos from accidental loss.
Read also:
Ways to Recover Lost Photos from iPhone
Recover Permanently Deleted Photos on Mac
Recover Permanently Deleted Photos From Android
Best Photo Recovery Software Tools
FAQ: Common Questions About SD Card Photo Recovery
[
How to recover deleted photos from an SD card?
](#collapse-item-faq1)
To recover deleted photos from an SD card effectively:
- Download and install Disk Drill data recovery software on your Windows or Mac computer.
- Connect the SD card to your computer using a card reader.
- Launch Disk Drill and select your SD card from the drive list.
- Click “Search for lost data” to scan the SD card for deleted photos.
- Preview recoverable photos and select the ones you want to restore.
- Click “Recover” and choose a safe recovery location (different from the SD card).
[
How to recover photos from a corrupted SD card?
](#collapse-item-faq2)
Recovering photos from a corrupted SD card depends on the severity of the corruption.
- If the SD card is recognized by your computer: Use SD card recovery software like Disk Drill to scan the corrupted card and attempt to recover photos.
- If the SD card is unrecognizable: First, try to repair the corruption using system tools like CHKDSK in Windows or First Aid in macOS. If repair is successful, then use data recovery software. If repair fails, professional data recovery services might be needed. Refer to guides on how to fix an unrecognizable SD card.
[
How can I recover deleted photos from my SD card for free?
](#collapse-item-faq3)
You can try free SD card recovery options:
- Disk Drill (Free for preview and up to 500MB recovery on Windows): User-friendly interface.
- PhotoRec (Free, open-source for Windows, Mac, and Linux): Command-line based, powerful recovery.
- Windows File Recovery (Free, Windows): Command-line utility from Microsoft.
Disk Drill offers a graphical interface, making it easier for beginners, while PhotoRec and Windows File Recovery are command-line tools requiring some technical familiarity.
[
How to recover deleted photos from memory card without software?
](#collapse-item-faq4)
Unfortunately, recovering deleted photos from a memory card without using software is generally not possible. Deleted files are not permanently erased immediately, and recovery software is needed to scan the card and reconstruct them.
You can check for backups (cloud, computer backups) as an alternative to software-based recovery. Some cameras might also create temporary backups in internal memory.
[
How to recover deleted photos from an SD card on Android phone?
](#collapse-item-faq5)
For SD cards used in Android phones:
- Use an Android data recovery app: Download and install DiskDigger photo recovery from the Google Play Store directly on your phone.
- Scan your SD card using the app.
- Select and recover photos to your phone’s storage or another location.
DiskDigger offers a free version, with a Pro version available for advanced features and rooted devices.
[
How Do I Recover Photos From a SanDisk SD Card?
](#collapse-item-faq6)
Recovering photos from a SanDisk SD card is the same as recovering from any other SD card brand. Use data recovery software like Disk Drill:
- Download and install Disk Drill on your Mac or Windows PC.
- Connect the SanDisk SD card to your computer via a card reader.
- Launch Disk Drill, select the SanDisk SD card, and click “Search for lost data.”
- Wait for the scan to complete.
- Preview and select photos you want to recover.
- Click “Recover” and choose a recovery destination.
[
Can You Recover Photos From a Formatted SD Card?
](#collapse-item-faq7)
Yes, it is often possible to recover photos from a formatted SD card, especially after a quick format. Formatting doesn’t completely erase data immediately.
- Use SD card data recovery software: Follow the steps outlined in this guide using Disk Drill or similar software to scan the formatted SD card.
- Recovery chances are higher after a quick format compared to a full format, which overwrites more data.
- Refer to guides on formatted SD card recovery for more in-depth information.