The power of a photograph to transcend language is well-known. It’s often said, “A picture is worth a thousand words,” and for photographers, this adage rings especially true. Images possess an innate ability to narrate, forging profound connections and communicating emotions, moods, and messages in ways that words sometimes cannot. A photograph that tells a story can evoke understanding and empathy on a purely visual level.
Most seasoned photographers understand this intuitively. They instinctively seek out compelling moments and fleeting expressions, capturing images with the express intention of conveying a narrative. However, crafting a sequence of images into a cohesive and compelling story requires more than just instinct. Like skilled storytellers in any medium, visual narrators hone their craft through dedicated practice and by studying exemplary narratives.
Whether you’re deeply immersed in the art of visual storytelling or just beginning to explore photography, this guide is designed to help you create photos that truly tell a story and resonate with viewers.
Crafting Your Narrative: The Storytelling Plan
Every impactful visual story begins with a strategic approach. Planning allows photographers to identify and capture pivotal moments, evoke specific emotions, and ultimately refine their work into a polished final product. Much like a writer outlines a plot or a director sets a scene, photographers can benefit immensely from developing a plan before even picking up their camera.
While spontaneous shooting can sometimes lead to unexpected inspiration, relying solely on improvisation can result in disjointed image sequences and a weakened narrative. To effectively use pictures that tell a story, it’s crucial to first contemplate the narrative you wish to convey.
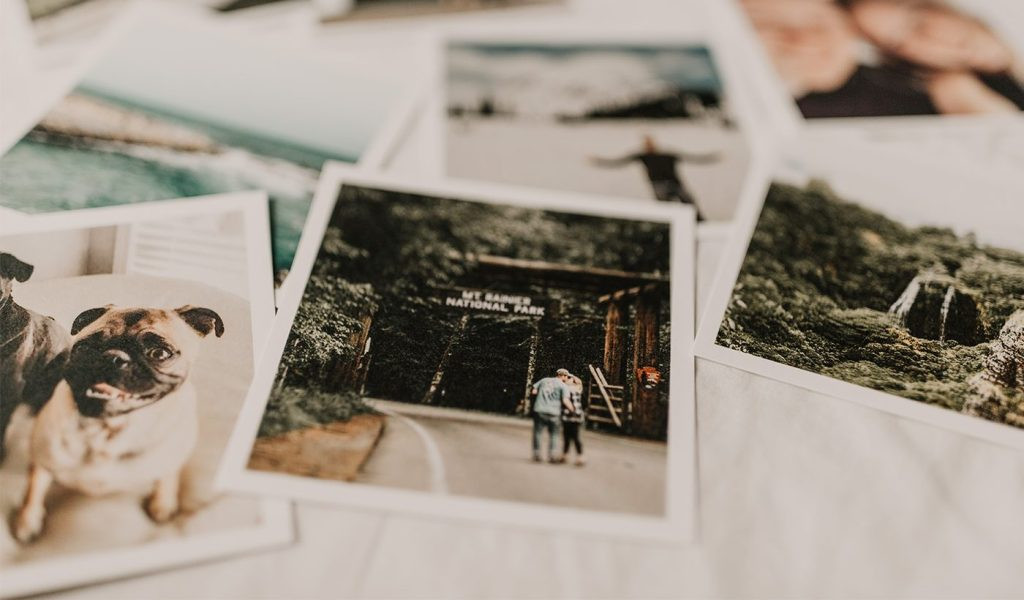 Six polaroid pictures side-by-side telling a different story
Alt text: Six diverse polaroid photos arranged in a grid, each depicting a different miniature scene, illustrating the concept of visual storytelling through varied subjects and compositions.
Essential Questions for Story Development
Asking the right questions is fundamental to developing a solid plan for photos that tell a compelling story. Consider these key questions to guide your narrative:
- What is the central goal of your story? What message do you want to leave with your audience?
- Which genre best describes your story? Is it documentary, portraiture, street photography, or something else?
- Who are the main subjects or characters in your story? How will you establish rapport and trust with them to capture authentic moments?
- What kind of research is necessary for your subject matter or location? Understanding context is key to impactful storytelling.
- What is the timeframe for your project? Are you capturing a single event, a day, or a longer period?
- What level of access do you have to your subjects and locations? This will influence the scope and depth of your story.
- What equipment and props will you need to effectively capture your vision?
- What are the logistical considerations, such as timing and location, for your photoshoot?
- What lighting conditions and weather patterns should you prepare for?
- What is the narrative arc of your story? How will you visually represent the beginning, middle, and end?
- How will you ultimately share your photo story with an audience? Will it be a photo book, online gallery, or social media series? What medium is best suited to your narrative?
Establishing a Visual Theme
Choosing a visual or stylistic theme prior to shooting is an effective method for ensuring a cohesive and unified story when it’s time to present your work. Photo stories that incorporate disparate visual elements can feel disjointed and confusing to viewers, much like a book with inconsistent writing styles. Conversely, a lack of visual variety can be equally underwhelming.
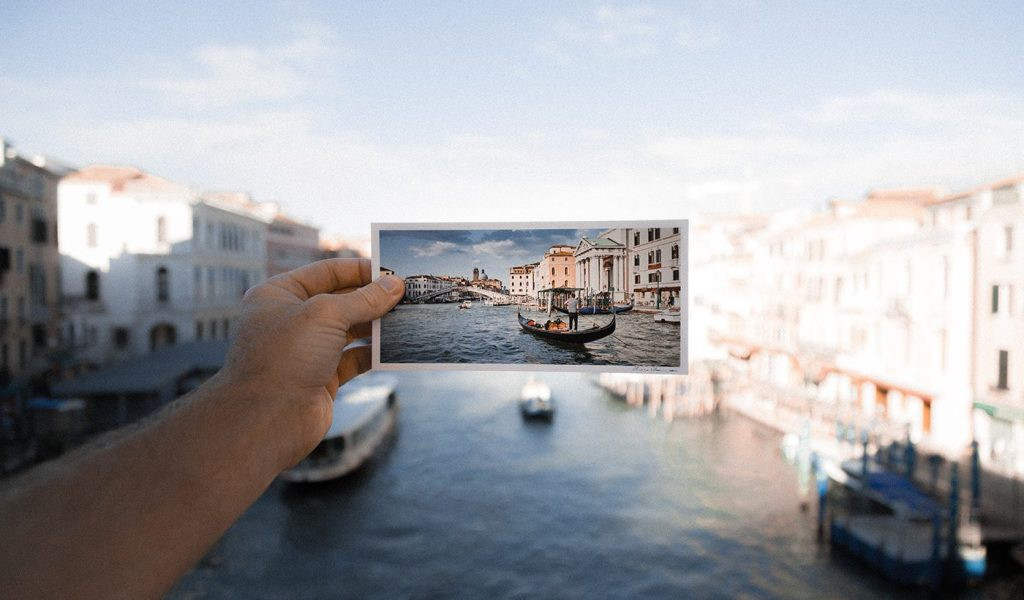 Person holding a photo of the Venice canals in front of the same scene
Alt text: Creative composition blending reality and photography, person holds a print of Venice canals aligning it perfectly with the actual canal scene in the background, emphasizing thematic consistency.
Here are some thematic ideas to get you started:
- Define a specific color palette to maintain visual harmony throughout your images.
- Select a dominant “hero” color, perhaps a brand color if you’re working on a commercial project, to create visual branding.
- Maintain a consistent aspect ratio or shooting angle for a unified look.
- Incorporate recurring props to establish continuity and symbolic meaning.
- Experiment with a particular type of film to achieve a distinctive visual style.
- Consider using black and white photography for a timeless and dramatic effect.
It’s beneficial to gather visual examples of your desired aesthetic, editing style, composition, or color scheme during the planning stage. If you are collaborating with a client, sharing these visual references beforehand, along with a shot list, ensures clear communication and alignment of expectations, leading to client satisfaction with the final results.
Developing a Detailed Shot List
Shot lists are invaluable tools, especially when working with clients. They facilitate clear communication, manage expectations, and provide a structured plan for the photoshoot. Forgetting to capture a crucial shot that a client envisioned is a major pitfall to avoid. Even for personal projects, developing a shot list beforehand saves considerable time in conceptualizing and organizing, preventing on-the-spot planning and problem-solving during the shoot.
A well-defined shot list ensures that you don’t overlook essential images for a campaign or event. For outdoor shoots, a shot list helps schedule your day effectively, allowing you to capture those sought-after golden hour shots or dramatic sunset silhouettes.
Start by noting down essential “must-have” shots and then expand from there. A wedding shot list might include detailed shots of the cake, a wide shot of the grand entrance, and candid moments from the dancing and toasts. For real estate photography, the list could include each room of the house, exterior shots of the front and back, and specific drone views of the property. Writing down the list and double-checking it with your client or team members minimizes the risk of missing critical shots.
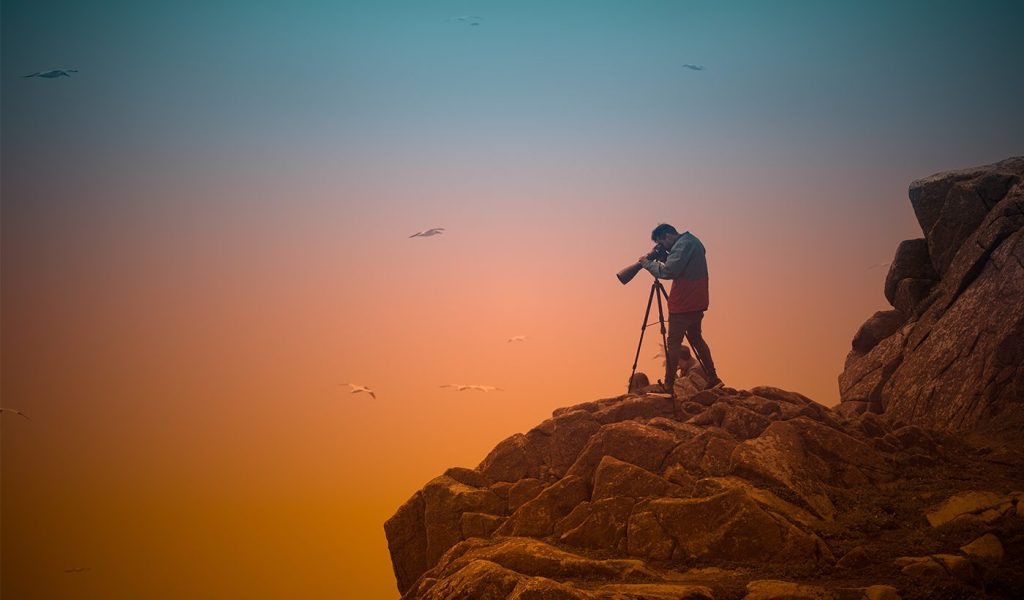 Photographer standing at the top of a rocky mountain taking a photo with a camera equipped with a long lens
Alt text: Adventurous photographer atop a mountain peak, capturing expansive landscape with a telephoto lens, embodying dedication and preparation in visual storytelling.
Capturing the Narrative: Shooting for the Story Arc
With a solid plan and shot list in hand, you can now focus on capturing the images that will construct your photo story. Experience will guide you in recognizing moments of inspiration, such as captivating lighting or an unexpected spontaneous event, and in knowing when to adhere strictly to your shot list.
Every compelling story, regardless of length, features an opening, rising action, climax, and resolution. This structure holds true whether your narrative is condensed into a single image or expanded across a series of photographs or a photo book. Your primary task during the shoot is to visually capture each distinct phase of this storytelling arc as it unfolds.
Setting the Stage: Shooting the Beginning
The opening scene and rising action of your photo story are crucial for introducing characters, establishing context, and generating anticipation. From the moment you arrive at your location, be observant for moments that precede the main action. These could include an empty chair before someone sits, a scenic landscape shot establishing the location, or an environmental portrait of your main subject revealing their initial emotions. Keep the establishing shot in mind – this powerful opening image will grab the viewer’s attention, set the scene, and pique their curiosity about what’s to come.
Narrative photographer Jan Butchofsky dedicated years to documenting the Mescalero Apache tribe’s young maiden coming-of-age ceremonies. She excels at setting scenes and capturing anticipatory moments. In an interview, she shared her approach of arriving early to multi-day ceremonies, assisting with setting up teepees, and unobtrusively photographing the moments leading up to the central event. Her photos, ranging from wide establishing shots to intimate portraits, introduce viewers to the subjects and create a sense of anticipation for the unfolding narrative.
Butchofsky emphasizes the importance of gaining the community’s trust and conducting thorough research, especially when documenting private and personal stories. This approach allows her to provide viewers with the full context and depth of the scene.
Building Intensity: Capturing the Middle
The middle section of your photo story forms the core of your narrative—the climax, the central action. Aim to capture profound and pivotal moments that deliver on the promise set up by your introductory shots. This is where the heart of your story resides.
Visually, the middle section is an excellent opportunity to explore creative angles and compositions. Experiment with unusual perspectives and detailed shots to add depth and intrigue. Shoot from high and low angles, and capture a mix of action shots, landscapes, and close-up details. When combined later, these varied perspectives will enrich your narrative.
Don’t forget the importance of transitions and intermediary moments. Documentary photographer Jennifer Tonetti Spellman incorporates what she calls “eye palette images” and transition shots into the middle of her in-home documentary work. These images serve to advance the story and offer visual breaks. In her photography, this might include detail shots of everyday objects like sticky fingerprints or hair tie collections, or quick snaps of children running up stairs or stumbling over toys.
Resolving the Story: Snapping the End
Following the climax is the resolution, conclusion, or aftermath of your story. These images provide closure, depict transformation, and hint at the future outcome, whether positive or uncertain. Documentary photographers might capture candid reactions of grief after a tragedy, while wedding photographers might photograph the traditional cans tied to the newlyweds’ getaway car.
The resolution is also a chance to add subtlety to your story, using unexpected focal points, callbacks to earlier images, and complex emotions. You don’t always need to tie everything up neatly, especially if the story is ongoing or unresolved. A simple, evocative shot like a hand resting against a doorframe or a changed landscape echoing your introductory image can allow viewers to interpret their own ending and continue the narrative in their minds.
Packaging the Story: Sharing Your Visual Narrative
Stories are meant to be shared. Long before written history, humans gathered around fires to listen to oral storytellers. There’s a unique magic in weaving together words, movements, or pictures into a narrative that others can experience. Don’t let your photographs remain confined to your camera or lost in digital storage.
While visual storytelling can still occur in intimate settings, today it often reaches audiences through phone screens, photo books, or gallery exhibitions. The choice of medium is yours to make.
 Two people going through a photo book telling a photo story
Alt text: Intimate scene of two people engrossed in a photo book, sharing memories and narratives through printed photographs, highlighting the tangible aspect of visual storytelling.
Selecting the Right Format
The how of sharing your story is as much a part of the narrative as the images themselves. A series of portraits displayed as large-format prints in a gallery evokes a different feeling than the same portraits viewed as a digital carousel on social media. Viewers will have a distinct experience holding and touching your photos in a glossy magazine compared to flipping through a luxurious layflat photo album. The space available for your story also influences how you narrate it.
Carefully consider your medium. Is your story unfolding in real-time, requiring ongoing updates? Do you want it to endure over time? How do factors like cost and editing time influence your choice of medium? Each format shapes the story and demands different approaches from you as the storyteller.
Culling Your Image Selection
Just as white space enhances visual impact in design, what you omit from your story is as important as what you include. Strategic omissions allow the most impactful moments to stand out and resonate.
Culling photos can be emotionally challenging, especially when you are personally invested in the project. To simplify the process, consider multiple passes or seek input from a trusted friend. In your first pass, remove duplicates, blurry images, and poorly composed shots. Then, organize your photos into beginning, middle, and end sequences and eliminate images that don’t align with your chosen narrative.
Step away from your work for a few days and then return with a fresh perspective. Which photos stand out most? Which evoke the strongest emotions? Which best fulfill the brief and contribute to the story you’re telling? These are the images to retain.
For further guidance on this complex process, explore resources like Lourenzo Smith’s conversation with Dan Milnor about selecting photos for his publication “Full Frames,” which offers valuable insights into the selection process.
Sequencing Your Images for Impact
After culling your images and organizing them into narrative sections, the next crucial step is arranging them in an order that tells your photo story in the most compelling and logical way.
Sequencing is a refined skill, often a lifelong pursuit for visual storytellers. It guides viewers on a journey through the narrative arc. Think of your photos as chapters, each moment building toward your story’s climax.
Effective sequencing involves manipulating tension rather than simply displaying a collection of your best shots, each with the same level of impact. Just as you carefully shot the introduction, rising action, climax, and resolution, you need to sequence your photos to build tension and then release it strategically.
Not every story unfolds linearly from beginning to end. You might choose to start with the ending and then backtrack to reveal the events that led to it. Some stories are more abstract, and sequencing might involve a gradual shift in color composition or visual motifs from start to finish. Experiment with different arrangements before finalizing your order.
If you feel overwhelmed by the sequencing process, consider these helpful pointers:
- Begin with an arresting, question-provoking image to immediately engage the viewer.
- Introduce visual variety by juxtaposing different types of shots—still portraits with action shots, landscapes with details, horizontal with vertical compositions.
- Maintain narrative momentum by sequencing shots that build and release tension, creating a dynamic viewing experience.
- Encourage audience engagement by intentionally creating gaps and allowing viewers to make their own connections and interpretations.
- Conclude with a powerful, resonant image that provides a sense of closure or lingering thought.
Creating the Final Product
The final and often most rewarding stage of visual storytelling is bringing your final product to life. After all the effort invested, it’s time to showcase your story!
Dedicate time and attention to this stage. Carefully select frames, canvas, and print sizes if you are preparing a gallery exhibition. Experiment with whitespace and post layouts if you’re sharing on social media or a blog. And take care with layout, captions, and paper choices when creating a photo book.
These details can elevate your story from good to exceptional, so don’t overlook this step. It’s where the narrative and the physical product merge, making it a worthwhile investment of your time and effort.
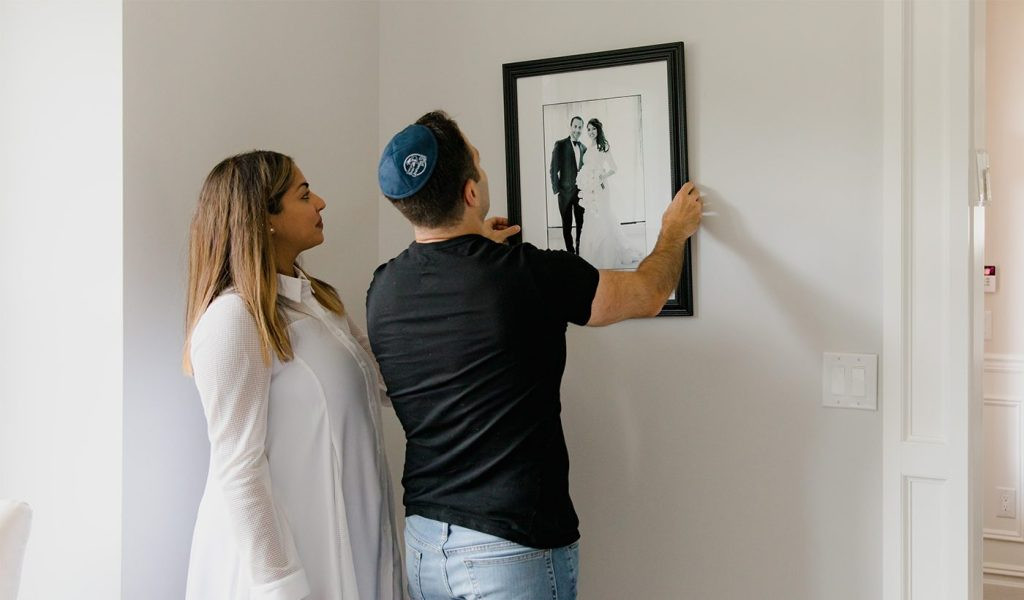 Two people hanging a picture of themselves getting married on their wall
Alt text: Heartwarming scene of a couple proudly hanging a framed wedding photo on their wall, symbolizing the culmination and lasting impact of a photo story capturing a significant life event.
Refining Your Work Through Editing
Just as novels undergo revisions and comic books are re-edited before publication, photographic stories also benefit from refinement. Reworking and editing are integral parts of the creative process, and arguably among the most crucial.
By this stage, you’ve chosen your format, culled your photos, and sequenced your shots. Editing provides the final polish needed before presenting your work to the world.
Consider editing on multiple levels. You’ll want to refine individual photos through cropping, sharpening, and enhancing. But also consider the overall visual harmony and feel of your final product. Zoom out to assess how all the images work together as a cohesive unit, ensuring a unified composition rather than just a series of individual pictures.
Re-evaluate the emotional impact of the entire story. Additionally, meticulously review captions, text, and page numbering relevant to your chosen medium.
Seeking feedback from an editor or mentor is always advisable. While self-editing is valuable, a fresh perspective can make a significant difference, especially for self-published projects or client work.
Finally, if you are printing a photo book, magazine, poster, or canvas, always print a proof copy. Reviewing a single printed copy before committing to a full run allows you to achieve pixel-perfect precision and catch any errors that may have slipped through the editing process. If you find and correct errors, be sure to print another proof to ensure no new errors were introduced during corrections. There’s nothing more disappointing than discovering a mistake in a large print run after only checking a single proof initially.
***What story do your photographs have to tell? Make a photo book today.