Low resolution photos can be a real frustration. Whether you’re trying to print a picture, use it online, or simply want to view it on a larger screen, a blurry, pixelated image just doesn’t cut it. You might be wondering, “How Do You Fix Low Resolution Photos?” While you can’t magically add detail that wasn’t there originally, there are techniques to make low-resolution images more usable. This guide will walk you through a simple method to increase the resolution of your photos and discuss what to expect from this process.
Understanding Low Resolution in Photos
Before we dive into fixing low resolution photos, it’s important to understand what “resolution” actually means in the context of digital images. Resolution refers to the number of pixels in an image. Pixels are the tiny building blocks that make up a digital photograph. A low resolution photo has fewer pixels, resulting in less detail and a potentially blurry or pixelated appearance, especially when enlarged. Common reasons for low-resolution photos include:
- Using older cameras or phone cameras: Older devices often have sensors with lower megapixel counts, leading to smaller image sizes.
- Downloading images from the internet: Images found online are often compressed and saved at lower resolutions to reduce file size and improve website loading times.
- Social media compression: Platforms like Facebook and Instagram automatically compress uploaded photos, which can reduce their resolution.
- Screenshotting images: Screenshots capture only the pixels displayed on your screen, often resulting in lower resolution versions of the original image.
Upsampling: A Quick Fix for Low Resolution Photos
One of the most accessible methods to improve the appearance of low resolution photos is called “upsampling,” or “resizing.” This process increases the pixel dimensions of an image, essentially making it larger. While it doesn’t add actual detail, it can smooth out pixelation and make the image look better, particularly when viewed at a larger size than it was originally intended for.
For Mac users, the built-in “Preview” application offers a straightforward way to upsample images. Here’s how to do it:
-
Open your low-resolution photo in Preview. You can do this by dragging and dropping the image file onto the Preview icon in your Dock or by right-clicking on the image file, selecting “Open With,” and choosing “Preview.”
-
Access the “Adjust Size” tool. Once your photo is open in Preview, navigate to the menu bar at the top of your screen and click on “Tools.” From the dropdown menu, select “Adjust Size…”
-
Enter the desired dimensions. In the “Adjust Size” dialog box, you’ll see options to change the image dimensions.
- “Fit into”: You can choose a preset size from the dropdown menu or enter custom dimensions in pixels. For example, selecting “1024 x 768” is a common screen resolution.
- “Width” and “Height”: Alternatively, you can directly input the desired width and height in pixels.
-
Ensure “Scale proportionally” and “Resample image” are checked. These options are crucial for maintaining the image’s aspect ratio and applying the upsampling algorithm. “Scale proportionally” keeps the image from becoming distorted (stretched or squashed), while “Resample image” tells Preview to add new pixels to increase the size.
-
Click “OK” to apply the changes. Preview will now upsample your image to the new dimensions.
-
Save the upsampled photo as a new file. To avoid overwriting your original low-resolution image, it’s essential to save the upsampled version separately. Go to “File” in the menu bar and select “Save As…”
- Rename the file: Add a suffix to the filename (e.g., “_upsampled”) to easily distinguish it from the original.
- Choose a destination: Select where you want to save the new file, such as your Desktop for easy access.
- Format and Quality: Ensure the “Format” is set to “JPEG” (or your preferred image format) and the “Quality” is set to “Best” to preserve image quality during saving.
-
Click “Save.” You now have an upsampled version of your low-resolution photo.
 Adjust Size dialog in Preview for upsampling photos
The “Adjust Size” dialog in Preview, highlighting the options for resizing and resampling an image to fix a low-resolution photo.
Upsampling: Does it Really Improve Image Quality?
The effectiveness of upsampling in “fixing” low resolution photos is a topic of debate among photographers and image experts. Some argue that upsampling inherently degrades image quality because it involves creating new pixels based on existing ones, rather than adding actual detail. This process is often referred to as interpolation.
However, as demonstrated by some users, upsampling can subjectively improve the visual quality of a low-resolution image, particularly when the goal is simply to make it viewable at a larger size or to reduce pixelation.
Consider this example of an old scanned genealogy photo with an original resolution of 634 x 982 pixels:
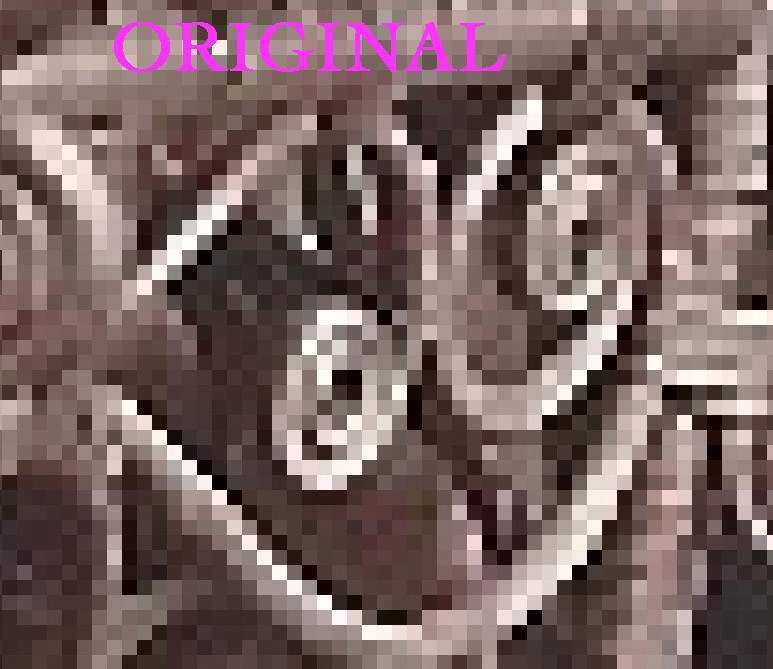 Detail of original low-resolution genealogy photo
A close-up detail of the original low-resolution photo, exhibiting pixelation and a harsh appearance.
When this image is upsampled to 1,300 x 2,000 pixels, the result is visually smoother:
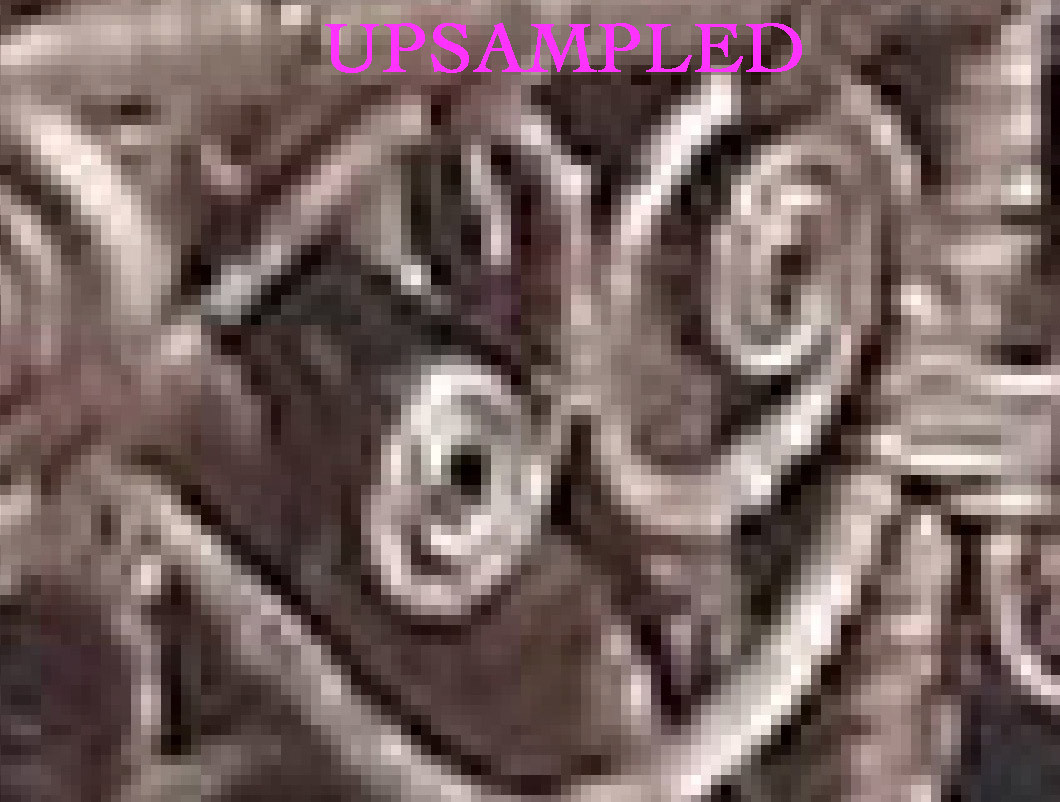 Detail of upsampled genealogy photo with improved smoothness
The same detail after upsampling, showing a reduction in pixelation and a smoother overall appearance.
While technically, the upsampled image doesn’t contain more detail than the original, the interpolation process can “even out the appearance of the original pixels,” as Wikipedia describes image resampling. This can lead to a perceived improvement in quality, especially when viewing the image on a screen.
The key takeaway is to manage expectations. Upsampling is not a magic bullet. It cannot restore lost detail or turn a heavily blurred image into a high-resolution masterpiece. However, for slightly low-resolution photos, especially those intended for screen viewing rather than high-quality printing, upsampling can be a helpful technique to enhance visual appeal and reduce distracting pixelation.
Beyond Preview: Other Tools for Fixing Low Resolution Photos
While Preview offers a basic and readily available upsampling tool, more advanced software provides sophisticated algorithms that can potentially yield better results. Options include:
- Adobe Photoshop: Photoshop and other professional image editing software offer various resampling methods (like Bicubic Smoother, Preserve Details) that can produce higher-quality upsampling compared to basic interpolation.
- Online Upscaling Tools: Numerous websites and online tools utilize AI-powered upscaling algorithms that claim to intelligently enhance details and reduce artifacts during upsampling.
- Dedicated Upscaling Software: Software specifically designed for image upscaling often incorporates advanced algorithms and machine learning to produce the best possible results.
Exploring these alternatives might be worthwhile if you frequently need to fix low resolution photos or require the highest possible quality for upsampled images.
Conclusion: Making the Most of Your Low Resolution Photos
Dealing with low resolution photos doesn’t have to be a dead end. By understanding the basics of resolution and employing techniques like upsampling, you can often make these images more usable and visually pleasing. While upsampling has its limitations and won’t magically create detail, it’s a valuable tool for improving the appearance of slightly low-resolution photos, especially for digital display. Experiment with Preview’s “Adjust Size” feature and consider exploring more advanced tools for situations where higher quality upscaling is needed. Remember to always save upsampled images as new files to preserve your originals, and you’ll be well-equipped to tackle the challenge of low resolution photos.
