iCloud Shared Photo Library offers a fantastic way for families and close friends to consolidate their cherished memories. Imagine a space where everyone can contribute, edit, and relive shared experiences through photos and videos. This feature, seamlessly integrated within Apple’s ecosystem, allows up to five individuals to collaborate on a single photo and video collection, ensuring that everyone has access to a more complete tapestry of shared moments. This guide will walk you through everything you need to know about How Can I Share Photos On Icloud using the Shared Photo Library, from setting it up to making the most of its features.
Understanding iCloud Shared Photo Library
When you actively share photos and videos to iCloud Shared Photo Library, these media files are relocated from your Personal Library into this collaborative space. Think of it as moving photos from your personal album to a shared family album. You’re entitled to participate in one Shared Library at a time. Crucially, you have control over what you share, with options to manually select content or even automate sharing directly from your device’s camera.
A key aspect of the iCloud Shared Photo Library is its egalitarian approach. All participants are granted equal permissions. This means everyone can add their own photos and videos, as well as edit and even delete content within the Shared Library. It’s designed for collaborative memory keeping. The person who initiates the Shared Library setup, known as the library creator, is responsible for providing the iCloud storage that accommodates all the shared content. However, a significant advantage for other members is that accessing and contributing to the Shared Library doesn’t count against their personal iCloud storage limits.
Setting Up Your Shared Library
Before you begin, ensure your devices are updated. Creating a Shared Library requires a device running iOS 16.1, iPadOS 16.1, or macOS Ventura or later, and iCloud Photos must be enabled. For users under 13, participation is restricted to Shared Libraries with members of their Family Sharing group.
Creating a Shared Library on iPhone or iPad
- Navigate to Settings. Then, depending on your iOS version, go to Apps > Photos or directly to Photos. Tap on Shared Library.
- You’ll be prompted to invite participants. You can select up to five people at this stage, or choose to add them later.
- Next, you need to choose which existing photos and videos to initially move to your Shared Library. You can select specific items or decide to add content later.
- Follow the on-screen prompts to preview your Shared Library setup, confirm your sharing choices, and send out invitations to your chosen participants.
 You can preview your Shared Library during setup.
Creating a Shared Library on Mac
- Open the Photos app on your Mac. In the menu bar, select Photos > Settings, and then click on iCloud.
- Verify that iCloud Photos is turned on. If it’s not, enable it by selecting the checkbox.
- Click on Shared Library, and then click Get Started to initiate the setup process.
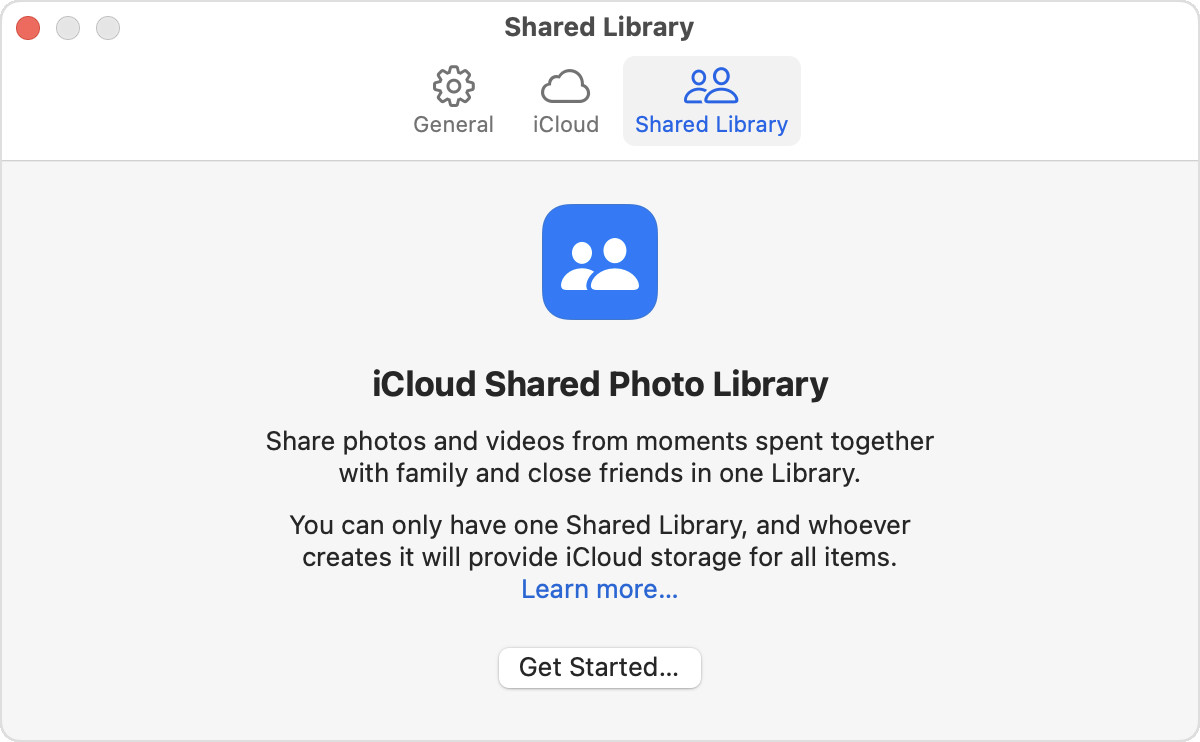 The Shared Library tab is next to the iCloud tab.
- Follow the on-screen instructions to invite participants and select the initial photos and videos to add to your Shared Library.
Joining an Existing Shared Library
To join an iCloud Shared Photo Library, your device must also meet the software requirements: iOS 16.1, iPadOS 16.1, or macOS Ventura or later with iCloud Photos enabled. Age restrictions for users under 13 are the same as for creating a library.
Joining a Shared Library on iPhone or iPad
- You can join either through an invitation link sent by the library creator or by going to Settings > Apps > Photos (or Settings > Photos in iOS 17 or earlier).
- If you received an invitation, tap Accept & Continue. If joining through settings, you should see the invitation there.
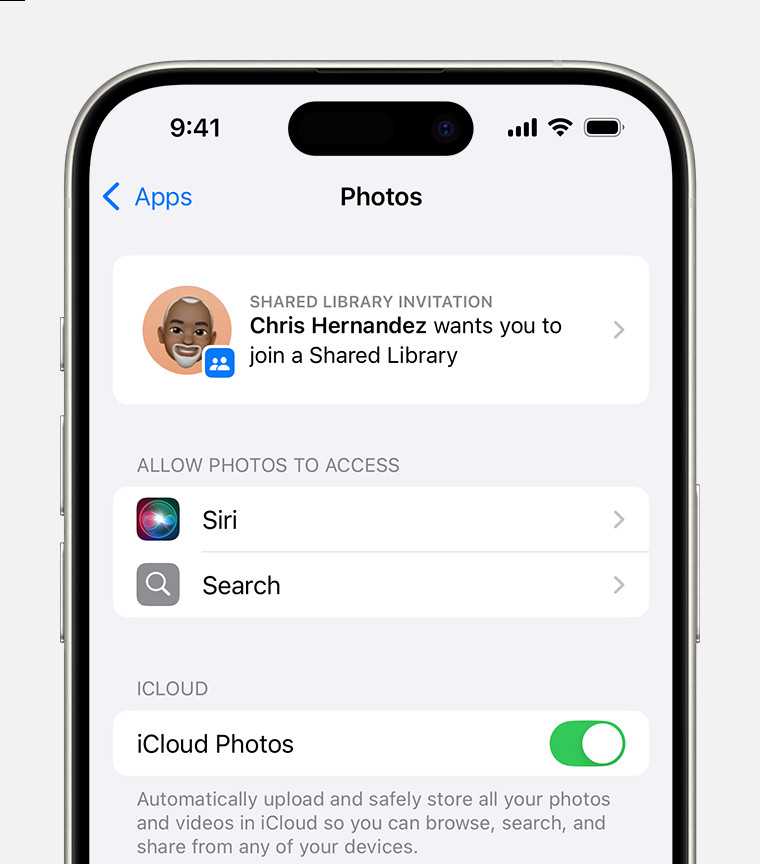 If you have a Shared Library invitation, you can find it in the Photos section of your device Settings.
- You’ll be asked to choose photos and videos from your Personal Library to contribute to the Shared Library. You can make your selections at this point or choose to do it later.
- Follow the subsequent steps to preview the Shared Library content and confirm your sharing preferences.
Joining a Shared Library on Mac
- Open the invitation from the library creator or go to Photos > Settings, and select View Invitation.
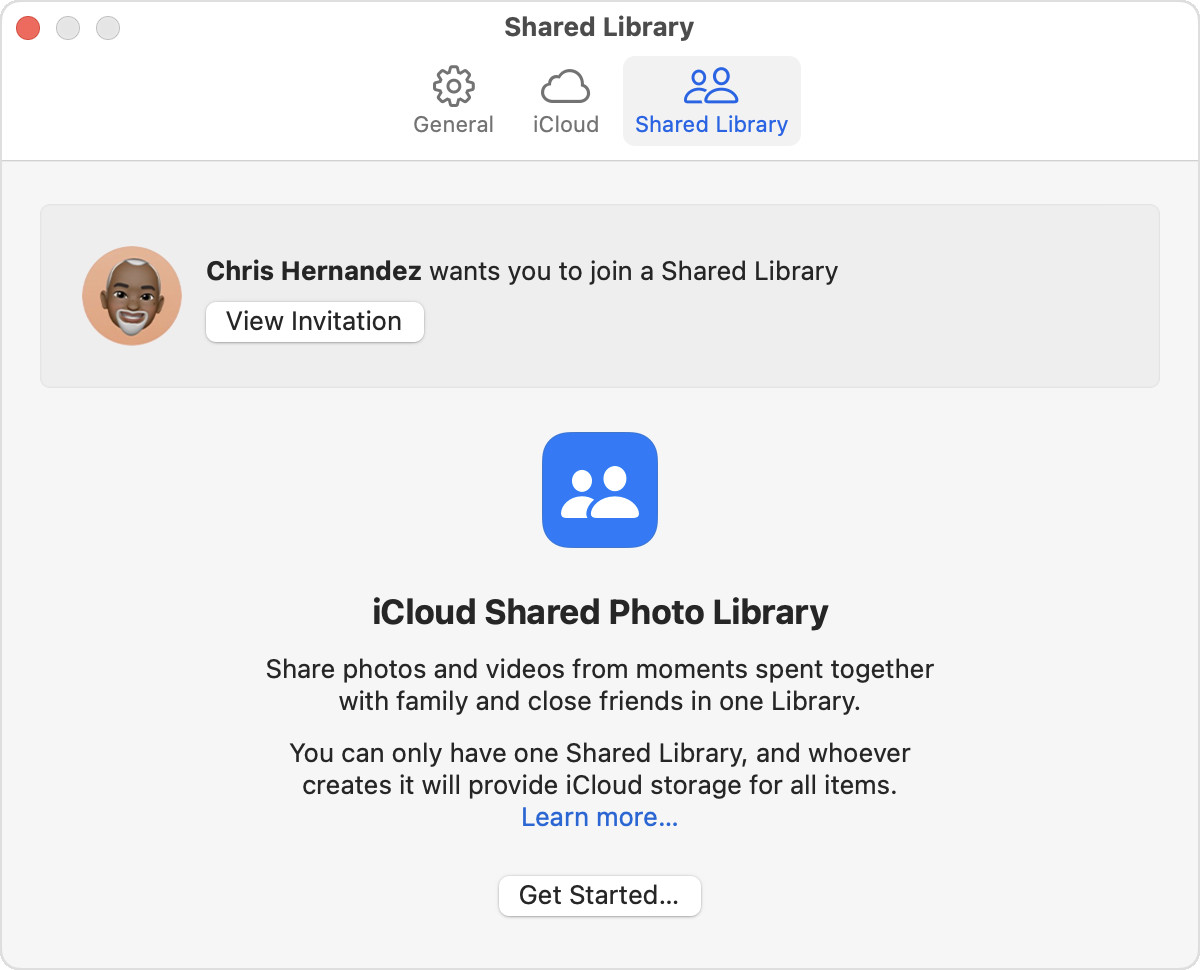 If you have a Shared Library invitation, you can find it in Settings in the Photos app.
- Click Get Started, and then follow the on-screen prompts to choose which photos and videos you wish to move to the Shared Library, or opt to add photos at a later time.
- Continue to follow the steps to preview the Shared Library and finalize your content sharing choices.
Effectively Using Your Shared Library
iCloud Shared Photo Library offers several flexible options to manage and view your shared photos and videos. You can share photos directly from your camera, switch between viewing your Personal and Shared Libraries, and customize how you interact with shared content.
Sharing Photos Directly from Your Camera on iPhone or iPad
- Go to Settings > Apps > Photos (or Settings > Photos in iOS 17 or earlier), and tap Shared Library.
- Tap on Sharing from Camera and ensure it is toggled on.
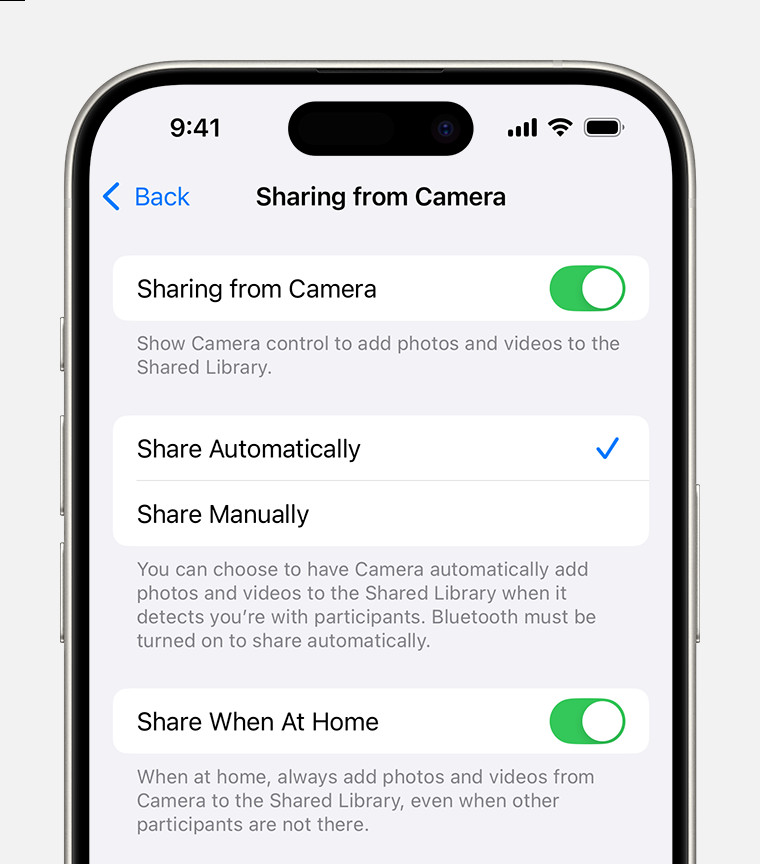 To add a button in the Camera app to share photos and videos to your Shared Library, turn on Sharing from Camera.
*   **Share Automatically:**  The Camera app can automatically add photos to the Shared Library when you are near other participants.
*   **Share Manually:**  You can choose each time whether to add photos to the Shared Library.
* **Share When At Home:** Automatically share photos taken at your home location to the Shared Library.- In the Camera app, a Shared Library button will appear at the top of the screen. Ensure this button is active (turned on) to send photos and videos directly to your Shared Library as you capture them. Tap it to turn off direct sharing and save to your Personal Library instead.
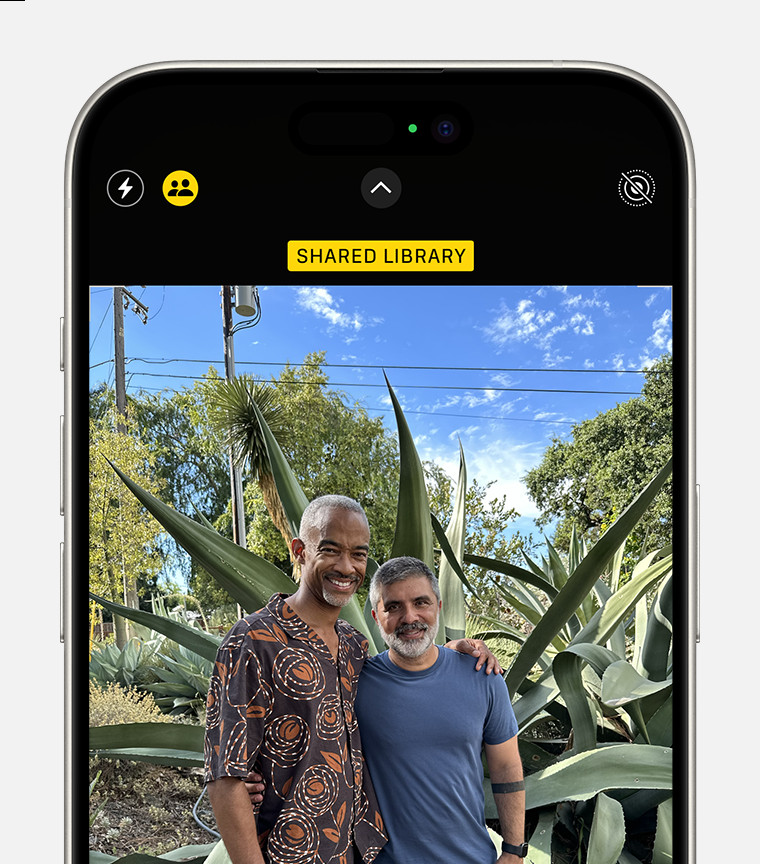 The Shared Library button is at the top of the screen.
Switching Between Personal and Shared Libraries on iPhone or iPad
- Open the Photos app.
- Tap the profile button usually located in the upper corner. Scroll down to find Library View Options. In iOS 17 or earlier, look for the library view options button at the top of the Albums or Library tabs.
- Choose between Personal Library, Shared Library, or Both Libraries to view your desired content.
 An iPhone screen showing Both Libraries, Personal Library, and Shared Library under Library View Options.
When viewing Both Libraries or just the Shared Library, photos that are part of the Shared Library are marked with a special icon. You can disable this badge by turning off the Shared Library Indicator in the view options.
Switching Between Libraries on Mac
- Open the Photos app on your Mac.
- At the top of the Photos app window, you will see options to toggle between Personal Library, Shared Library, or Both Libraries. Select your preferred view.
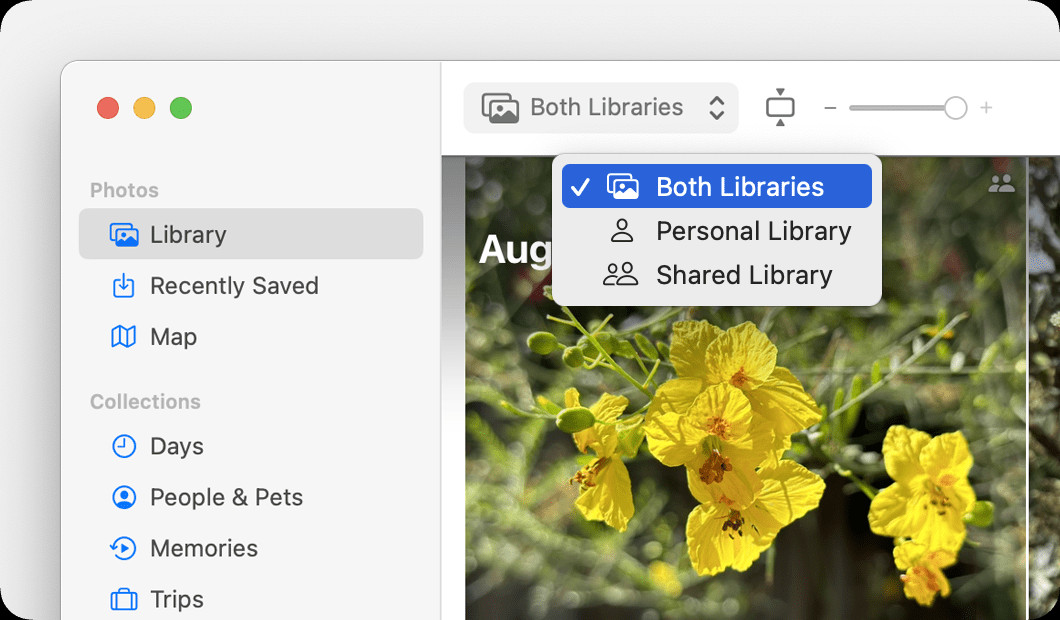 A Mac screen showing that you can toggle between Both Libraries, Personal Library, and Shared Library.
Similar to iOS, in Both Libraries or Shared Library view on Mac, photos in the Shared Library are marked with an icon. You can hide these icons by going to View > Metadata and deselecting In Shared Library.
Leaving a Shared Library
Your participation in an iCloud Shared Photo Library is flexible. If you are the creator, you have the authority to remove participants or delete the entire Shared Library at any time. Deleting the library sends a notification to all participants. Depending on how long a participant has been in the library, they will receive either all content or just their contributions back in their Personal Library upon deletion.
As a participant, you can also leave a Shared Library whenever you choose. When leaving, you can opt to receive a copy of everything in the Shared Library or only the photos and videos you personally contributed.
Learn how to leave a Shared Library to explore the detailed steps for exiting a shared library.
Getting Help with Shared Library
For further assistance or troubleshooting, Apple provides comprehensive support resources. You can find more detailed information and help guides on the Apple Support website by searching for “iCloud Shared Photo Library” or related topics.
* Age varies by country or region regarding age restrictions for iCloud features.
Published Date: (Original publish date would be placed here if available)
This guide provides a comprehensive overview of how can I share photos on iCloud using the Shared Photo Library, empowering you to easily collaborate and share memories with your chosen group.