In today’s digital age, privacy is paramount, especially when it comes to personal photos and videos. Apple devices offer a built-in feature that allows you to hide sensitive or private media, ensuring they are not readily visible in your photo library. Whether you are using an iPhone, iPad, Mac, or Apple Vision Pro, understanding how to hide photos is a valuable skill. This guide will walk you through the steps to effectively use the “Hidden” album on your Apple devices, ensuring your private moments remain private.
Hiding Photos on Your iPhone or iPad
Apple’s iOS and iPadOS make it straightforward to hide photos and videos directly from the Photos app. Here’s how you can do it in a few simple steps:
Steps to Hide Photos on iPhone or iPad
- Open Photos: Launch the Photos app on your iPhone or iPad.
- Select Media: Navigate to the photo or video you wish to hide. Tap and hold on the specific media to bring up options.
- Choose Hide: From the options menu, tap “Hide”.
- Confirm Action: A confirmation prompt will appear at the bottom of your screen. Tap “Hide Photo” or “Hide Video” to confirm your decision. The selected media will now be moved to the Hidden album.
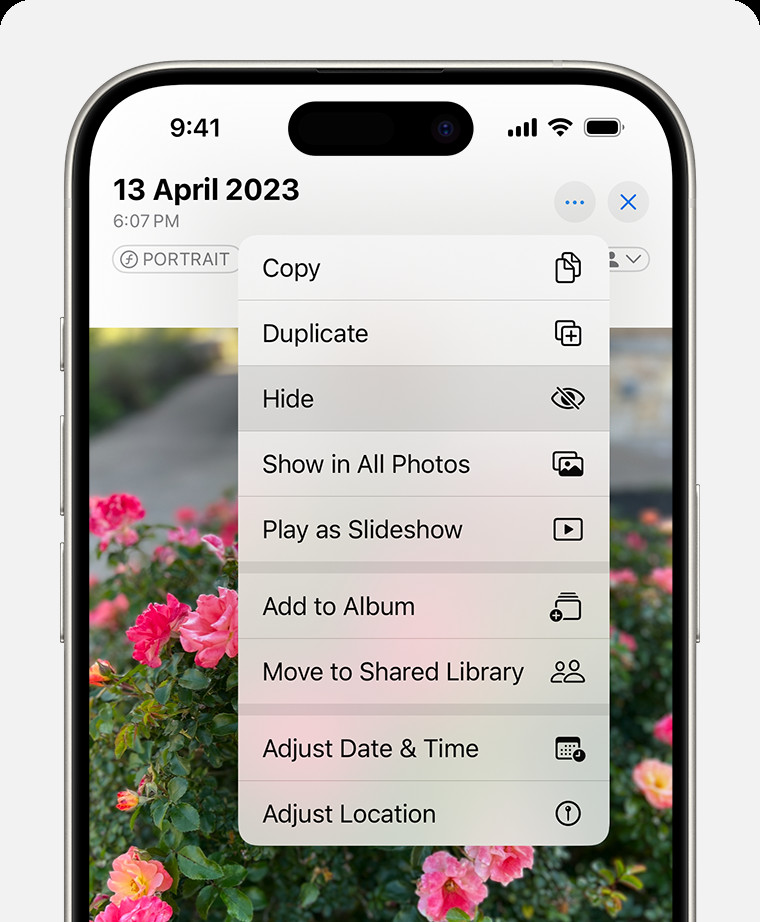 Dropdown menu highlighting the Hide feature feature for a photo.
How to Unhide Photos on iPhone or iPad
If you decide to make a hidden photo or video visible again, the process is just as simple:
- Access Albums: Open the Photos app. On an iPad, you might need to tap the sidebar icon in the top-left corner to view albums.
- Find Hidden Album: Scroll down to the “Utilities” section and tap on “Hidden”.
- Unlock if Necessary: If you are using iOS 16 or later, or iPadOS 16.1 or later, the Hidden album is locked by default. Tap “View Album” and use Face ID, Touch ID, or your passcode to unlock it.
- Select to Unhide: Once in the Hidden album, tap and hold the photo or video you want to unhide.
- Choose Unhide: From the options, select “Unhide”. The photo or video will be moved back to your main library and will reappear in albums and moments based on its date.
Finding the Hidden Album and Controlling Its Visibility
By default, the Hidden album is visible within the Utilities section of the Photos app. Here’s how to find it and how to make it completely invisible if you wish:
- Open Photos and Navigate to Albums: Open the Photos app and navigate to the Albums view.
- Locate Hidden Album: Scroll down under “Utilities” to find the “Hidden” album.
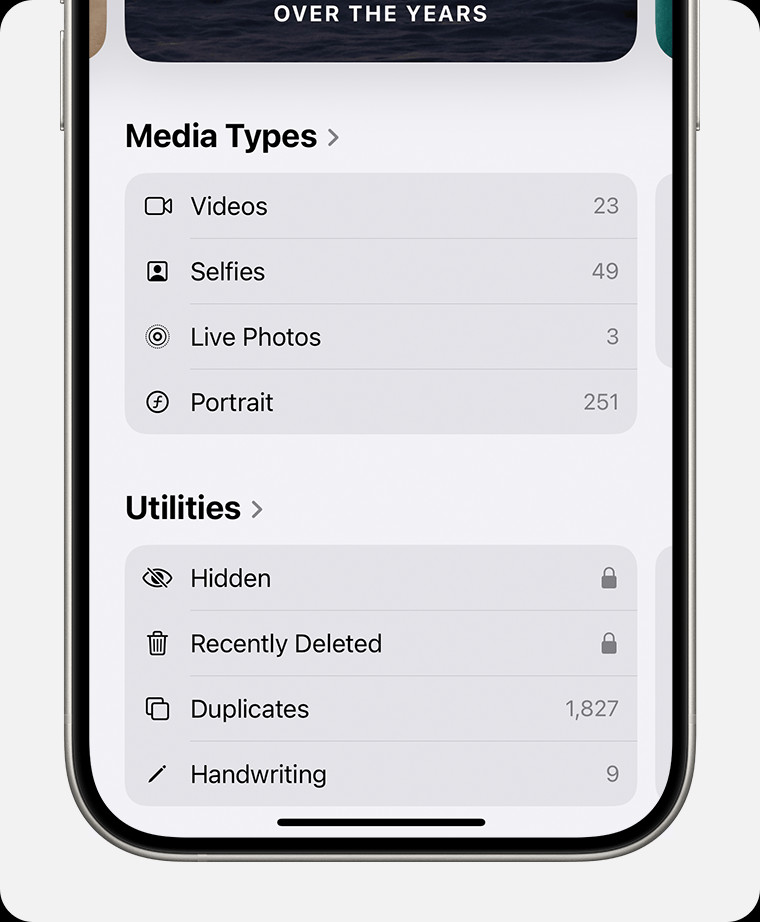 Hidden album highlighted under Utilities.
To turn off the visibility of the Hidden album altogether:
- Open Settings: Go to the Settings app on your iPhone or iPad.
- Navigate to Photos Settings: Scroll down and tap on “Photos”.
- Toggle off Hidden Album: Under the “Albums” section, find the “Show Hidden Album” option and toggle it off. When this is disabled, the Hidden album will not appear in the Utilities section of your Photos app, making your hidden photos and videos completely invisible unless you re-enable this setting.
Hiding Photos on Your Mac
macOS also provides a straightforward way to hide photos within the Photos application, ensuring privacy on your desktop.
Steps to Hide Photos on Mac
- Open Photos: Launch the Photos app on your Mac.
- Select Media: Select the photo or video you intend to hide. You can do this by control-clicking (or right-clicking) on the media.
- Choose Hide Photo: From the context menu, select “Hide Photo”. Alternatively, with the photo selected, you can go to the menu bar at the top of your screen, click on “Image,” and choose “Hide Photo.” You can also use the keyboard shortcut
Command-L. - Confirm Action: Confirm that you want to hide the selected photo or video when prompted.
How to Unhide Photos on Mac
To unhide photos on your Mac, follow these steps:
- Show Hidden Album: In the Photos app, go to the menu bar, click on “View,” and select “Show Hidden Photo Album.”
- Access Hidden Album: The Hidden album will now appear in the sidebar under “Photos.” Select “Hidden.”
- Unlock if Necessary: Click “View Album.” You might be prompted to use Touch ID or your login password to unlock the album if you have security features enabled.
- Select to Unhide: Select the photo or video you wish to unhide.
- Choose Unhide Photo: Control-click on the selected media and choose “Unhide Photo.” You can also unhide from the menu bar by going to “Image” and selecting “Unhide Photo,” or by using the
Command-Lshortcut again.
Finding the Hidden Album on Mac
Unlike iPhone and iPad, the Hidden album on Mac is hidden by default. You need to manually enable its visibility:
- Open Photos: Open the Photos application on your Mac.
- Show Hidden Album: In the menu bar, click on “View” and then select “Show Hidden Photo Album.” The Hidden album will then be visible in the sidebar.
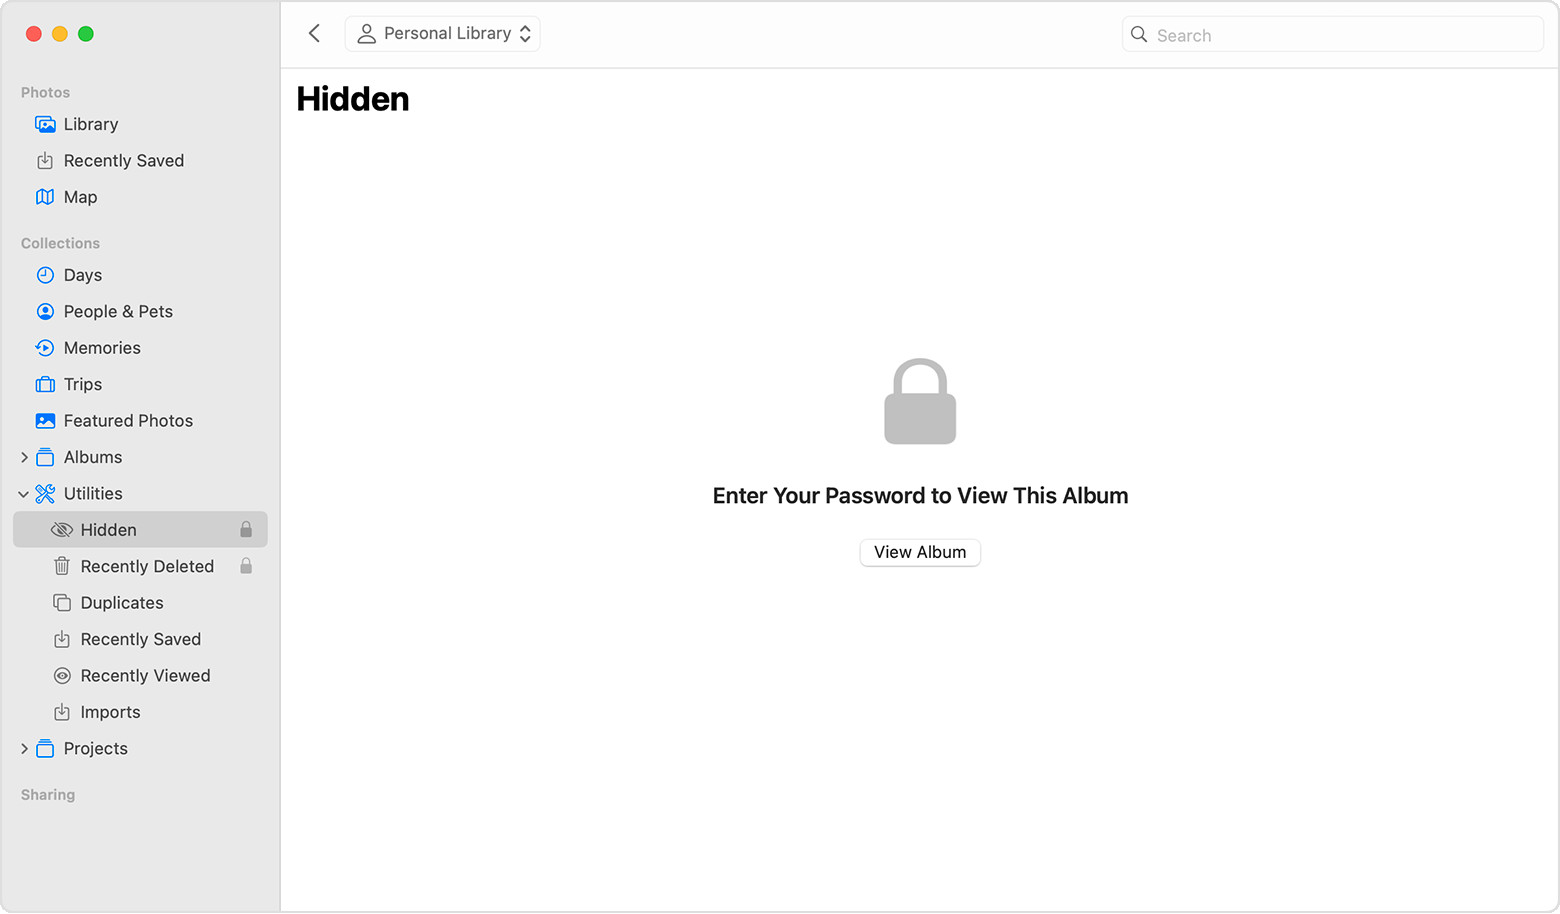 Hidden album highlighted in MacOS Photos app.
Hiding Photos on Your Apple Vision Pro
Apple Vision Pro users can also maintain their photo privacy with similar steps to hide photos directly within the Photos app on this device.
Steps to Hide Photos on Apple Vision Pro
- Open Photos App: Open the Photos app on your Apple Vision Pro.
- Select and Hide: Select the photo or video you wish to hide by holding down on it, then tap “Hide” from the options.
- Confirm: Confirm that you want to hide the photo or video.
How to Unhide Photos on Vision Pro
To unhide photos on Apple Vision Pro:
- Open Photos and Access Collections: Open the Photos app and tap “Collections” in the sidebar.
- Find Hidden Album: Scroll down to the “Utilities” section and tap “Hidden.”
- Select and Unhide: Tap and hold on the photo or video you want to unhide, and then tap “Unhide.”
Finding the Hidden Album on Apple Vision Pro and Controlling Visibility
Finding the Hidden album on Apple Vision Pro is similar to iPhone and iPad, and you can also control its visibility:
- Access Collections: In the Photos app, tap the “Collections” tab in the sidebar.
- Locate Hidden Album: Scroll down under “Utilities” to find the “Hidden” album.
To turn off the Hidden album visibility on Apple Vision Pro:
- Open Settings: Go to Settings on your Apple Vision Pro.
- Navigate to Photos Settings: Tap “Apps,” then “Photos.”
- Toggle off Show Hidden Album: Scroll down and turn off “Show Hidden Album.”
Conclusion
Utilizing the Hidden album feature across your Apple devices is an effective way to manage your photo privacy. By following these straightforward steps, you can easily hide and unhide your personal photos and videos on your iPhone, iPad, Mac, and Apple Vision Pro. Remember to keep your software updated to ensure you have the latest security features, including the locked Hidden album in newer operating systems, providing an extra layer of protection for your private media. Whether for personal reasons or to maintain discretion, mastering the “hide photo” function on Apple devices gives you greater control over your visual content.