Capturing stunning photos with your iPhone is a breeze, but what about getting those precious memories onto your laptop? Whether you need to free up phone storage, back up your photos, or simply want to edit them on a larger screen, transferring photos from your iPhone to your laptop is a common task. While connecting with a USB cable is an option, many users seek the convenience of wireless transfer.
But How To Transfer Photos From Iphone To Laptop Wirelessly in the easiest and most efficient way? This guide explores several methods to wirelessly move your photos, ensuring you can keep your memories safe and accessible without the hassle of cables. We’ll cover popular options and help you decide which method best suits your needs and preferences.
Part 1: Using iCloud to Wirelessly Transfer Photos from iPhone to Laptop
iCloud, Apple’s cloud storage service, offers a seamless way to synchronize your photos across all your Apple devices and even Windows laptops. It’s a popular choice for those within the Apple ecosystem and provides automatic syncing, making photo transfer almost effortless.
For iPhone to MacBook or iMac
If you are transferring photos from your iPhone to a Mac laptop or desktop, iCloud is deeply integrated and incredibly straightforward:
-
Enable iCloud Photos on your iPhone: Go to Settings on your iPhone, tap on your Apple ID at the top, then select iCloud.
-
Tap on Photos.
-
Toggle iCloud Photos to the ON position.
This will automatically upload your iPhone photos to iCloud. On your Mac, the Photos app is already linked to iCloud. As long as you are signed in with the same Apple ID on both devices, your photos will automatically appear in the Photos app on your Mac. You can then access and manage them directly on your laptop.
For iPhone to Windows Laptop
Transferring photos from iPhone to a Windows laptop via iCloud requires a few extra steps but is still a convenient wireless method:
- Enable iCloud Photos on your iPhone: Follow the same steps as above for iPhone to Mac: Settings > Apple ID > iCloud > Photos > iCloud Photos (ON).
- Download iCloud for Windows on your Laptop: Visit the Microsoft Store on your Windows laptop and download the iCloud for Windows application.
- Sign in to iCloud for Windows: Open the iCloud for Windows app and sign in using your Apple ID and password – the same one you use on your iPhone.
- Select Photos: In the iCloud for Windows app, ensure that Photos is checked. You can also click the Options button next to Photos to customize the download location for your iCloud photos on your laptop.
- Access Photos: Once set up, iCloud for Windows will create an “iCloud Photos” folder in File Explorer on your laptop. Your photos from iCloud will automatically download to this folder, allowing you to access them on your Windows laptop.
Pros of using iCloud:
- Automatic Syncing: Once set up, photos automatically sync between your iPhone and laptop.
- Ease of Use (Apple Ecosystem): Extremely simple for users with both iPhones and Macs.
- Background Operation: Transfers happen in the background without requiring manual steps for each transfer.
Cons of using iCloud:
- Limited Free Storage: iCloud offers only 5GB of free storage, which may quickly fill up, especially with photos and videos. You may need to pay for a larger iCloud storage plan.
- Internet Dependency: Requires a stable internet connection for both uploading from your iPhone and downloading to your laptop. Transfer speeds can be affected by internet speed and file sizes.
- Potential Data Usage: Uploading photos over cellular data can consume a significant amount of your data plan if you are not connected to Wi-Fi.
Part 2: Transferring iPhone Photos to Laptop Wirelessly via Bluetooth
Bluetooth offers another wireless method for transferring photos, although it’s generally more suitable for transferring a smaller number of images due to its slower transfer speeds compared to Wi-Fi or cloud services.
Here’s how to use Bluetooth to send photos from your iPhone to your laptop:
-
Enable Bluetooth on both iPhone and Laptop:
- iPhone: Go to Settings > Bluetooth and toggle Bluetooth to ON. Make sure your device is discoverable.
- Windows Laptop: Go to Settings > Devices > Bluetooth & other devices and turn Bluetooth ON. Click “Add Bluetooth or other device” and select “Bluetooth”.
- MacBook: Go to System Settings (or System Preferences) > Bluetooth and turn Bluetooth ON. Make sure “Discoverable” is enabled.
-
Pair your iPhone and Laptop:
- On your laptop, it will search for nearby Bluetooth devices. Select your iPhone from the list of devices.
- A pairing code will appear on both your iPhone and laptop screens. Confirm that the codes match and click Pair on both devices.
-
Send Photos via Bluetooth from iPhone:
- Open the Photos app on your iPhone and select the photos you want to transfer.
- Tap the Share icon (the square with an arrow pointing upwards).
- In the Share Sheet, scroll through the options and tap Bluetooth.
- Select your laptop from the list of Bluetooth devices.
-
Accept the Transfer on your Laptop:
- Windows Laptop: You may see a notification prompting you to accept the incoming file. Click Accept. The photos will typically be saved in your Bluetooth exchange folder, usually found in your user folder under “Documents” or “Downloads”.
- MacBook: The files should automatically be received. You might be prompted to choose where to save the received files.
Alt: Wirelessly transferring photos from iPhone to laptop using Bluetooth connection.
Pros of using Bluetooth:
- No Internet Required: Bluetooth works independently of an internet connection, making it useful in situations with limited or no internet access.
- Direct Transfer: Establishes a direct connection between your iPhone and laptop.
Cons of using Bluetooth:
- Slow Transfer Speed: Bluetooth is significantly slower than Wi-Fi or cloud-based methods, making it impractical for transferring large numbers of photos or large files.
- Manual Selection and Transfer: You need to manually select and send photos one by one or in small batches.
- Pairing Required: Devices need to be paired initially, although they usually remember pairings for future use.
- Less Stable for Large Transfers: Bluetooth connections can sometimes be less stable for prolonged data transfers.
Part 3: Emailing Photos Wirelessly from iPhone to Laptop
Email is a simple and universally accessible method to wirelessly transfer photos, especially for sending just a few images. Most email providers have limitations on attachment sizes, so this method is best suited for transferring a small selection of photos rather than your entire photo library.
Here’s how to transfer photos from your iPhone to your laptop using email:
- Select Photos on your iPhone: Open the Photos app and select the photos you want to transfer.
- Share via Email: Tap the Share icon and choose Mail (or your preferred email app).
- Compose Email: Your selected photos will be attached to a new email message. Enter your own email address (the one you can access on your laptop) in the “To” field. You can add a subject if you like, and then tap Send.
- Access Email and Download Photos on your Laptop:
- Open your email account on your laptop using a web browser or email application.
- Find the email you just sent from your iPhone.
- Download the attached photos. You may have an option to “Download All” if you sent multiple photos. The downloaded photos will typically be saved in your laptop’s “Downloads” folder.
Pros of using Email:
- Universally Accessible: Email is available on virtually all devices and platforms.
- Simple for a Few Photos: Very straightforward for sending a small number of images quickly.
- No Additional Software Required: Uses built-in email functionality on both iPhone and laptop.
Cons of using Email:
- Attachment Size Limits: Email providers have restrictions on the size of attachments, typically around 20-25MB. This limits the number and resolution of photos you can send in a single email.
- Time-Consuming for Many Photos: Sending and downloading photos one email at a time is inefficient and time-consuming for transferring a large photo library.
- Quality Reduction (Potential): Some email services may compress images to reduce file size for transmission, potentially leading to a slight loss in image quality.
Bonus Tip: MobileTrans – The Best Solution for Transferring Large Photo Libraries (Wired Option)
While this article focuses on wireless methods, it’s worth mentioning a highly efficient and reliable method, especially when dealing with transferring a large number of photos or videos: using MobileTrans.
MobileTrans is a professional phone transfer tool that, although it uses a USB cable for connection, provides a remarkably fast and easy way to transfer photos and other data between iPhones and laptops (both Windows and Mac).
Key Features of MobileTrans:
- Transfer Photos and More: Supports transferring various data types, including photos, videos, contacts, messages, and more.
- Cross-Platform Compatibility: Works seamlessly between iPhones, Android phones, Windows PCs, and Macs.
- Selective Transfer: Allows you to choose specific photos or albums to transfer, giving you control over what gets moved.
- User-Friendly Interface: Simple and intuitive interface guides you through the transfer process step-by-step.
- Preserves Original Quality: Transfers photos and videos without any compression or loss of quality, maintaining the original image integrity.
Steps to Transfer Photos from iPhone to Laptop using MobileTrans (Wired):
-
Connect iPhone to Laptop: Install and launch MobileTrans on your laptop. Connect your iPhone to your laptop using a USB cable. Trust the computer on your iPhone if prompted.
-
Select “Phone Transfer” and “Export to Computer”: In MobileTrans, choose the Phone Transfer module, and then select Export to Computer.
 export files to computer
 -
Choose Photos to Transfer: MobileTrans will detect your iPhone and display the different data types you can transfer. Select Photos (and any other data you wish to transfer). Click Start.
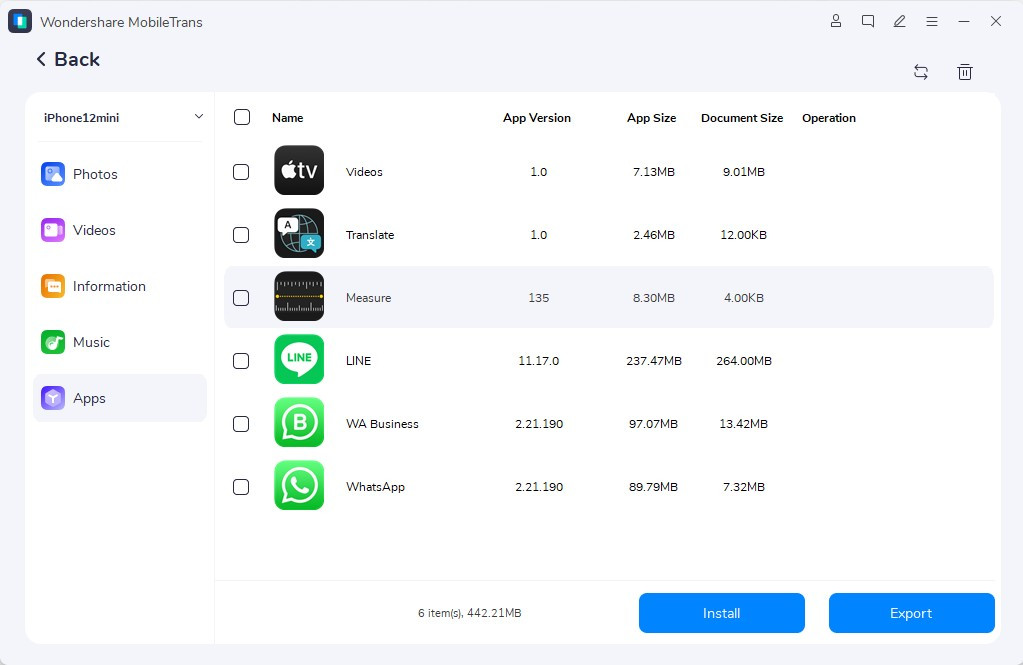 select files to export
 -
Transfer Process: MobileTrans will begin transferring the selected photos from your iPhone to your laptop. Wait for the process to complete. Ensure the connection remains stable during the transfer.
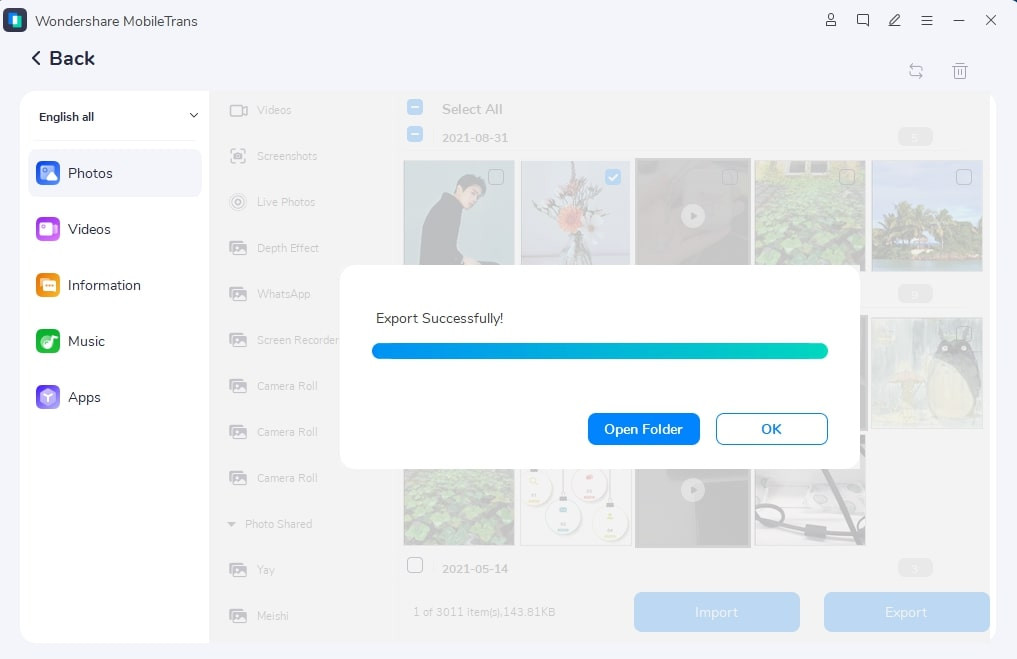 export successfully
Why consider MobileTrans?
While not wireless, MobileTrans offers significant advantages, especially when dealing with large photo libraries:
- Speed and Efficiency: Transfers large amounts of data much faster than wireless methods like Bluetooth or email.
- Reliability: Wired connection ensures a stable and uninterrupted transfer process.
- Bulk Transfer: Ideal for transferring your entire photo library or large albums quickly and easily.
- No Storage Limits: Not constrained by cloud storage limits or email attachment sizes.
Conclusion
You now have a comprehensive understanding of how to transfer photos from iPhone to laptop wirelessly using various methods. For occasional transfers of a few photos, iCloud, Bluetooth, or email can be convenient options. However, for users who regularly need to transfer large photo libraries or want a fast and reliable solution, especially for backups, MobileTrans offers a superior, albeit wired, experience.
Consider your needs, the number of photos you typically transfer, and your internet connectivity when choosing the best method for you. Explore MobileTrans to discover how it can simplify your photo management and data transfer needs between your iPhone and laptop.