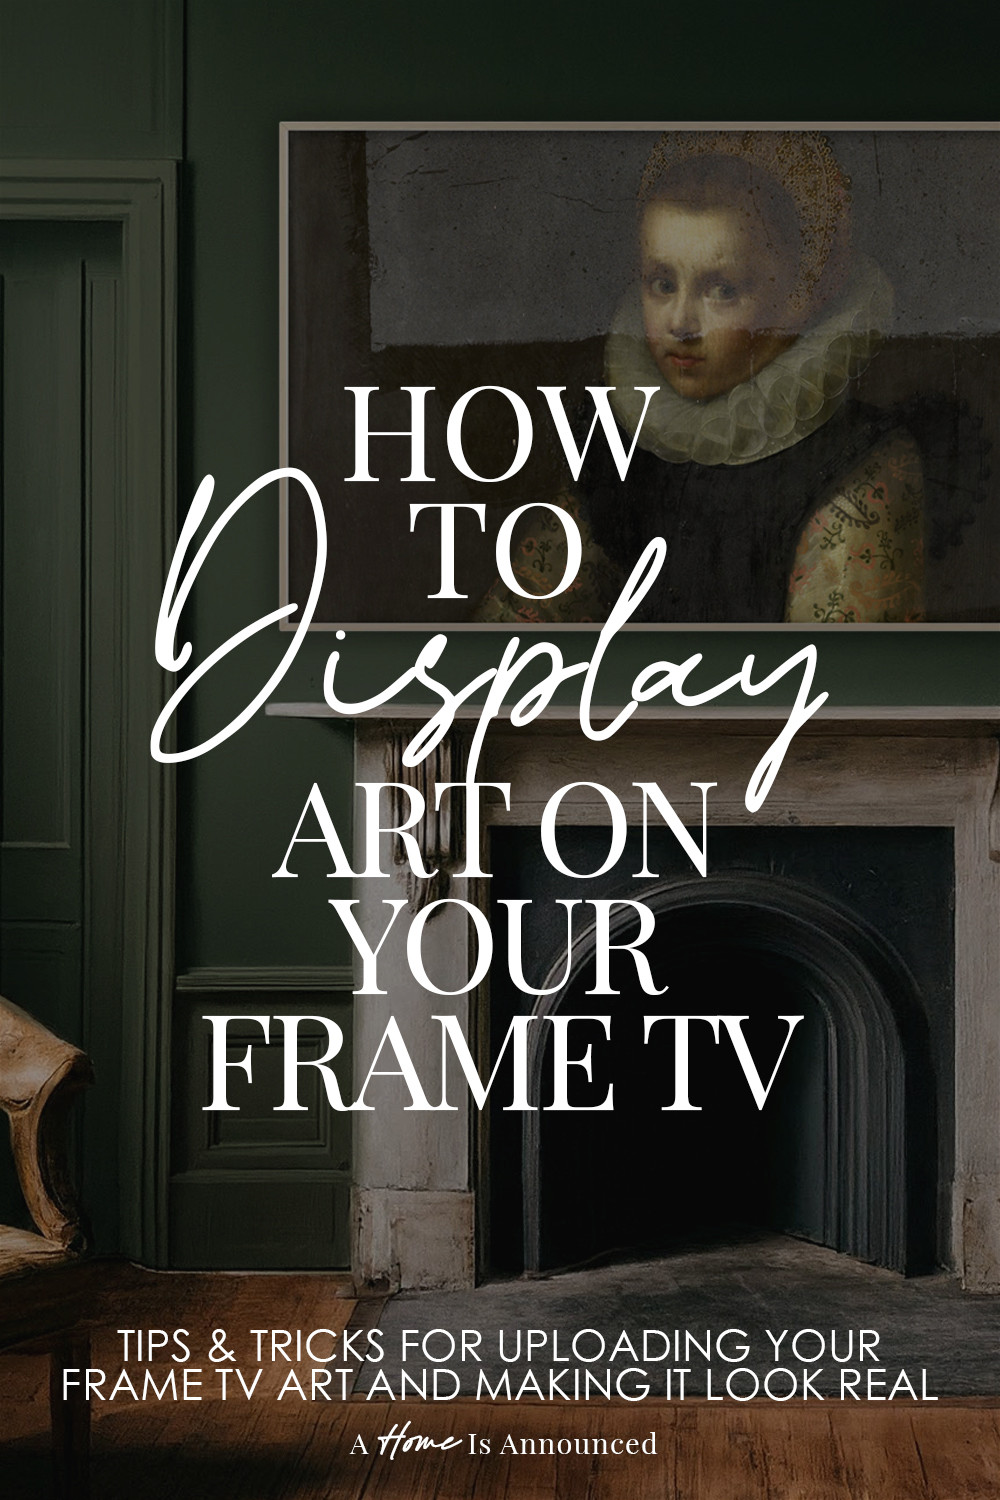
I’m all about finding smart ways to save money around the house, but if you ask me about things worth spending a little extra on, the Samsung Frame TV is at the top of my list. Honestly, it’s one splurge I have absolutely zero regrets about.
What I truly love is that it’s not just another black screen staring back at you when it’s off. It’s incredibly slim, sits almost perfectly flush against the wall, and here’s the best part – most people who visit our home don’t even realize it’s a TV. They just think I’ve got a really impressive piece of art hanging in the living room.
And it’s like having a constantly changing art gallery right in your home. I can switch out the artwork whenever I feel like it, depending on my mood, which, let’s be honest, can change quite a bit throughout the day!
However, I’m not going to pretend it was instantly obvious how to get my own photos and artwork onto the Frame TV when we first got it. There was definitely a learning curve. That’s why I’m sharing all the tips and tricks I’ve picked up over the years to make it super easy for you.
This post contains affiliate links. If you make a purchase through these links, I may earn a small commission at no extra cost to you. This helps support the blog and allows me to keep creating helpful content for you!
Discovering Digital Artwork for Your Samsung Frame TV
If you’re on the hunt for fresh artwork for your Frame TV, you’ve landed in the perfect spot! While the Frame TV itself has an art store built right into its app, I’ve found there are better places to find your digital masterpieces. Why do I say that? Firstly, it’s often more budget-friendly, and secondly, you get to keep a personal backup of your art files. This means if anything goes wrong with your TV, you won’t lose your art collection and can easily upload it again. Let’s dive into my favorite places to find Frame TV art downloads:
Digital Art Marketplaces:
You’ll find tons of online stores selling digital art, but I have to be upfront – I’m a bit picky about some of them. My main concern is that many don’t give credit to the original artists behind the paintings they sell. If knowing the creator of your art is important to you, I highly recommend these online marketplaces:
There are many more digital shops offering art for Frame TVs, but these are the ones I’ve found that not only offer art correctly sized and cropped for Samsung Frame TVs but also give credit to the original artists. (If you know of others that do this, please let me know, and I’ll add them to this list!)
Exploring the Public Domain for Free Art
Did you know there are thousands of FREE digital downloads of classic art pieces in the public domain? It’s absolutely true! You just need to know where to look. These are my go-to resources for finding public domain art:
IMPORTANT: If you choose to get your art this way, you’ll need to take a few extra steps to crop and size the images correctly before you upload them to your Frame TV. Don’t worry, I’ll walk you through exactly how to do that in the next section!
Choosing the Best Artwork for Your Frame TV Display

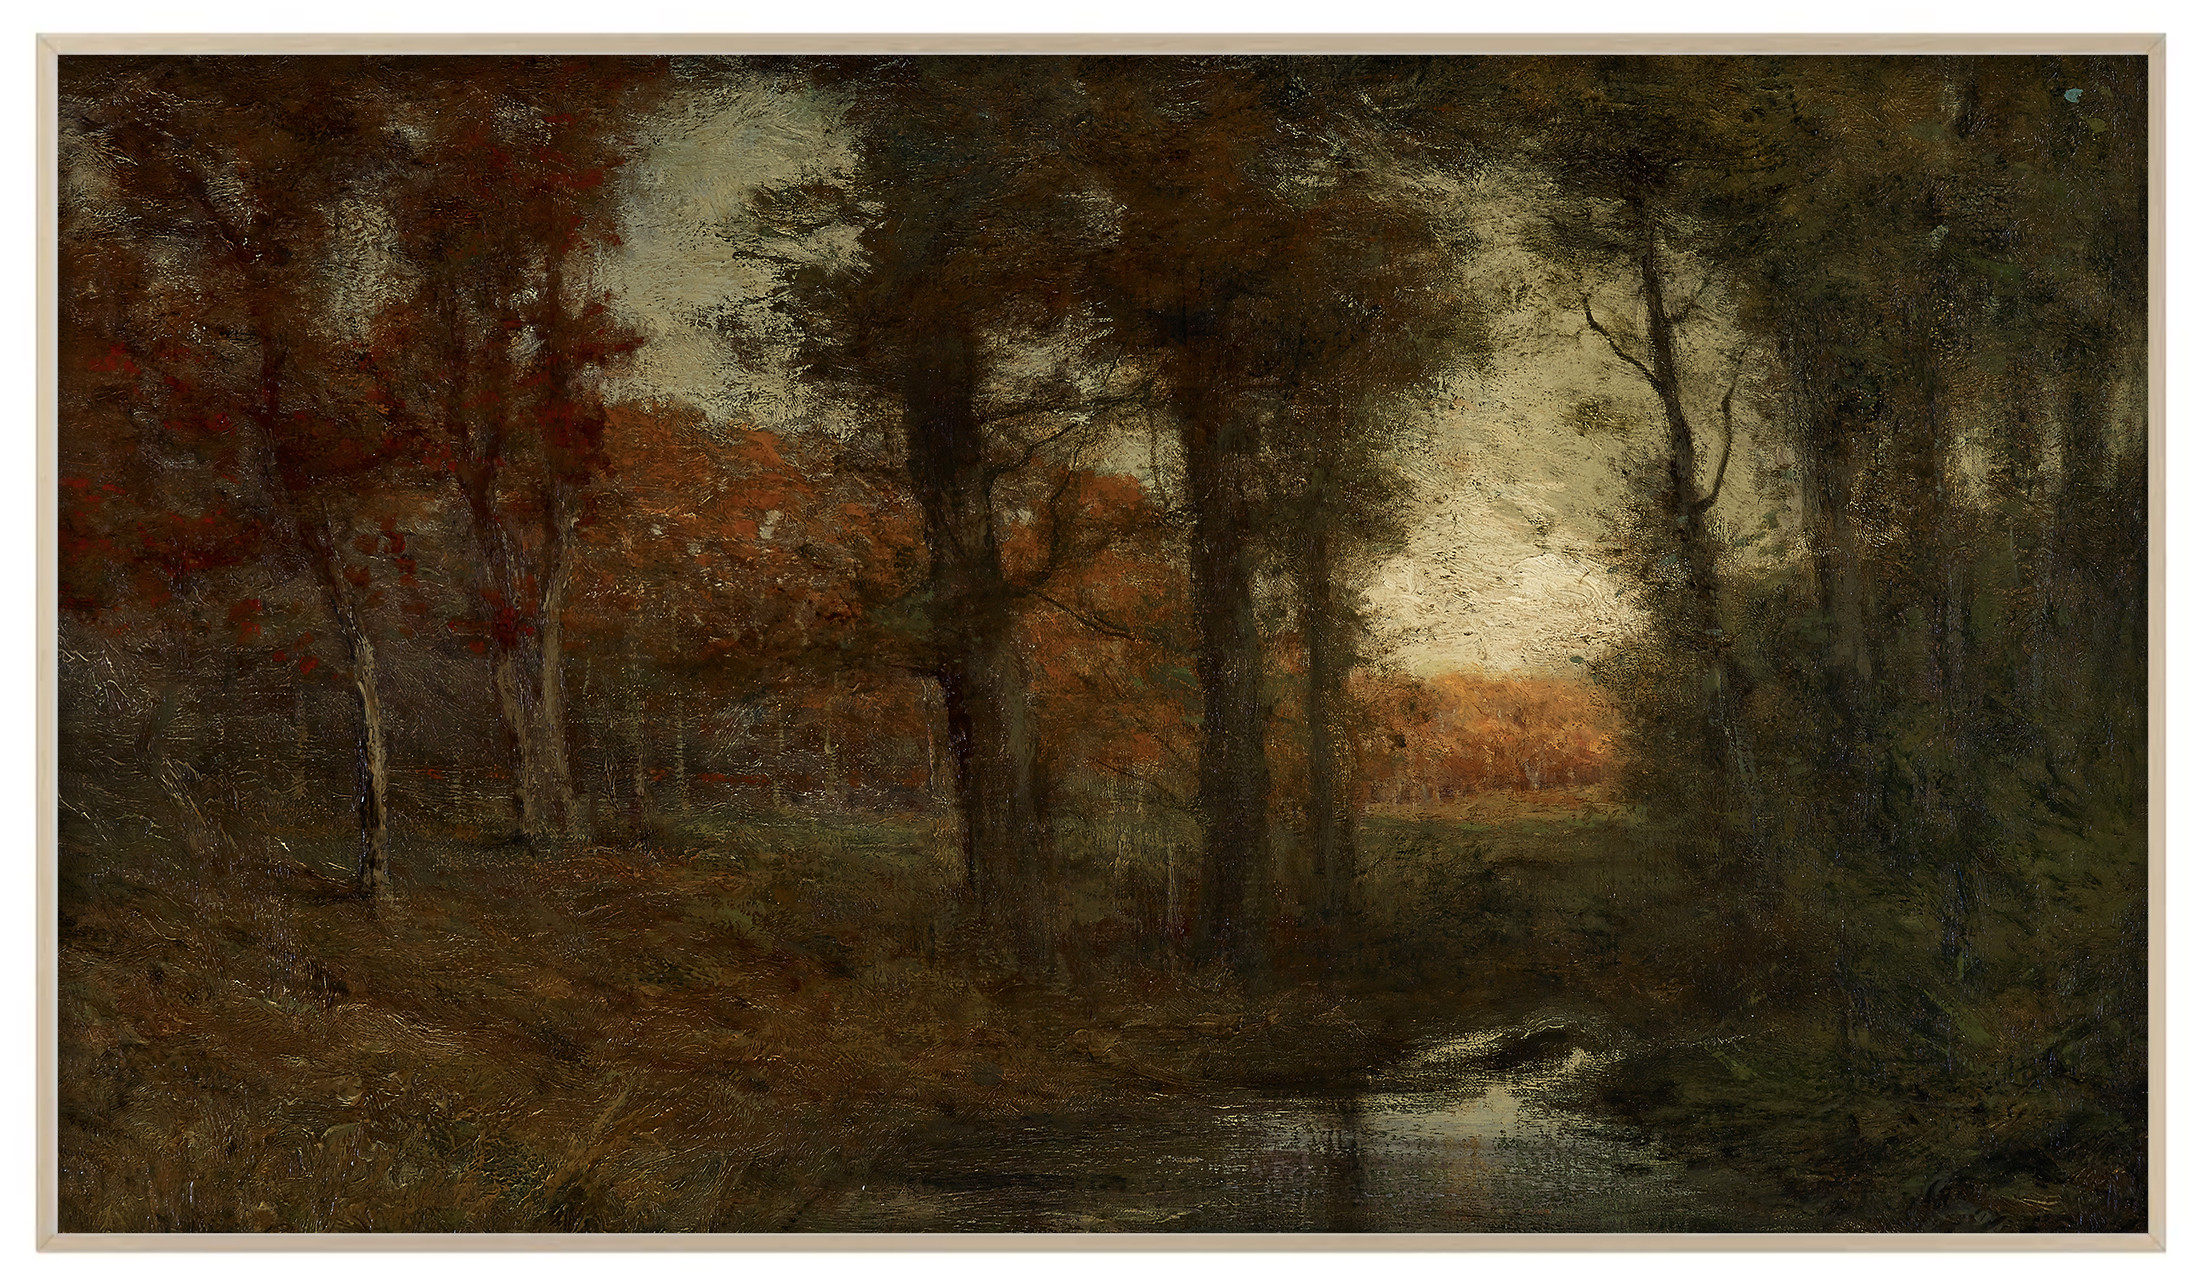
You can download this Frame TV artwork from my shop here!
When it comes to picking artwork for your Frame TV, especially if you’re using your own photos or pieces from the public domain, you might wonder what kind of artwork will look its absolute best? From my experience, the images that look fantastic on the Frame TV share a few key qualities:
High-Resolution Artwork is Key
When selecting a digital art file for your Frame TV, make sure it’s high resolution and at least 3840 pixels wide.
If the download doesn’t specify the pixel dimensions, here’s a quick way to check: zoom in closely on the digital file. Does it still look sharp and detailed? Can you see the brushstrokes or textures clearly? Or does it become blurry and pixelated as you zoom in? If it holds up well when zoomed to around 200%, you’re in good shape!
Horizontal Orientation is Generally Ideal
Generally, horizontal or landscape-oriented artwork tends to look best on the Frame TV’s widescreen display. However, don’t rule out vertical pieces! If you find a portrait-style painting that’s at least 3840 pixels wide, it can work beautifully once you crop it to fit.
Darker Tones Often Look More Realistic
It’s important to remember that the artwork on your Samsung Frame TV is backlit. Because of this, I’ve noticed that darker paintings usually appear more authentic than lighter ones. Lighter artwork can sometimes have a tendency to look like it’s glowing, like a picture on a regular TV screen. But there are display settings you can adjust to help minimize this, which I’ll cover later.
Consider the Original Artwork Size
If you’re aiming for the most authentic art display, try to choose artwork that was originally created on a larger scale. Enlarging a very small piece of art to fill the Frame TV screen can sometimes make brushstrokes, lines, and textures look less realistic or even distorted.
Think of it like blowing up a tiny fingerprint to be huge on your screen. You know how big fingerprints actually are, so seeing one that size would immediately look fake. But if you display a fingerprint at its real size, it would look much more believable.
The same idea applies to art. Overly enlarged brushstrokes, pencil marks, or etching lines can make the artwork appear less genuine on your Frame TV.
Cropping and Sizing Your Art Files for Samsung Frame TV
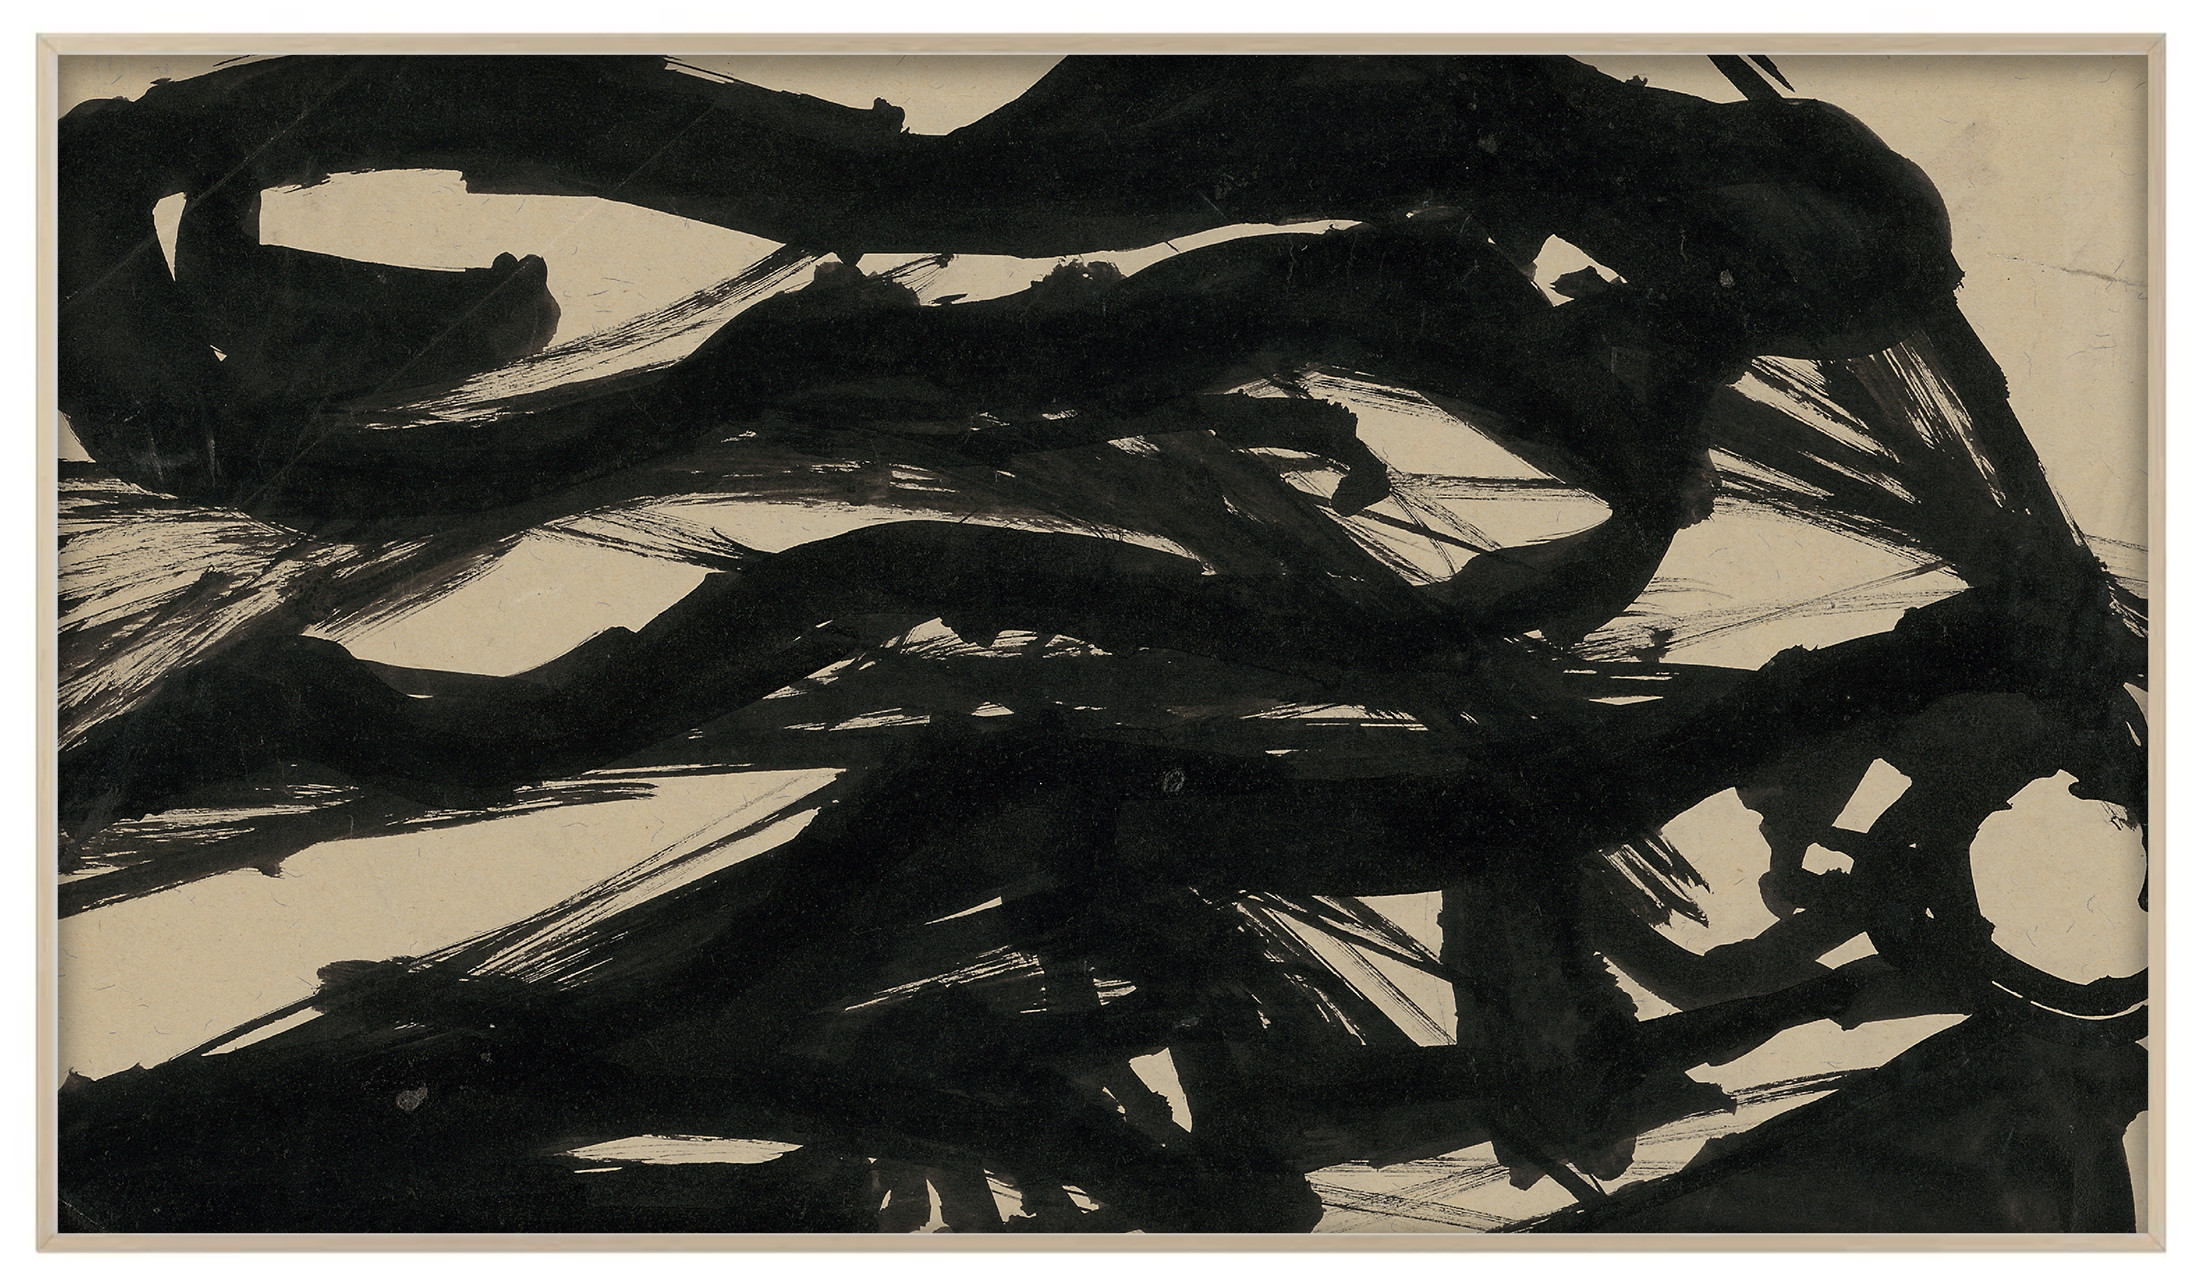
You can download this artwork from my Frame TV shop here!
For some reason, the Frame TV requires art files to be exactly 3840 pixels wide and 2160 pixels tall to display correctly.
If your downloaded artwork isn’t already in this exact size, you’ll need to resize it before uploading to the SmartThings app. Here are three easy ways to do it:
Using Photoshop or Similar Photo Editing Software
If you have access to photo editing software like Photoshop that allows you to crop images to specific pixel dimensions, this is a straightforward method. The only slight drawback is that you’ll need to transfer the resized files to your phone or tablet to upload them to the SmartThings app, adding a small extra step.
Utilizing the Free Canva App
For those familiar with Canva, I’ve created a free Canva template that makes resizing your art files a breeze. The Canva app and my template are completely free to use on any mobile device! Click here to access my FREE CANVA TEMPLATE and resize your artwork in seconds.
Using the Free Online Converter by Deco TV Frames
Another handy option is the FREE Image to Art Converter offered by Deco TV Frames on their website. Simply upload your artwork, adjust the crop as needed, and download the perfectly sized file!
A quick tip: If your artwork isn’t properly resized, the Frame TV won’t show all six mat options, including the “No Mat” full-screen option that many prefer. So, if you notice mat options missing, double-check your file dimensions to ensure they are correct!
Step-by-Step Guide: Uploading Art to Your Samsung Frame TV
You can download this artwork from my Frame TV shop here!
Once you’ve chosen your artwork, ensured it’s correctly sized, and saved it to your device, you’re ready to display it on your Frame TV!
Step One: Save Artwork to Your Phone or Tablet
I recommend creating a dedicated album on your phone or tablet called “Frame TV Art.” This keeps everything organized and simplifies the upload process. (I’ll be using art from THIS COLLECTION for this guide if you’d like to follow along)
Step Two: Open the SmartThings App
NOTE: This tutorial uses the SmartThings App Version 1.7.22 on an iPad.
If you haven’t used the SmartThings app before, it’s a versatile tool for controlling your smart home devices. For our purpose, you’ll want to tap on your Frame TV icon within the app. (Important: Make sure your TV is powered on for the app to connect.)
Step Three: Navigate to “Art Mode”
Once you’ve selected your Frame TV in the SmartThings app, tap on the “Art Mode” box. Then, select the “ADD YOUR PHOTOS +” option.
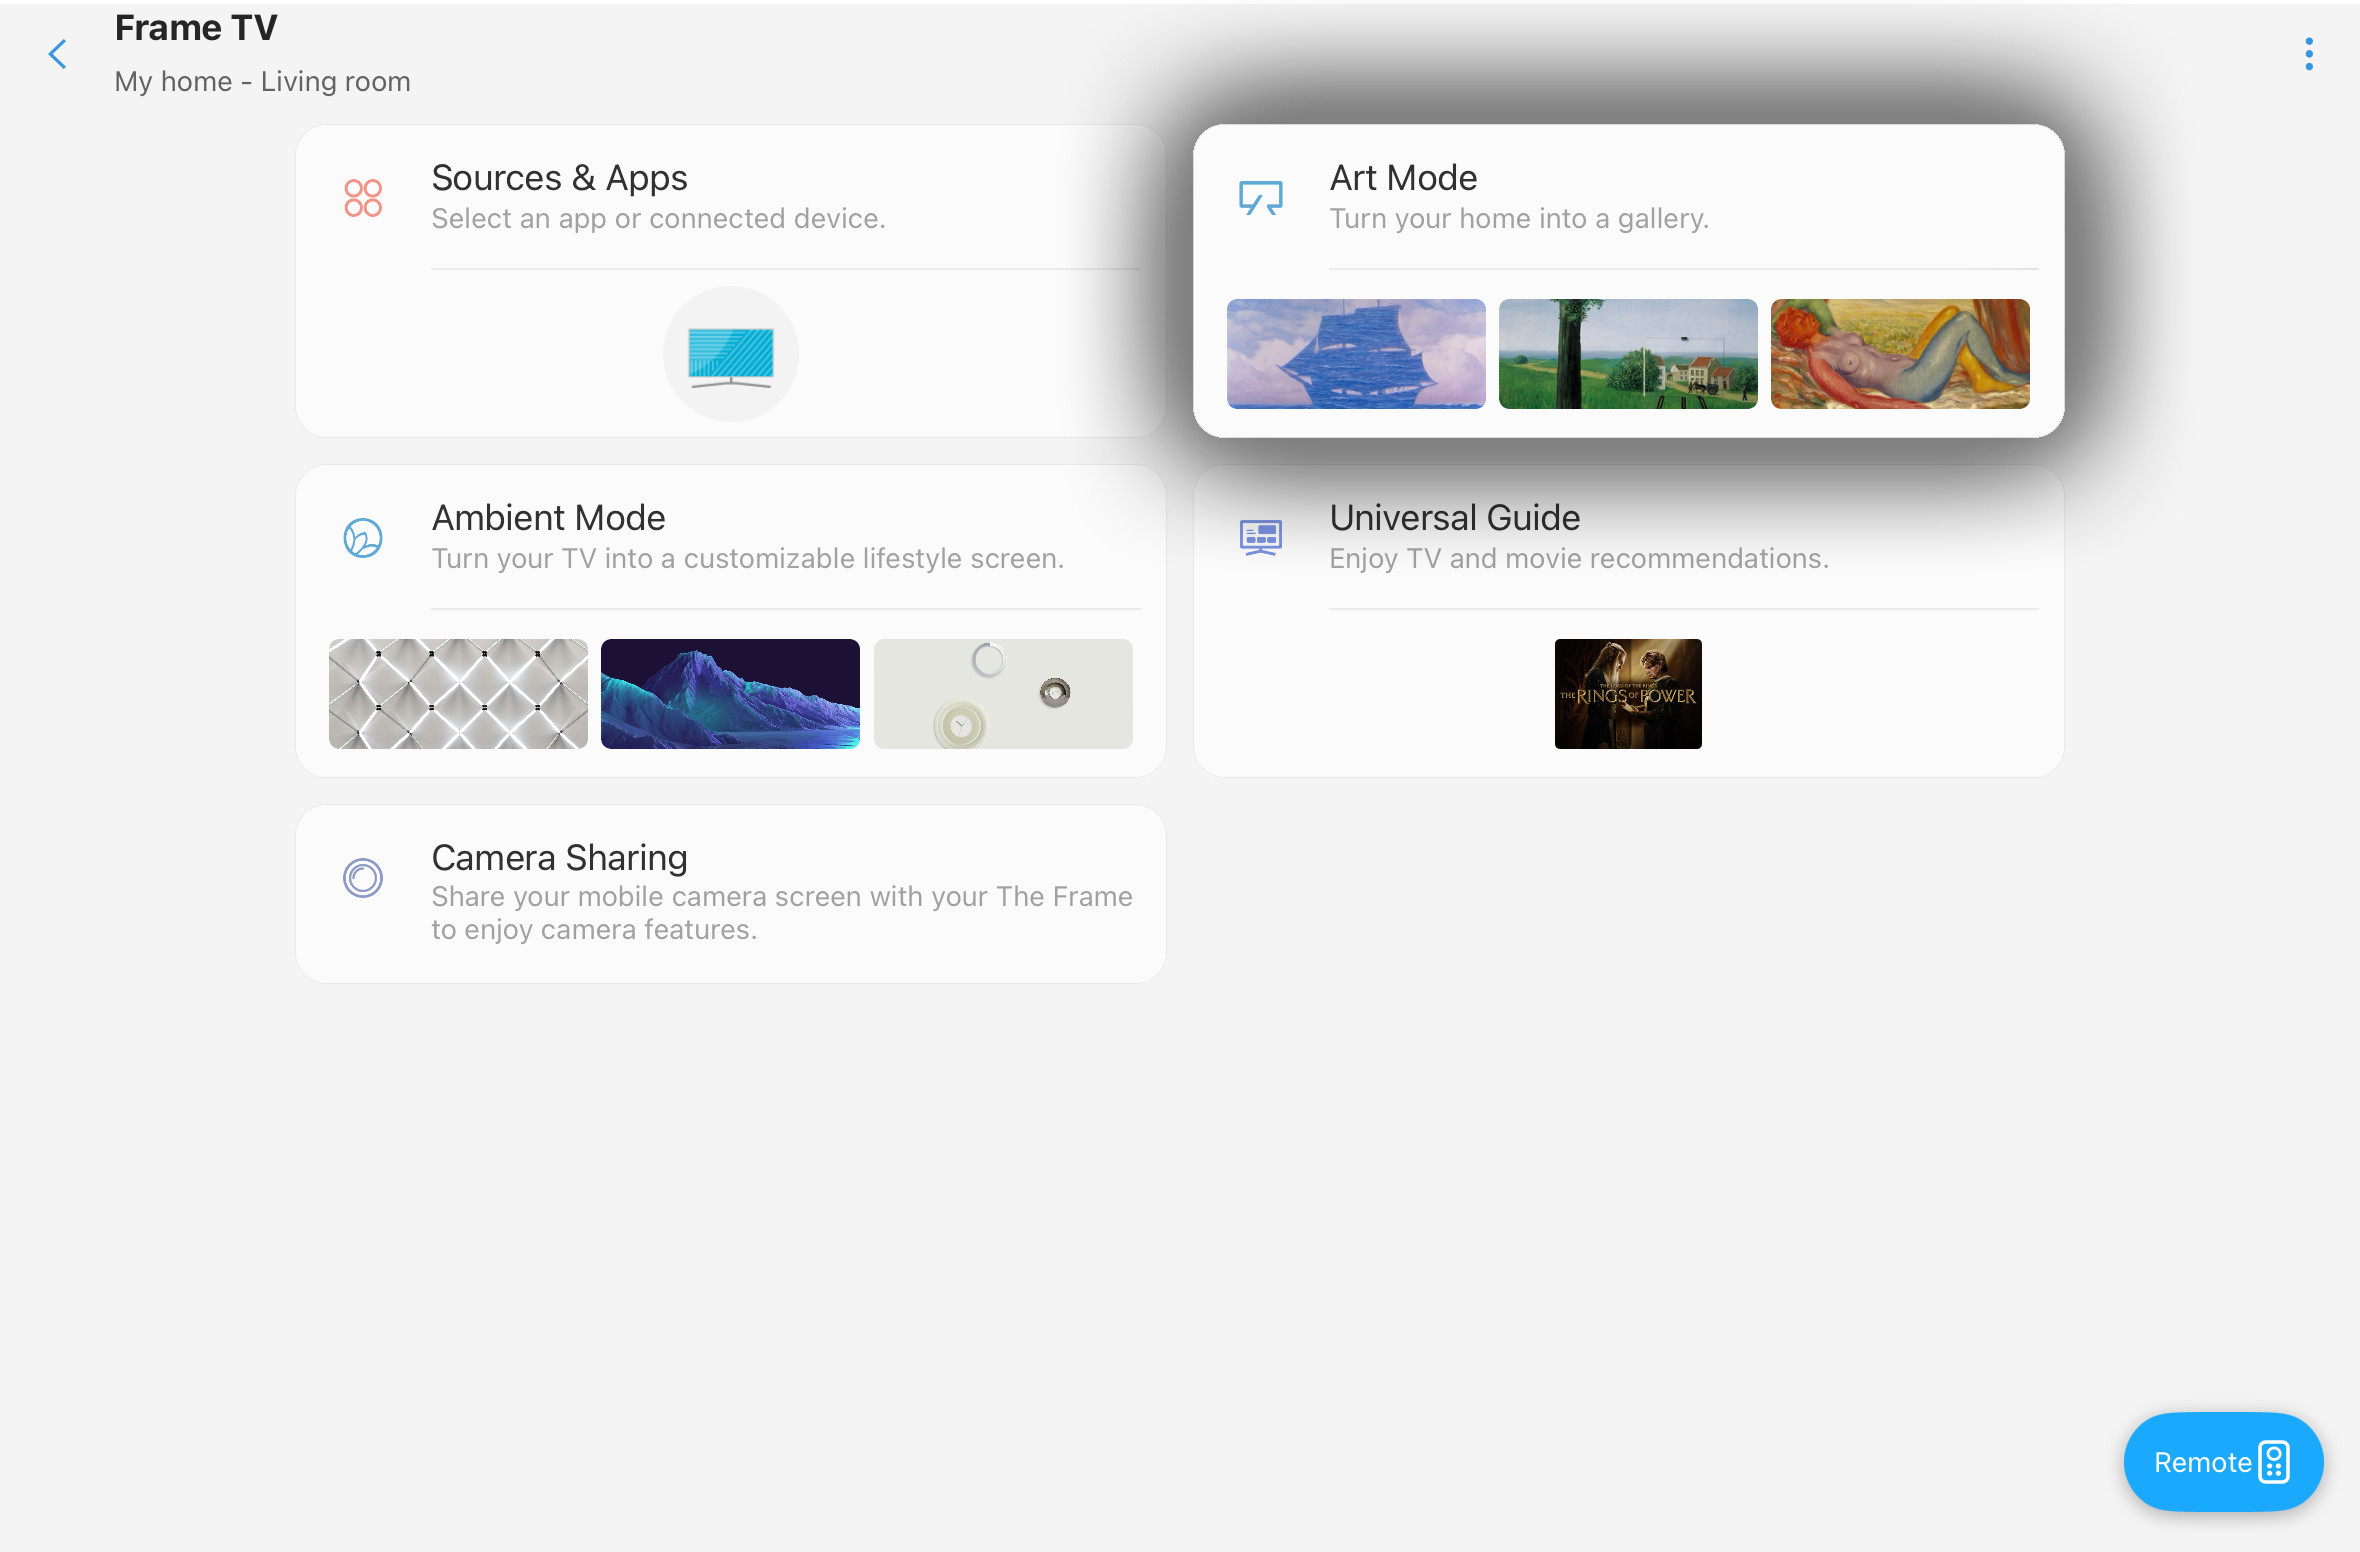
Open the SmartThings app and click “Art Mode” (Note: The “Browse” button will take you to the Frame TV Art Store. However, at the very top of the screen you can tap “My Collection” which will let you see your personal uploads gallery collection.)
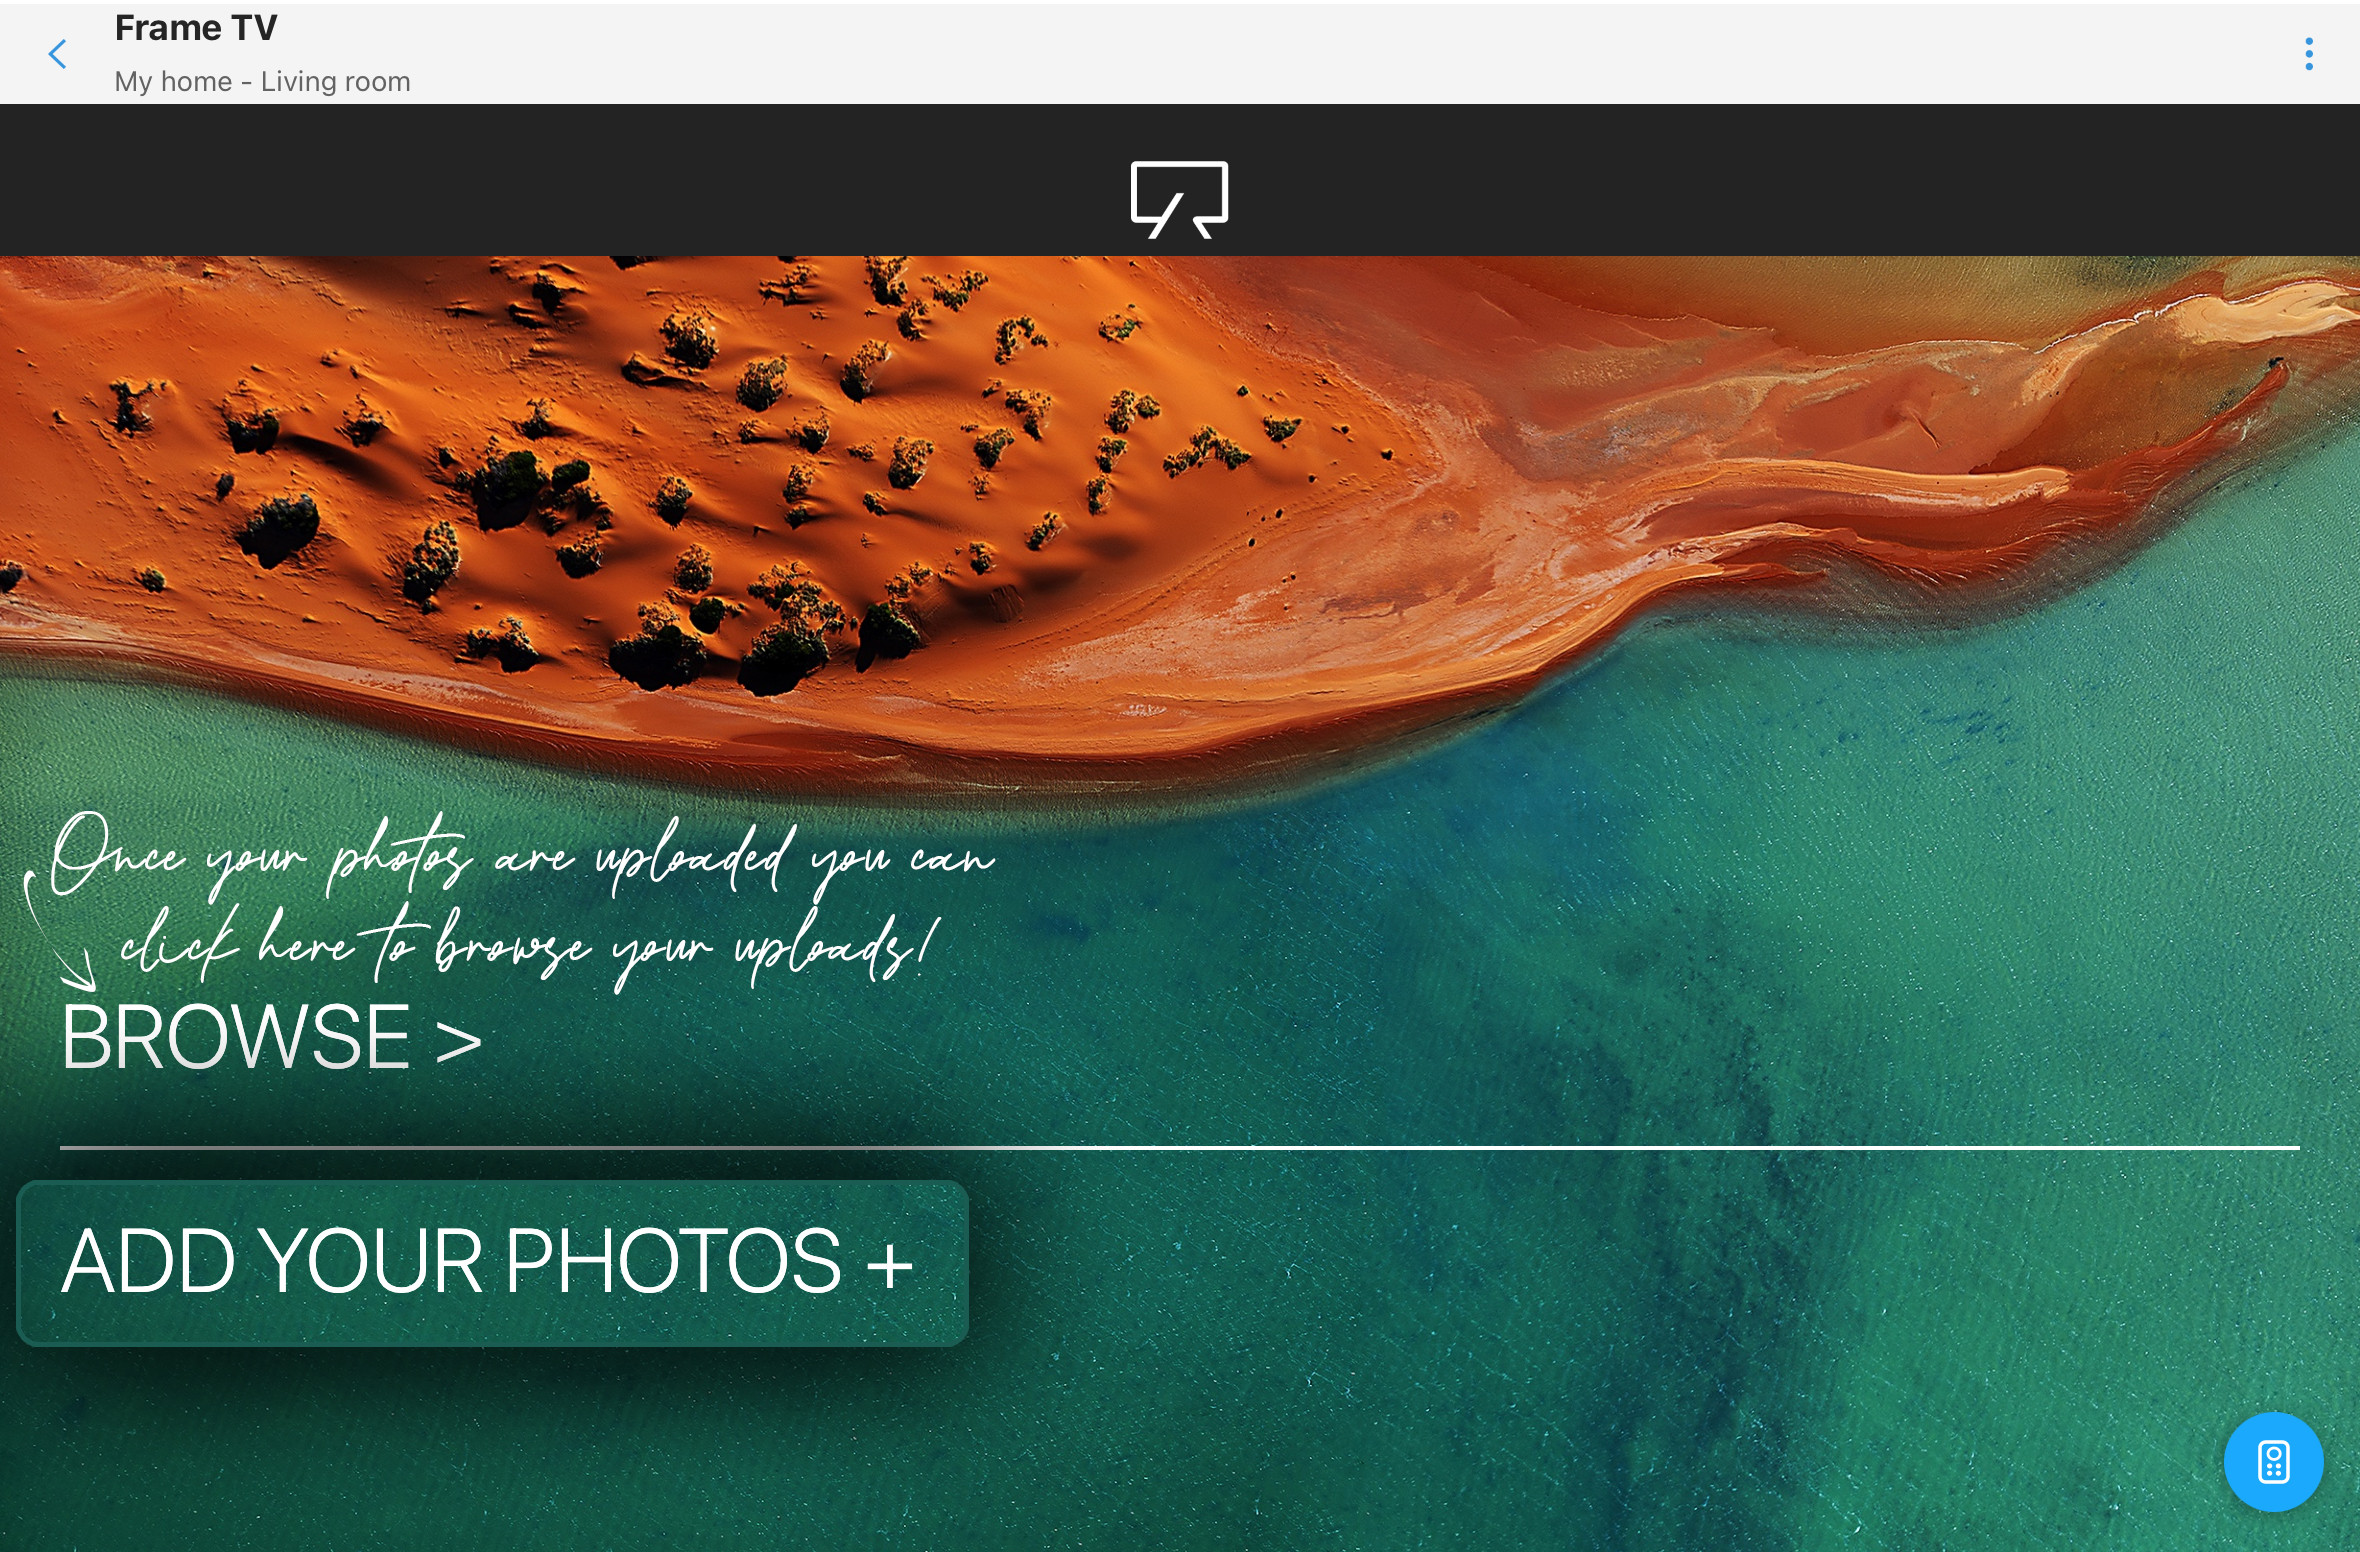
Tap on the “ADD YOUR PHOTOS +” text
Step Four: Select Your Desired Artwork
Use the dropdown menu in the top left corner to choose the album where you saved your Frame TV art files. Then, tap the checkbox in the upper left corner of each image you want to upload. A number will appear in the box indicating your selection.
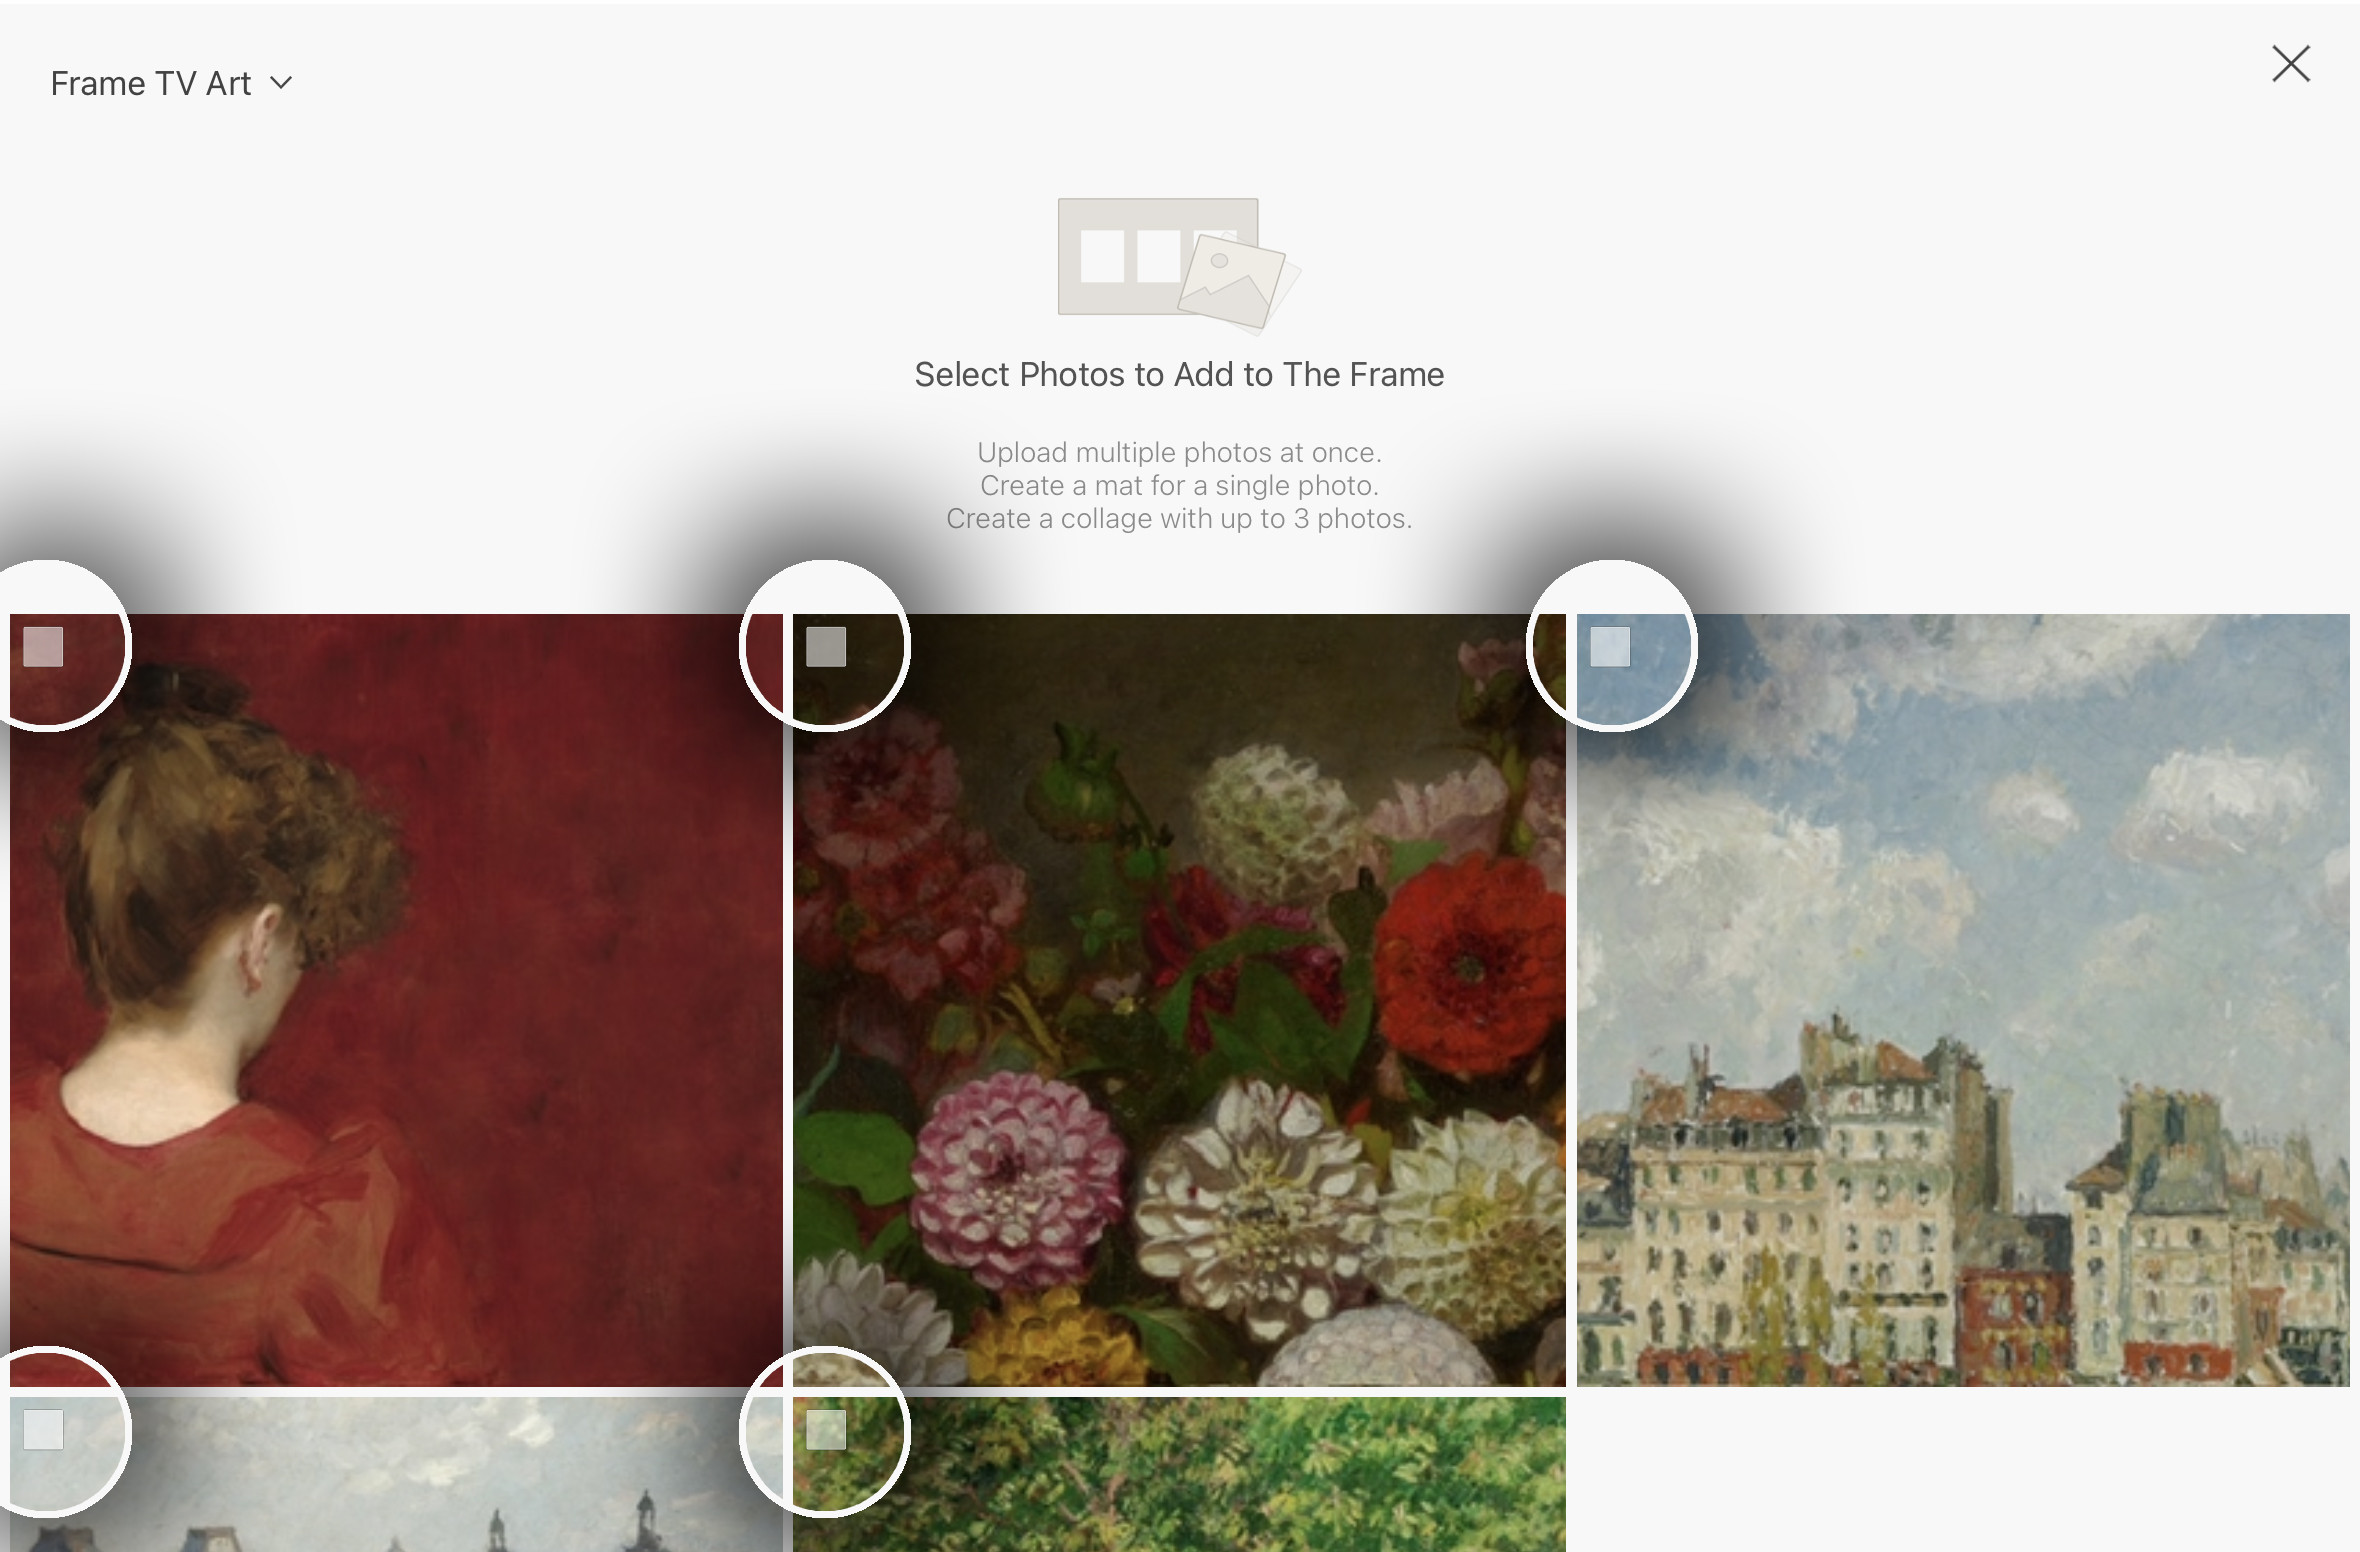
Select the photos you wish to upload to your Frame TV
If you’re uploading just one image, you’ll see a “Create Mat” option at the bottom of the screen before saving to your Frame TV.
However, if you’re uploading multiple images at once, first tap “Save on The Frame” and then you can go back and adjust the mat settings for each image individually later.
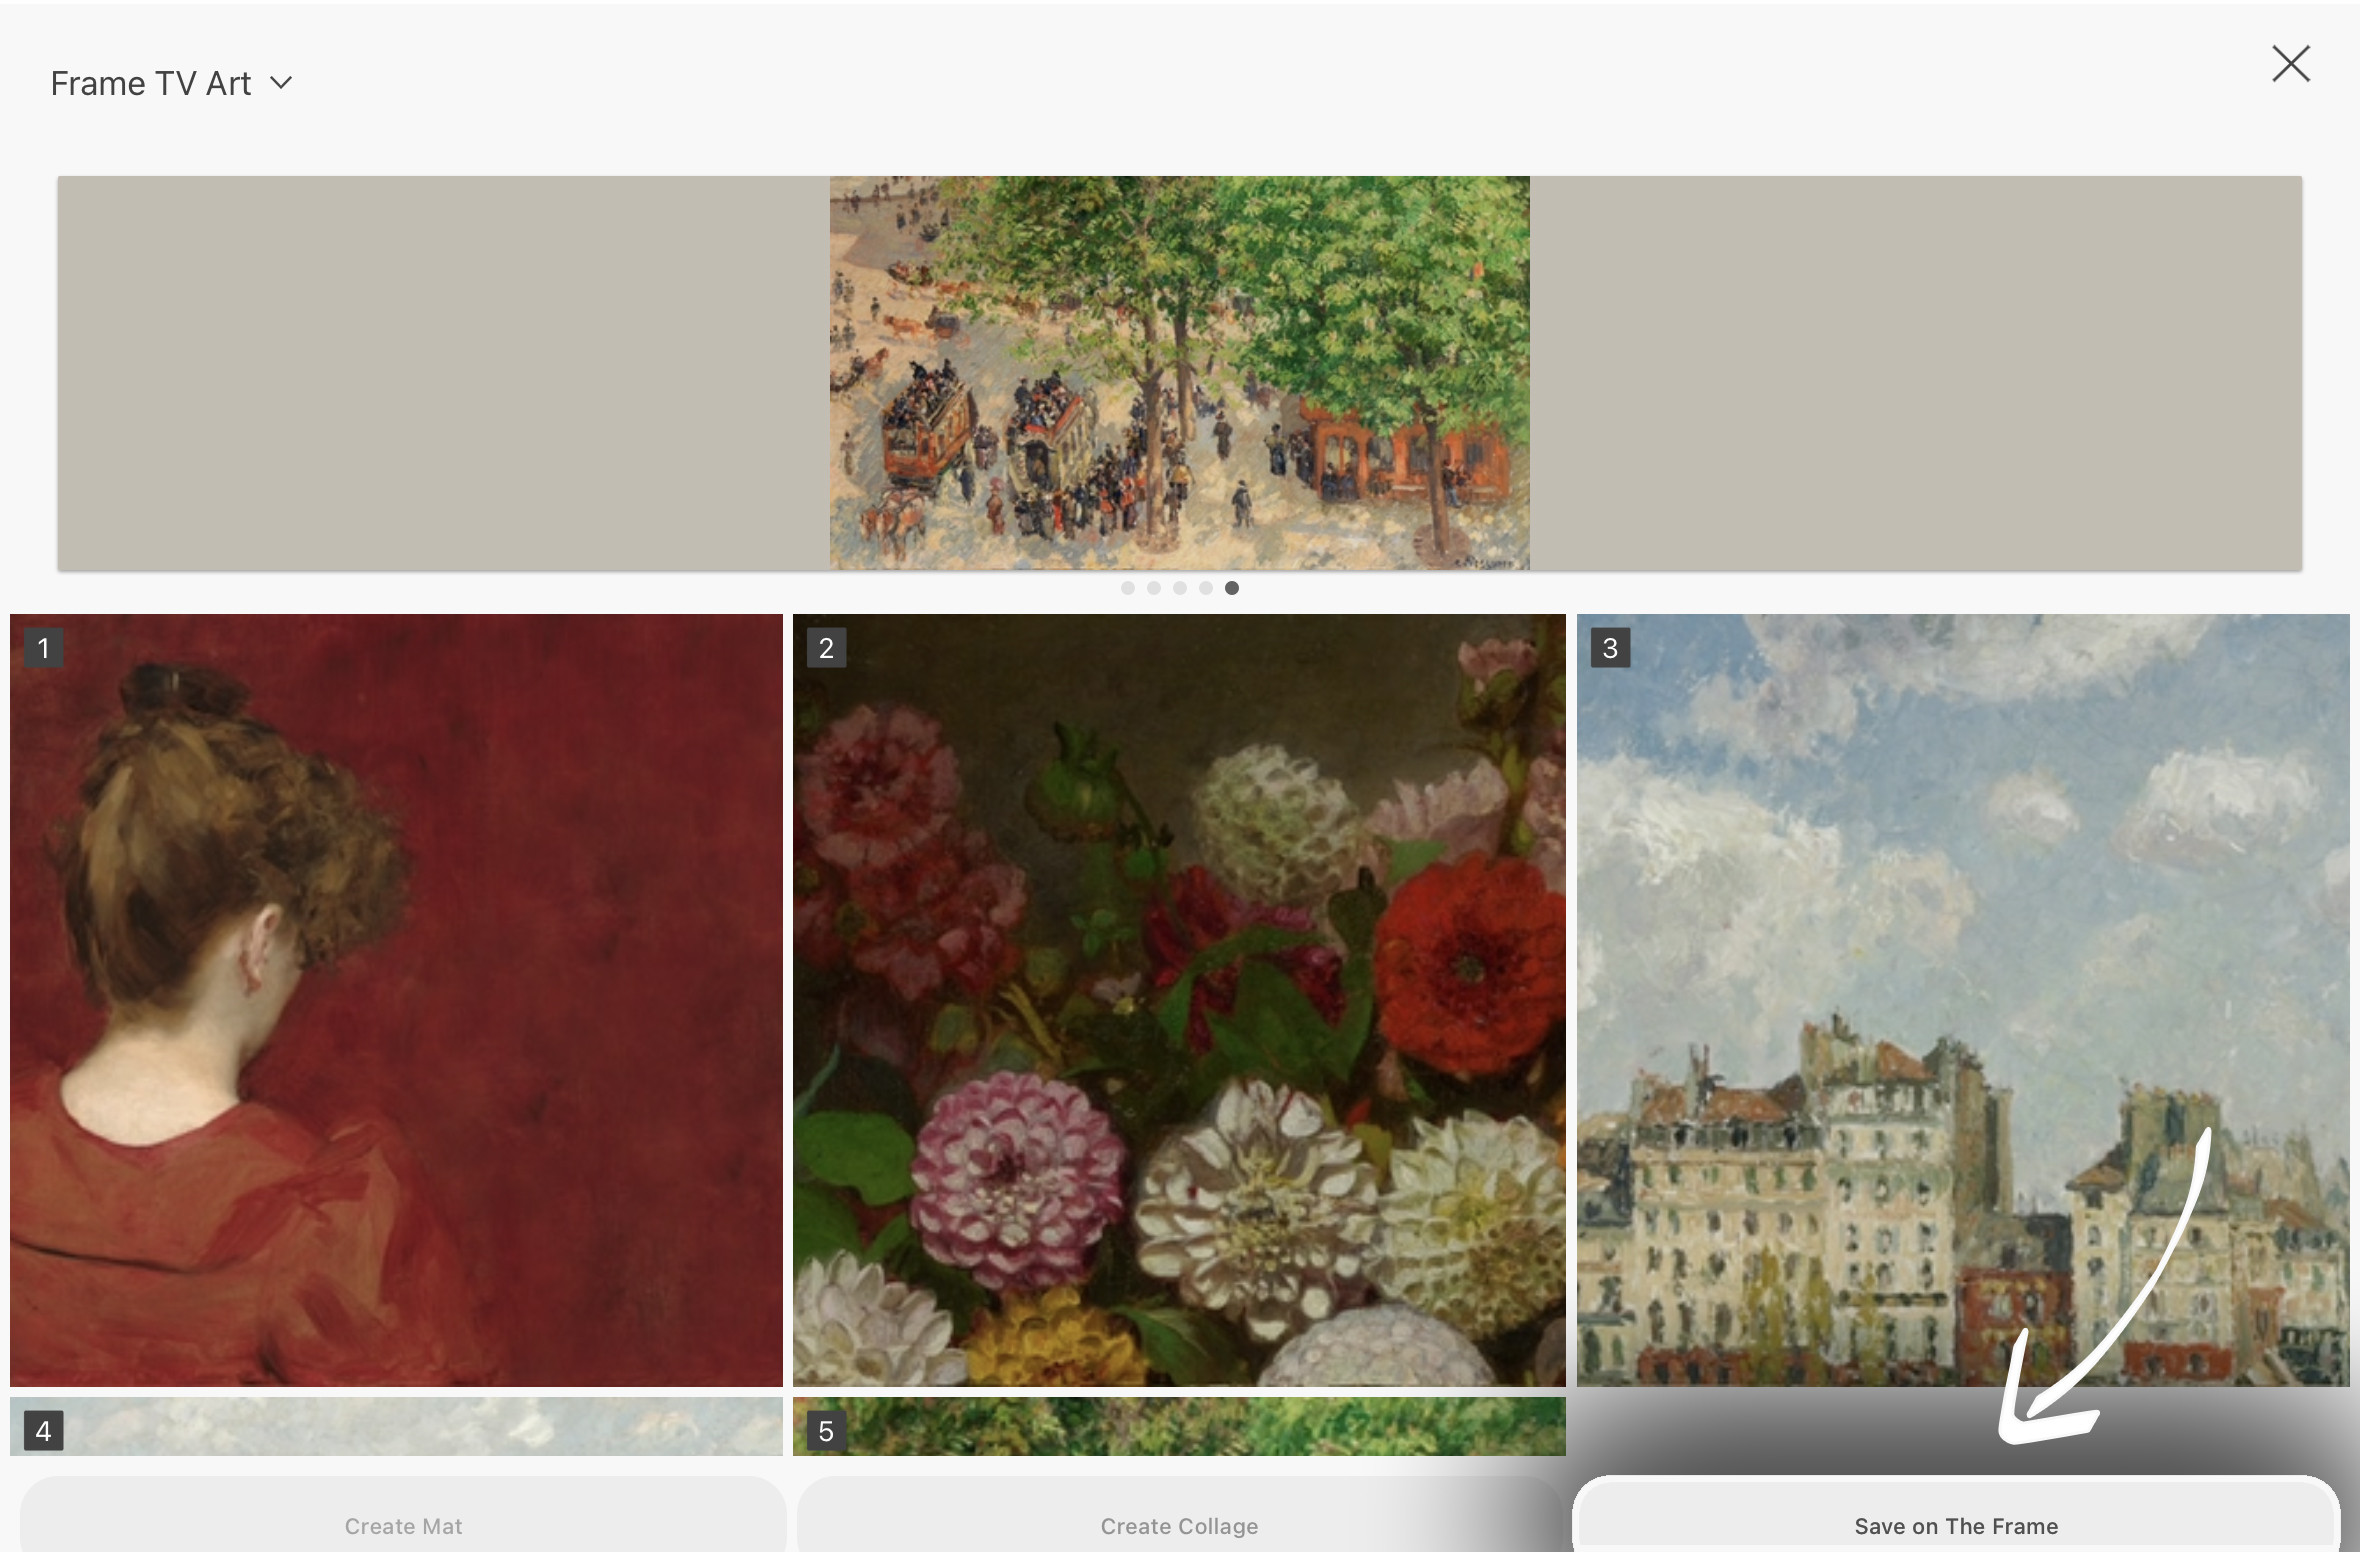
Tap “Save on The Frame” once your photos are selected
Step Five: Choosing a Mat and Displaying Full Screen
After uploading your art, you can customize the mat option. Tap on the artwork you want to adjust, and then tap the “Mat” button on the far right, located beneath the image.
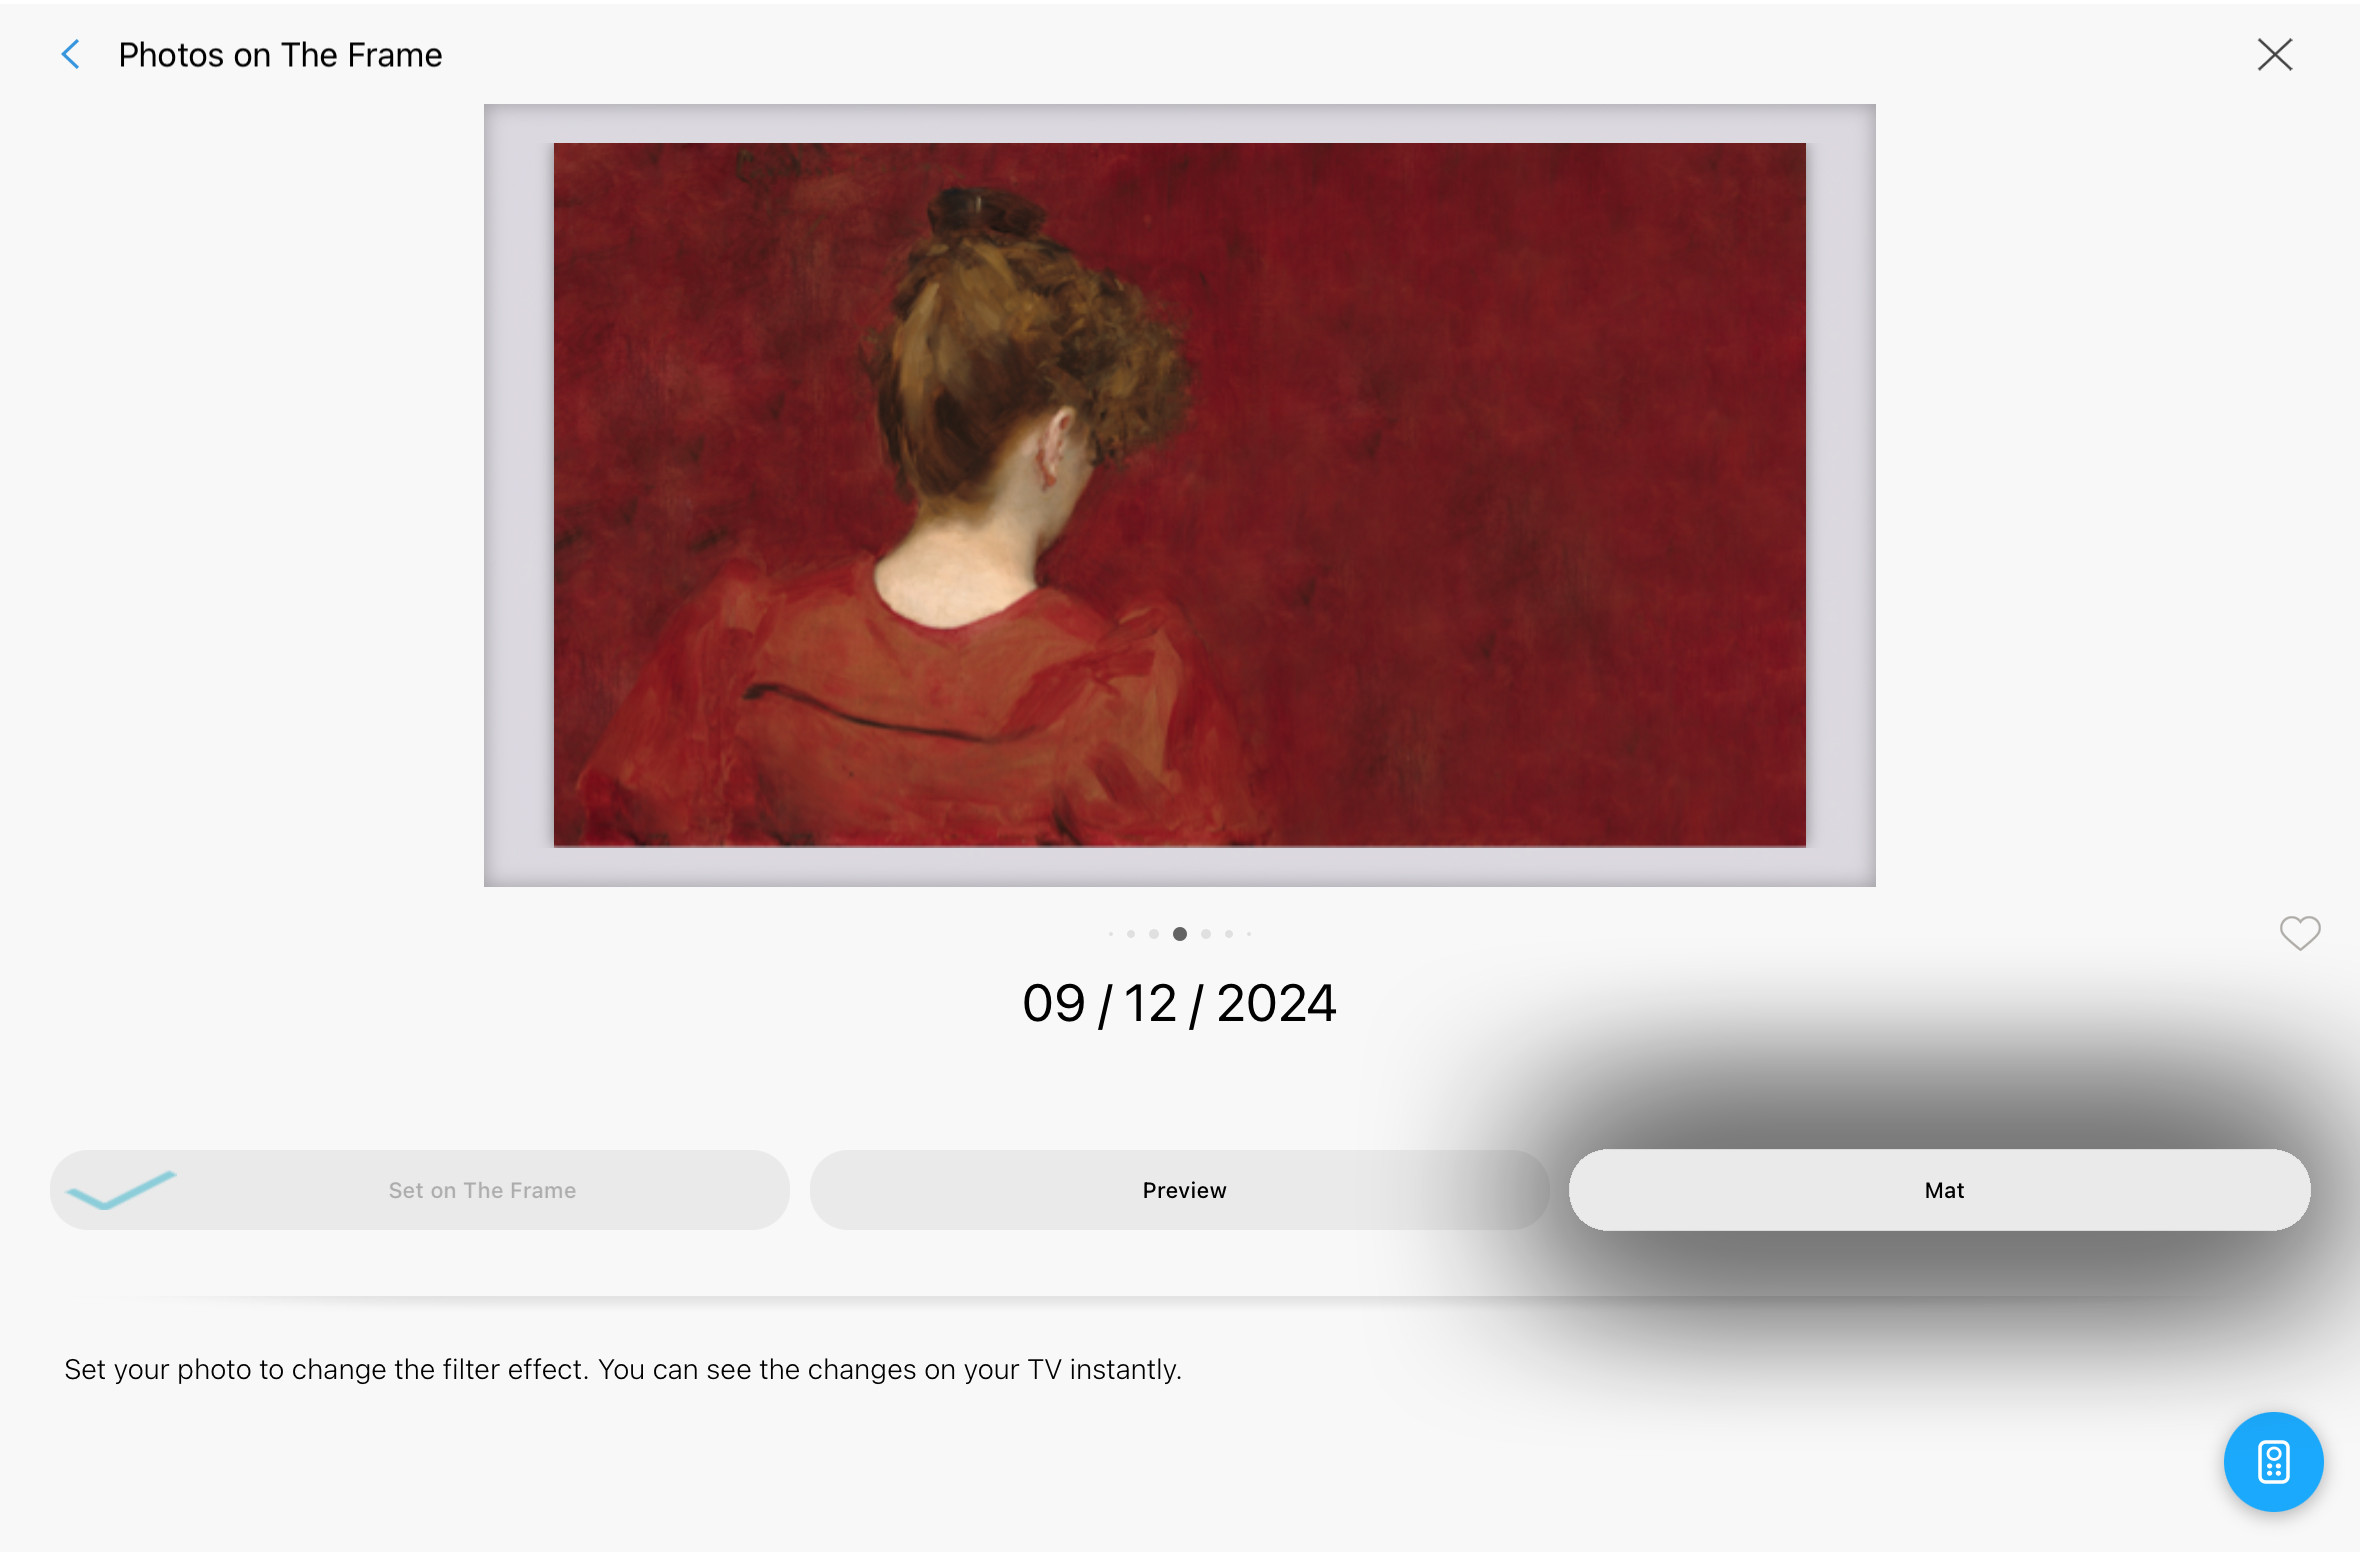
Tap on the art you’d like to use, then tap the “Mat” button on the far right
The Frame TV offers six different mat options, but my two favorites are “No Mat” and “Modern Mat – Auto.”
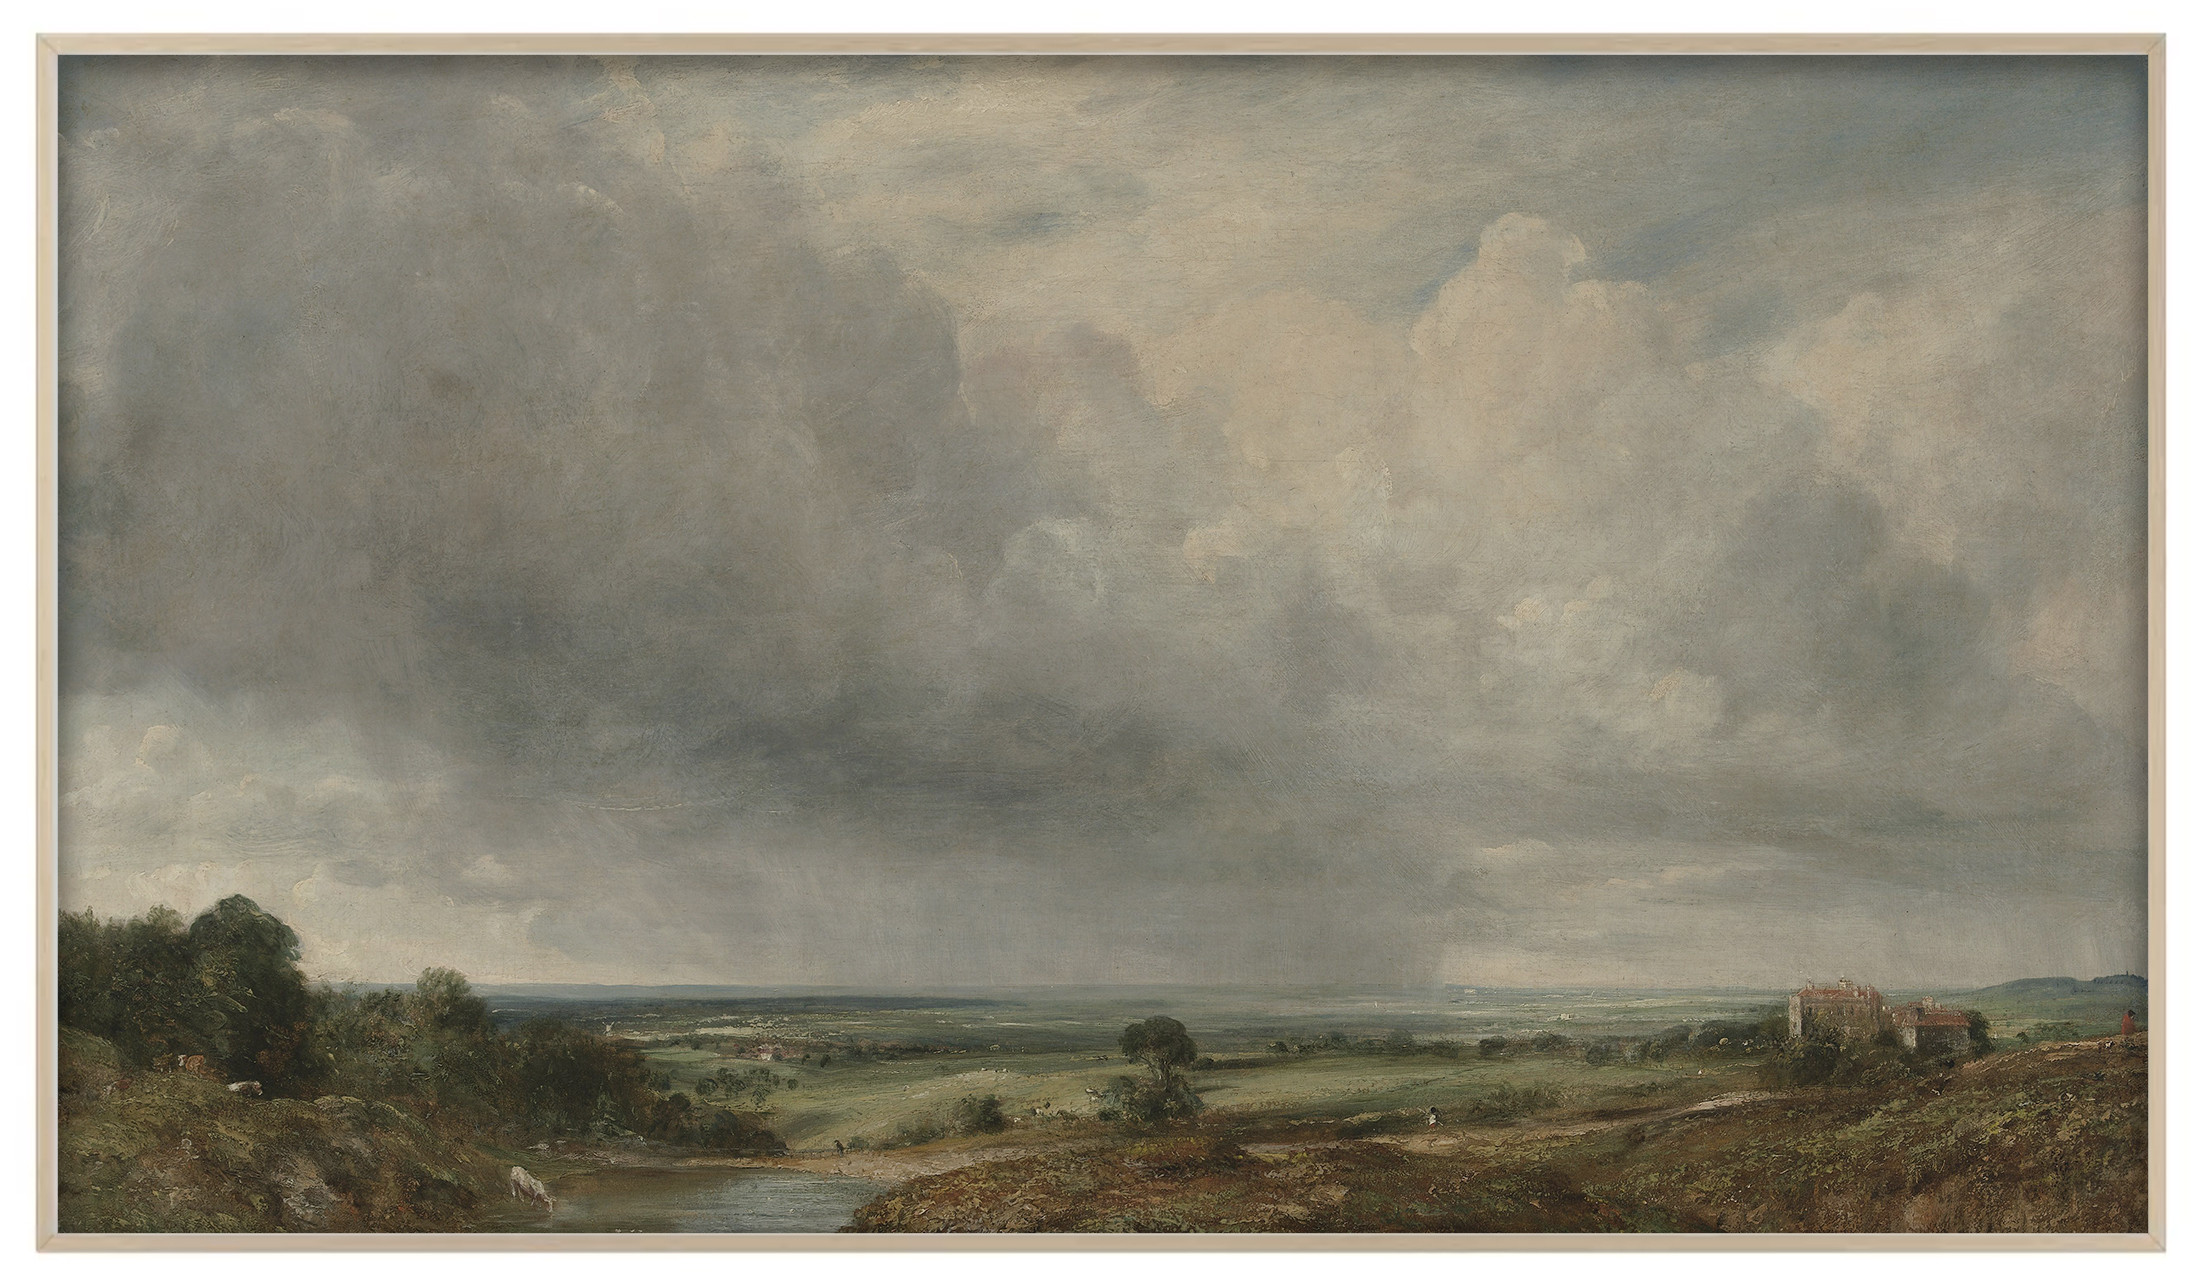
Selecting “No Mat” will display your artwork across the entire screen, edge-to-edge.
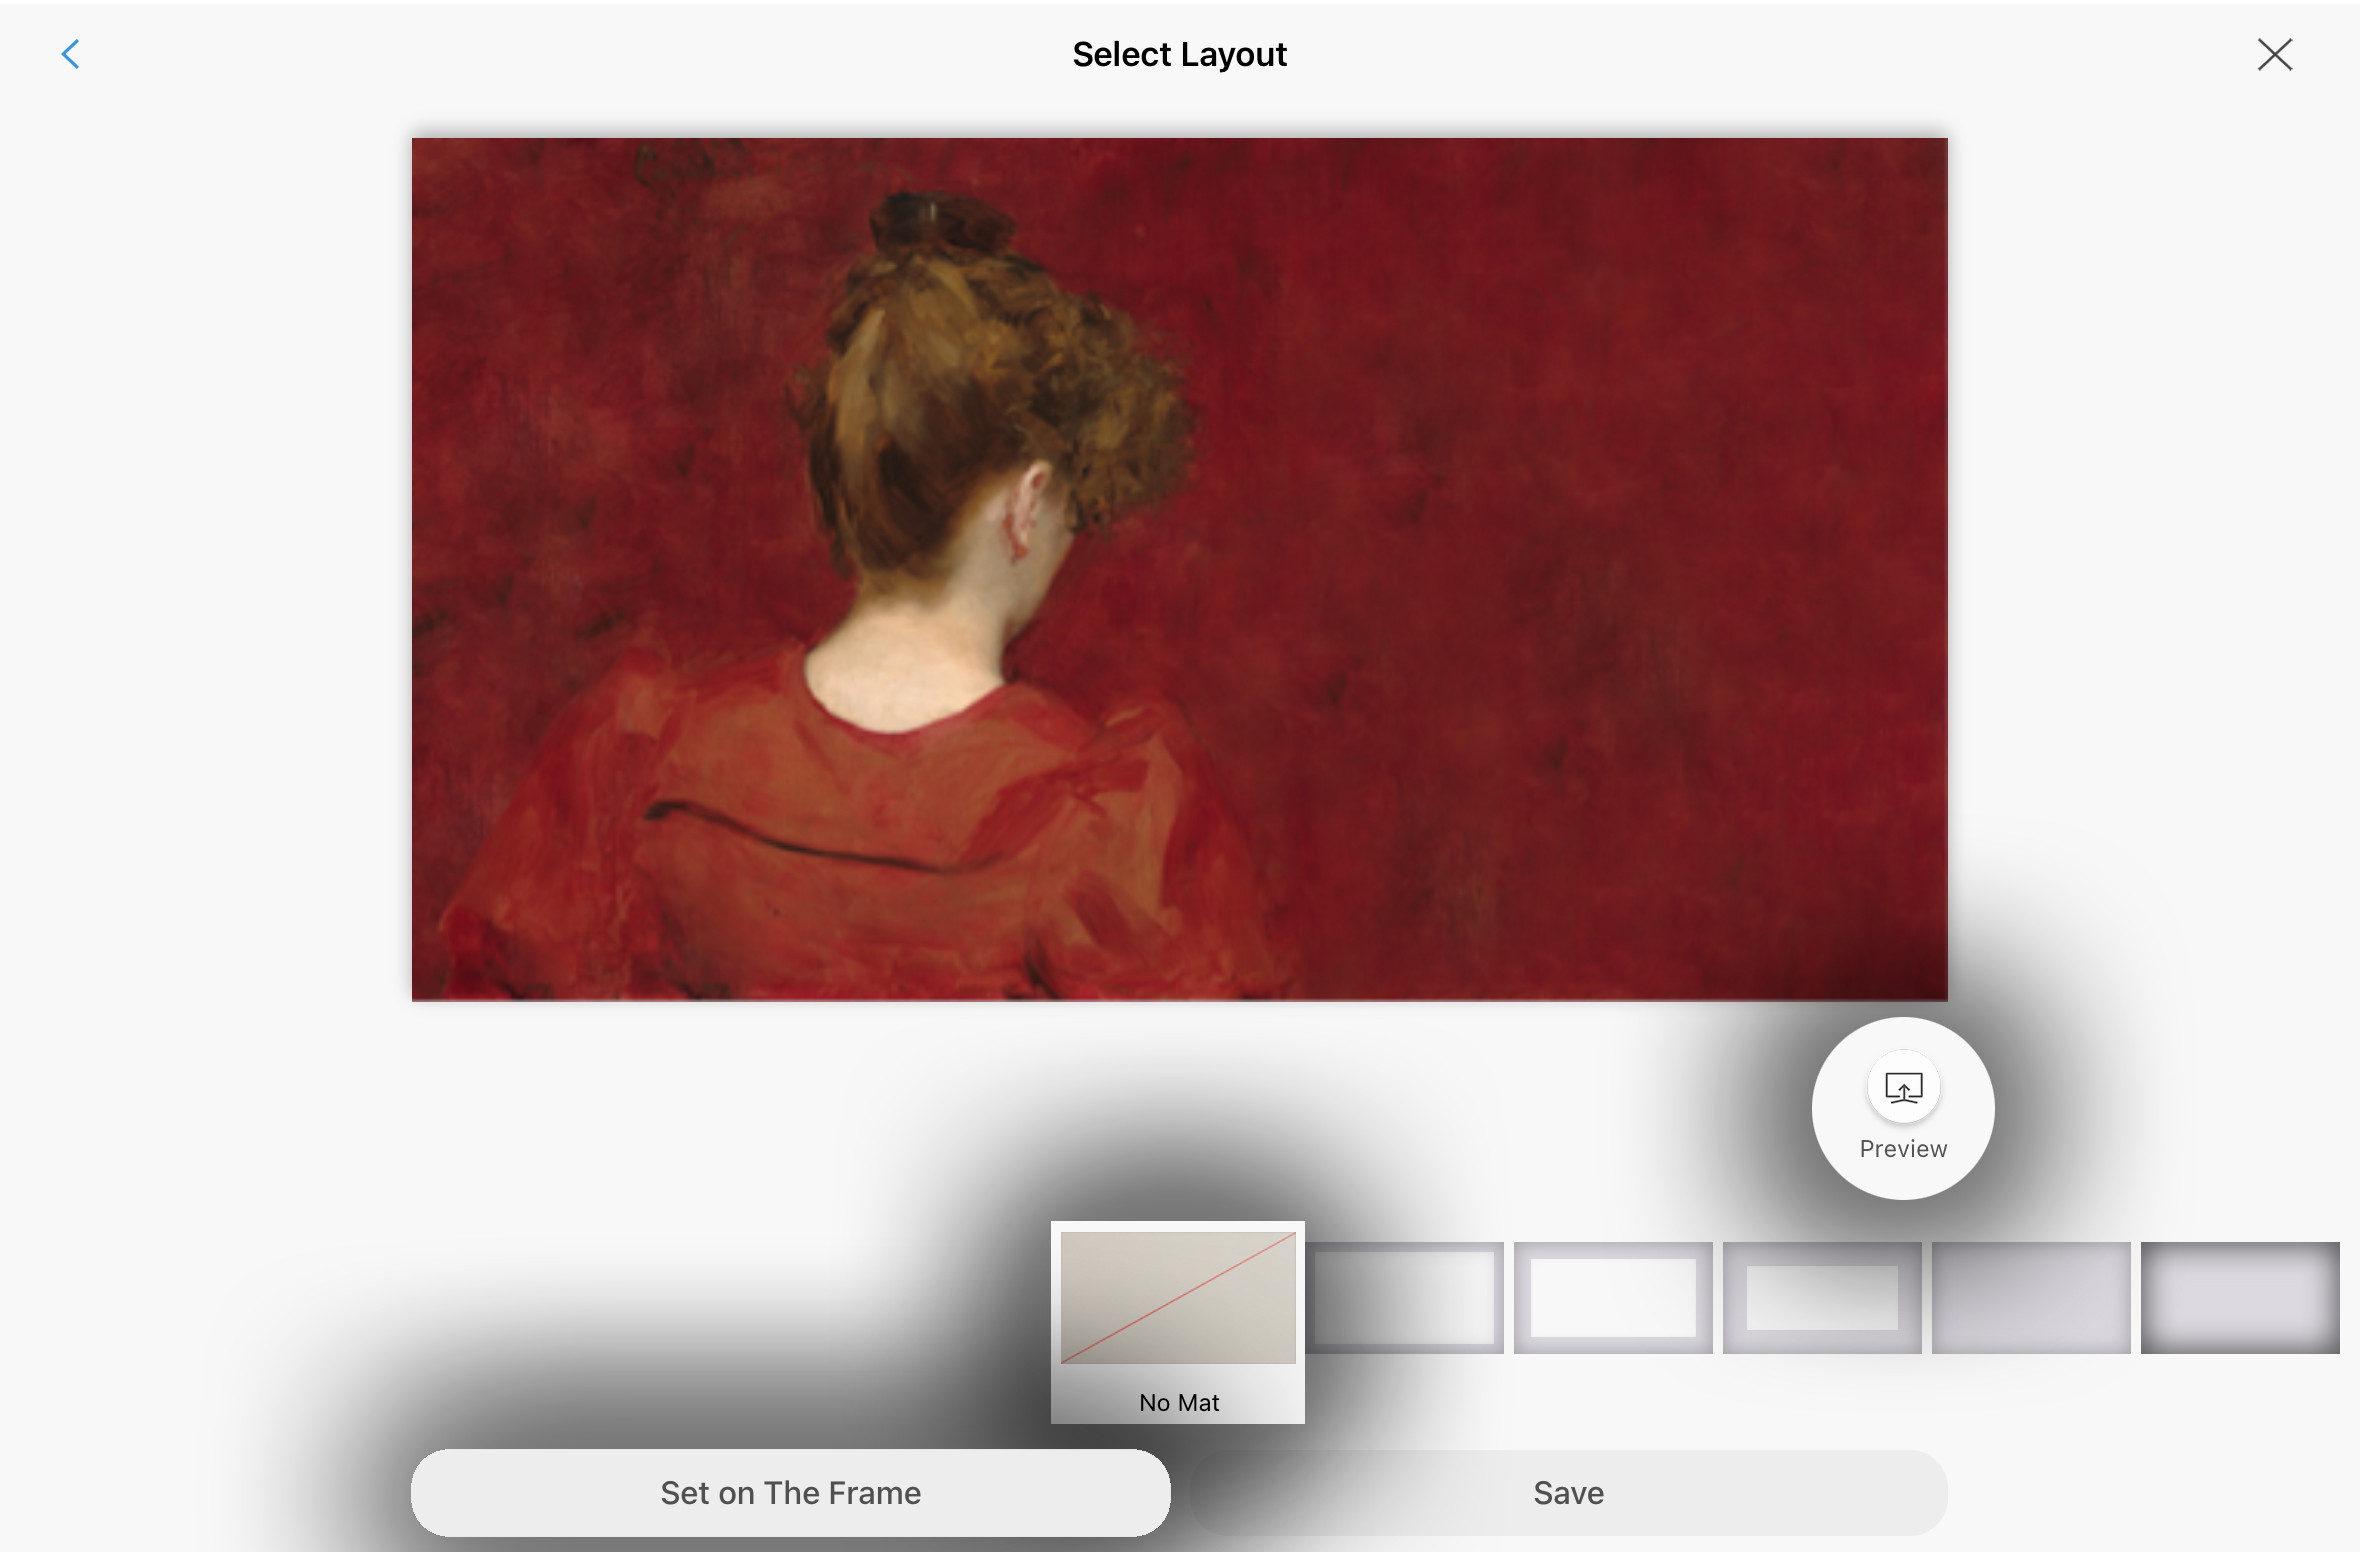
“No Mat” will fill the screen with your image
If you choose a matted option, tap “Next” at the bottom of the screen. You’ll then be able to select your desired mat color. I prefer a slightly off-white cream color, as I find it looks the most realistic.
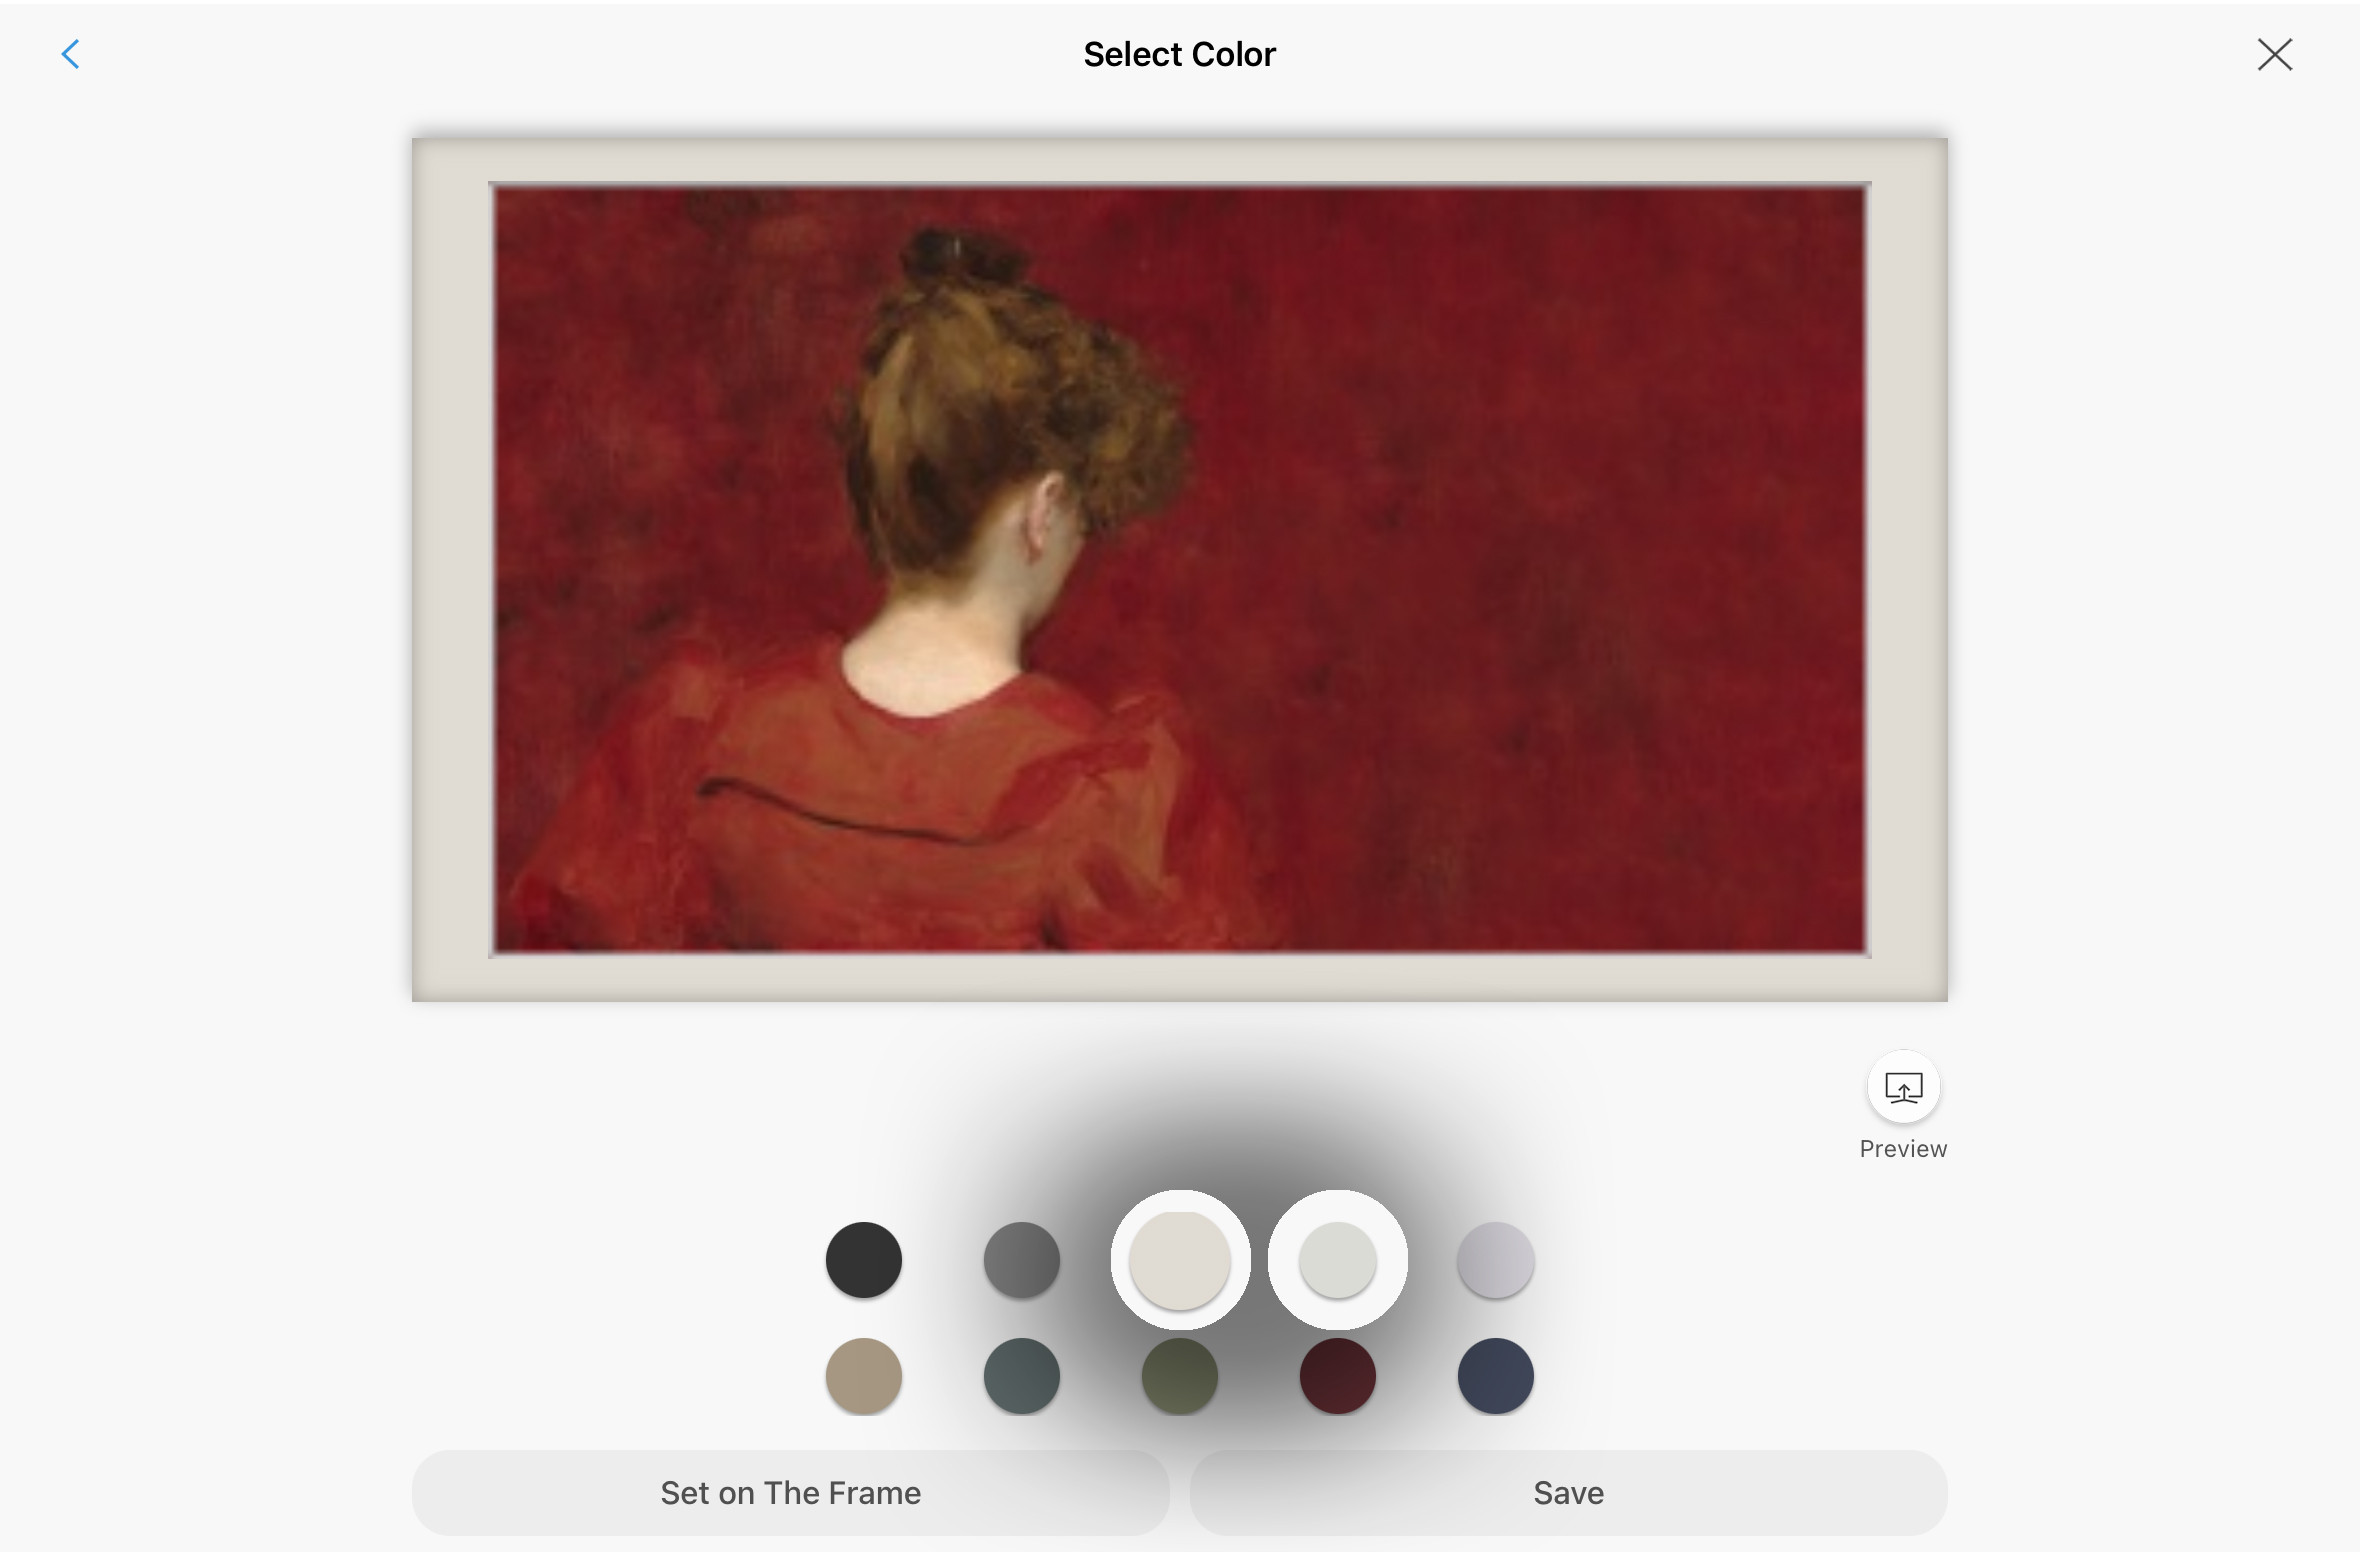
If using a mat, I prefer a slightly warmer cream color. I find this looks more realistic
At any point in this process, you can tap the “Preview” button to see a quick look at how the different mat options will appear on your TV.
Once you’ve finalized your mat settings, tap “Save” to keep these settings for future use (without displaying the art now) or “Set on The Frame” to immediately display your chosen artwork on your TV.
Step Six: Skip the Photo Filters
After selecting “Set on The Frame,” a screen will pop up asking you to “Select Photo Filter.” Unless you specifically want to add a filter, I recommend skipping this step, especially if you’re uploading professional-quality art files. Simply tap the “X” in the top right corner to close this screen and bypass the filters.
I’d suggest avoiding all these filters and just clicking X to skip this menu option
Optimizing Your Art for the Best Display on Your Frame TV
You can download this artwork from my Frame TV shop here!
The magic of the Frame TV is making people believe you have a real painting, not a television, on your wall. One key to enhancing this illusion is adjusting the Art Mode lighting settings.
You can adjust these settings using either your TV remote or the SmartThings app. I find the app a bit easier, so I’ll show you that method.
With your TV in Art Mode, open the SmartThings app and go to “Frame TV” -> “Art Mode” -> “Browse”. This will take you to the Frame TV Art Store, but look for the three vertical dots in the top right corner. Tap them to reveal a dropdown menu:
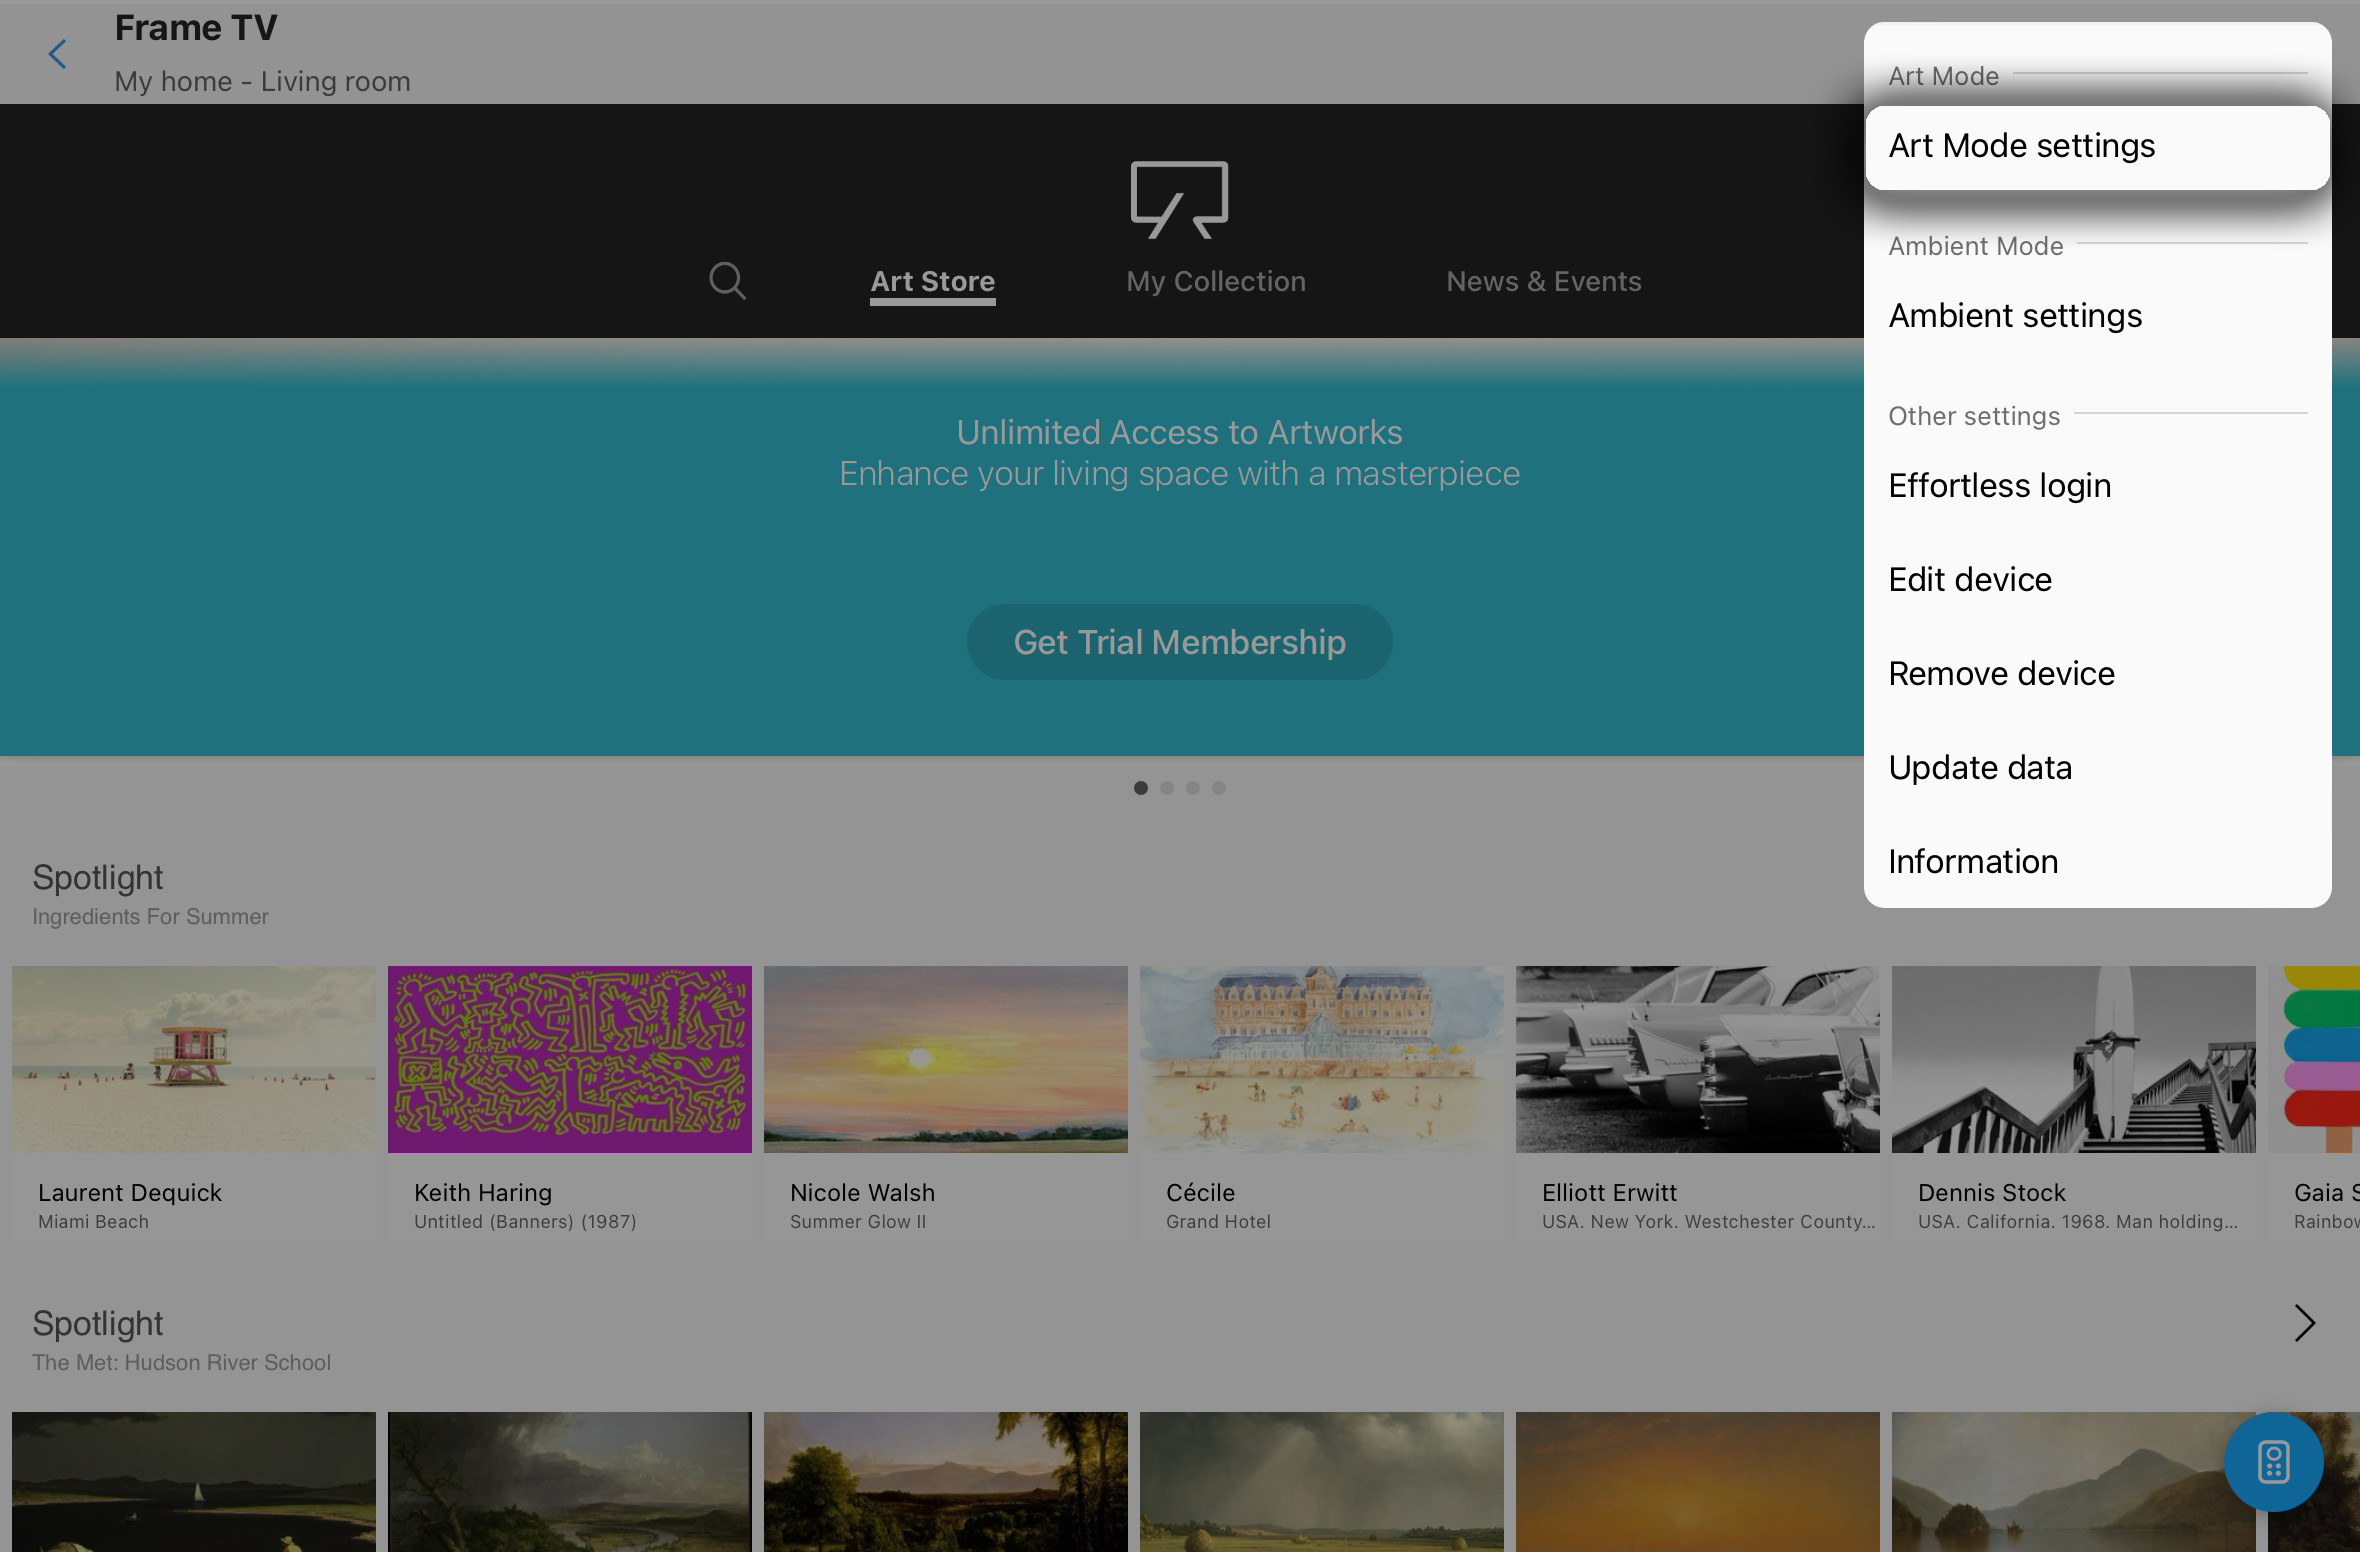
To adjust the art lighting options select “Art Mode settings” from the drop down menu
Next, tap “Art Mode settings” to access the adjustment screen:
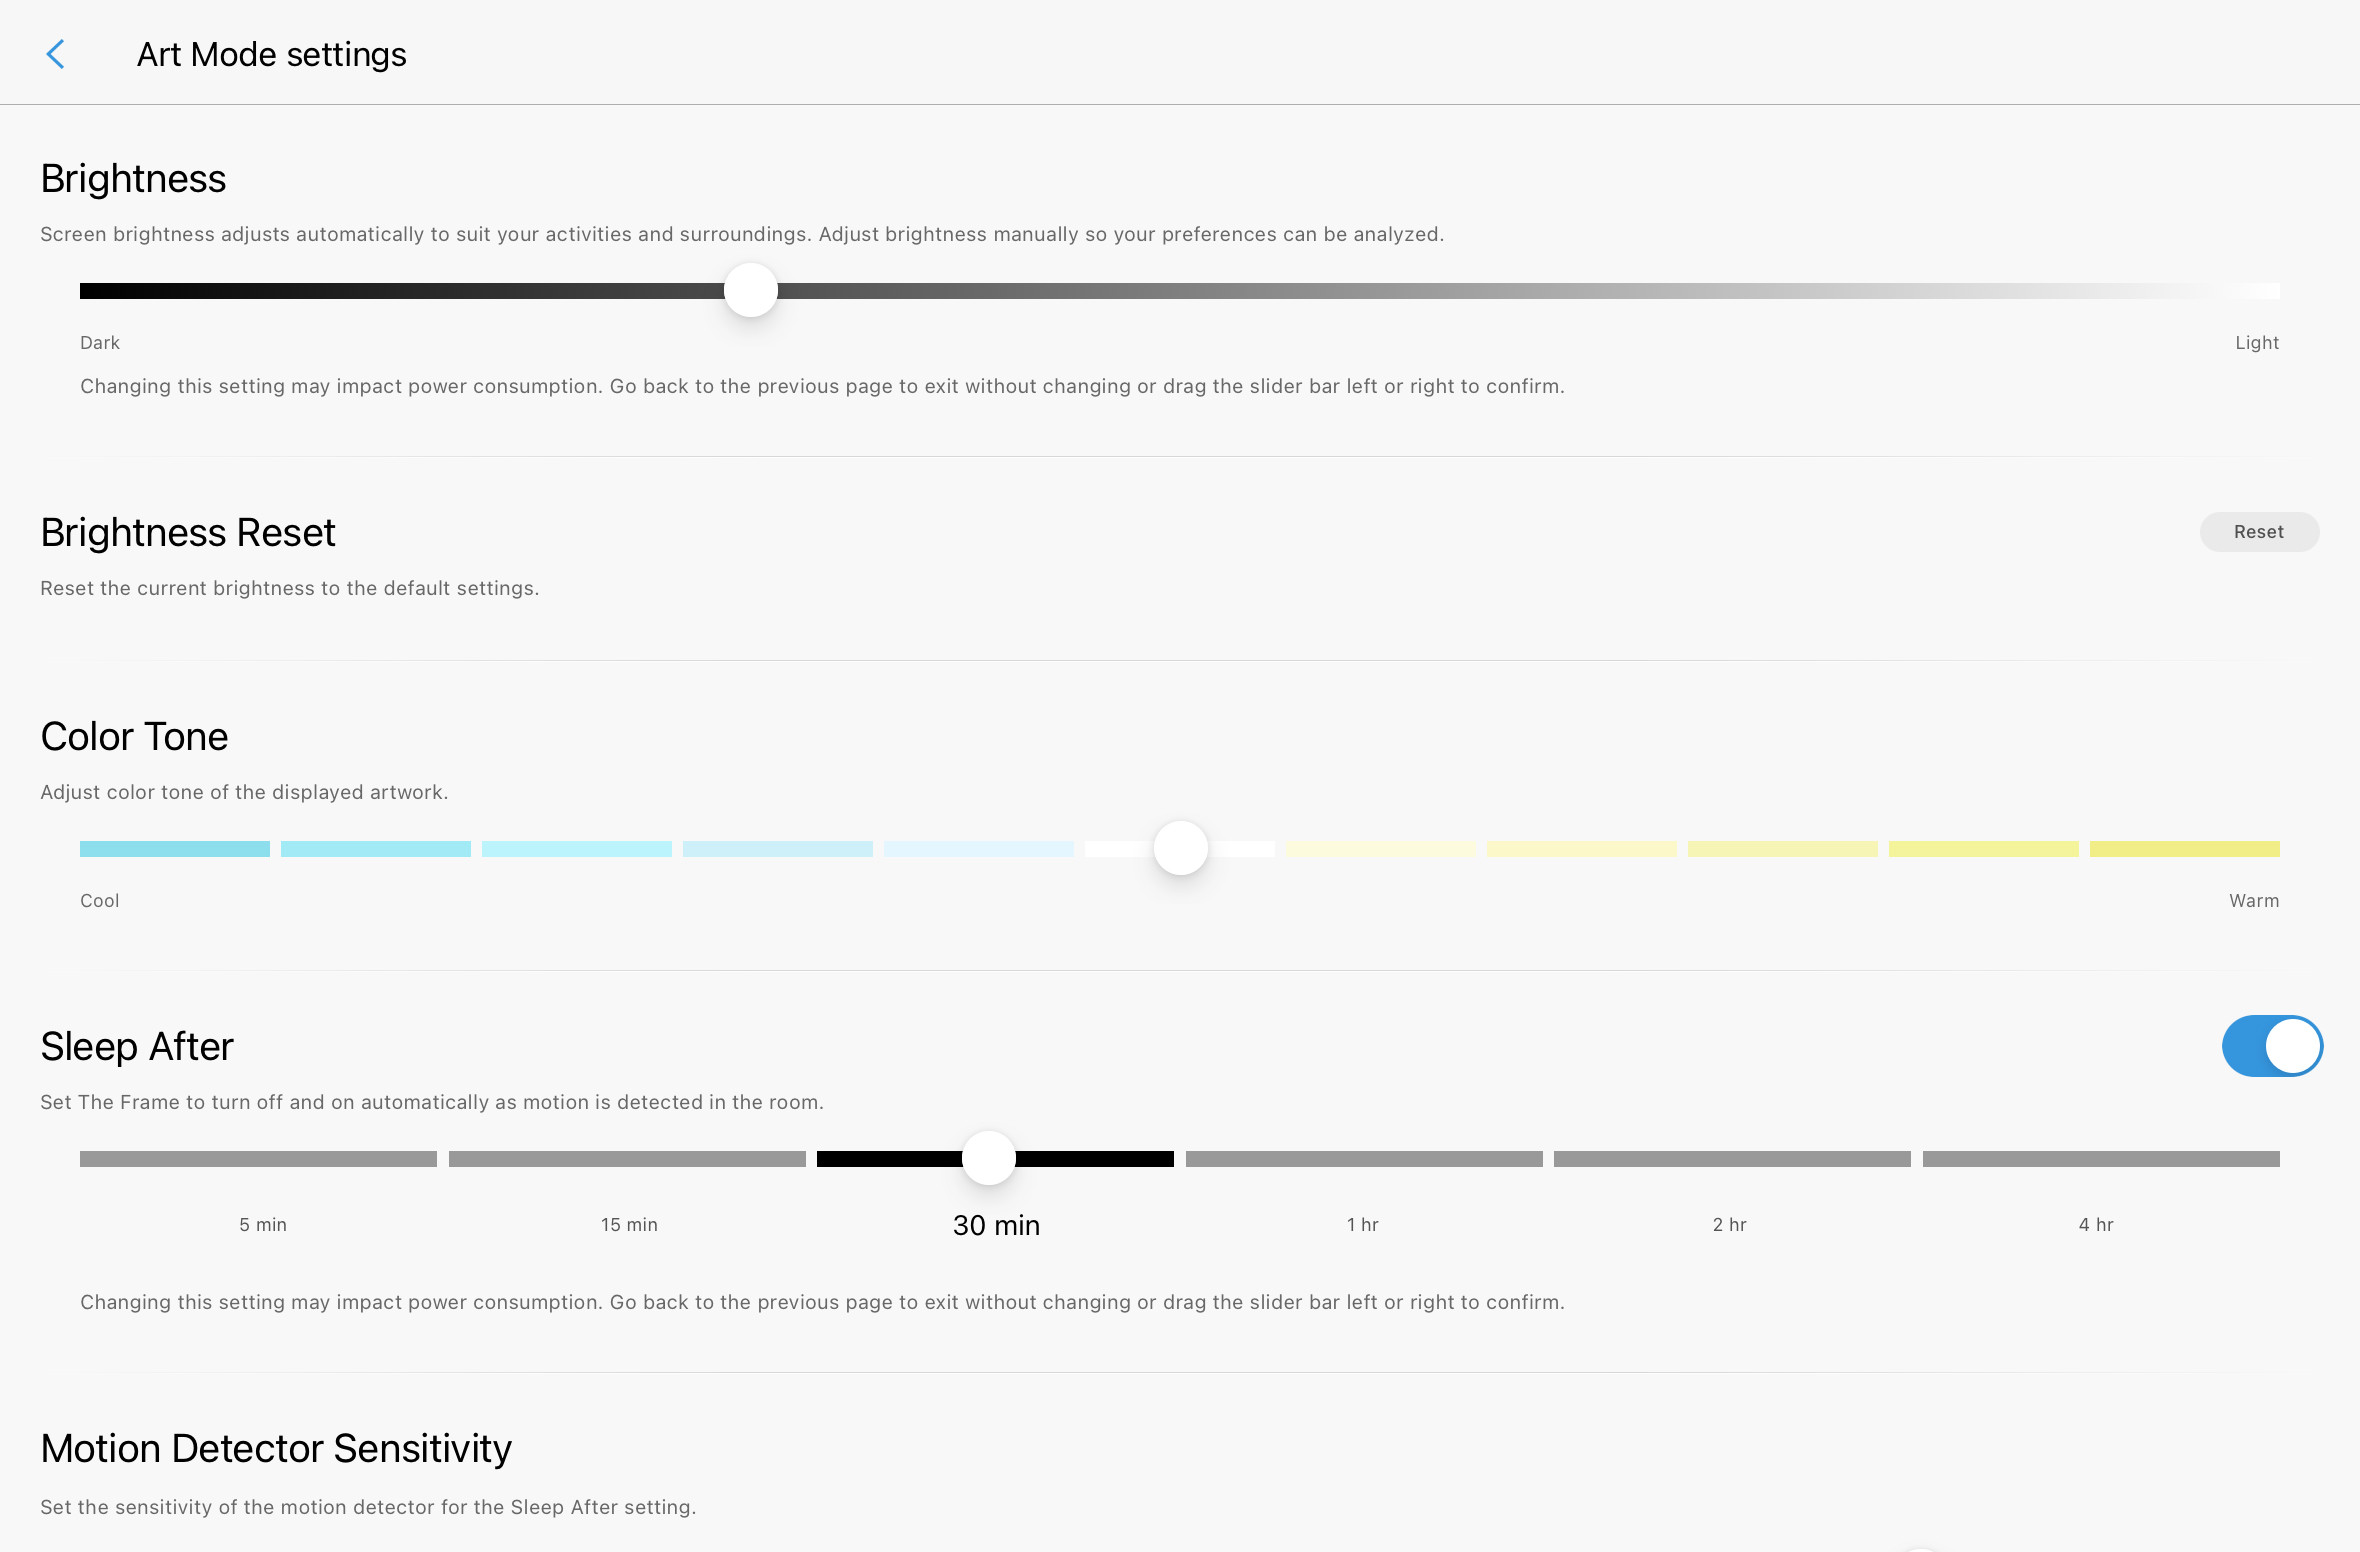
To make my art look more realistic, I’ll lower the brightness and slide the color tone a tad warmer
This is where you can experiment to find what looks best. Start by using the “Brightness” slider to reduce the brightness slightly. (For very bright images, you might want to reduce it by as much as half). You’ll see a real-time preview on your TV as you adjust the slider.
Since TV screens often emit a cooler, bluer light, you can counteract this and add warmth by using the “Color Tone” slider to slightly adjust towards the warmer side. A tiny nudge to the right is usually all it takes.
*Good news: These adjustments only affect Art Mode. Your brightness and color settings for regular TV viewing remain unchanged.
Get Free Art for Your Frame TV!
Sign up for my monthly newsletter below, and you’ll receive 15 of my most popular trending artworks, perfectly sized and ready for your Frame TV! Plus, each month, I’ll send you another free seasonal Frame TV art download straight to your inbox!

IMPORTANT NOTE: After clicking “subscribe,” you’ll be taken to a landing page where you can download your Frame TV art files.
This page is only accessible immediately after subscribing, so be sure to save the URL if you need to access the files later.
Thank you!
You have successfully joined our subscriber list.
Discover More Frame TV Art in My Shop
Looking to expand your art collection? Visit my online store to explore all my Frame TV art collections. Each collection features 10 curated vintage artworks, perfectly sized and formatted for your Samsung Frame TV.
Shop More Frame TV Artwork Collections
Don’t Forget To Pin This Post & Subscribe!
Want more DIY home decor inspiration, thrifting tips & tricks, free art downloads, reading recommendations, and home renovation tutorials? Pin this post for later so you can follow me on Pinterest and subscribe to my blog to get my latest content as soon as it’s published!
Share this:
Like this:
Like Loading…