It’s a familiar frustration for any photographer: you excitedly review your shots, only to find that a seemingly perfect image is marred by blurriness. Especially when you’re capturing a fleeting moment or a stunning landscape, discovering a lack of sharpness can be truly disheartening. Even seasoned professionals aren’t immune to this issue, sometimes capturing unintentionally soft images. But don’t despair! Understanding Why Are My Photos Blurry is the first step to consistently achieving sharp, crisp images.
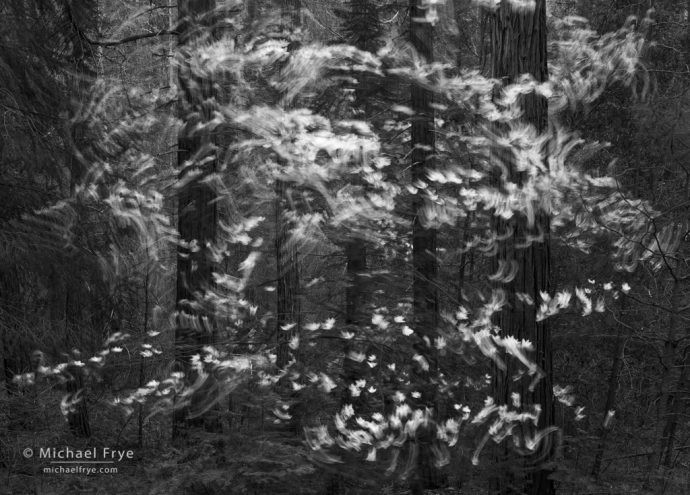 Swirling dogwood blossoms, Yosemite. A deliberately blurry photos.
While sometimes blur is intentionally used for artistic effect, like in this image of swirling dogwood blossoms in Yosemite taken with a slow shutter speed, most of the time, sharpness is the goal. When your photos are unintentionally blurry, it’s crucial to become a photo detective and figure out the root cause. This knowledge empowers you to prevent the same issue from happening again.
There are five primary culprits behind blurry photos:
- Camera Movement
- Subject Movement
- Missed Focus
- Insufficient Depth of Field
- Lens Softness
By carefully examining your images and recalling your shooting conditions, you can effectively diagnose and eliminate these causes, leading to sharper, more satisfying photographs. Let’s delve into each of these reasons and explore practical solutions to ensure your photos are crystal clear.
1. Camera Movement (Camera Shake)
Camera movement, often referred to as camera shake, is one of the most frequent reasons for blurry photos, especially when shooting handheld. This occurs when the camera moves even slightly during the exposure, causing the entire image to lose sharpness and exhibit a characteristic “ghosting” or double-image effect, particularly noticeable when viewing the image at 100% magnification.
This ghosting effect is more pronounced when using a tripod, where vibrations, rather than continuous hand movement, are the primary cause. Even minor vibrations, magnified by longer focal length lenses, can lead to noticeable blur.
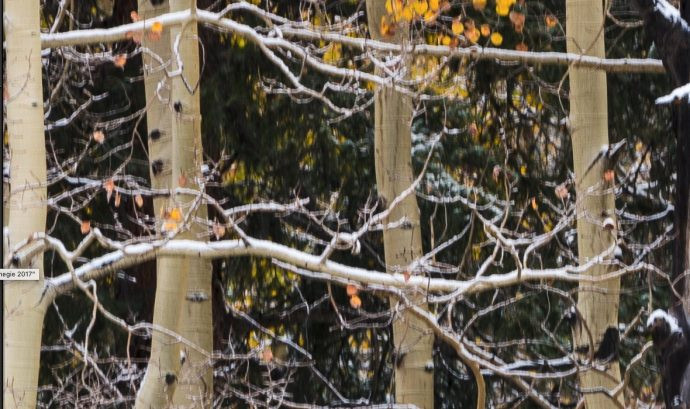 This view shows the ghosting (double image) characteristic of images blurred by camera movement. (Click on the image to view at 100%).
Look closely at the branches in this 100% crop. The subtle doubling or ghosting is a telltale sign of camera movement blur. If the entire image shows this effect and you were shooting handheld at a slow shutter speed, camera shake is highly likely the culprit.
How to Fix Camera Movement Blur:
- Increase Shutter Speed: The most direct solution is to use a faster shutter speed. As a general rule of thumb, when handholding, your shutter speed should be at least 1/focal length (e.g., 1/100th of a second for a 100mm lens). For longer lenses or unsteady hands, even faster speeds are necessary.
- Use Image Stabilization (IS/VR): Many modern lenses and camera bodies incorporate image stabilization, which compensates for minor movements. Engage IS/VR when shooting handheld, but remember to turn it off when using a tripod, as it can sometimes introduce blur in those situations.
- Employ a Tripod: For slow shutter speeds or when using long lenses, a sturdy tripod is essential. Ensure your tripod is stable and set up correctly.
- Use a Remote Shutter Release or Self-Timer: Pressing the shutter button can introduce vibrations. Use a remote release cable or the camera’s self-timer to trigger the shutter without physically touching the camera.
- Mirror Lockup (for DSLRs): In DSLR cameras, the mirror flipping up during exposure can cause vibrations. Use mirror lockup mode to raise the mirror before the exposure, minimizing vibrations.
- Electronic Front-Curtain Shutter or Silent Shutter (for Mirrorless Cameras): Some mirrorless cameras offer electronic front-curtain shutter or silent shutter options, which reduce mechanical vibrations caused by the shutter mechanism.
- Check Sharpness on Camera Screen: After taking a shot, zoom in on the image on your camera’s LCD screen to check for sharpness immediately in the field. This allows you to identify and correct camera shake issues on the spot.
- Minimize Vibrations on Tripod: Be mindful of your tripod setup. Ensure legs are locked, avoid extending thin leg sections unnecessarily, and consider weighing down the tripod in windy conditions.
By addressing camera movement, you can significantly improve the sharpness of your handheld and tripod-based photographs.
2. Subject Movement (Motion Blur)
Subject movement, also known as motion blur, occurs when the subject you are photographing moves during the exposure time. Unlike camera shake, which blurs the entire image evenly, subject movement typically results in blur localized to the moving parts of the scene, while stationary elements remain sharp.
Wind-blown vegetation is a common example of subject movement. Leaves, flowers, and branches can move during the exposure, causing them to appear blurred, while more solid, stationary objects like tree trunks or rocks stay sharp.
 With wind-created subject movement, some objects will be sharper than others – even though they might be in close proximity – and you
In this image, notice how some leaves and branches are relatively sharp, while others, particularly towards the upper left, are noticeably blurred and exhibit ghosting. This indicates wind-induced subject movement. When photographing people or animals in motion, you’ll often see motion blur in extremities like hands, legs, tails, or wingtips, while the main body might be sharper.
How to Fix Subject Movement Blur:
- Increase Shutter Speed: Just like with camera shake, increasing the shutter speed is the primary solution for freezing subject movement. A faster shutter speed reduces the exposure time, minimizing the amount of movement captured during the shot.
- Raise ISO: To achieve faster shutter speeds, you may need to increase your ISO sensitivity, especially in low-light conditions. Higher ISO allows you to use faster shutter speeds while maintaining proper exposure.
- Be Patient: In situations like photographing wind-blown flowers, sometimes waiting for a lull in the wind is the simplest solution. Observe the subject and time your shot when the movement subsides.
- Anticipate Movement: For predictable subject movement, like a runner or a bird in flight, anticipate the movement and time your shot accordingly. Pre-focus on the expected path of motion to increase your chances of capturing a sharp image.
- Panning Technique (Creative Motion Blur): While not a fix for unwanted blur, panning is a technique where you move your camera along with a moving subject, keeping it relatively sharp while blurring the background. This can create a sense of speed and motion, but it’s a deliberate artistic choice, not a solution for general blurry photos.
By understanding and addressing subject movement, you can capture sharper images of dynamic scenes and moving subjects.
3. Missed Focus (Focus Error)
Missed focus occurs when the point of focus is not precisely where you intended it to be. While it’s rare for an entire photograph to be completely out of focus, especially with modern autofocus systems, focusing errors can still lead to blurry images, particularly in critical areas of your composition.
In landscape photography, where smaller apertures and autofocus are commonly used, some part of the scene is usually in focus. However, the focus might be on the wrong element, or not on the most important part of the image.
When focus is missed, the image typically appears soft overall, but unlike camera shake or subject movement, it usually lacks the distinct ghosting effect. A key clue to missed focus is that some parts of the image might be slightly sharper than others. If objects closer to the camera are sharper, you likely focused too close. If objects farther away are sharper, you focused too far.
 The crane is blurred, while the geese behind it are sharper – a sure sign that I focused behind the birds.
In this example, the crane (large gray bird) is blurry, while the geese behind it are sharper. This clearly indicates that the focus was mistakenly placed behind the intended subject.
How to Fix Missed Focus:
- Ensure Autofocus is ON: Double-check that your autofocus is enabled, especially if you sometimes switch to manual focus. Accidentally leaving autofocus off is a common mistake.
- Select the Correct Focus Point/Area: Choose the appropriate focus point or focus area mode for your subject. For stationary subjects, single-point autofocus is often precise. For moving subjects, continuous autofocus with a wider focus area might be more effective.
- Use Back-Button Focus: Back-button focus separates focusing from the shutter button. Assign autofocus to a button on the back of your camera. This allows you to focus once and recompose without refocusing, and also to easily switch between autofocus and manual focus.
- Calibrate Autofocus (Camera Setting): Some cameras allow autofocus calibration to fine-tune the autofocus accuracy for specific lenses. If you consistently experience front-focusing or back-focusing issues with a particular lens, consider calibrating your autofocus in your camera’s menu.
- Consider a Better Autofocus System: For photographing fast-moving subjects like wildlife or sports, a camera body with a more advanced autofocus system might be necessary for consistently accurate focus.
- Utilize Focus Peaking/Magnification (Manual Focus): When using manual focus, especially with mirrorless cameras, focus peaking highlights in-focus areas, and magnification allows you to zoom in and precisely adjust focus.
- Focus on the Right Spot: For portraits, focus on the eyes. For landscapes, consider using back-button focus and focusing on a point approximately one-third into the scene to maximize depth of field, or use hyperfocal distance techniques.
By paying close attention to your focusing technique and utilizing your camera’s focus features effectively, you can minimize missed focus and achieve sharper images.
4. Insufficient Depth of Field (Shallow DOF)
Insufficient depth of field (DOF) occurs when the portion of your image that is acceptably sharp – the depth of field – is too shallow to encompass all the elements you want in focus. This is often a deliberate creative choice to isolate a subject against a blurred background, but unintentionally shallow DOF can lead to blurry photos when you desire sharpness throughout the scene, particularly in landscape photography.
Shallow DOF is primarily controlled by aperture. Wider apertures (smaller f-numbers like f/2.8, f/4) create shallow DOF, blurring backgrounds, while narrower apertures (larger f-numbers like f/8, f/11, f/16) increase DOF, bringing more of the scene into focus.
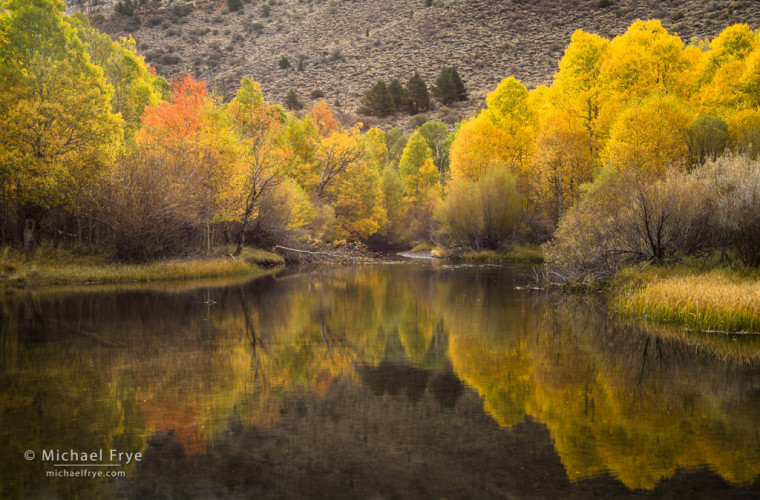
 Dogwoods and giant sequoia, Yosemite NP, CA, USA
While this image of dogwoods and giant sequoia trees in Yosemite appears reasonably sharp at a smaller size, closer inspection at 100% reveals areas of blur.
 The foreground leaves are (mostly) sharp, while the background leaves are a little soft, indicating either a focusing error or insufficient depth of field (even though I used f/16).
As seen in this 100% crop, the foreground leaves are relatively sharp, but the background foliage is noticeably softer. This indicates insufficient depth of field, even though a relatively narrow aperture of f/16 was used.
 I focused a little farther back, which put the background trunks and leaves into focus, but now the foreground leaves are a little soft.
Focusing further back improved the sharpness of the background trees, but then the foreground leaves became slightly out of focus. This illustrates the challenge of achieving sufficient DOF in scenes with significant depth.
How to Fix Insufficient Depth of Field:
- Use a Smaller Aperture (Larger f-number): The most straightforward solution is to use a narrower aperture. Stop down to f/8, f/11, or even f/16 to increase depth of field and bring more of the scene into focus.
- Focus Further Back (Hyperfocal Distance): Focusing at the hyperfocal distance maximizes depth of field for a given aperture and focal length. Hyperfocal distance is the closest distance at which a lens can be focused while keeping objects at infinity acceptably sharp. You can use online hyperfocal distance calculators or smartphone apps to determine the hyperfocal distance for your specific setup.
- Focus Stacking (Advanced Technique): For scenes with extreme depth, focus stacking is a technique where you take multiple images at different focus points and combine them in post-processing to create an image with extensive DOF.
- Use a Tripod: Smaller apertures often require slower shutter speeds. Use a tripod to maintain sharpness when using smaller apertures in lower light conditions.
- Understand Depth of Field and Focusing: Familiarize yourself with the concept of depth of field and how aperture, focal length, and focus distance affect it. Experiment and practice to develop an intuitive understanding of DOF.
By carefully managing depth of field, you can ensure that the desired portions of your image are sharp, especially in landscape and architectural photography where extensive sharpness is often preferred.
5. Lens Softness (Lens Imperfections)
Lens softness refers to a lack of sharpness caused by the optical characteristics of the lens itself. While all lenses have some degree of softness, especially at their widest apertures or in the corners of the frame, some lenses are inherently softer than others, particularly budget kit lenses, wide-range zoom lenses, or lenses used with teleconverters.
Lens softness can manifest as overall fuzziness throughout the image, but more commonly, it appears as soft corners, while the center of the image remains relatively sharp. Diffraction, which occurs at very small apertures (f/16, f/22 and beyond), can also contribute to overall lens softness.
 Aspens along a creek in the eastern Sierra Nevada, CA, USA
This image of aspens in the Sierra Nevada looks acceptable at a smaller size, but closer examination reveals lens softness issues.
 The center of the photo looks sharp. (Click on the image to view at 100%.)
The center of the image, when viewed at 100%, appears reasonably sharp, indicating that focus and camera movement are not the primary issues.
 The upper-left corner is soft.
However, the upper-left corner exhibits significant softness and lack of detail, characteristic of lens softness in the corners.
 The upper-right corner is also soft.
The upper-right corner shows similar softness, further pointing to lens limitations as the cause of the blurry corners.
How to Fix Lens Softness:
- Use Sharper Lenses: Investing in higher-quality lenses, especially prime lenses (fixed focal length lenses), often results in significantly sharper images compared to kit lenses or budget zooms.
- Avoid Extreme Zoom Ranges: Wide-range zoom lenses, while versatile, often compromise sharpness, particularly at their longer focal lengths. Consider lenses with more limited zoom ranges for better optical performance.
- Use Optimal Aperture (Lens Sweet Spot): Lenses typically have a “sweet spot” aperture, usually around f/5.6 to f/8, where they perform at their sharpest. Experiment with different apertures to find the sweet spot for your lenses.
- Avoid Very Small Apertures (Minimize Diffraction): While smaller apertures increase DOF, extremely small apertures like f/16, f/22, and beyond can cause diffraction, which softens the entire image. Avoid these apertures unless absolutely necessary for DOF, and understand the trade-off in sharpness.
- Test Lens Sharpness at Different Apertures: Conduct lens sharpness tests at various apertures to understand your lens’s performance characteristics and identify its optimal aperture range.
- Consider Lens Corrections in Post-Processing: Software like Lightroom and Photoshop offer lens correction profiles that can help mitigate some lens distortions and softness, particularly in the corners.
While you cannot fundamentally change the inherent sharpness of a lens, understanding lens softness and employing these techniques can help you maximize the sharpness of your images and make informed lens choices.
Conclusion: Sharpen Your Photography Skills
Dealing with blurry photos can be frustrating, but by understanding the five common reasons – camera movement, subject movement, missed focus, insufficient depth of field, and lens softness – you can become a more effective photographer. Each cause has distinct characteristics and solutions, and by becoming a photo detective and analyzing your blurry images, you can pinpoint the problem and take corrective action.
Remember to review your images critically, especially at 100% magnification, to identify sharpness issues in the field. Experiment with different settings, practice good shooting techniques, and learn the limitations of your equipment. With practice and attention to detail, you can minimize blurry photos and consistently capture sharp, compelling images that reflect your photographic vision.
Keep exploring and learning to elevate your photography skills! For more tips and techniques to improve your photography, explore other articles and resources here at dfphoto.net.