Unleash your creativity and personalize your messages and photos by turning your cherished memories into fun, shareable stickers right on your iPhone. The Photos app offers a seamless way to transform subjects from your photos and Live Photos into both static and animated stickers. This guide will walk you through the simple steps to create your own custom stickers and add a unique touch to your digital communication.
Creating Static Stickers from Your Photos
Transforming a regular photo into a sticker is a straightforward process, allowing you to isolate subjects and turn them into digital decorations. Here’s how to make photo stickers on your iPhone:
-
Open the Photos App: Begin by launching the Photos app directly on your iPhone to access your photo library.
-
Select Your Photo: Browse through your photos and tap on the image you wish to convert into a sticker. Open it in full screen for a better view.
-
Isolate the Subject: This is where the magic happens. Touch and firmly hold the main subject of your photo. After a brief moment, you’ll see a highlight appear around the subject, indicating it has been selected. Release your finger.
-
Add Sticker Option: A context menu will pop up above the selected subject. From the options presented, tap “Add Sticker”.
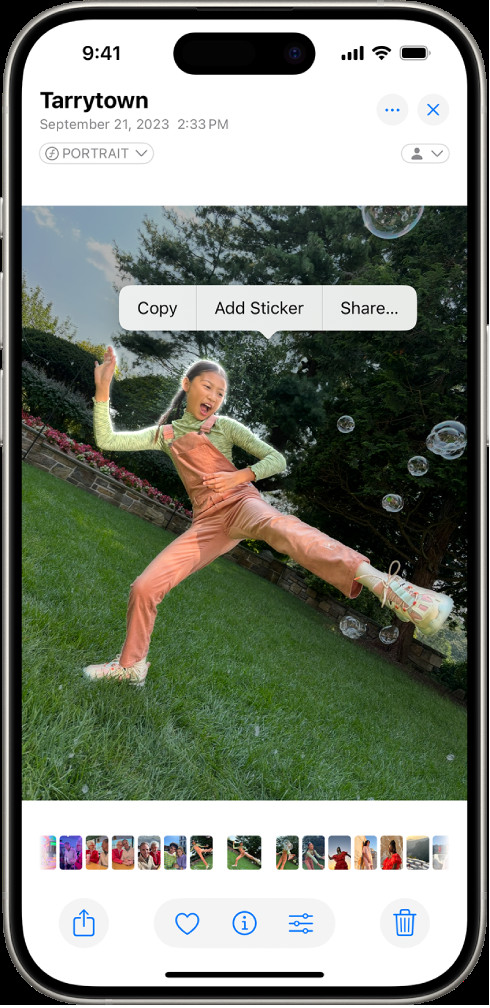 The iPhone Photos app showing a photo of a person. The person is selected, and the 'Add Sticker' option is highlighted in the menu.
 -
Access Your Stickers: The newly created sticker is instantly saved to your stickers menu. You can find and use these stickers anytime you use the iPhone onscreen keyboard in apps like Messages, Mail, or when using Markup tools to edit photos or screenshots.
-
Enhance with Effects (Optional): To further customize your sticker, tap “Add Effect”. You can choose from visual enhancements like “Outline”, “Comic”, or “Puffy” to give your sticker a unique look and feel.
Tip: Experiment with using your newly created stickers to personalize your photos. When editing a photo, access your stickers to add fun elements and creative flair.
Making Animated Stickers from Live Photos
For dynamic stickers, Live Photos are the key. You can extract the moving subject from a Live Photo to create animated stickers that bring your messages to life. Here’s the process for creating animated photo stickers:
- Navigate to Your Live Photos: Open the Photos app on your iPhone and locate the Live Photo you want to use.
- Open in Full Screen: Tap the Live Photo to view it in full screen mode.
- Extract the Animated Subject: Touch and hold the subject within the Live Photo. Instead of just releasing, continue sliding your finger upwards until you see a ghosted, duplicate image of the subject appear. Then, release your finger. This upward swipe action is crucial for creating an animated sticker.
- Select “Add Sticker”: Just like with static photos, an “Add Sticker” option will appear in the menu. Tap it to save your animated sticker.
- Find Your Animated Stickers: Your animated sticker is now available in your stickers menu alongside your static stickers. Access them via the keyboard or Markup tools to use in your messages and creative projects.
- Apply Effects to Animated Stickers (Optional): Similar to static stickers, you can tap “Add Effect” to apply styles like “Outline,” “Comic,” or “Puffy” to your animated stickers for added visual interest.
Removing Stickers from Your Collection
If you want to declutter your sticker collection, deleting stickers is simple. Here’s how to remove stickers you no longer need:
- Go to Photos and Edit: Open any photo in the Photos app and tap “Edit” at the top right corner.
- Access Markup Tools: Tap the Markup button and then tap the Add button which looks like a plus icon inside a circle.
- Open Stickers Menu: Tap “Add Sticker” to view your sticker collection.
- Delete Stickers: Touch and hold the sticker you wish to delete. A menu will appear; tap “Remove” to delete the sticker from your collection.
Your stickers are conveniently synced across your Apple devices through iCloud. This means any stickers you create or delete on your iPhone will be reflected on your iPad, Mac, and Apple Vision Pro, as long as you are logged in with the same Apple ID.
Start turning your photos into stickers today and explore a new dimension of personal expression on your iPhone!