Cutting out photos, or removing backgrounds from images, is a fundamental skill for anyone working with visuals. Whether you’re creating presentations, designing documents, or simply want to isolate a subject, mastering background removal can significantly enhance your projects. While dedicated photo editing software offers advanced tools, Microsoft Office provides a surprisingly effective built-in feature to help you quickly cut out photos. This guide will walk you through the simple steps to remove image backgrounds directly within Office applications like Word, PowerPoint, and Excel.
 A photograph after the background tool has been used to remove one person and the background.
Example of a photo with background removed using Office tools.
This method is particularly useful for isolating subjects in photos when you need a clean, transparent background. Let’s explore how to use the “Remove Background” tool in different versions of Microsoft Office.
Removing Photo Backgrounds in Newer Versions of Office
This method applies to the latest versions of Microsoft Office 365 and newer standalone releases.
-
Select Your Image: Begin by inserting the picture you want to edit into your Office document (Word, PowerPoint, or Excel). Click on the image to select it. This action will activate the Picture Format tab in the toolbar.
-
Access the Remove Background Tool: Navigate to the Picture Format tab and locate the Remove Background option in the Adjust group. Click on it. Alternatively, in some layouts, you may find it under Format > Remove Background.
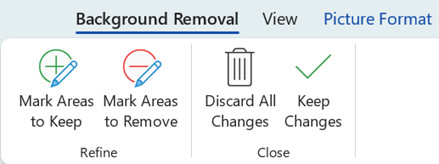 The background removal options let you mark specific areas of an image to keep or remove.
 -
Automatic Background Removal: Office will automatically attempt to detect and select the background, typically coloring it magenta to indicate areas marked for removal. The foreground, which Office identifies as the subject, will retain its original colors.
-
Refine the Selection: Often, the automatic selection isn’t perfect. You’ll likely need to refine it manually using the Background Removal toolbar options:
-
Mark Areas to Keep: If parts of your subject are incorrectly marked magenta (for removal), select Mark Areas to Keep. Use the pencil tool that appears to draw on the areas you want to restore. Simply draw lines or shapes over the parts of the image you want to keep.
-
Mark Areas to Remove: Conversely, if parts of the background are not magenta and you want to remove them, select Mark Areas to Remove. Use the pencil tool to mark these background areas for removal.
-
-
Keep the Changes: Once you are satisfied with your selection and the magenta areas accurately represent the background you want to remove, click Keep Changes. Office will then remove the magenta areas, leaving you with a transparent background around your subject.
-
Save the Cut Out Photo (Optional): If you wish to save the image with the transparent background as a separate file, right-click on the edited image and choose Save as Picture. Select a file format (PNG is recommended for transparency) and save it to your desired location.
Steps for Office 2016 – 2019
The process for removing backgrounds in Office 2016 and 2019 is very similar, with slight variations in the interface.
-
Select the Picture: Select the image in your Office application.
-
Access Remove Background: Under Picture Tools, go to the Format tab. In the Adjust group, click on Remove Background.
-
Adjust the Marquee: Initially, Office places a rectangular marquee around the image. Adjust the size and position of this marquee by dragging the handles. Enclose the primary area you want to keep within the marquee, excluding as much of the background as possible initially.
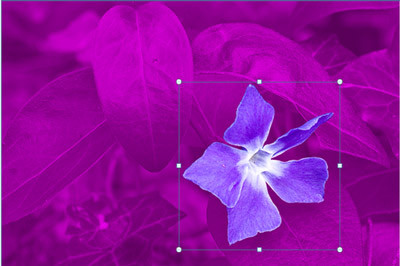 Flower with leaves in the background
 -
Refine with Markings: Use the Mark Areas to Keep and Mark Areas to Remove tools as described in the “Newer Versions” section to fine-tune the background removal.
-
Keep Changes and Save: Click Keep Changes to finalize the background removal. Save the image separately if needed by right-clicking and selecting Save as Picture.
Removing Backgrounds on macOS
The steps on macOS versions of Office are also consistent with the Windows versions.
-
Select the Image: Click on the image you want to edit in your Office for Mac application.
-
Open Remove Background: Select the Picture Format tab on the ribbon, and then click Remove Background.
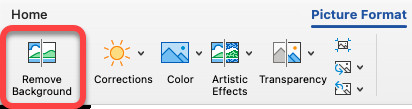 The Remove Picture option is on the Picture Format tab in Office apps.
 -
Automatic and Manual Refinement: Office will automatically mark areas for removal. Use Mark Areas to Keep and Mark Areas to Remove to refine the selection as needed.
-
Finalize and Save: Click Keep Changes. Save the image as a separate file if required using Save as Picture.
By following these steps, you can effectively cut out photos and remove backgrounds directly within Microsoft Office, making it a convenient tool for quick image editing tasks without needing extra software. While Office’s background removal tool is powerful for basic tasks, for more intricate and professional photo cutouts, dedicated photo editing software may offer more precision and advanced features.