Watermarking your photos is a crucial step in safeguarding your intellectual property and branding your work online. Whether you’re a professional photographer or simply sharing images on social media, adding a watermark helps prevent unauthorized use and ensures credit where it’s due. While dedicated photo editing software offers watermark features, you might be surprised to learn that you can efficiently add a watermark using a tool you likely already have: PowerPoint. This guide will walk you through the simple steps of watermarking your photos in PowerPoint, making image protection accessible to everyone.
Step-by-Step Guide to Watermarking Photos in PowerPoint
PowerPoint, primarily known for presentations, provides a surprisingly effective method for applying watermarks. The process involves inserting your image, adding a text or image watermark, customizing its appearance, and then saving your watermarked photo. Here’s how to do it:
Add the Watermark Text or Image
-
Open a Blank Slide: Start by launching PowerPoint and opening a new blank presentation. This provides a clean canvas for your photo.
-
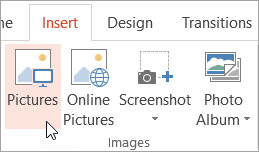
Insert Your Photo: Navigate to the Insert tab on the PowerPoint ribbon. In the Images group, click on Pictures and select This Device to browse and insert the photograph you wish to watermark. Choose your image and click Insert.
 Inserting a picture into PowerPoint using the Pictures button on the Insert tab
 -
Add WordArt for Text Watermark: To add a text watermark, go back to the Insert tab. In the Text group, click WordArt and choose a text style that suits your watermark. WordArt allows for easy customization of text effects.
-
Position Your Watermark: Click on the WordArt text box to select it and drag it to your desired position on the photo. Common locations include corners or across the center of the image.
-
Enter Your Watermark Text: Select the placeholder text within the WordArt box and type in your watermark text. This could be your name, website, copyright symbol, or brand name.
Format the Watermark for Transparency
A good watermark should be visible but not distracting. Achieving a transparent watermark ensures your image remains the focus. Here’s how to format your watermark in PowerPoint:
- Select the Watermark: Click on your WordArt watermark text to select it. This should activate the Shape Format tab (or Drawing Tools tab depending on your PowerPoint version).
- Access Format Shape Options: Look for the WordArt Styles dialog box launcher (often a small arrow in the corner of the WordArt Styles group) within the Shape Format tab. Click this to open the Format Shape pane.
- Adjust Text Fill Transparency: In the Format Shape pane, navigate to the Text Options tab, and then select Text Fill & Outline. Click on Text Fill, choose your desired color for the watermark (white or black often works well), and then adjust the Transparency slider. Setting the transparency to around 80% is a good starting point for a subtle watermark.
- Adjust Text Outline Transparency (Optional): If your chosen WordArt style has an outline, you can also adjust its transparency. Click Text Outline, choose a color, and set the Transparency slider, perhaps slightly lower than the text fill (e.g., 75%), for a softer outline.
- Add Text Effects (Optional): Explore the Text Effects options within the Format Shape pane to add subtle effects like shadows or 3D effects to your watermark, enhancing its visibility without being intrusive.
Save Your Watermarked Photo
Once you’re satisfied with your watermark’s placement and appearance, it’s time to save your watermarked image as a separate photo file:
-
Group the Watermark and Photo: Press CTRL+A (or Command+A on Mac) to select both the WordArt watermark and the photograph. Then, under the Shape Format tab, in the Arrange group, click Group and select Group again from the dropdown menu. This combines the watermark and photo into a single object.
 Grouping the watermark and the photograph in PowerPoint using the Group option under the Arrange group of Picture Tools tab
 -
Save as Picture: Right-click on the grouped image (photo with watermark). In the context menu, select Save as Picture….
-
Choose File Type and Save: Choose a location to save your watermarked photo, give it a new name to differentiate it from the original, select your desired image file type (JPEG is common for photos), and click Save.
Quickly Add a Watermark to Multiple Photos
If you need to watermark a batch of photos, PowerPoint offers a quick way to reuse your watermark setup:
-
Ungroup the Watermark and Photo: Select a watermarked photo in PowerPoint. Go to the Picture Format tab, in the Arrange group, click Group, and then select Ungroup. This separates the watermark from the original photo.
-
Delete the Old Photo: Select only the original photo (leaving the watermark in place) and press DELETE.
-
Insert a New Photo: Go to the Insert tab, click Pictures, and insert your next photo that needs watermarking.
 Inserting a new picture using the Pictures button on the Insert tab for quick watermarking in PowerPoint
 -
Send to Back if Needed: If your newly inserted photo covers the watermark, select the photo, go to the Picture Format tab, in the Arrange group, click Send Backward, and choose Send to Back to bring the watermark to the front.
-
Regroup and Save: Press CTRL+A to select both the watermark and the new photo, regroup them as described earlier, right-click, and Save as Picture with a new filename.
By following these steps, you can efficiently add watermarks to your photos using PowerPoint, ensuring your images are protected and professionally branded. This method is a practical solution for anyone looking to safeguard their visual content without needing specialized software.