Transferring your precious photos from your Samsung phone to your PC is a crucial task for backup, editing, or simply freeing up phone storage. If you’ve ever wondered, “How To Download Photos From Samsung Phone To Pc,” you’re in the right place. This guide will explore various methods to seamlessly transfer your images, ensuring you choose the most convenient and efficient option for your needs.
Part 1: Transfer Photos via USB Cable: Direct and Reliable
Using a USB cable remains a dependable and fast method for transferring photos from your Samsung phone to your computer. This direct connection allows for efficient file management and is ideal for transferring large batches of photos quickly.
Method 1: Utilizing File Explorer (File Management)
File Explorer (or Finder on Mac) provides a straightforward way to access your Samsung phone’s file system and manually copy photos. This method offers granular control over which photos are transferred.
Step 1: Connect your Samsung phone to your computer using a USB cable. Once connected, swipe down from the top of your Samsung phone screen to access the notification panel. Tap on the notification that likely reads “USB charging this device” or similar.
 Selecting File Transfer USB option on Samsung phone
Step 2: From the USB options, select “File Transfer” or “MTP (Media Transfer Protocol)“. This will allow your computer to access your phone’s files.
Step 3: Open “File Explorer” on your Windows PC (or Finder on Mac). Look for your Samsung phone listed under “This PC” or in the devices list. It will typically appear with your phone’s model name or as a generic “Portable Device.”
Step 4: Navigate to the “DCIM” folder. “DCIM” stands for “Digital Camera Images,” and this folder typically contains your photos and videos taken with your phone’s camera. Inside the DCIM folder, you’ll usually find another folder named “Camera” where your photos are stored.
 Navigating to DCIM folder in File Explorer to find Samsung phone photos
Step 5: Select the photos you want to transfer. You can drag and drop them to a folder on your computer, or copy and paste them. Choose a destination folder on your PC to save your photos.
Method 2: Importing Photos with Windows Photos App
Windows Photos app offers a user-friendly interface for importing and managing photos directly from your Samsung phone. This method is integrated within Windows and simplifies the transfer process.
Step 1: Connect your Samsung phone to your computer using a USB cable and select “File Transfer” mode as described in Method 1.
 Selecting File Transfer option on Samsung phone for photo download
Step 2: Open the “Photos” app on your Windows computer. You can find it in the Start Menu by typing “Photos.”
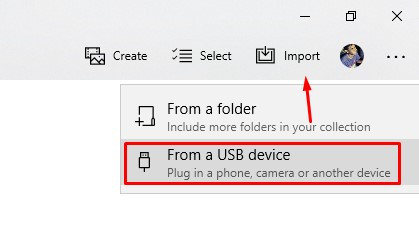
Step 3: In the Photos app, click on the “Import” button located in the top right corner. Then, select “From a USB device.”
 Importing photos from USB device using Windows Photos app
Step 4: The Photos app will detect your connected Samsung phone. Select your phone and choose the photos you want to import. You can choose to import all new items or select specific photos. Click “Import selected” to begin the transfer.
Method 3: MobileTrans – Dedicated Transfer Software
For users seeking a more robust and feature-rich solution, software like MobileTrans offers streamlined photo transfer and device management capabilities. MobileTrans simplifies the process with a user-friendly interface and additional features.
Step 1: Download and install MobileTrans on your computer from the official Wondershare website. Launch the application.
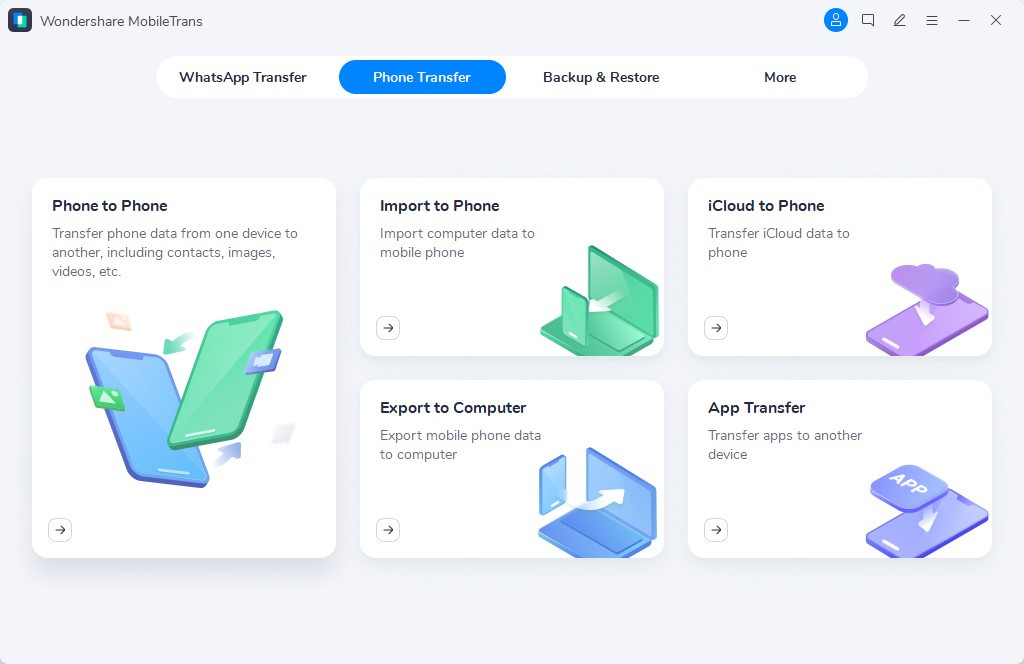
Step 2: Connect your Samsung phone to your computer using a USB cable. In MobileTrans, select the “Phone Transfer” module from the main menu.
 Choosing Phone Transfer module in MobileTrans software
Step 3: MobileTrans will recognize your connected Samsung phone. Select the “Export to Computer” option.
Step 4: Choose “Photos” from the list of data types to transfer. You can select other data types if needed as well.
Choosing Phone Transfer module in MobileTrans software
Step 5: Click the “Export” button to start the photo transfer process. MobileTrans will copy your selected photos from your Samsung phone to your computer.
Choosing Phone Transfer module in MobileTrans software
Pros of USB Cable Transfer:
- Speed and Reliability: USB transfer is generally faster than wireless methods, especially for large files or numerous photos. It provides a stable and direct connection.
- Offline Transfer: No internet connection is required, making it ideal for situations with limited or no internet access.
- Phone Charging: Your Samsung phone charges while connected via USB, ensuring your battery doesn’t drain during the transfer process.
Cons of USB Cable Transfer:
- Physical Cable Required: You need a compatible USB cable and a functional USB port on your computer.
- Proximity Limitation: You need to have your phone physically close to your computer during the transfer.
Part 2: Cloud Services: Wireless Photo Transfer and Backup
Cloud services offer a wireless and convenient way to download photos from your Samsung phone to your PC. These services also provide automatic backup and accessibility from multiple devices.
Method 1: Google Photos: Seamless Sync and Access
Google Photos is a popular choice due to its seamless synchronization and user-friendly interface. It automatically backs up your photos and allows easy access from any device.
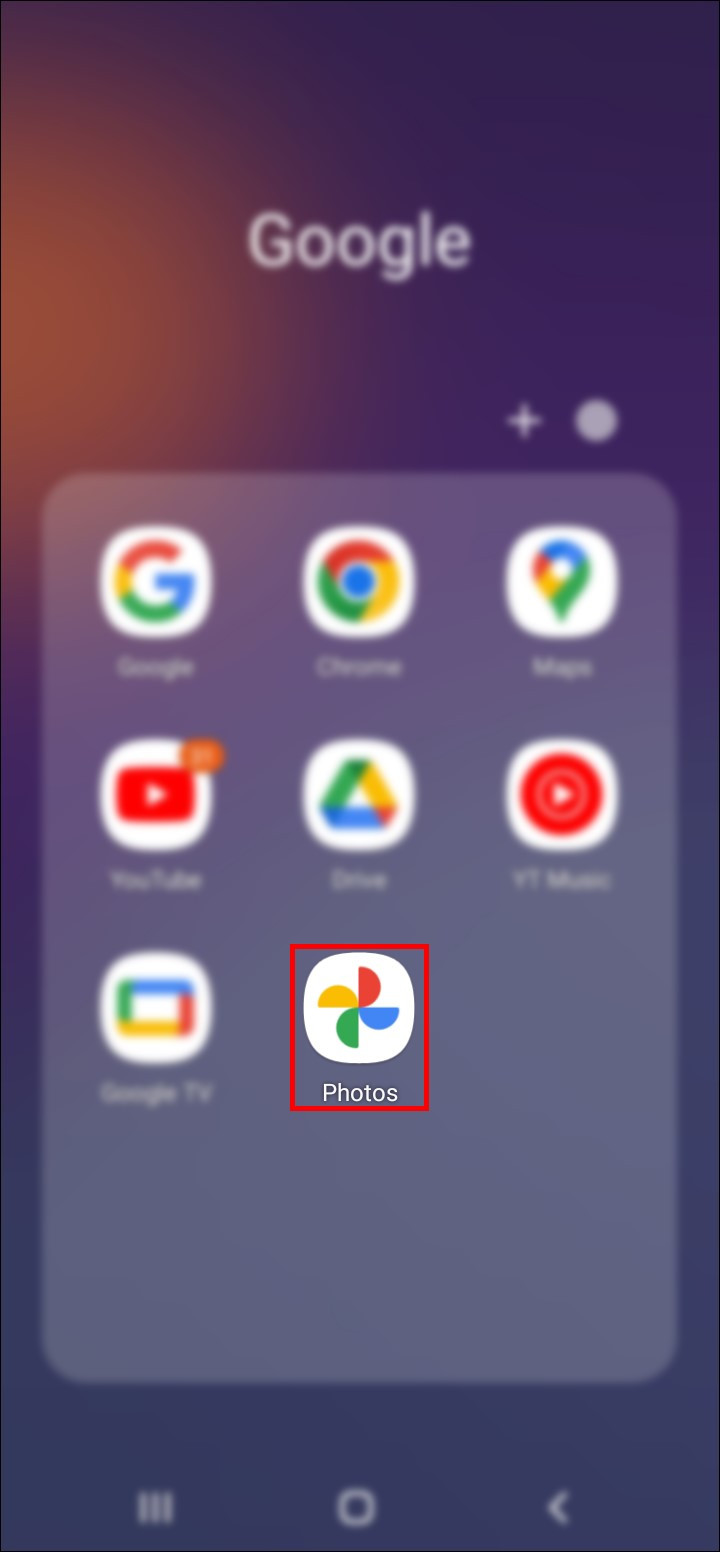
Step 1: Ensure you have the Google Photos app installed on your Samsung phone and are signed in with your Google account.
Step 2: Open the Google Photos app on your Samsung phone. Tap your profile icon (usually in the top right corner) and select “Back up & sync.” Ensure backup is turned on.
 Opening Google Photos app on Samsung phone
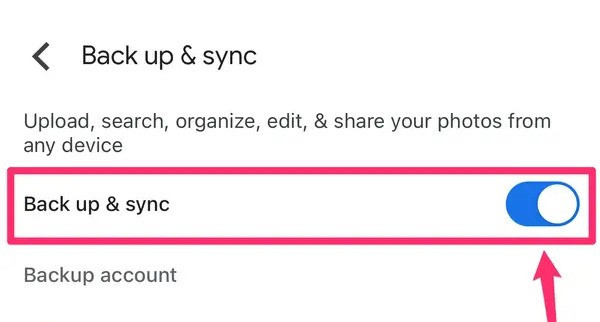
Step 3: Check that “Backup & sync” is enabled and your photos are being backed up to your Google account.
 Enabling Backup & sync in Google Photos settings on Samsung phone
Step 4: On your computer, open a web browser and go to the Google Photos website (photos.google.com). Sign in with the same Google account you use on your phone.
Step 5: Your photos from your Samsung phone will be visible in Google Photos on your PC. Select the photos you want to download. Click the three dots (More options) in the top right corner and choose “Download.”
Method 2: Samsung Cloud Drive: For Samsung Ecosystem Users
Samsung Cloud Drive is integrated with Samsung devices and offers a direct way to back up and access photos within the Samsung ecosystem.
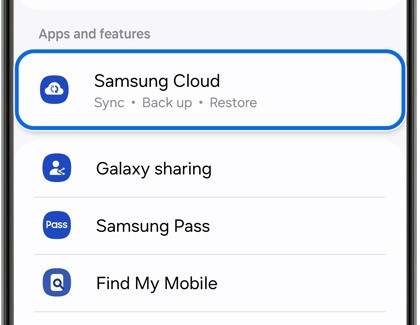
Step 1: On your Samsung phone, navigate to “Settings” > “Accounts and backup” > “Samsung Cloud“.
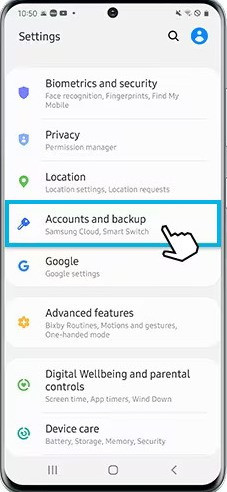 Navigating to Samsung Cloud settings on Samsung phone
Step 2: In Samsung Cloud settings, tap on “Gallery” and ensure sync is enabled to back up your photos.
 Choosing Gallery backup option in Samsung Cloud settings
Step 3: On your computer, go to the Samsung Cloud website (usually through the Samsung account website) and log in with your Samsung account credentials.
Step 4: Navigate to the “Gallery” section within Samsung Cloud on the website. Select the photos you wish to download and initiate the download process from the website interface.
Method 3: OneDrive: Microsoft’s Cloud Solution
OneDrive, Microsoft’s cloud storage service, offers seamless integration with Windows PCs and provides a reliable way to transfer photos wirelessly.
Step 1: Install the OneDrive app on your Samsung phone from the Google Play Store and sign in with your Microsoft account.
Step 2: Open the OneDrive app on your Samsung phone and enable “Camera Upload” in the settings. This will automatically upload new photos to OneDrive.
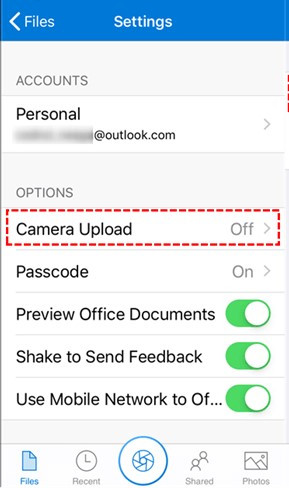 Enabling Camera Upload in OneDrive app on Samsung phone
Step 3: On your computer, you can access OneDrive through a web browser (onedrive.com) or through the OneDrive desktop app if installed. Sign in with the same Microsoft account.
Step 4: Locate the “Pictures” folder in OneDrive (or the folder where your camera uploads are saved). Select the photos you want to download and click the “Download” button.
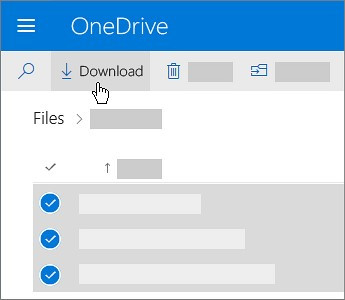 Downloading photos from OneDrive website to PC
Pros of Cloud Service Transfer:
- Accessibility from Anywhere: Access your photos from any device with an internet connection.
- Automatic Backup: Cloud services often offer automatic backup, ensuring your photos are safely stored.
- Wireless Convenience: Transfer photos without the need for cables.
- Storage Flexibility: Cloud storage can free up space on your phone.
Cons of Cloud Service Transfer:
- Internet Dependency: Requires a stable and reliable internet connection for both upload and download.
- Storage Limits and Costs: Free cloud storage tiers may be limited, and larger storage may require paid subscriptions.
- Upload Speed: Uploading large numbers of high-resolution photos can take time depending on your internet speed.
Part 3: Bluetooth Transfer: Wireless Simplicity for Smaller Transfers
Bluetooth offers a cable-free method for transferring photos, ideal for sending a few images when a USB cable or internet connection isn’t readily available.
Step 1: Enable Bluetooth on both your Samsung phone and your computer. On your phone, go to “Settings” > “Connections” > “Bluetooth” and turn it on. On your computer, enable Bluetooth in settings as well.
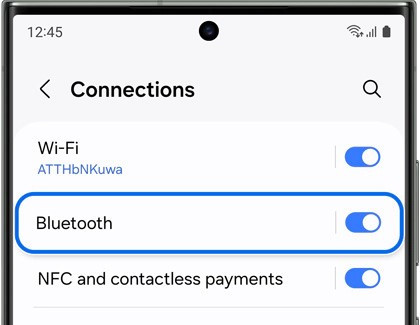 Turning on Bluetooth on Samsung phone
Step 2: Pair your Samsung phone with your computer via Bluetooth. On your phone, search for available Bluetooth devices and select your computer. Follow the pairing instructions on both devices, which usually involves confirming a passcode.
Step 3: On your Samsung phone, open the “Gallery” app and select the photos you want to transfer. Tap the “Share” icon (usually three dots connected by lines).
Step 4: From the share options, choose “Bluetooth“. Select your paired computer from the list of Bluetooth devices.
Step 5: On your computer, you may need to accept the incoming file transfer request. The photos will be transferred via Bluetooth and saved to a default location on your PC (check your Bluetooth settings for the receive folder).
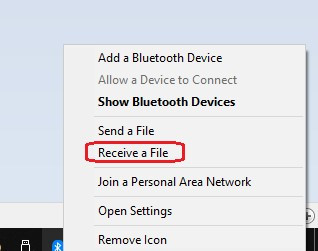 Accepting Bluetooth file transfer request on computer
Pros of Bluetooth Transfer:
- Cable-Free: No cables are needed for transfer.
- Device Versatility: Bluetooth is widely supported across various devices.
- No Internet Required: Works without an internet connection.
Cons of Bluetooth Transfer:
- Slow Transfer Speed: Bluetooth is significantly slower than USB or Wi-Fi, making it less suitable for large photo transfers.
- Proximity Requirement: Devices need to be relatively close to maintain a Bluetooth connection.
Part 4: Samsung Flow: Seamless Samsung Device Connectivity
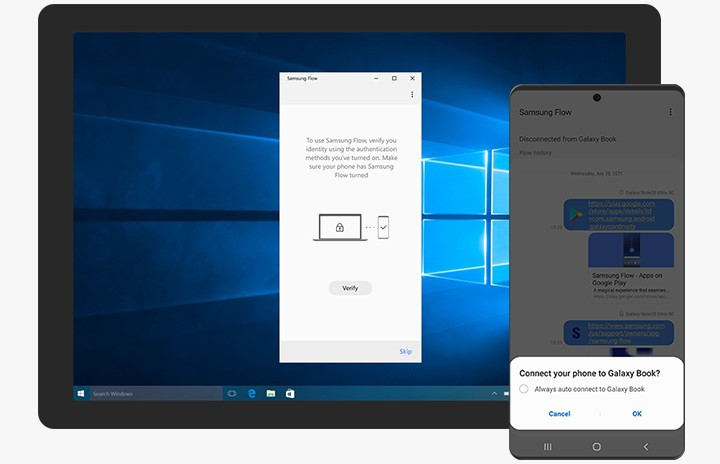
Samsung Flow is a Samsung-specific application that enhances connectivity between Samsung phones and computers, offering file transfer and screen mirroring features.
Step 1: Install Samsung Flow on both your Samsung phone and your Windows computer. You can download it from the Galaxy Store on your phone and the Microsoft Store on your PC.
 Installing Samsung Flow app on computer
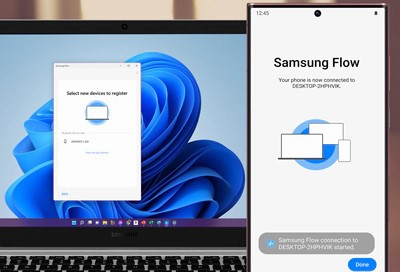
Step 2: Launch Samsung Flow on both devices and pair them. Pairing typically involves scanning a QR code displayed on your computer screen with your phone or selecting your computer from a device list.
 Connecting Samsung Flow on phone and computer by scanning QR code
Step 3: Once connected, you can use Samsung Flow to transfer photos. On your Samsung phone, select the photos you want to transfer, use the share option, and choose Samsung Flow. Select your connected computer as the destination.
Pros of Samsung Flow:
- Seamless Samsung Integration: Optimized for Samsung devices, offering a smooth user experience.
- File Transfer and More: Offers not only file transfer but also notification syncing and screen mirroring.
- User-Friendly Interface: Designed for ease of use within the Samsung ecosystem.
Cons of Samsung Flow:
- Samsung Device Limitation: Primarily works with Samsung phones and certain Windows PCs.
- Setup Required: Initial setup and pairing are necessary.
Part 5: Microsoft Phone Link (Link to Windows): Bridging Samsung and Windows
Microsoft Phone Link (formerly Your Phone) provides deep integration between Samsung phones and Windows PCs, allowing you to access photos, messages, and more directly on your computer.
Step 1: Ensure you have the “Phone Link” app installed on your Windows computer. It is often pre-installed, but you can download it from the Microsoft Store.
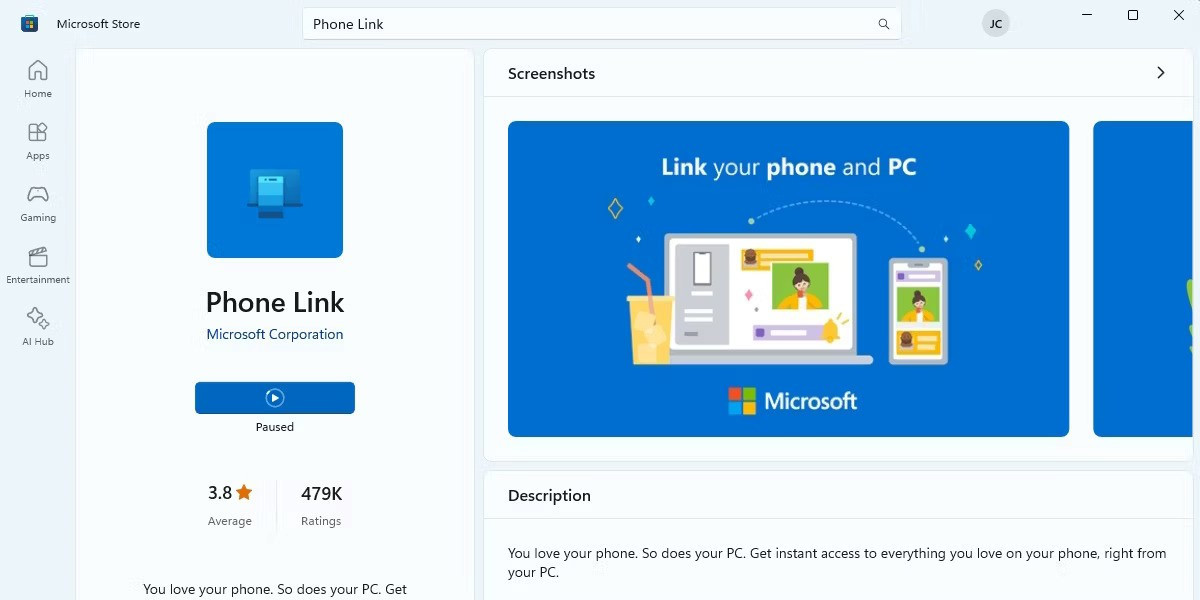 Installing Phone Link app on Windows computer
Step 2: On your Samsung phone, the “Link to Windows” app is usually pre-installed. If not, download it from the Google Play Store. Sign in with your Microsoft account on both apps.
Step 3: Follow the on-screen instructions to link your devices. This typically involves scanning a QR code or entering a code. Ensure both devices are connected to the same Wi-Fi network or Bluetooth.
Step 4: In the Phone Link app on your Windows PC, navigate to the “Photos” section. You will see your recent photos from your Samsung phone. Select the photos you want to download and drag them to a folder on your computer or right-click and choose “Copy.”
Pros of Microsoft Phone Link:
- Windows Integration: Excellent integration with Windows PCs, providing seamless access to photos and other phone content.
- Unified Experience: Syncs notifications and messages in addition to photos.
- User-Friendly Interface: Straightforward and easy-to-use interface within Windows.
Cons of Microsoft Phone Link:
- Windows Focus: Primarily designed for Windows users, less beneficial for macOS or other OS users.
- Initial Configuration: Requires setup and linking of devices.
Part 6: SD Card Transfer: Physical Media for Direct Access
Using an SD card offers a physical and direct way to transfer photos, especially useful if your Samsung phone uses an SD card for storage and you have an SD card reader on your computer.
Step 1: Power off your Samsung phone. Carefully remove the SD card using an SD card ejector tool (or a SIM ejector tool).
Step 2: Insert the SD card into an SD card reader connected to your computer.
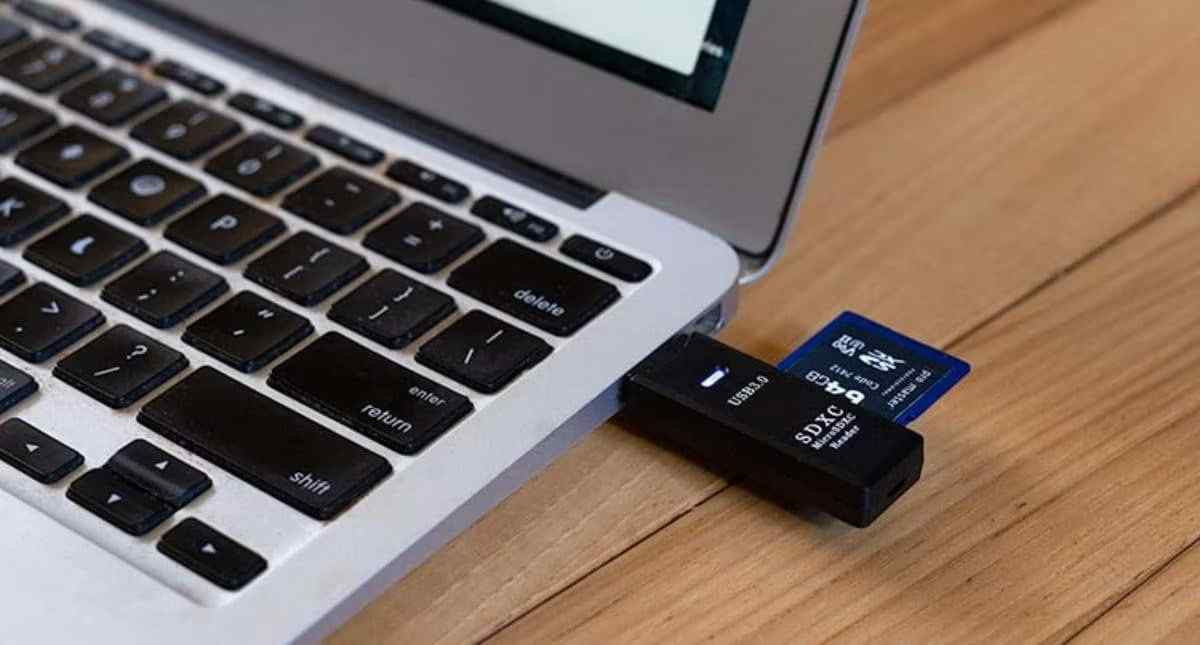 Connecting SD card reader with Samsung phone SD card to computer
Step 3: Open “File Explorer” (or Finder on Mac) on your computer. The SD card will appear as a removable drive.
Step 4: Navigate to the “DCIM” folder on the SD card, then to the “Camera” folder to find your photos. Select the photos and copy them to your desired location on your computer.
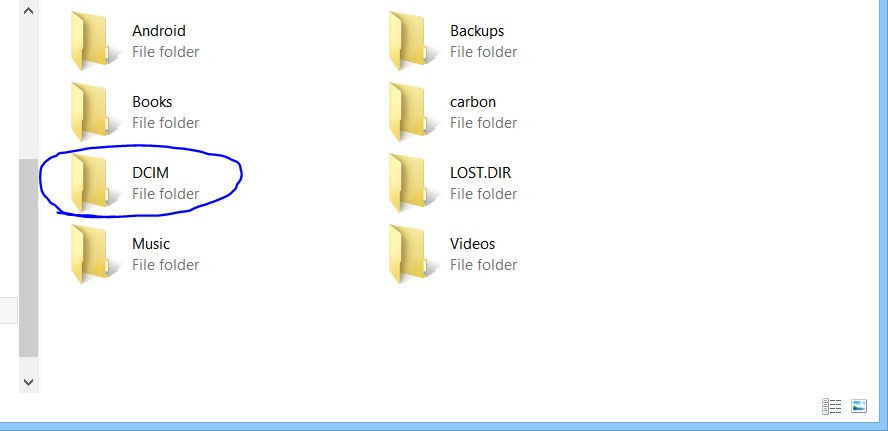 Navigating to DCIM folder on SD card to access Samsung phone photos
Step 5: After transferring, safely eject the SD card from your computer and re-insert it into your Samsung phone if needed.
Pros of SD Card Transfer:
- Large Storage Capacity: SD cards can store significant amounts of data.
- Direct Transfer: Provides direct access to files without needing software or internet.
- Offline Access: Works without an internet connection.
Cons of SD Card Transfer:
- SD Card Reader Required: Requires an SD card reader on your computer.
- Physical Handling: Involves physically removing and handling the SD card, which can be inconvenient and carries a risk of loss or damage.
- Phone Compatibility: Not all Samsung phones support SD card storage.
Part 7: Tips for Efficient Photo Downloading
To ensure a smooth and efficient photo downloading experience from your Samsung phone, consider these helpful tips:
- Maintain a Stable Connection: Whether using Wi-Fi for cloud services or a USB cable, ensure a stable connection to prevent interruptions and speed up the transfer process.
- Check File Formats: Samsung phones typically save photos in JPEG or HEIC formats. Ensure your computer supports these formats for seamless viewing and editing. Most modern systems support JPEG natively. For HEIC, you might need to install codecs.
- Organize Photos Before Transfer: Organizing your photos into albums on your Samsung phone can make it easier to locate and download specific sets of images when transferring to your PC.
- Regular Backups: Implement a regular photo backup routine, whether using cloud services or USB transfer, to prevent data loss and keep your memories safe.
Conclusion
Downloading photos from your Samsung phone to your PC is a straightforward process with multiple options available. From the speed and reliability of USB cables to the wireless convenience of cloud services and Bluetooth, and the specialized features of Samsung Flow and Microsoft Phone Link, you can choose the method that best suits your needs and technical preferences. By understanding each method’s pros and cons, you can efficiently manage and safeguard your valuable photos.
Free Download Free Download safe & secure
