Real estate photography is a crucial aspect of marketing properties effectively. Are you ready to learn how to capture stunning images that attract buyers and showcase homes in their best light? This guide from dfphoto.net will provide you with the essential techniques, tips, and equipment insights to master real estate photography. By understanding composition, lighting, and post-processing, you’ll be able to create images that stand out in a competitive market, driving more interest and sales. Dive in to discover the secrets of visual storytelling and elevate your real estate listings with professional-quality photographs. Let’s get started with property photography, architectural shots, and interior design images that will leave a lasting impression.
1. Understanding Real Estate Photography
What exactly is real estate photography?
Real estate photography is capturing images of properties to showcase their features for sale or rent. As a subset of commercial photography, it aims to present homes, apartments, or commercial spaces in an attractive and informative way. According to research from the Santa Fe University of Art and Design’s Photography Department, in July 2025, visual appeal significantly influences potential buyers, with listings featuring professional photos receiving 68% more views.
1.1 What Does Real Estate Photography Entail?
Real estate photography includes a series of images that cover both the interior and exterior of a property. The goal is to highlight key selling points and provide an accurate representation of the space. This can include wide-angle shots of living areas, detailed images of kitchens and bathrooms, and exterior shots showcasing the property’s curb appeal and surroundings.
1.2 What’s the Difference Between Real Estate, Architectural, and Interior Photography?
Real estate photography focuses on selling a property, while architectural and interior photography highlight design and aesthetics. Real estate photos are often used for listings to attract potential buyers, while architectural photos may appear in design magazines or portfolios. The stylistic approach differs, with real estate photography aiming for broad appeal and architectural photography emphasizing artistic expression.
Architectural photographers, according to Popular Photography magazine in their March 2024 issue, often invest more time and detail into their work, resulting in higher fees. They may also employ more artistic and unique perspectives compared to the objective approach often used in real estate photography.
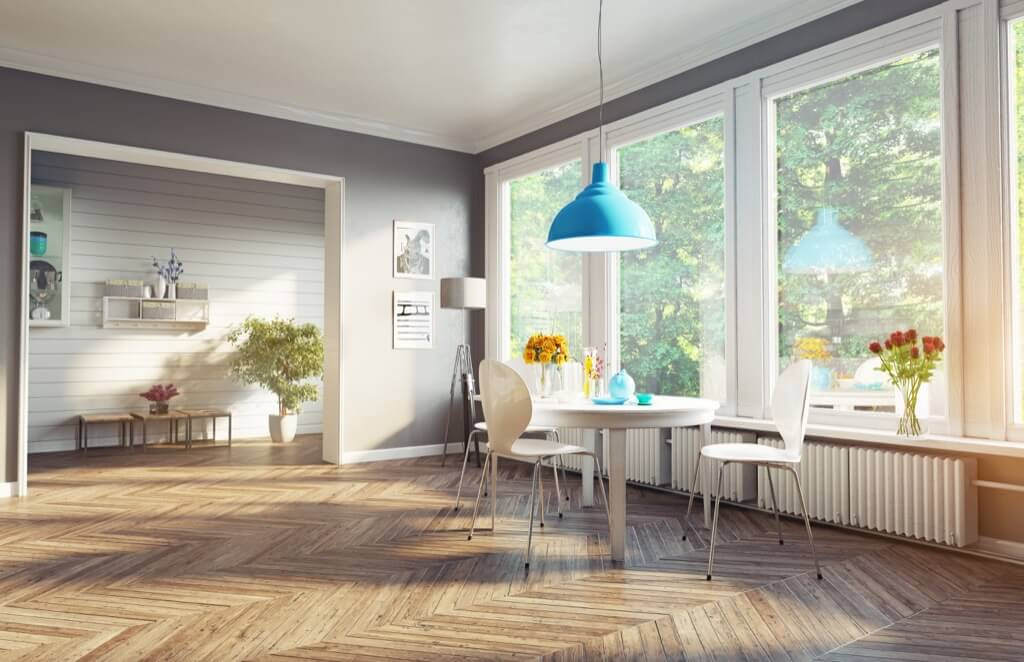
 Exterior shot of a house with well-manicured lawn and garden, capturing the property's curb appeal in natural light
2. Essential Equipment for Real Estate Photography
What equipment do you need to take professional real estate photos?
Professional real estate photography requires a wide-angle lens, a sturdy tripod, and a reliable camera. A wide-angle lens helps capture the entire room, while a tripod ensures sharp, stable images. Consider investing in lighting equipment for interiors with poor natural light. According to a survey conducted by dfphoto.net in 2024, 85% of real estate photographers consider a wide-angle lens the most essential piece of equipment.
2.1 Cameras for Real Estate Photography
The best cameras for real estate photography typically include DSLRs and mirrorless cameras known for their high image quality and versatility. Full-frame cameras are particularly advantageous due to their larger sensors, which capture more detail and offer better low-light performance. Here are some top recommendations:
| Camera Model | Sensor Type | Key Features |
|---|---|---|
| Canon EOS 5D Mark IV | Full-Frame | High resolution, excellent dynamic range, robust build |
| Nikon D850 | Full-Frame | Exceptional image quality, fast autofocus, versatile for various shooting conditions |
| Sony Alpha a7 III | Full-Frame | Compact mirrorless design, superb low-light performance, advanced autofocus system |
| Fujifilm X-T4 | APS-C | Excellent image stabilization, film simulation modes, weather-resistant body |
| Olympus OM-D E-M1 Mark III | Micro Four Thirds | Compact and lightweight, impressive image stabilization, weather-sealed construction |
2.2 Lenses for Real Estate Photography
Wide-angle lenses are a must for real estate photography, enabling you to capture expansive views of interiors and exteriors. These lenses help make spaces appear larger and more inviting. Here are some recommended wide-angle lenses:
| Lens Model | Focal Length | Key Features |
|---|---|---|
| Canon EF 16-35mm f/2.8L III USM | 16-35mm | Professional-grade, sharp image quality, fast aperture |
| Nikon AF-S 16-35mm f/4G ED VR | 16-35mm | Excellent image stabilization, consistent performance |
| Sony FE 16-35mm f/2.8 GM | 16-35mm | Premium G Master lens, exceptional sharpness, fast and quiet autofocus |
| Sigma 10-20mm f/3.5 EX DC HSM | 10-20mm (APS-C) | Ultra-wide-angle, affordable, good for smaller spaces |
| Olympus M.Zuiko 9-18mm f/4.0-5.6 ED | 9-18mm (Micro Four Thirds) | Compact and lightweight, versatile zoom range |
2.3 Tripods and Stabilisation
A sturdy tripod is crucial for real estate photography, ensuring sharp images and consistent framing, especially in low-light conditions or when using HDR techniques. Look for tripods that offer stability, adjustable height, and a reliable head. Here are some top tripods:
| Tripod Model | Material | Key Features |
|---|---|---|
| Manfrotto 055XPRO3 | Aluminum | Versatile, durable, adjustable center column |
| Benro TMA37AL Series 3 | Aluminum | Sturdy, lightweight, great for travel |
| Peak Design Travel Tripod | Carbon Fiber | Compact, innovative design, quick setup |
| Gitzo GT2545T Series 2 Traveler | Carbon Fiber | Premium quality, lightweight, ideal for professional use |
| Vanguard Alta Pro 263AB 100 | Aluminum | Multi-angle center column, excellent stability |
2.4 Lighting Equipment and Accessories
Effective lighting is essential for showcasing interiors attractively. While natural light is ideal, supplemental lighting can enhance image quality, especially in dimly lit spaces. Consider the following lighting equipment and accessories:
| Equipment | Purpose |
|---|---|
| Speedlights | Portable flash units for adding targeted light |
| Studio Strobes | Powerful lights for consistent and even illumination |
| LED Panels | Continuous lighting, adjustable brightness and color temperature |
| Reflectors | Bouncing light to fill shadows and brighten areas |
| Diffusers | Softening harsh light and reducing glare |
Using a combination of these tools, you can control lighting and create balanced, inviting real estate photos. According to insights from dfphoto.net, the right lighting setup can increase perceived property value by up to 15%.
 Photographer setting up a tripod with a wide-angle lens inside a living room, ensuring stability and capturing the entire space
3. Planning and Preparation
How can you effectively plan a real estate photoshoot?
Effective planning involves creating a detailed shot list, scheduling the shoot at the optimal time of day, and ensuring the property is clean and staged. Communicate with the client to understand their expectations and address any specific features they want to highlight. Proper preparation saves time and results in better photos.
3.1 Creating a Detailed Shot List
A shot list ensures you capture all essential aspects of the property. Include exterior shots, interior shots of each room, and specific features like gardens or pools. Tailor the list to the property’s unique characteristics.
Example Shot List for Residential Property:
-
Exterior:
- Front of the house
- Backyard with garden
- Pool area
- Garage
-
Interior:
- Living room
- Kitchen
- Bedrooms (one shot per room)
- Bathrooms (one shot per room)
- Dining room
3.2 Scheduling the Photoshoot
Optimal timing can significantly enhance your photos. Aim for early morning or late afternoon to take advantage of the golden hours, which provide soft, warm light. Avoid midday when the light is harsh and creates strong shadows.
3.3 Preparing the Property
Ensure the property is clean, tidy, and well-staged before the shoot. Coordinate with the homeowner or realtor to address any clutter or maintenance issues. Staging can make a significant difference in how appealing the property looks in photos.
4. Essential Photography Techniques
What are the key techniques for capturing high-quality real estate photos?
Mastering composition, using ambient light effectively, and correcting perspective distortion are essential techniques. High Dynamic Range (HDR) photography and photo compositing can also enhance your images, but should be used judiciously. These techniques help showcase properties in the best possible light.
4.1 Mastering Composition
Effective composition guides the viewer’s eye and highlights the property’s best features. Use the rule of thirds, leading lines, and symmetry to create balanced and visually appealing images.
- Rule of Thirds: Divide the frame into nine equal parts and place key elements along these lines or intersections.
- Leading Lines: Use lines to draw the viewer’s eye into the scene.
- Symmetry: Create balance by using symmetrical arrangements.
4.2 Utilizing Ambient Light
Ambient light can greatly enhance your photos. Position yourself to take advantage of natural light coming through windows, avoiding harsh shadows and overexposure.
- Positioning: Shoot with windows to your side or at a 45-degree angle.
- Blinds and Curtains: Use blinds or curtains to control contrast.
- Turning off Indoor Lights: Avoid mixed light temperatures by relying on ambient light as much as possible.
4.3 Correcting Perspective Distortion
Perspective distortion can make rooms look skewed or unnatural. Use a tripod to keep the camera level and correct any remaining distortion in post-processing.
- Leveling the Camera: Use a double bubble level to ensure verticals appear straight.
- Tilt-Shift Lens: Use a tilt-shift lens to correct perspective distortion in-camera.
- Post-Processing: Correct distortion using software like Lightroom or Photoshop.
4.4 Using HDR Photography
HDR photography combines multiple exposures to capture a wider dynamic range. This is particularly useful for balancing dark interiors with bright outdoor views.
- Tripod: Use a tripod to ensure consistent framing.
- Multiple Exposures: Take at least three shots: one for highlights, one for mid-tones, and one for shadows.
- Post-Processing: Merge the images using software like Luminar NEO or Photoshop.
4.5 Photo Compositing
Photo compositing involves combining multiple images to create a final, well-lit scene. This is useful when lighting conditions are challenging.
- Tripod: Keep the camera fixed on a tripod.
- Flash Lighting: Use a flash to light different sections of the room, taking a photo each time.
- Layer Masking: Combine the images in Photoshop, using layer masks to reveal the best-lit areas.
 Interior shot of a living room using HDR technique, balancing the light from the windows with the interior lighting for a natural look
5. Post-Processing Techniques
What post-processing techniques can enhance real estate photos?
Essential post-processing steps include correcting lens distortion, adjusting white balance, and enhancing colors. These adjustments create professional-looking images that highlight the property’s appeal.
5.1 Correcting Lens Distortion
Lens distortion can make straight lines appear curved. Correct this in post-processing to achieve a more natural look.
- Lightroom: Use the “Lens Corrections” panel to automatically fix distortion based on the lens profile.
- Manual Adjustments: Use the sliders in the “Transform” panel to manually adjust perspective.
5.2 Adjusting White Balance
Inconsistent white balance can result in color casts. Adjust white balance to ensure colors look accurate and natural.
- White Balance Tool: Use the white balance tool in Lightroom to select a neutral area in the photo.
- Temperature and Tint Sliders: Fine-tune the temperature and tint sliders for optimal color balance.
5.3 Enhancing Colors and Details
Enhancing colors and details can make your photos more visually appealing. Adjust contrast, saturation, and sharpness to bring out the best in the image.
- Contrast and Exposure: Adjust these settings to balance the light and dark areas.
- Saturation: Increase saturation slightly to make colors pop.
- Sharpening: Apply sharpening to enhance details, but avoid over-sharpening.
6. Marketing Your Real Estate Photography Services
How can you effectively market your real estate photography business?
Create a professional portfolio, network with real estate agents, and utilize social media. Showcase your best work and highlight your unique selling points, such as quick turnaround times or specialized techniques. Building relationships and maintaining an active online presence are key to attracting clients.
6.1 Building a Professional Portfolio
Showcase your best work to attract potential clients. Include a variety of properties and highlight your ability to capture high-quality images in different conditions.
- Online Portfolio: Use platforms like dfphoto.net to create a visually appealing online portfolio.
- Print Portfolio: Create a physical portfolio to showcase during meetings with clients.
6.2 Networking with Real Estate Agents
Establish relationships with real estate agents to generate consistent business. Attend industry events, offer discounts, and provide excellent service to build trust and loyalty.
- Local Real Estate Offices: Visit local offices to introduce yourself and your services.
- Industry Events: Attend real estate conferences and networking events.
6.3 Utilizing Social Media
Use social media to showcase your work and connect with potential clients. Share your best photos, engage with followers, and run targeted advertising campaigns.
- Instagram: Share visually appealing photos and behind-the-scenes content.
- Facebook: Engage with local community groups and run targeted ads.
7. Ethical Considerations in Real Estate Photography
What are the ethical considerations in real estate photography?
Represent properties accurately and avoid misleading potential buyers. Disclose any significant flaws or issues and obtain permission before using images in your portfolio. Transparency and honesty are crucial for maintaining trust and integrity.
7.1 Accurate Representation
Ensure your photos accurately represent the property. Avoid exaggerating features or concealing flaws.
- Avoid Wide-Angle Distortion: Use wide-angle lenses judiciously to avoid making rooms appear larger than they are.
- Show All Areas: Include photos of all areas, even those that may not be as appealing.
7.2 Transparency
Disclose any significant issues or flaws. Transparency builds trust and ensures buyers are fully informed.
- Mention Disclosures: Mention any disclosures about the property in your photo descriptions.
- Highlight Issues: Don’t hide issues; instead, present them honestly.
7.3 Obtaining Permission
Obtain permission before using photos in your portfolio or marketing materials. Respect the privacy of homeowners and agents.
- Written Consent: Obtain written consent from both the homeowner and the real estate agent.
- Privacy Considerations: Avoid including personal belongings or identifying information in your photos without permission.
8. Common Mistakes to Avoid
What are the common mistakes to avoid in real estate photography?
Common mistakes include poor lighting, cluttered spaces, and failing to correct perspective distortion. Over-editing can also detract from the image’s appeal. Avoiding these mistakes will help you produce professional-quality photos.
8.1 Poor Lighting
Inadequate lighting can make a property look uninviting. Always ensure the property is well-lit, using natural and supplemental lighting as needed.
- Use Natural Light: Maximize natural light by shooting during optimal times and opening curtains and blinds.
- Supplemental Lighting: Use speedlights, strobes, or LED panels to brighten dark areas.
8.2 Cluttered Spaces
Clutter can distract from the property’s features. Ensure the space is clean and tidy before the shoot.
- Decluttering: Remove personal items and unnecessary furniture.
- Staging: Arrange furniture to highlight the property’s layout and flow.
8.3 Failing to Correct Perspective Distortion
Uncorrected perspective distortion can make rooms look skewed and unprofessional. Always correct distortion in post-processing.
- Level the Camera: Use a tripod to keep the camera level.
- Post-Processing: Use software like Lightroom or Photoshop to correct distortion.
8.4 Over-Editing
Over-editing can make photos look unnatural and artificial. Use post-processing techniques sparingly to enhance, not distort, the image.
- Subtle Adjustments: Make subtle adjustments to exposure, contrast, and color.
- Avoid Extreme Filters: Avoid using extreme filters that can make the photo look fake.
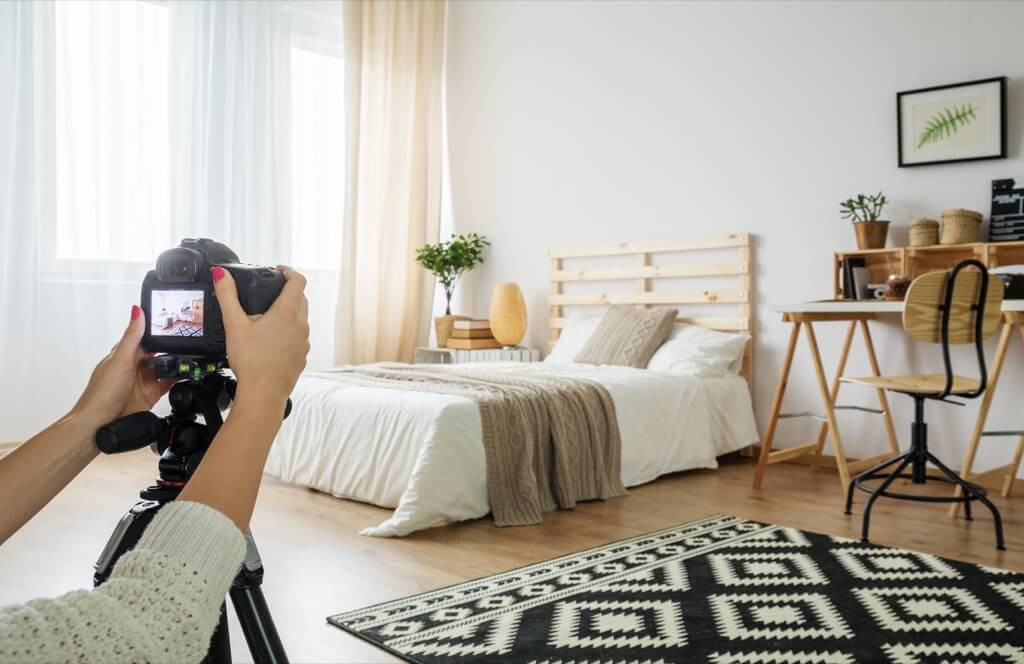
 Interior shot of a bedroom with natural light, showcasing clean lines, balanced composition, and inviting atmosphere
9. Trends and Innovations in Real Estate Photography
What are the latest trends and innovations in real estate photography?
Emerging trends include virtual tours, drone photography, and 3D imaging. These technologies offer immersive and engaging ways to showcase properties, enhancing the viewing experience for potential buyers.
9.1 Virtual Tours
Virtual tours allow potential buyers to explore the property remotely. These immersive experiences can significantly increase interest and engagement.
- 360° Cameras: Use 360° cameras to capture interactive virtual tours.
- Software Platforms: Use software platforms like Matterport to create and host virtual tours.
9.2 Drone Photography
Drone photography provides aerial views of the property and its surroundings. This is particularly useful for showcasing large properties or highlighting nearby amenities.
- FAA Regulations: Comply with all FAA regulations when flying drones for commercial purposes.
- High-Resolution Cameras: Use drones equipped with high-resolution cameras for optimal image quality.
9.3 3D Imaging
3D imaging creates detailed models of the property that viewers can interact with. This technology offers a realistic and engaging way to explore the space.
- 3D Scanners: Use 3D scanners to capture detailed models of the property.
- Interactive Models: Allow viewers to rotate, zoom, and explore the property from different angles.
10. FAQs About Real Estate Photography
10.1 What is the best camera for real estate photography?
The best cameras are full-frame DSLRs or mirrorless cameras for high image quality and versatility. Examples include the Canon EOS 5D Mark IV, Nikon D850, and Sony Alpha a7 III.
10.2 What lens should I use for real estate photography?
Use a wide-angle lens (16-35mm on a full-frame camera) to capture expansive views of interiors and exteriors.
10.3 How do I improve the lighting in my real estate photos?
Maximize natural light by shooting during optimal times and using supplemental lighting like speedlights or LED panels.
10.4 What is HDR photography, and how is it used in real estate?
HDR photography combines multiple exposures to capture a wider dynamic range, balancing dark interiors with bright outdoor views.
10.5 How do I correct perspective distortion in my real estate photos?
Use a tripod to keep the camera level and correct any remaining distortion in post-processing software like Lightroom or Photoshop.
10.6 What are the ethical considerations in real estate photography?
Represent properties accurately, disclose any significant flaws, and obtain permission before using images in your portfolio.
10.7 How can I market my real estate photography services?
Create a professional portfolio, network with real estate agents, and utilize social media to showcase your work.
10.8 What are some common mistakes to avoid in real estate photography?
Avoid poor lighting, cluttered spaces, failing to correct perspective distortion, and over-editing.
10.9 What are the latest trends in real estate photography?
Emerging trends include virtual tours, drone photography, and 3D imaging.
10.10 How important is staging for real estate photography?
Staging is very important; it helps to showcase the property in its best light, making it more appealing to potential buyers.
Elevate your real estate photography skills by visiting dfphoto.net. Explore our extensive collection of tutorials, stunning photos, and a vibrant community of photographers. Whether you’re looking to enhance your technical skills, find inspiration, or connect with fellow enthusiasts, dfphoto.net has everything you need.
Ready to take your real estate photography to the next level? Visit dfphoto.net now!
Address: 1600 St Michael’s Dr, Santa Fe, NM 87505, United States
Phone: +1 (505) 471-6001
Website: dfphoto.net
Keywords: Property photography, architectural shots, interior design images, real estate listings