Are you eager to learn How To Create A Silhouette Photo that captures dramatic light and striking shapes? At dfphoto.net, we’ll guide you through the art of silhouette photography, turning ordinary scenes into extraordinary images with strong contrast and artistic flair. Dive in to discover how to master this technique, and get inspired to create breathtaking silhouette pictures.
1: What is Silhouette Photography?
Silhouette photography is capturing a subject as a dark shape against a brighter background, usually during sunrise or sunset. It emphasizes the outline and form of the subject, creating a dramatic and mysterious effect. According to research from the Santa Fe University of Art and Design’s Photography Department, in July 2025, silhouette photography is valued for its ability to evoke emotion and tell stories through shape and light. It’s a simple yet powerful technique for creating visually stunning images.
1.1: What are the Key Elements of a Good Silhouette?
A good silhouette needs a clear, recognizable shape, strong contrast between the subject and background, and interesting composition. The best silhouettes are often those where the subject’s form is easily identifiable and tells a story on its own. Paying attention to these elements ensures your silhouette images are both visually appealing and emotionally resonant.
1.2: How is Silhouette Photography Different From Other Types of Photography?
Unlike other photography styles that focus on capturing detail and color, silhouette photography is all about simplicity and shape. It strips away the details, emphasizing the outline of the subject. This technique is particularly useful when the subject’s shape or form is more important than its texture or color.
2: What Equipment Do You Need for Silhouette Photography?
You don’t need expensive gear to start with silhouette photography; a basic camera or even a smartphone can work wonders. However, having some essential tools can enhance your ability to capture stunning silhouettes.
2.1: Do You Need a Special Camera for Silhouette Photography?
No, you don’t need a special camera. A DSLR, mirrorless camera, or even a smartphone will do. The key is understanding how to control your camera’s settings to achieve the desired effect. Most modern cameras, including smartphones, have the capability to produce excellent silhouette photos.
2.2: What Lenses are Best for Silhouette Photography?
While any lens can be used, a telephoto lens (70-200mm) can help isolate your subject against the bright background. Wide-angle lenses can also be effective for capturing silhouettes in landscapes. The choice depends on the specific scene and the effect you want to achieve.
2.3: What Accessories are Useful for Silhouette Photography?
A tripod is helpful for keeping your camera steady in low light conditions, and a remote shutter release can prevent camera shake. Filters, such as graduated neutral density (GND) filters, can balance the exposure between the bright sky and the darker foreground.
3: How Do You Set Up Your Camera for Silhouette Photography?
Setting up your camera correctly is crucial for achieving the perfect silhouette. Adjusting the settings to capture the contrast between light and shadow is key.
3.1: What is the Best Shooting Mode for Silhouette Photography?
Manual mode (M) gives you the most control over your camera settings. Aperture Priority mode (Av or A) can also work well, allowing you to set the aperture while the camera adjusts the shutter speed. Experiment to see which mode works best for you.
3.2: What Aperture, Shutter Speed, and ISO Settings Should You Use?
- Aperture: Use a smaller aperture (f/8 to f/16) to ensure sharpness and depth of field.
- Shutter Speed: Adjust the shutter speed to properly expose the background. Start with a fast shutter speed and adjust as needed.
- ISO: Keep the ISO as low as possible (ISO 100 or 200) to minimize noise.
3.3: How Do You Use Exposure Compensation in Silhouette Photography?
Use negative exposure compensation (-1 to -3 stops) to darken the subject and create a strong silhouette. This ensures that the background is properly exposed while the subject appears black. Adjust the exposure compensation until you achieve the desired effect.
4: What are the Best Locations and Times for Silhouette Photography?
The location and time of day are essential for capturing stunning silhouette images. Ideal conditions involve a bright, unobstructed background, such as a sunset or sunrise.
4.1: Why is Shooting During Sunrise or Sunset Ideal for Silhouettes?
Sunrise and sunset provide the most dramatic lighting conditions, with the sun low on the horizon creating a vibrant backdrop. The golden hour, the period shortly after sunrise or before sunset, offers soft, warm light that enhances the contrast between the subject and background.
4.2: What Types of Locations Work Best for Silhouette Photography?
Beaches, mountaintops, and open fields are excellent locations because they offer clear horizons. Urban environments with interesting skylines can also provide compelling silhouette opportunities. Look for locations where you can position your subject against a bright, uncluttered background.
4.3: How Do You Scout Locations for Silhouette Photography?
Scout locations in advance to determine the best angles and compositions. Use apps like PhotoPills or Sun Surveyor to track the sun’s position and plan your shoot accordingly. Knowing the landscape and potential shooting spots ahead of time can save you valuable time and effort.
5: How Do You Compose a Silhouette Photo?
Composition is key to creating impactful silhouette images. Pay attention to the placement of your subject, the use of negative space, and the overall balance of the photo.
5.1: What Composition Techniques Work Well in Silhouette Photography?
- Rule of Thirds: Place your subject along the lines or at the intersections of the rule of thirds grid to create a balanced and visually appealing composition.
- Leading Lines: Use lines in the scene to draw the viewer’s eye towards the subject.
- Negative Space: Use empty space around the subject to emphasize its shape and create a sense of drama.
5.2: How Do You Position Your Subject for the Best Silhouette Effect?
Position your subject so that its most distinctive features are clearly outlined against the bright background. Avoid overlapping elements that can muddy the silhouette. Experiment with different poses and angles to find the most compelling composition.
5.3: How Do You Use Negative Space in Silhouette Photography?
Negative space can enhance the impact of your silhouette by isolating the subject and creating a sense of depth. Use the sky, water, or other empty areas in the scene to emphasize the subject’s shape and form. Balancing the negative space with the subject creates a visually pleasing image.
6: How Do You Focus in Silhouette Photography?
Focusing can be tricky in silhouette photography because the subject is often dark. Use these techniques to ensure your silhouette photos are sharp and clear.
6.1: What Focus Modes Work Best for Silhouettes?
Manual focus (MF) allows you to fine-tune the focus, especially in low-light conditions. Single-point autofocus (AF) can also be effective if you focus on the edge of the subject where it meets the bright background. Experiment to see which focus mode works best for your specific situation.
6.2: How Do You Use Manual Focus for Silhouette Photography?
Switch your lens to manual focus and use the focus ring to adjust until the subject appears sharp. Use live view and zoom in to ensure accurate focus. Manual focus is particularly useful when autofocus struggles to find the subject in low light.
6.3: What is Focus Peaking and How Can It Help?
Focus peaking highlights the in-focus areas in your live view display, making it easier to achieve sharp focus. Enable focus peaking in your camera’s settings and adjust the focus ring until the subject’s outline is highlighted. This feature can be a great aid in manual focusing.
7: How Do You Meter for Silhouette Photography?
Metering is crucial in silhouette photography to ensure the background is properly exposed while the subject remains dark. Use these metering techniques to achieve the best results.
7.1: What Metering Modes Work Best for Silhouettes?
- Spot Metering: Measures the light from a small area of the scene, allowing you to expose for the bright background.
- Partial Metering: Similar to spot metering but measures a slightly larger area.
- Center-Weighted Metering: Measures the light from the center of the scene while considering the surrounding area.
7.2: How Do You Use Spot Metering to Expose for the Background?
Point your camera’s spot meter at the brightest part of the sky and set your exposure based on that reading. This will ensure the background is properly exposed, and the subject will appear as a dark silhouette. Use negative exposure compensation to further darken the subject if needed.
7.3: How Do You Adjust Exposure Compensation for the Perfect Silhouette?
After metering the background, use negative exposure compensation (-1 to -3 stops) to darken the subject and create a strong silhouette. Review your images and adjust the exposure compensation until you achieve the desired effect. This fine-tuning is essential for creating impactful silhouette photos.
8: What Subjects Work Well for Silhouette Photography?
Certain subjects lend themselves particularly well to silhouette photography, allowing you to create compelling and dramatic images.
8.1: What are Some Good Subjects for Silhouettes?
People, trees, animals, and architectural elements with strong, recognizable shapes are excellent subjects. Dynamic poses and interesting forms enhance the visual impact of the silhouette. Experiment with different subjects to discover what works best for you.
8.2: How Can You Capture Silhouettes of People?
Capture people in profile to highlight their facial features or in dynamic poses that convey movement or emotion. Make sure their limbs and body are clearly separated to avoid a cluttered silhouette. Directing your subjects and experimenting with different poses can lead to captivating images.
8.3: How Do You Capture Silhouettes of Animals?
Photograph animals against a clear sky or horizon to emphasize their shape and form. Capture them in action, such as birds in flight or horses running, to add a sense of energy and movement. Patience and timing are crucial when photographing animals in silhouette.
 Silhouette of a person standing on a beach during sunset with vibrant sky
9: How Do You Edit Silhouette Photos?
Post-processing can enhance your silhouette photos, allowing you to refine the contrast, adjust the colors, and remove distractions.
9.1: What Software Can You Use to Edit Silhouette Photos?
Adobe Lightroom, Photoshop, and Capture One are popular choices for editing silhouette photos. Mobile apps like Snapseed and VSCO also offer powerful editing tools. Choose the software that best suits your needs and skill level.
9.2: What Adjustments Should You Make in Post-Processing?
- Contrast: Increase the contrast to make the silhouette darker and the background brighter.
- Blacks: Lower the blacks to deepen the shadows and enhance the silhouette effect.
- Highlights: Adjust the highlights to fine-tune the brightness of the background.
- Clarity: Increase clarity to enhance the details in the background.
9.3: How Can You Remove Distractions in Post-Processing?
Use the spot removal tool or clone stamp tool to remove any unwanted elements from the scene, such as power lines or small objects on the horizon. Cleaning up distractions ensures that the focus remains on the silhouette.
10: What are Some Creative Silhouette Photography Ideas?
Silhouette photography offers endless opportunities for creativity. Explore different themes, techniques, and perspectives to create unique and compelling images.
10.1: How Can You Use Props in Silhouette Photography?
Incorporate props like umbrellas, hats, or musical instruments to add interest and context to your silhouette. Choose props that complement the subject and enhance the overall composition. Props can transform a simple silhouette into a visually engaging story.
10.2: How Can You Capture Silhouettes in Urban Environments?
Use city skylines, buildings, and bridges as backdrops for your silhouettes. Capture people interacting with urban elements to create dynamic and visually striking images. Urban silhouette photography can showcase the contrast between human life and the built environment.
10.3: How Can You Create Abstract Silhouette Photos?
Experiment with unusual angles, perspectives, and compositions to create abstract silhouette images. Focus on shapes, lines, and patterns to create visually intriguing photos that challenge the viewer’s perception. Abstract silhouette photography can be a powerful form of artistic expression.
11: How To Create Silhouette Art From an Image
Creating silhouette art from an image is easier than you think and can result in beautiful, personalized artwork. With simple tools and a few steps, you can transform your favorite photos into stunning silhouettes.
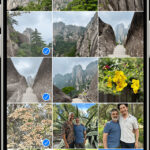
11.1: Upload your photo
Start by uploading your photo to Canva. I worked on my computer, but you can do this on your phone, too. Here’s the step by step process I followed on my computer:
- Click “create a design”
- Choose “custom size” and type in the size you want to print. I chose 5″ x 7″.
- Click “uploads”, then “upload files” and add your image.
- Drag your image onto the page and resize it so it fills your entire template.
11.2: Remove the background
Now, you want to remove the background. I took my photos against a white background so there wasn’t much to remove, but you can still see the texture of the wall. Canva has a quick button that makes this SUPER simple. Just click on your image, then click “edit image”. From there, select “Background Remover”.
It’ll automatically remove your background. Just wait a second and it’s like magic. If it misses something or messes anything up, there will be buttons that say “erase” and “restore” afterwards. Use those to adjust until it’s right (but, it usually gets it right on the first try).
11.3: Use the “Duotone” tool
Next, you’re going to stay in the “edit image” section and scroll down until you get to the section that says “You may also like…”. Look for the filter that says Duotone. That’s the one you want.
Click one it, and just choose the first color available. For me, it was Cherry. It doesn’t matter, because you’re going to change the colors.
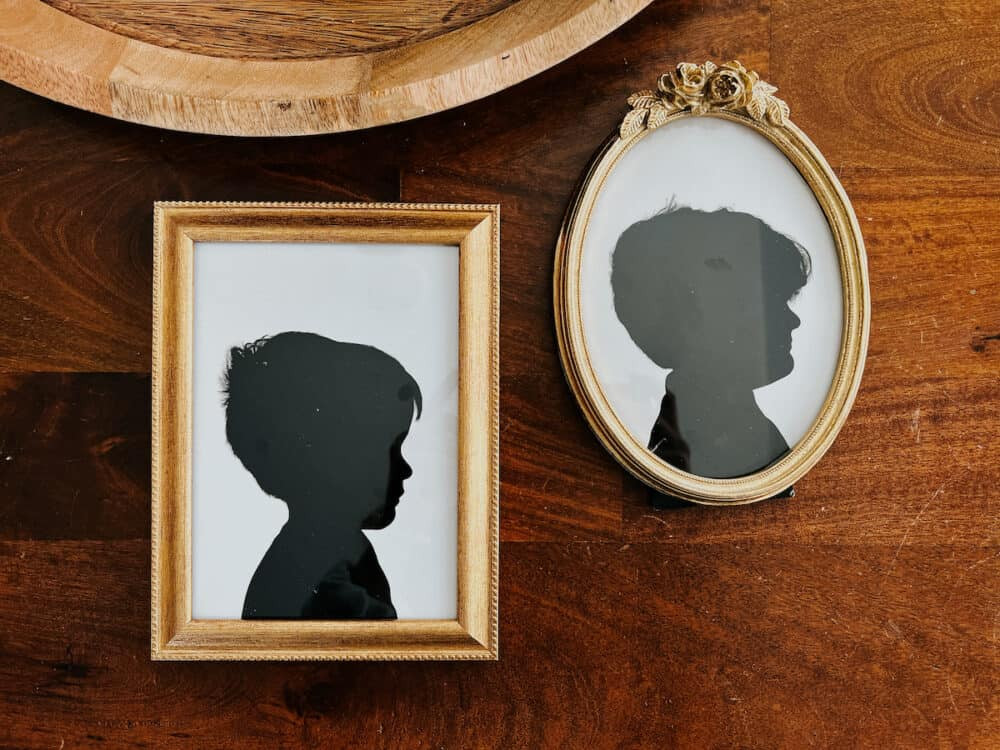
11.4: Change the colors
Now, one the Duotone editor you should see a bunch of little sliders show up on top of the color you chose. Click on the sliders to get a page that allows you to select a different shade for the Duotone filter.
Change both the “Highlights” and the “Shadows” colors to black. Or white, if you plan to print on black paper. And just like that…you have a beautiful silhouette picture.
12: What are Common Mistakes to Avoid in Silhouette Photography?
Even experienced photographers can make mistakes. Here are some common pitfalls to avoid in silhouette photography.
12.1: How Do You Avoid Overlapping Subjects in Silhouettes?
Ensure that your subjects are positioned so that their outlines are clearly separated. Overlapping subjects can create a cluttered and confusing silhouette. Adjusting your position or the subjects’ positions can help avoid this issue.
12.2: How Do You Prevent Losing Detail in the Background?
Avoid overexposing the background, which can wash out the colors and details. Use proper metering techniques and negative exposure compensation to maintain detail in the sky or other background elements. Balancing the exposure is key to a visually appealing silhouette.
12.3: How Do You Avoid Silhouettes That Are Too Dark or Too Bright?
Achieving the right balance between the dark subject and the bright background is crucial. Use negative exposure compensation to darken the subject without losing detail in the background. Review your images and make adjustments as needed to achieve the perfect silhouette.
13: How Can You Improve Your Silhouette Photography Skills?
Like any skill, practice makes perfect. Here are some tips for honing your silhouette photography skills and taking your images to the next level.
13.1: Why is Practice Important in Silhouette Photography?
The more you practice, the better you’ll become at recognizing ideal lighting conditions, composing compelling scenes, and mastering your camera settings. Regular practice will also help you develop your own unique style and vision. Photography is a skill that improves with experience.
13.2: How Can You Experiment With Different Techniques?
Try different camera settings, compositions, and subjects to discover what works best for you. Don’t be afraid to break the rules and experiment with unconventional approaches. Experimentation is essential for pushing your creative boundaries.
13.3: How Can You Learn From Other Photographers?
Study the work of other silhouette photographers to gain inspiration and learn new techniques. Analyze their compositions, lighting, and subject choices to understand what makes their images successful. Learning from others is a valuable way to grow as a photographer.
14: Frequently Asked Questions (FAQs) About Silhouette Photography
Here are some common questions about silhouette photography, along with detailed answers to help you improve your skills.
14.1: What is the best time of day to shoot silhouettes?
The best time is during the golden hours, shortly after sunrise and before sunset, when the light is soft and warm.
14.2: Do I need a specific camera for silhouette photography?
No, any camera with manual settings will work, including smartphones.
14.3: What settings should I use for silhouette photography?
Use a low ISO, small aperture (f/8-f/16), and adjust the shutter speed to expose the background properly. Use negative exposure compensation to darken the subject.
14.4: How do I focus when shooting silhouettes?
Use manual focus or single-point autofocus on the edge of the subject against the bright background.
14.5: What subjects are best for silhouettes?
People, animals, trees, and objects with recognizable shapes work well.
14.6: How do I compose a good silhouette photo?
Use the rule of thirds, leading lines, and negative space to create a balanced and visually appealing composition.
14.7: How do I edit silhouette photos?
Increase contrast, lower blacks, and adjust highlights in post-processing software.
14.8: How can I remove distractions in my silhouette photos?
Use the spot removal tool or clone stamp tool in post-processing to clean up the scene.
14.9: What are some creative ideas for silhouette photography?
Use props, shoot in urban environments, and experiment with abstract compositions.
14.10: What are common mistakes to avoid in silhouette photography?
Avoid overlapping subjects, losing detail in the background, and silhouettes that are too dark or too bright.
15: Enhance Your Photography Skills with dfphoto.net
Ready to take your silhouette photography to the next level? At dfphoto.net, we offer a wealth of resources to help you master this captivating technique. Explore our detailed tutorials, browse our stunning photo collections, and connect with a vibrant community of photographers eager to share their knowledge and inspiration.
Address: 1600 St Michael’s Dr, Santa Fe, NM 87505, United States.
Phone: +1 (505) 471-6001
Website: dfphoto.net
Discover the art of silhouette photography and unleash your creative potential today. Visit dfphoto.net and transform your vision into breathtaking reality.