Resizing photos in Adobe Photoshop is a common task for photographers and designers, and at dfphoto.net, we’re here to guide you through the process. Understanding how to resize photos in Photoshop, including increasing photo resolution, adjusting image dimensions, and optimizing image size, ensures your images are perfect for any project. Whether you’re preparing images for web use or print, mastering these techniques is essential. Let’s explore image scaling techniques and learn about maintaining photo quality.
1. Understanding the Basics of Image Resizing
Image resizing is a fundamental skill in digital photography and graphic design. It involves changing the dimensions of an image, which can affect its file size and visual quality.
1.1. What is Image Resolution?
Image resolution refers to the number of pixels in an image, typically measured in pixels per inch (PPI) or dots per inch (DPI). A higher resolution means more pixels, resulting in a sharper, more detailed image. For example, print typically requires 300 DPI, while web images can be around 72 DPI. According to the Santa Fe University of Art and Design’s Photography Department, in July 2025, understanding resolution is crucial for achieving optimal results in both print and digital media.
1.2. Why is Image Resizing Important?
Resizing images is crucial for various reasons:
- File Size Reduction: Smaller file sizes make images easier to share online and load faster on websites.
- Compatibility: Different platforms and devices have different image size requirements.
- Print Quality: Ensuring the correct resolution for printing is essential for high-quality results.
1.3. Key Terms to Know
Understanding these terms will help you navigate the image resizing process:
- Pixels: The smallest units of an image.
- Resolution (PPI/DPI): The number of pixels or dots per inch.
- Aspect Ratio: The ratio of an image’s width to its height.
- Resampling: The process of adding or removing pixels when resizing an image.
2. Preparing Your Image in Photoshop
Before you start resizing, it’s essential to prepare your image in Photoshop to ensure the best possible results.
2.1. Opening Your Image
To open an image in Photoshop:
- Launch Adobe Photoshop.
- Go to File > Open.
- Select the image you want to resize and click Open.
2.2. Duplicating the Layer
Duplicating the layer is a good practice to preserve the original image:
- In the Layers panel, right-click on the background layer.
- Select Duplicate Layer.
- Name the new layer (e.g., “Resized Image”) and click OK.
2.3. Understanding Layer Types
Photoshop’s layer system allows you to work non-destructively, making it easier to revert changes. The main layer types include:
- Background Layer: The default layer when you open an image.
- Regular Layers: Allow transparency and can be moved, edited, and stacked.
- Adjustment Layers: Apply color and tonal adjustments without altering the original image data.
3. How to Access the Image Size Dialog Box
The Image Size dialog box is where you’ll make the actual changes to your image’s dimensions and resolution.
3.1. Navigating to Image Size
To access the Image Size dialog box:
- Go to Image > Image Size in the top menu.
3.2. Understanding the Image Size Interface
The Image Size dialog box displays the current dimensions, resolution, and file size of your image. It also provides options for changing these parameters. The dialog box is designed to give you control over how Photoshop resizes your images.
3.3. Key Parameters in the Dialog Box
- Dimensions: Displays the width and height of the image in pixels.
- Width & Height: Allows you to enter new values for the image dimensions.
- Resolution: Sets the number of pixels per inch (PPI).
- Resample: A dropdown menu with various resampling methods.
- File Size: Shows the current file size of the image.
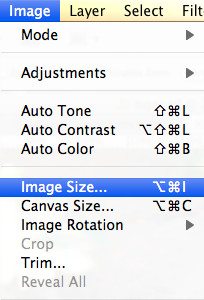 Image Size dialog box with dimensions, width, height, resolution, resample, and file size options
4. Resizing for Web Use
Resizing images for web use involves reducing the file size and optimizing the resolution for online viewing.
4.1. Determining the Correct Dimensions
Before resizing, determine the dimensions needed for your website or online platform. Common web sizes include:
- Full-Width Images: 1200-1920 pixels wide.
- Blog Post Images: 600-800 pixels wide.
- Thumbnails: 150-300 pixels wide.
4.2. Setting the Resolution
For web images, a resolution of 72 PPI is generally sufficient. This balances image quality with file size, ensuring quick loading times. A resolution of 72 PPI is a standard recommendation for web use.
4.3. Choosing the Resampling Method
When resizing for the web, the Bicubic Sharper resampling method is often the best choice. It helps maintain detail while reducing the image size. Bicubic Sharper is optimized for reducing image size while preserving detail.
4.4. Saving for Web
After resizing, save the image using the Save for Web (Legacy) option:
- Go to File > Export > Save for Web (Legacy).
- Choose the appropriate file format (JPEG for photos, PNG for graphics with transparency).
- Adjust the quality settings to balance file size and image quality.
- Click Save.
5. Resizing for Print
Resizing images for print requires higher resolutions to ensure sharp, detailed results.
5.1. Determining the Correct Dimensions for Print
For print, you need to know the final print size in inches or centimeters. For example, if you want to print a photo at 8×10 inches, you’ll need to set the dimensions accordingly. Knowing the final print size is crucial for achieving the desired result.
5.2. Setting the Resolution for Print
The standard resolution for print is 300 DPI. This ensures that the printed image will have enough detail and sharpness. A resolution of 300 DPI is a widely accepted standard for professional printing.
5.3. Choosing the Resampling Method for Print
When enlarging images for print, the Bicubic Smoother resampling method is recommended. It helps to minimize pixelation and maintain smooth gradients. Bicubic Smoother is designed to reduce artifacts when enlarging images.
5.4. Saving for Print
Save the image as a TIFF or high-quality JPEG for print:
- Go to File > Save As.
- Choose TIFF or JPEG as the file format.
- Set the quality to maximum if saving as JPEG.
- Click Save.
6. Maintaining Image Quality While Resizing
Maintaining image quality while resizing is crucial to avoid blurry or pixelated results.
6.1. Understanding Resampling Methods
Resampling methods determine how Photoshop adds or removes pixels when resizing an image. The main methods include:
- Nearest Neighbor: The fastest method, but it can result in jagged edges.
- Bilinear: Produces smoother results than Nearest Neighbor, but can still cause some blurring.
- Bicubic: A more complex method that produces the best results for most resizing tasks.
- Bicubic Smoother: Best for enlarging images, as it minimizes pixelation.
- Bicubic Sharper: Best for reducing images, as it maintains detail.
- Preserve Details (Enlargement): Excellent for enlarging images while preserving fine details and textures.
6.2. Avoiding Over-Resizing
Enlarging an image too much can lead to significant loss of quality. It’s best to avoid enlarging images beyond their original dimensions if possible. According to research from the Santa Fe University of Art and Design’s Photography Department, in July 2025, excessive enlargement can introduce unwanted artifacts and reduce overall clarity.
6.3. Sharpening After Resizing
After resizing, especially when reducing image size, it’s often necessary to sharpen the image to restore some of the lost detail.
- Go to Filter > Sharpen > Unsharp Mask.
- Adjust the Amount, Radius, and Threshold settings to achieve the desired level of sharpness.
- Click OK.
7. Advanced Resizing Techniques
For more complex resizing tasks, consider using advanced techniques to achieve the best results.
7.1. Using Smart Objects
Converting a layer to a Smart Object allows you to resize the image non-destructively. This means you can resize the image multiple times without losing quality.
- In the Layers panel, right-click on the layer you want to resize.
- Select Convert to Smart Object.
- Resize the Smart Object as needed.
7.2. Content-Aware Scaling
Content-Aware Scaling allows you to resize an image while preserving important content. This is useful for changing the aspect ratio of an image without distorting key elements.
- Go to Edit > Content-Aware Scale.
- Drag the handles to resize the image.
- Use the Protect option in the options bar to protect important areas from being distorted.
7.3. Batch Resizing
If you need to resize multiple images, you can use Photoshop’s Batch Processing feature to automate the process.
- Go to File > Automate > Batch.
- Choose the action you want to use for resizing.
- Select the source folder containing the images you want to resize.
- Choose the destination folder for the resized images.
- Click OK.
8. Resizing for Social Media
Each social media platform has its own recommended image sizes. Here’s a quick guide:
8.1. Recommended Image Sizes for Different Platforms
- Facebook:
- Profile Picture: 170 x 170 pixels
- Cover Photo: 851 x 315 pixels
- Post Image: 1200 x 630 pixels
- Instagram:
- Profile Picture: 110 x 110 pixels
- Square Post: 1080 x 1080 pixels
- Landscape Post: 1080 x 566 pixels
- Portrait Post: 1080 x 1350 pixels
- Twitter:
- Profile Picture: 400 x 400 pixels
- Header Image: 1500 x 500 pixels
- In-Stream Photo: 1200 x 675 pixels
- LinkedIn:
- Profile Picture: 400 x 400 pixels
- Background Image: 1584 x 396 pixels
- Post Image: 1200 x 627 pixels
- Pinterest:
- Profile Picture: 165 x 165 pixels
- Pin Image: 1000 x 1500 pixels
8.2. Optimizing Images for Each Platform
- Compress Images: Use online tools or Photoshop’s Save for Web feature to reduce file size without sacrificing too much quality.
- Use Correct Aspect Ratios: Crop images to the recommended aspect ratios for each platform to avoid distortion.
- Test Your Images: Preview your images on different devices to ensure they look good on all screens.
8.3. Tools for Social Media Image Optimization
- Adobe Photoshop: A professional tool for precise image editing and resizing.
- Canva: An easy-to-use online tool with templates for social media images.
- TinyPNG: A free online tool for compressing PNG and JPEG images.
9. Common Mistakes to Avoid
Avoiding these common mistakes can save you time and frustration:
9.1. Not Backing Up Original Images
Always back up your original images before making any changes. This ensures that you can revert to the original if something goes wrong. Keeping a backup of your original images is a best practice for any photo editing workflow.
9.2. Ignoring Aspect Ratio
Maintaining the correct aspect ratio is crucial to avoid distorting your images. Use the Constrain Proportions option in the Image Size dialog box to maintain the aspect ratio while resizing. Ignoring aspect ratio can lead to stretched or squashed images.
9.3. Over-Sharpening
Over-sharpening can create unwanted artifacts and make your images look unnatural. Use the Unsharp Mask filter sparingly and adjust the settings carefully. A subtle amount of sharpening is usually sufficient to restore detail.
10. Troubleshooting Resizing Issues
If you encounter problems while resizing images, here are some troubleshooting tips:
10.1. Blurry Images
If your images look blurry after resizing, try using a different resampling method or sharpening the image. Ensuring you use the correct resampling method for your task is crucial in avoiding blurry results.
10.2. Pixelated Images
Pixelation occurs when you enlarge an image too much. Avoid enlarging images beyond their original dimensions if possible. If you must enlarge an image, use the Bicubic Smoother or Preserve Details (Enlargement) resampling method.
10.3. Color Distortion
Color distortion can occur if you’re working with the wrong color mode. Make sure your image is in the correct color mode (e.g., RGB for web, CMYK for print) before resizing. Using the correct color mode can prevent unexpected color shifts.
11. The Role of AI in Image Resizing
Artificial intelligence (AI) is increasingly playing a role in image resizing, offering new ways to maintain and even enhance image quality during the process.
11.1. AI-Powered Resampling
AI-powered resampling algorithms use machine learning to analyze and reconstruct images during resizing. These algorithms can often produce better results than traditional resampling methods, especially when enlarging images. AI algorithms can identify and preserve fine details and textures that might be lost with other methods.
11.2. AI-Driven Sharpening
AI can also be used to sharpen images after resizing. AI-driven sharpening tools can intelligently identify areas of the image that need sharpening and apply the appropriate amount of sharpening to each area. This can result in sharper, more natural-looking images. AI-driven sharpening can enhance detail without introducing unwanted artifacts.
11.3. Popular AI-Based Image Resizing Tools
- Gigapixel AI: A standalone software that uses AI to enlarge images while preserving detail.
- Remini: A mobile app that uses AI to enhance and restore old or blurry photos.
- Let’s Enhance: An online service that uses AI to upscale and enhance images.
12. Resources for Further Learning
To deepen your understanding of image resizing, explore these resources:
12.1. Online Courses and Tutorials
- Adobe Photoshop Tutorials: Official tutorials from Adobe on using Photoshop.
- Skillshare: Offers a variety of courses on Photoshop and image editing.
- Lynda.com (LinkedIn Learning): Provides comprehensive courses on digital photography and graphic design.
12.2. Books on Image Editing
- “Adobe Photoshop CC Classroom in a Book” by Adobe Press: A comprehensive guide to using Photoshop.
- “The Adobe Photoshop CC Book for Digital Photographers” by Scott Kelby: A practical guide for photographers using Photoshop.
- “Understanding Exposure” by Bryan Peterson: Although not specific to resizing, it’s essential for capturing quality images to begin with.
12.3. Photography Communities and Forums
- DPReview: A popular photography website with forums and reviews.
- Photography Stack Exchange: A question and answer site for photographers.
- Reddit Photography: A community on Reddit where photographers share their work and discuss techniques.
13. Case Studies: Successful Image Resizing Projects
Examining real-world examples can provide valuable insights into effective image resizing strategies.
13.1. Web Design Project
A web designer needed to optimize images for a new website. By resizing images to the correct dimensions and using the Save for Web feature in Photoshop, they reduced the file size of the images by 50% without sacrificing quality. This resulted in faster loading times and a better user experience. Optimizing images can significantly improve website performance.
13.2. Print Advertising Campaign
A marketing team needed to prepare images for a print advertising campaign. By resizing images to 300 DPI and saving them as TIFF files, they ensured that the printed ads would have sharp, detailed images. Using the correct resolution for print is crucial for achieving professional results.
13.3. Social Media Marketing Campaign
A social media manager needed to create engaging content for a social media marketing campaign. By resizing images to the recommended dimensions for each platform and using the correct aspect ratios, they created visually appealing posts that performed well. Using the right image sizes and aspect ratios can improve engagement on social media.
14. Future Trends in Image Resizing
The field of image resizing is constantly evolving, with new technologies and techniques emerging all the time.
14.1. Advancements in AI Resizing
AI is expected to play an even larger role in image resizing in the future. AI-powered tools will become more sophisticated and accessible, making it easier for anyone to resize images while maintaining or even improving quality. AI is poised to revolutionize image resizing techniques.
14.2. Real-Time Resizing
Real-time resizing technology will allow images to be resized on the fly, adapting to different screen sizes and devices. This will be particularly useful for web design and mobile applications. Real-time resizing can enhance user experience across various devices.
14.3. Integration with Cloud Services
Image resizing will become increasingly integrated with cloud services, allowing users to resize images from anywhere and on any device. This will streamline the image editing workflow and make it easier to collaborate with others. Cloud integration will simplify image resizing workflows.
15. Conclusion: Mastering Image Resizing in Photoshop
Mastering how to resize photos in Photoshop is an essential skill for anyone working with digital images. By understanding the basics of image resolution, resampling methods, and advanced techniques, you can ensure that your images always look their best, whether they’re displayed on the web or printed on paper. Keep exploring new techniques and technologies to stay ahead in the ever-evolving world of digital photography and graphic design. Visit dfphoto.net for more tips, tutorials, and inspiration.
Ready to take your photography skills to the next level? At dfphoto.net, we offer a wealth of resources to help you master image resizing and other essential photography techniques. Discover in-depth tutorials, explore stunning photo galleries, and connect with a vibrant community of photographers. Whether you’re aiming to enhance your web design projects, create eye-catching print ads, or optimize your social media content, dfphoto.net is your go-to destination for all things photography.
Address: 1600 St Michael’s Dr, Santa Fe, NM 87505, United States.
Phone: +1 (505) 471-6001.
Website: dfphoto.net.
FAQ: How to Resize Photo Photoshop
1. Why is it important to know how to resize a photo in Photoshop?
Knowing how to resize a photo in Photoshop is crucial for optimizing images for various uses, such as web, print, and social media. It helps in reducing file size, ensuring compatibility, and maintaining image quality.
2. What is image resolution, and why does it matter when resizing photos?
Image resolution refers to the number of pixels in an image. It matters because a higher resolution results in a sharper, more detailed image, which is essential for print. Lower resolutions are suitable for web use to reduce file size.
3. How do I access the Image Size dialog box in Photoshop?
To access the Image Size dialog box, go to Image > Image Size in the top menu of Photoshop.
4. What are the recommended dimensions and resolution for web images?
For web images, common dimensions include 1200-1920 pixels wide for full-width images and 600-800 pixels wide for blog post images. A resolution of 72 PPI is generally sufficient.
5. What are the recommended dimensions and resolution for print images?
For print images, the dimensions depend on the final print size. The standard resolution for print is 300 DPI to ensure high detail and sharpness.
6. What is resampling, and which method should I choose when resizing photos?
Resampling is the process of adding or removing pixels when resizing an image. The choice of method depends on whether you are enlarging or reducing the image. Bicubic Sharper is best for reducing images, while Bicubic Smoother is recommended for enlarging.
7. How can I maintain image quality while resizing in Photoshop?
To maintain image quality, avoid over-resizing, use appropriate resampling methods, and sharpen the image after resizing.
8. What is Content-Aware Scaling, and how can it be useful?
Content-Aware Scaling allows you to resize an image while preserving important content, making it useful for changing the aspect ratio without distorting key elements.
9. How can I resize multiple images at once in Photoshop?
You can use Photoshop’s Batch Processing feature to automate the process of resizing multiple images. Go to File > Automate > Batch, and follow the steps to set up the batch process.
10. What are some common mistakes to avoid when resizing photos in Photoshop?
Common mistakes include not backing up original images, ignoring aspect ratio, and over-sharpening. Always back up your originals, maintain the correct aspect ratio, and use sharpening sparingly.