Are you looking to learn How To Blur Background In Iphone Photo for stunning, professional-looking shots? This guide, brought to you by dfphoto.net, explores simple techniques that unlock a world of creative possibilities. Whether you are aiming to enhance your portrait photography or minimize distracting elements, mastering background blur with your iPhone is a transformative skill. Learn to leverage depth of field, explore post-processing techniques, and use filters to create visually appealing photographs. Discover how to capture images with enhanced focus and artistic flair, all while using your iPhone’s amazing capabilities, and creating captivating bokeh effects.
1. Mastering Portrait Mode for Beautifully Blurred Backgrounds
Do you want to create iPhone photos with the subject in sharp focus and a stunningly blurred background?
Gone are the days when only DSLR cameras could achieve this effect! Your iPhone has an incredible built-in tool for blurring backgrounds. It is called Portrait mode.
 Close-up portrait of a woman with a blurred background, showcasing the depth of field achieved with iPhone's Portrait mode
Portrait mode utilizes sophisticated depth-effect software to create background blur while you shoot. This keeps your subject in sharp focus, ideal for portrait photography. It also excels in scenarios where the background is distracting. Blurring the background makes your subject stand out prominently.
Portrait mode is available on newer iPhones such as the iPhone 12, iPhone 12 Mini, iPhone 12 Pro, 12 Pro Max, iPhone 11, iPhone 11 Pro, iPhone 11 Pro Max, iPhone XS, iPhone XS Max, iPhone XR, iPhone X, iPhone 8 Plus, and iPhone 7 Plus.
Don’t fret if your iPhone doesn’t have Portrait mode! You can skip to Section 2 to find out how to blur photos on iPhone without using Portrait mode.
1.1. How Do You Use Portrait Mode To Blur Background On iPhone?
First, launch the Camera app, and then select Portrait from the options at the bottom.
 Close-up shot of a flower with a blurred background, highlighting the use of Portrait mode in iPhone photography
Ensure your subject is between two and eight feet away and there is sufficient light. Portrait mode can struggle in low light conditions.
Once you’ve framed your shot, a yellow focus box will appear around your subject’s face. This confirms that the face is in focus and the background is blurred.
When you see the words Natural Light (or Depth Effect on iPhone 7 Plus) highlighted in yellow, your iPhone is ready. Simply tap the shutter button to take the picture!
A serene outdoor portrait with background blur, demonstrating the effectiveness of iPhone's Portrait mode in various lighting conditions
1.2. Can You Change Background Blur In Portrait Photos?
Absolutely! Did you know that you can tweak the background blur even after capturing the photo?
If you have an iPhone 12, 12 Mini, 12 Pro, 12 Pro Max, 11, 11 Pro, 11 Pro Max, XS, XS Max, or XR, you can easily adjust the strength of the blur.
To start, open the portrait photo in your Photos app and tap Edit in the upper right corner.
Close-up of a person's face with blurred background, showcasing the adjustable depth of field feature on iPhone
Next, tap the f/number icon at the top left. A Depth slider will appear below your photo, allowing you to adjust the blur.
Example of adjusting the depth slider to control background blur in a photo on an iPhone
A low f/number intensifies the blur, while a high f/number reduces the blur, showing more background detail.
While the Depth slider isn’t available on older iPhones, you can still revert to the original, unblurred image. Tap the yellow Portrait option at the top of the screen to disable the depth effect and remove the blur. You can reactivate it anytime by tapping Portrait again.
While exploring Portrait mode editing, let’s also discuss Portrait Lighting (not available on iPhone 7 Plus). Portrait Lighting allows you to apply different studio lighting effects to your portrait photos.
Tap the Portrait Lighting (hexagon) icon at the top left of the edit screen. The Portrait Lighting options will then appear below your photo.
Demonstration of Portrait Lighting options on an iPhone, showing various studio lighting effects
Swipe through the Portrait Lighting icons (cube icons) at the bottom of the photo.
Natural Light leaves the lighting unchanged. Studio Light brightens your subject’s face. Contour Light adds shadows to define facial features. Stage Light blacks out the background, while Stage Light Mono does the same but in black and white. High-Key Light Mono creates a black and white photo with a white background.
Different lighting styles applied in Portrait mode, emphasizing how each setting alters the background and subject's appearance
Once you’ve selected a Portrait Lighting effect, use the slider to adjust its intensity. Tap Done to save your changes after editing your portrait photo.
2. Utilizing Proximity for Incredible Background Blur
Do you want to know how to blur a background on an iPhone even without Portrait mode? There’s a simple trick to get stunning background blur: Get closer to your subject.
Close-up photo of a colorful flower with a blurred background, achieved by getting physically closer to the subject
Shooting close to the subject creates a shallow depth of field, where only a small portion of the image is in focus, blurring the rest. The closer you are, the shallower the depth of field and the blurrier the background becomes.
If you get too close, however, the camera may not focus, and your subject will appear blurred. Always ensure your subject is sharply in focus. If not, step back slightly and try again.
For extreme close-ups, consider using an add-on macro lens like the Moment Macro Lens.
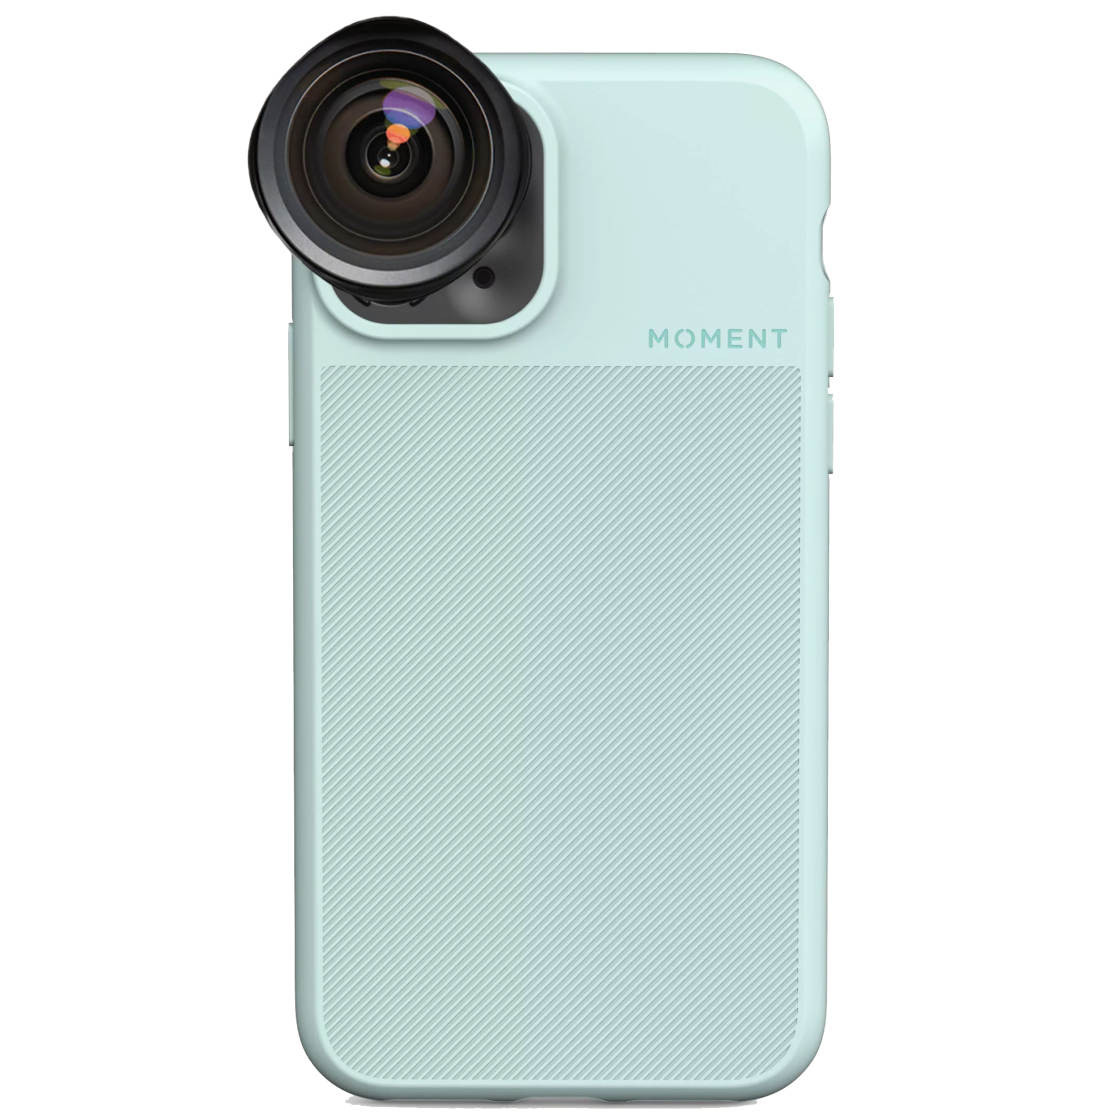 Macro lens attached to an iPhone, capturing extreme close-up details with a beautifully blurred background
A macro lens allows the camera to focus at very short distances, perfect for capturing amazing close-up photos of flowers, insects, and other natural details. When shooting up close, it’s essential to focus on the right part of the scene. You want your foreground subject sharp and the background blurred.
Luckily, it’s easy to set the iPhone camera focus. In the Camera app, tap the screen where you want to focus. A yellow box will appear, marking the focus point. If the background doesn’t blur enough, move closer and tap to refocus. Remember, the closer you get, the blurrier the background!
Demonstration of focusing on a small object to maximize background blur on an iPhone
3. Post-Capture Background Blurring Through Editing
Taking photos with blurred backgrounds is straightforward, but what if you didn’t capture enough blur and want to enhance it afterward?
No problem!
You can use an editing app to blur the background after taking the picture.
Example of using a photo editing app on an iPhone to blur the background of an image
This tutorial explains how to blur a photo’s background using the AfterFocus app.
3.1. How Do You Select Your Foreground Subject & Background?
Open AfterFocus and tap Select Photo at the bottom. Choose the photo you want to edit.
Helpful tips might appear after opening your image. Swipe through them, then tap the X at the top left to close.
The first step is to use the Smart Selection tools to define the subject and background. Tap the Focus icon at the bottom and draw a line inside the area you want to keep in focus.
Using the Smart Selection tool in AfterFocus to select the subject and background for blurring
Precision isn’t crucial here; roughly outline the foreground subject you want in focus. Next, tap the Background icon and draw a line over the area you want to blur. The foreground will then be highlighted with a red mask.
The red area with white lines is the part of the image that will remain in focus. The black line indicates the area that will be blurred in the next step.
Before blurring, ensure the app has accurately selected your subject. Check if any part of your subject isn’t highlighted in red or if part of the background appears red. If so, correct this to ensure only the background is blurred.
Illustration of inaccurately selected areas that need correction before applying the blur effect in AfterFocus
In the example above, the cycle helmet’s top wasn’t selected. You can try drawing more lines, but this doesn’t always work perfectly.
If the Smart Selection tools aren’t accurate, switch to Manual Selection mode by tapping the Pencil icon at the top. Zoom in with two fingers and carefully check the edges of your selection. Use two fingers to drag the image while zoomed in.
Tap the Brush Size icon and select a suitable size for the area you’re selecting. Choose either the Focus or Background icon, then brush over the subject or background.
Fine-tuning the selection manually in AfterFocus for precise background blurring
Be precise with the Manual Selection tools, as any brushed area will be selected. If you make a mistake, tap Undo (curved arrow) or switch between the Focus and Background icons to correct the area.
When finished, the red mask should cover only the foreground subject you want in sharp focus. The cleaner your selection, the more realistic the blur effect. Once you’ve made a neat selection, tap the arrow at the top right. The background of your photo will now appear blurred!
If you notice an error, tap the single left arrow at the top to adjust your selection using the Focus and Background tools. Then, tap the right arrow to return to the blur effects screen.
3.2. How Do You Customize The Blur Effect?
The icons at the bottom of AfterFocus allow you to customize the blur. Tap the Blur icon and ensure Lens Blur is selected. Drag the slider to adjust the blur intensity.
Adjusting the lens blur effect intensity in AfterFocus to achieve the desired background blur
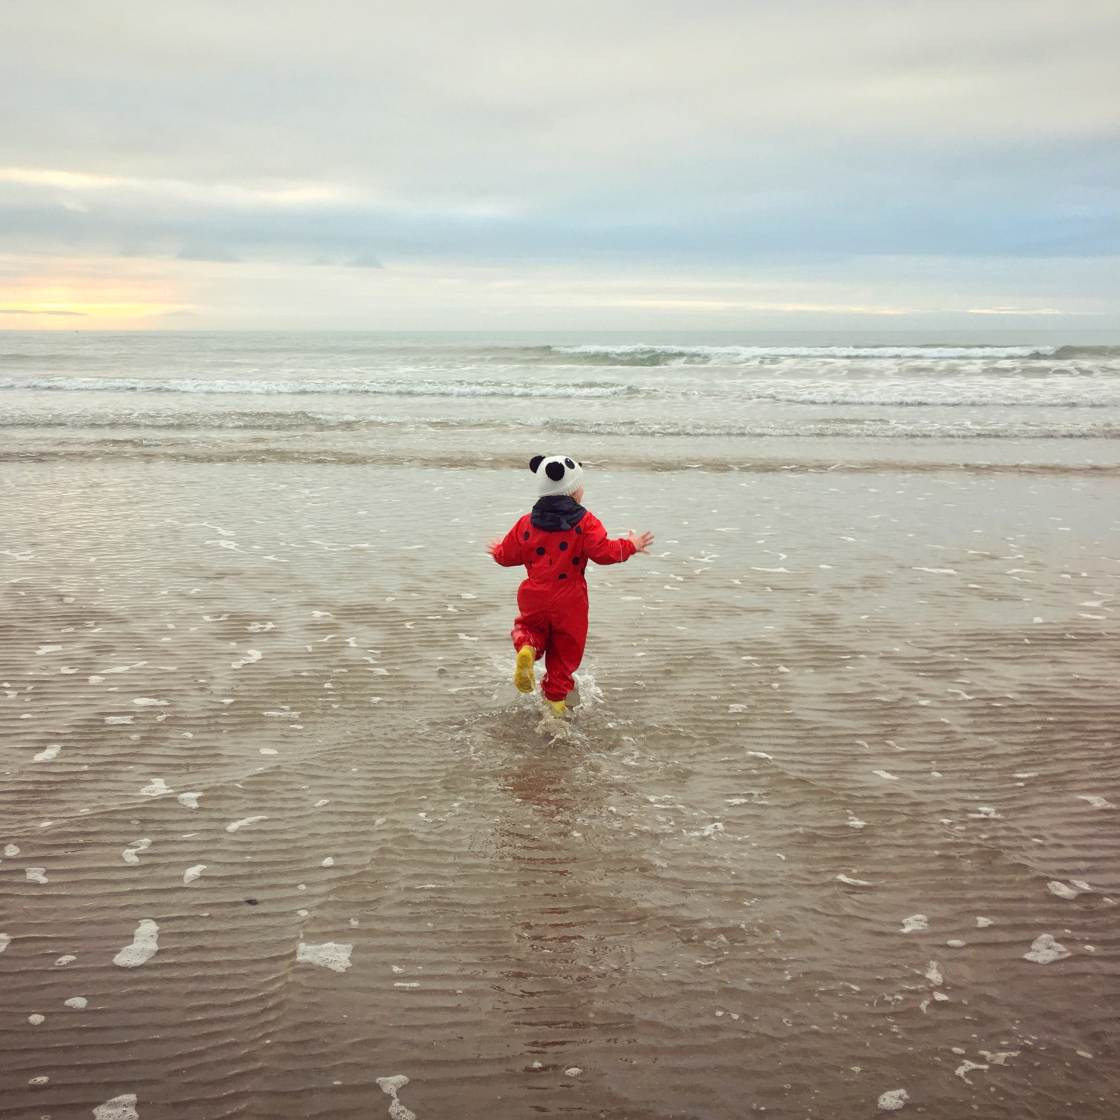
Here’s an edited photo with a beautifully blurred background. For comparison, below is the original image where the background is in focus. Notice how the blurred background draws attention to the boy.
Here is the original image where the background is in focus. Notice how the blurred background helps to draw attention to the boy.
Original photo with the background in focus, used for comparison with the blurred version
To add a sense of movement, use the Motion Blur option instead of Lens Blur. This exaggerates the feeling of motion, making it perfect for moving subjects.
Here’s an image with motion blur applied to the background.
Example of using motion blur in AfterFocus to add a dynamic feel to the background
The original photo was taken while the boy was stationary, but the motion blur makes it appear as if he was moving quickly. After editing, save your photo by tapping the down arrow at the top and then tapping Yes.
4. Framing Subjects With Dreamy Blurred Vignettes
This editing technique provides a unique effect. Instead of blurring the entire background, you’ll create a blurred vignette around the edges.
Creating a blurred vignette effect on an iPhone using Snapseed
The blurred edges draw attention to the central focused area, acting as a frame. A blurred vignette also adds a dreamy quality to your photo.
Here’s how to blur photos on your iPhone using the free Snapseed app:
Open Snapseed and tap the screen to access your photo library. Select Open From Device, then choose the photo you want to open.
Opening a photo in Snapseed to apply the lens blur tool and create a vignette effect
Tap Tools at the bottom and select the Lens Blur tool. Two white circles will appear on your image.
Anything inside the inner circle will be in sharp focus, and anything outside the outer circle will be blurred. The area between the circles marks the transition from sharp to blurred.
Adjusting the lens blur circles in Snapseed to control the vignette effect
You can drag the circle to a different area or resize it by pinching with two fingers. Adjust the blur intensity by swiping up or down and selecting Blur Strength, then swipe left or right. Adjust the Transition and Vignette Strength similarly.
Transition adjusts the gradual shift from focused to blurred areas, and Vignette Strength controls the darkness of the photo’s edges.
When satisfied with the blur effect, tap the checkmark at the bottom right. Save your image by tapping Export, then Save A Copy.
Exporting the edited image with the blurred vignette from Snapseed
Here’s an edited image with a dreamy blurred vignette around the edges.
Here’s the original image without any blur. Notice how the subtle blurring in the photo above draws the eye toward the center of the frame.
Comparison of the original image with the blurred vignette applied in Snapseed
A blurred vignette is most effective when the subject is centrally positioned and there’s enough space around it to blur the edges. However, in the right photo, it can be very effective.
According to research from the Santa Fe University of Art and Design’s Photography Department, in July 2025, blurred vignettes are most effective when applied subtly, enhancing the focus on the subject without overwhelming the image.
5. Exploring Alternative Camera Apps
Are you curious about other apps that can enhance background blur on your iPhone photos?
Beyond the built-in Camera app and well-known editors like AfterFocus and Snapseed, several alternative camera apps offer unique tools and features to achieve stunning background blur effects.
| App Name | Description | Key Features |
|---|---|---|
| Focos | Offers DSLR-like photography with large aperture and real bokeh effects. | Real 3D imaging, simulates different lens characteristics, adjustable aperture after shooting. |
| Halide Camera | Manual controls and depth capture for advanced editing. | Manual focus, exposure, ISO control, depth map visualization, RAW support. |
| Camera+ 2 | Provides manual controls and depth editing tools. | Manual shooting modes, RAW capture, depth editing, focus peaking. |
| Obscura Camera | Designed for intuitive manual control with a minimalist interface. | Gesture-based controls, manual settings, filters, depth capture. |
| ProCamera | Professional photography and video app with extensive manual controls. | Manual and semi-automatic modes, RAW and TIFF support, depth control, high-bitrate video recording. |
| Adobe Lightroom Mobile | Offers professional-grade editing, including depth-based adjustments. | Advanced color correction, selective adjustments, cloud syncing, AI-powered features. |
| Darkroom | Fast and easy-to-use with a focus on color editing and depth adjustments. | Non-destructive editing, batch processing, depth map editing, RAW support. |
| Focus Camera | Simple app dedicated to creating photos with blurred backgrounds. | Simple interface, dedicated focus tools, background blur adjustments, real-time effects. |
| TADA! Camera | Provides quick and easy background blur with masking tools. | Fast background blurring, edge detection, masking tools, filters. |
| Depth Effects | Allows for easy creation of blurred backgrounds and foreground effects. | Easy-to-use interface, various blur effects, foreground and background adjustments, depth map editing. |
5.1. How Do Alternative Camera Apps Enhance Blurring Capabilities?
Alternative camera apps often provide more granular control over focus, aperture simulation, and depth of field than the native iPhone camera app. For example, Focos app simulates different lens characteristics and lets you adjust the aperture after the shot, mimicking the effects of a DSLR camera.
Halide Camera and Camera+ 2 both offer manual controls, RAW capture, and depth editing tools, allowing photographers to fine-tune their images with greater precision. These apps often include features like focus peaking, which highlights the sharpest areas in the frame, making it easier to achieve perfect focus.
5.2. What Advanced Editing Features Can You Find In These Apps?
Advanced editing features in these apps include:
- Real 3D Imaging: Focos app uses real 3D imaging to calculate depth, creating more accurate and natural-looking blur effects.
- Depth Map Visualization: Halide Camera allows you to visualize the depth map of your photos, giving you a better understanding of the depth data and how it affects the blur.
- Selective Adjustments: Adobe Lightroom Mobile and Darkroom allow you to make selective adjustments to specific areas of your photo based on depth, enabling you to precisely control the blur effect.
- RAW Support: Apps like Halide, Camera+ 2, and ProCamera support RAW capture, providing more flexibility in post-processing and allowing you to recover more detail in your images.
5.3. How Do These Apps Compare To Native iPhone Camera Options?
Compared to the native iPhone Camera app, alternative camera apps generally offer:
- More Manual Control: They give you more control over settings like ISO, aperture, shutter speed, and focus.
- Greater Customization: They provide more options for customizing the blur effect and fine-tuning the depth of field.
- Advanced Editing Tools: They include advanced editing tools like depth map visualization, selective adjustments, and RAW support.
- Specialized Features: They offer specialized features like lens simulation, real 3D imaging, and focus peaking.
While the native iPhone Camera app is convenient and easy to use, these alternative apps are ideal for photographers who want to take their iPhone photography to the next level.
6. Understanding Depth of Field (DOF) in iPhone Photography
Do you wonder what depth of field (DOF) is and how it affects your iPhone photos?
Depth of field refers to the range of distance in a photograph that appears acceptably sharp. In simpler terms, it’s the area of your image that is in focus, from the nearest to the farthest point. Understanding DOF is essential for controlling focus and creating visually appealing images.
According to research from Popular Photography Magazine in June 2024, mastering depth of field is crucial for enhancing the storytelling aspect of an image, drawing viewers’ attention to specific elements.
6.1. What Factors Influence Depth Of Field On An iPhone?
Several factors influence the depth of field in iPhone photography:
- Aperture: Although iPhones have a fixed aperture, Portrait mode simulates different apertures to control DOF. A wider aperture (smaller f-number) results in a shallower DOF, blurring the background more.
- Focal Length: Longer focal lengths (zooming in) decrease the DOF, making the background blurrier.
- Subject Distance: The closer you are to your subject, the shallower the DOF becomes.
6.2. How Does Aperture Simulation Work In Portrait Mode?
Portrait mode uses computational photography to simulate the effects of different apertures. When you take a photo in Portrait mode, the iPhone captures depth information using its dual-lens system (on iPhones with dual cameras) or through software analysis (on iPhones with a single camera). It then applies a blur effect to the background, based on the simulated aperture.
You can adjust the intensity of the blur (simulated aperture) after taking the photo using the Depth Control feature. This allows you to fine-tune the DOF to achieve the desired effect.
6.3. How Do You Use Subject Distance To Maximize Background Blur?
To maximize background blur, position yourself as close to your subject as possible while keeping them in focus. This reduces the depth of field, blurring the background. Ensure that the subject is well-lit and that the background is far enough away to enhance the blur.
6.4. What Are Common Mistakes To Avoid When Working With DOF On An iPhone?
Common mistakes to avoid when working with DOF on an iPhone include:
- Not Ensuring Proper Focus: Always make sure that your subject is sharply in focus. Use tap-to-focus to set the focus point on your subject.
- Ignoring Lighting Conditions: Low light can affect the iPhone’s ability to accurately capture depth information, leading to poor blur effects. Ensure adequate lighting for best results.
- Overdoing The Blur: Too much blur can make your photo look unnatural. Use Depth Control to adjust the blur intensity to a realistic level.
- Not Considering Composition: Pay attention to the composition of your photo. Ensure that the blurred background complements the subject and doesn’t distract from it.
By understanding these factors and avoiding common mistakes, you can effectively control depth of field and create stunning photos with beautiful background blur on your iPhone.
7. Tips For Capturing Bokeh With An iPhone
Do you want to learn how to capture beautiful bokeh effects with your iPhone?
Bokeh refers to the aesthetic quality of the blur produced in the out-of-focus parts of an image. It’s often characterized by soft, pleasing circles of light that add a dreamy, artistic touch to photos. While iPhones may not have the same optical capabilities as DSLRs, you can still capture stunning bokeh with some clever techniques.
7.1. What Is Bokeh And How Does It Enhance iPhone Photos?
Bokeh is the way a lens renders out-of-focus points of light. Good bokeh is smooth and pleasing, with soft edges, while bad bokeh can be harsh and distracting. In iPhone photography, bokeh can enhance photos by:
- Adding Depth: Bokeh separates the subject from the background, creating a sense of depth and dimension.
- Creating Atmosphere: Bokeh adds a dreamy and artistic touch, enhancing the mood and atmosphere of the photo.
- Drawing Attention: Bokeh draws the viewer’s eye to the in-focus subject, making it stand out.
7.2. How Do You Maximize Bokeh Using Portrait Mode?
To maximize bokeh using Portrait mode:
- Ensure Good Lighting: Bokeh is most visible with bright, point-source lights in the background. Shoot in conditions with plenty of light or add artificial lights.
- Adjust Depth Control: After taking the photo, use the Depth Control feature to adjust the intensity of the bokeh. Experiment with different settings to achieve the desired effect.
7.3. Can You Create Bokeh Effects Without Portrait Mode?
Yes, you can create bokeh effects without Portrait mode by:
- Getting Close: Position yourself as close to your subject as possible. This reduces the depth of field and enhances the bokeh effect.
- Using a Macro Lens: Attach a macro lens to your iPhone to focus on very close subjects. This creates a shallow depth of field and pronounced bokeh.
- Utilizing Post-Processing Apps: Use apps like AfterFocus or Snapseed to add bokeh effects to your photos after taking them.
7.4. What Are The Best Lighting Conditions For Capturing Bokeh?
The best lighting conditions for capturing bokeh include:
- Backlighting: Shooting with the sun or a bright light source behind your subject creates beautiful bokeh.
- String Lights: String lights or fairy lights in the background produce small, circular bokeh balls.
- City Lights: Shooting in an urban environment at night with city lights in the background can create stunning bokeh.
7.5. How Can Post-Processing Enhance Bokeh Effects?
Post-processing can enhance bokeh effects by:
- Adding Blur: Use editing apps to add additional blur to the background, making the bokeh more pronounced.
- Adjusting Brightness: Increase the brightness of the bokeh highlights to make them stand out.
- Adding Contrast: Increase the contrast to enhance the separation between the subject and the background.
By following these tips, you can capture beautiful bokeh effects with your iPhone and add a touch of magic to your photos.
8. Exploring Third-Party Lens Adapters for Enhanced Blur
Are you interested in enhancing the background blur in your iPhone photos using third-party lens adapters?
While the iPhone’s built-in camera is powerful, using lens adapters can significantly expand your creative possibilities. Lens adapters allow you to attach external lenses to your iPhone, providing greater control over depth of field, focal length, and overall image quality.
8.1. What Are Lens Adapters And How Do They Improve Background Blur?
Lens adapters are accessories that attach to your iPhone and allow you to mount external lenses, such as those designed for DSLR or mirrorless cameras. These lenses often have wider apertures and longer focal lengths than the iPhone’s native lens, resulting in shallower depth of field and more pronounced background blur.
8.2. Which Types Of Lenses Are Compatible With iPhone Lens Adapters?
Various types of lenses are compatible with iPhone lens adapters, including:
- Prime Lenses: Prime lenses have a fixed focal length and often feature wide apertures (e.g., f/1.4, f/1.8). They are excellent for creating shallow depth of field and beautiful bokeh.
- Zoom Lenses: Zoom lenses offer variable focal lengths, providing flexibility in framing your shots. They can also achieve shallow depth of field, especially at longer focal lengths.
- Macro Lenses: Macro lenses are designed for close-up photography and can create extremely shallow depth of field, blurring the background dramatically.
8.3. What Are The Best Lens Adapter Brands For iPhones?
Several brands offer high-quality lens adapters for iPhones:
- Moment: Moment offers a range of lenses and adapters designed specifically for iPhones. Their lenses are known for their high optical quality and durability.
- Sandmarc: Sandmarc produces premium lenses and adapters for iPhone photography, with a focus on travel and adventure photography.
- ShiftCam: ShiftCam offers a variety of lenses and adapters, including multi-lens cases that allow you to quickly switch between different lenses.
8.4. How Do You Attach And Use Lens Adapters On An iPhone?
To attach and use lens adapters on an iPhone:
- Choose an Adapter: Select a lens adapter that is compatible with your iPhone model and the lenses you want to use.
- Mount the Adapter: Attach the adapter to your iPhone according to the manufacturer’s instructions. Some adapters clip onto the iPhone, while others attach using a case.
- Attach the Lens: Mount the external lens onto the adapter. Ensure that the lens is securely attached.
- Adjust Settings: Use a camera app that allows manual control over focus and exposure. Adjust the settings to achieve the desired depth of field and background blur.
- Take Photos: Experiment with different lenses and settings to capture stunning photos with enhanced background blur.
8.5. What Are The Limitations Of Using Lens Adapters With An iPhone?
While lens adapters can significantly enhance your iPhone photography, there are some limitations to consider:
- Size and Weight: External lenses can be bulky and heavy, making your iPhone less portable.
- Cost: High-quality lenses and adapters can be expensive.
- Complexity: Using external lenses requires more technical knowledge and manual control, which may be challenging for beginners.
- Compatibility: Not all lenses are compatible with iPhone lens adapters. Check compatibility before purchasing.
Despite these limitations, lens adapters offer a powerful way to expand your creative possibilities and achieve professional-looking background blur in your iPhone photos.
9. Editing Techniques to Simulate Shallow Depth of Field
Are you keen to learn how to simulate shallow depth of field in your iPhone photos through editing?
Even if you didn’t capture a shallow depth of field at the time of shooting, various editing techniques can help you create the illusion of background blur. These techniques are particularly useful for enhancing photos taken in environments where achieving natural blur is difficult.
9.1. What Is Shallow Depth Of Field And Why Simulate It In Editing?
Shallow depth of field refers to a narrow range of focus in an image, where the subject is sharp while the background is blurred. Simulating it in editing can:
- Emphasize the Subject: By blurring the background, you draw attention to the main subject of the photo.
- Create Visual Interest: A blurred background can add a sense of depth and dimension to the image.
- Improve Composition: It can help to remove distracting elements from the background, improving the overall composition.
9.2. Which Apps Offer Tools For Simulating Background Blur?
Several apps offer tools for simulating background blur:
- Adobe Photoshop Express: Provides a “Blur” tool that allows you to selectively blur parts of the image.
- PicsArt: Offers a “Lens Blur” effect that simulates shallow depth of field.
- Snapseed: Includes a “Lens Blur” tool that creates a bokeh effect.
- AfterFocus: Specializes in simulating shallow depth of field with precise control over the blur effect.
9.3. How Do You Selectively Blur The Background In Editing?
To selectively blur the background:
- Open the Photo: Import the image into your chosen editing app.
- Select the Blur Tool: Choose the blur tool or effect.
- Mask the Subject: Use a masking tool to isolate the subject, ensuring it remains sharp.
- Apply the Blur: Apply the blur effect to the background, adjusting the intensity as needed.
- Refine the Mask: Refine the mask to ensure a smooth transition between the sharp subject and the blurred background.
9.4. What Are Common Mistakes To Avoid When Simulating Blur?
Common mistakes to avoid when simulating blur include:
- Over-Blurring: Applying too much blur can make the image look unnatural.
- Inaccurate Masking: Poorly masked subjects can result in a sloppy and unprofessional look.
- Ignoring Lighting: The simulated blur should match the lighting conditions of the scene.
- Lack of Depth: Ensure the blur gradient is realistic, with objects farther away being more blurred.
9.5. Can AI-Powered Tools Improve Simulated Background Blur?
Yes, AI-powered tools can significantly improve simulated background blur by:
- Automatically Identifying the Subject: AI can accurately identify the subject, reducing the need for manual masking.
- Creating Realistic Blur Effects: AI can analyze the depth information in the image and create a more realistic blur effect.
- Improving Edge Detection: AI can improve edge detection, resulting in smoother transitions between the sharp subject and the blurred background.
By using these editing techniques, you can simulate shallow depth of field in your iPhone photos and create stunning images with enhanced focus and artistic flair.
10. Preserving Image Quality While Blurring Backgrounds
Are you looking for tips on preserving image quality while blurring backgrounds in your iPhone photos?
Blurring backgrounds can significantly enhance the visual appeal of your photos, but it’s essential to do so without compromising image quality. Here’s how to maintain clarity and detail while achieving the desired blur effect.
10.1. How Does Blurring Affect Image Quality On An iPhone?
Blurring can affect image quality in several ways:
- Loss of Detail: Over-blurring can result in a loss of detail in the blurred areas.
- Artifacts: Some blurring techniques can introduce artifacts, such as pixelation or banding.
- Reduced Sharpness: Blurring can reduce the overall sharpness of the image, especially if the effect is applied too aggressively.
10.2. What Are The Best File Formats For Editing And Blurring?
The best file formats for editing and blurring include:
- RAW: RAW files retain the most information and offer greater flexibility in post-processing.
- TIFF: TIFF files are lossless and preserve image quality, making them suitable for editing.
- JPEG: JPEG files are compressed and can lose quality with each edit. Use JPEG only if necessary and save the final version with the highest quality setting.
10.3. How Do You Minimize Compression Artifacts When Blurring?
To minimize compression artifacts:
- Edit in RAW or TIFF: Use RAW or TIFF files to avoid compression artifacts during editing.
- Avoid Excessive Blurring: Apply blur effects sparingly to minimize the risk of artifacts.
- Use High-Quality Editing Apps: Choose editing apps that use advanced algorithms to reduce artifacts.
- Save at High Quality: When saving the final image, use the highest quality setting to minimize compression artifacts.
10.4. What Are Non-Destructive Editing Techniques For Preserving Quality?
Non-destructive editing techniques preserve the original image data and allow you to make changes without permanently altering the file. These techniques include:
- Using Adjustment Layers: Apply blur effects using adjustment layers, allowing you to modify or remove the effect without affecting the original image.
- Smart Objects: Convert images into smart objects, enabling you to apply filters and effects non-destructively.
- History Panel: Use the history panel to undo changes and revert to previous versions of the image.
10.5. How Can Upscaling Techniques Help Maintain Detail?
Upscaling techniques can help maintain detail by increasing the resolution of the image before blurring. This provides more pixels to work with, reducing the loss of detail when the blur effect is applied. Use AI-powered upscaling tools to enhance the resolution of your images while preserving quality.
By following these tips, you can preserve image quality while blurring backgrounds in your iPhone photos, ensuring that your images look sharp and professional.
Ready to explore more tips and tricks for iPhone photography? Visit dfphoto.net to discover a wealth of resources, from in-depth tutorials to inspiring galleries. Join our community of passionate photographers and take your skills to the next level! Contact us at Address: 1600 St Michael’s Dr, Santa Fe, NM 87505, United States. Phone: +1 (505) 471-6001. Website: dfphoto.net.
FAQ: Mastering Background Blur on Your iPhone
1. Can I blur the background on any iPhone?
Yes, most iPhones can blur the background using Portrait mode or third-party apps. Newer iPhones have Portrait mode, while older models can use editing apps like AfterFocus or Snapseed.
2. How do I use Portrait mode on my iPhone?
Open the