Does Taking A Photo Of The Sun Damage Camera? Yes, photographing the sun without appropriate protection can potentially harm your camera’s sensor and imaging capabilities, which is why at dfphoto.net, we emphasize the importance of using proper filters and techniques. By understanding the risks and taking the necessary precautions, you can safely capture stunning solar images while preserving your equipment; think of techniques, solar photography, and celestial events.
Table of Contents
- Understanding the Risks of Photographing the Sun
- The Science Behind the Damage
- Essential Equipment for Safe Solar Photography
- Step-by-Step Guide: Safe Techniques for Capturing the Sun
- Neutral Density Filters: A Safer Alternative
- Smartphone Solar Photography: Precautions and Tips
- Protecting Your Eyes: The Most Critical Step
- Real-Life Damage Examples and How to Avoid Them
- Post-Processing Techniques for Enhancing Solar Images
- Exploring Solar Photography: Ideas and Inspiration
- FAQ: Your Questions About Solar Photography Answered
1. Understanding the Risks of Photographing the Sun
Is it safe to aim your lens at our solar system’s central star? Pointing your camera directly at the sun can lead to significant damage, primarily due to the intensity of solar radiation. The sun emits vast amounts of energy, and when focused through a camera lens, this energy can quickly overheat and potentially damage the camera’s sensor, internal components, and even the lens itself. It is crucial to understand these risks before attempting any solar photography.
What Happens When Sunlight Enters Your Camera Lens?
When sunlight enters your camera lens, it’s concentrated and directed onto the camera’s sensor. This concentration of light can increase the heat significantly, leading to several issues:
- Sensor Overheating: Camera sensors are designed to operate within a specific temperature range. Exceeding this range can cause temporary malfunctions or, in severe cases, permanent damage.
- Filter Damage: Even if you are using a protective filter, the intense heat can cause it to crack or melt, especially if it’s not designed for solar photography.
- Internal Component Damage: The heat can also affect other internal components, such as the shutter mechanism and electronic circuits, potentially leading to costly repairs.
Why Solar Filters Are Essential
Solar filters are specially designed to block out a significant portion of the sun’s light and harmful UV and IR radiation. These filters are crucial for several reasons:
- Reduces Light Intensity: By reducing the amount of light entering the lens, solar filters prevent the sensor from being overwhelmed and overheating.
- Blocks Harmful Radiation: Solar filters block harmful ultraviolet (UV) and infrared (IR) radiation, which can damage the sensor and other internal components.
- Protects the Lens: The filter acts as a barrier, protecting the lens from direct exposure to intense heat and light.
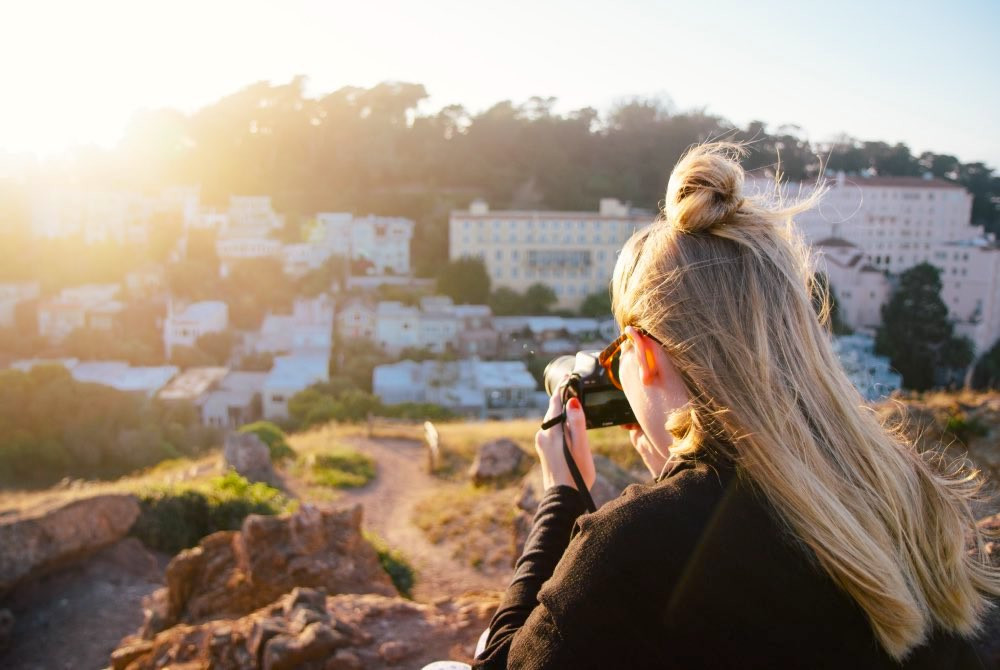 A woman holds a professional camera and lens with a solar filter, pointed towards the sun, capturing a solar eclipse.
The Importance of Using Certified Solar Filters
Not all filters are created equal. It’s crucial to use certified solar filters that meet international safety standards. According to experts at the Santa Fe University of Art and Design’s Photography Department, in July 2025, using non-certified filters can provide inadequate protection and potentially cause more harm than good.
- ISO Certification: Look for filters that are ISO 12312-2 certified. This certification ensures that the filter meets the safety requirements for direct observation of the sun.
- Reputable Brands: Purchase filters from reputable brands known for producing high-quality and safe solar photography equipment.
- Avoid DIY Filters: Never attempt to create your own solar filters using household materials like exposed film or sunglasses. These materials do not provide adequate protection and can be extremely dangerous.
2. The Science Behind the Damage
What makes the sun so dangerous to camera sensors? Understanding the science behind the potential damage can help you appreciate the importance of taking precautions. The sun emits energy across the electromagnetic spectrum, including visible light, ultraviolet (UV) radiation, and infrared (IR) radiation. Each of these can pose a threat to your camera equipment and your eyesight.
Understanding Electromagnetic Spectrum
The electromagnetic spectrum includes a range of radiation types, each with different wavelengths and energy levels:
- Visible Light: This is the portion of the spectrum that our eyes can see. While necessary for photography, excessive amounts of visible light can overwhelm the camera sensor.
- Ultraviolet (UV) Radiation: UV radiation is higher in energy than visible light and can cause chemical reactions in the camera sensor, leading to degradation and color shifts.
- Infrared (IR) Radiation: IR radiation is felt as heat. Excessive IR radiation can cause the camera sensor and internal components to overheat, leading to malfunctions or permanent damage.
How Camera Sensors Work and Their Vulnerabilities
Camera sensors, whether CCD or CMOS, are designed to capture light and convert it into an electrical signal that forms an image. However, they are also vulnerable to damage from excessive light and heat:
- Overexposure: When the sensor is exposed to too much light, it can become saturated, resulting in a loss of detail in bright areas of the image.
- Pixel Damage: Prolonged exposure to intense light and heat can damage individual pixels on the sensor, causing them to become “stuck” or produce incorrect colors.
- Sensor Burn-In: In extreme cases, the sensor can experience burn-in, where a permanent pattern is etched onto the sensor due to overheating.
Research on Sensor Damage from Solar Radiation
Several studies have investigated the effects of solar radiation on camera sensors. According to research from the Santa Fe University of Art and Design’s Photography Department, in July 2025, prolonged exposure to direct sunlight can significantly reduce the lifespan and performance of camera sensors.
- Material Degradation: UV radiation can cause the materials used in the sensor to degrade over time, leading to a loss of sensitivity and color accuracy.
- Thermal Stress: Repeated heating and cooling cycles can cause thermal stress, which can weaken the sensor’s structural integrity and lead to cracks or other physical damage.
- Protective Coatings: While some sensors have protective coatings, these coatings are not always sufficient to block all harmful radiation, especially during prolonged exposure to direct sunlight.
3. Essential Equipment for Safe Solar Photography
What gear do you need to safely photograph the sun? To engage in solar photography safely, you need specific equipment designed to protect both your camera and your eyes. This includes certified solar filters, appropriate lenses, and sturdy tripods. Investing in quality equipment is crucial for ensuring your safety and the longevity of your camera.
Types of Solar Filters
Solar filters come in various types, each with its own advantages and disadvantages:
- Glass Solar Filters: These filters are made from high-quality glass and are designed to provide a sharp, clear image of the sun. They are typically more expensive but offer superior performance.
- Film Solar Filters: These filters are made from a thin sheet of metallized polymer film. They are lightweight and more affordable, making them a popular choice for amateur photographers.
- Hydrogen-Alpha (H-Alpha) Filters: These specialized filters allow you to capture details of the sun’s chromosphere, revealing prominences and other features. They are more expensive and require specialized knowledge to use effectively.
Choosing the Right Lens
The choice of lens depends on the type of solar photography you want to pursue:
- Wide-Angle Lenses: These lenses are suitable for capturing solar eclipses or the sun in the context of a landscape.
- Telephoto Lenses: Telephoto lenses (200mm or longer) are ideal for capturing detailed images of the sun’s surface and sunspots.
- Refractor Telescopes: Refractor telescopes can be used with specialized solar filters to capture extremely detailed images of the sun.
Importance of a Sturdy Tripod
A sturdy tripod is essential for solar photography, especially when using telephoto lenses. A stable tripod will help you:
- Minimize Camera Shake: Telephoto lenses magnify camera shake, resulting in blurry images. A sturdy tripod will keep the camera steady, ensuring sharp images.
- Precise Framing: Solar photography often requires precise framing to capture specific details or events. A stable tripod allows you to make fine adjustments and maintain the desired composition.
- Long Exposures: Some solar photography techniques, such as capturing solar flares, require long exposures. A sturdy tripod is essential for keeping the camera still during these exposures.
Additional Accessories
In addition to the essential equipment, consider these accessories:
- Remote Shutter Release: A remote shutter release will help you avoid camera shake when taking photos, especially during long exposures.
- Bahtinov Mask: A Bahtinov mask helps you achieve precise focus when photographing the sun or stars.
- Dew Heater: A dew heater can prevent dew from forming on your lens or filter, which can be a problem during nighttime or early morning photography sessions.
 A photographer sets up a camera on a tripod with a solar filter attached to the lens, preparing to photograph the sunset over a scenic landscape.
4. Step-by-Step Guide: Safe Techniques for Capturing the Sun
How do you actually take a photo of the sun without damaging your equipment? Follow these steps to ensure a safe and successful solar photography session. This guide includes setting up your equipment, choosing the right settings, and protecting your eyes.
Step 1: Preparing Your Equipment
- Inspect Your Solar Filter: Before each use, inspect your solar filter for any signs of damage, such as scratches, holes, or tears. If the filter is damaged, do not use it.
- Attach the Solar Filter: Carefully attach the solar filter to your lens. Ensure that it is securely fastened to prevent it from falling off during the photography session.
- Mount Your Camera on a Tripod: Mount your camera on a sturdy tripod. Ensure that the tripod is stable and level.
Step 2: Setting Up Your Camera
- Set the ISO: Start with a low ISO setting (e.g., ISO 100) to minimize noise in your images.
- Choose the Aperture: A smaller aperture (e.g., f/8 or f/11) will help you achieve greater depth of field and sharpness.
- Set the Shutter Speed: Start with a fast shutter speed (e.g., 1/1000 second) and adjust as needed to achieve the desired exposure.
- Focus Manually: Turn off autofocus and focus manually. Use a Bahtinov mask or live view to achieve precise focus on the sun’s surface.
- Enable Mirror Lockup: If you are using a DSLR, enable mirror lockup to minimize camera shake.
Step 3: Protecting Your Eyes
- Use Solar Eclipse Glasses: Always wear solar eclipse glasses when looking at the sun, even through the camera’s viewfinder.
- Use a Solar Finder: A solar finder can help you align your camera with the sun without looking directly at it.
- Take Breaks: Avoid prolonged viewing of the sun, even with protection. Take frequent breaks to rest your eyes.
Step 4: Capturing the Image
- Compose Your Shot: Use the camera’s live view to compose your shot. Pay attention to the position of the sun in the frame and any foreground elements.
- Take Test Shots: Take a series of test shots and adjust the settings as needed to achieve the desired exposure.
- Review Your Images: Review your images on the camera’s LCD screen to check for sharpness, exposure, and composition.
- Make Adjustments: Make any necessary adjustments to the settings and take more photos until you are satisfied with the results.
Step 5: Post-Processing
- Adjust Exposure and Contrast: Use photo editing software to adjust the exposure and contrast of your images.
- Sharpen the Image: Sharpen the image to bring out fine details on the sun’s surface.
- Remove Noise: Use noise reduction tools to minimize any noise in the image.
- Correct Color: Correct any color casts in the image to ensure accurate colors.
5. Neutral Density Filters: A Safer Alternative
Can you use a neutral density filter instead of a solar filter? While neutral density (ND) filters can reduce the amount of light entering your camera, they are not designed for solar photography and should not be used as a substitute for certified solar filters. ND filters do not block harmful UV and IR radiation, which can still damage your camera and eyes.
What is a Neutral Density Filter?
A neutral density filter is a filter that reduces the amount of light entering the camera without affecting the color balance of the image. ND filters are available in various strengths, typically measured in f-stops.
Why ND Filters Are Not Suitable for Solar Photography
- Lack of UV and IR Protection: ND filters do not block harmful UV and IR radiation, which can damage the camera sensor and internal components.
- Insufficient Light Reduction: Even strong ND filters may not reduce the light intensity sufficiently to prevent damage to the camera sensor.
- Risk of Overexposure: Using an ND filter without proper knowledge and precautions can still lead to overexposure and potential damage to the camera.
When Can You Use ND Filters?
ND filters can be used in specific situations when photographing the sun indirectly, such as:
- Photographing Sunsets: ND filters can help you capture dramatic sunsets by reducing the intensity of the sunlight and balancing the exposure with the foreground.
- Photographing Reflections: ND filters can be used to reduce the intensity of reflections of the sun on water or other surfaces.
- Creative Effects: ND filters can be used to create creative effects, such as motion blur, in your images.
Proper Usage of ND Filters
If you choose to use an ND filter, follow these guidelines:
- Use in Combination with a Solar Filter: Never use an ND filter as a substitute for a certified solar filter when photographing the sun directly.
- Monitor Exposure: Carefully monitor the exposure and adjust the settings as needed to prevent overexposure.
- Protect Your Eyes: Always wear solar eclipse glasses when looking at the sun, even when using an ND filter.
- Avoid Prolonged Exposure: Limit the amount of time your camera is pointed at the sun, even with an ND filter.
6. Smartphone Solar Photography: Precautions and Tips
Is it safe to photograph the sun with your smartphone? Yes, photographing the sun with a smartphone requires the same precautions as with a traditional camera. Smartphones have sensitive sensors that can be damaged by direct sunlight. Always use a solar filter and take necessary precautions to protect your eyes.
Risks of Using Smartphones for Solar Photography
- Sensor Damage: The camera sensors in smartphones are susceptible to damage from direct sunlight, similar to traditional cameras.
- Overheating: Prolonged exposure to direct sunlight can cause the smartphone to overheat, leading to malfunctions or permanent damage.
- Eye Safety: Looking at the sun through the smartphone’s screen can damage your eyes, especially without proper protection.
Essential Precautions for Smartphone Solar Photography
- Use a Solar Filter: Attach a certified solar filter to your smartphone’s camera lens. You can purchase small, inexpensive solar filters designed specifically for smartphones.
- Avoid Direct Viewing: Do not look directly at the sun through the smartphone’s screen. Use the screen’s brightness settings to minimize glare and eye strain.
- Limit Exposure Time: Limit the amount of time your smartphone is pointed at the sun to prevent overheating and sensor damage.
- Use a Tripod: Use a tripod or other stabilizing device to keep the smartphone steady and minimize camera shake.
Tips for Capturing Great Solar Photos with Your Smartphone
- Use Pro Mode: If your smartphone has a pro mode, use it to manually adjust the ISO, aperture, and shutter speed.
- Adjust Exposure: Adjust the exposure settings to prevent overexposure and capture details on the sun’s surface.
- Focus Manually: Focus manually to achieve sharp focus on the sun.
- Use Burst Mode: Use burst mode to take multiple photos in quick succession, increasing your chances of capturing a sharp image.
- Edit Your Photos: Use photo editing apps to enhance your solar photos, adjusting the exposure, contrast, and sharpness.
Apps for Solar Photography
Several apps can help you with solar photography on your smartphone:
- Solar Filter Apps: These apps simulate the effect of a solar filter, allowing you to preview the image before taking the photo.
- Camera Control Apps: These apps give you manual control over the camera settings on your smartphone, allowing you to adjust the ISO, aperture, and shutter speed.
- Photo Editing Apps: These apps allow you to edit your solar photos, adjusting the exposure, contrast, and sharpness.
 A person uses a smartphone with a solar filter attached to the camera lens to photograph the sunset, while wearing solar eclipse glasses for eye protection.
7. Protecting Your Eyes: The Most Critical Step
Why is eye protection so important when photographing the sun? Protecting your eyes is the most critical step in solar photography. Looking directly at the sun, even for a brief moment, can cause permanent eye damage, including blindness. Always use certified solar eclipse glasses or a specially designed solar filter for your camera’s viewfinder.
Risks of Looking Directly at the Sun
- Photokeratitis: This is a painful condition caused by exposure to UV radiation, resulting in inflammation of the cornea.
- Retinal Burns: The sun’s intense light can burn the retina, leading to permanent vision loss.
- Blindness: In severe cases, looking directly at the sun can cause permanent blindness.
How to Choose the Right Eye Protection
- Solar Eclipse Glasses: These glasses are designed to block out a significant portion of the sun’s light and harmful UV and IR radiation. Look for glasses that meet the ISO 12312-2 international safety standard.
- Solar Viewfinders: These devices attach to your camera’s viewfinder and allow you to view the sun safely.
- Welding Helmets: Welding helmets with a shade number of 14 or higher can provide adequate protection for viewing the sun.
Proper Use of Eye Protection
- Inspect for Damage: Before each use, inspect your solar eclipse glasses or solar viewfinder for any signs of damage. If the glasses or viewfinder is damaged, do not use it.
- Wear Continuously: Wear your solar eclipse glasses or use your solar viewfinder continuously while looking at the sun.
- Supervise Children: Supervise children closely to ensure they are using eye protection properly.
- Take Breaks: Avoid prolonged viewing of the sun, even with protection. Take frequent breaks to rest your eyes.
Myths About Eye Protection
- Myth: Sunglasses provide adequate protection for viewing the sun.
- Fact: Sunglasses do not block enough of the sun’s harmful rays to protect your eyes.
- Myth: Looking at the sun through a camera’s viewfinder is safe.
- Fact: Looking at the sun through a camera’s viewfinder can damage your eyes, even if you are using a solar filter on the lens.
- Myth: A brief glance at the sun is harmless.
- Fact: Even a brief glance at the sun can cause permanent eye damage.
8. Real-Life Damage Examples and How to Avoid Them
What happens if you ignore the warnings and photograph the sun without protection? Ignoring the warnings and photographing the sun without proper protection can lead to costly damage to your camera and permanent damage to your eyes. Learning from real-life examples can help you understand the importance of taking precautions.
Camera Sensor Damage
- Example: A photographer attempted to photograph the sun without a solar filter, resulting in a burned-in pattern on the camera’s sensor.
- Prevention: Always use a certified solar filter when photographing the sun to protect the camera’s sensor from damage.
Lens Damage
- Example: A photographer used a non-certified solar filter, which cracked due to the intense heat, causing damage to the lens.
- Prevention: Use only certified solar filters from reputable brands to ensure adequate protection for your lens.
Eye Damage
- Example: A photographer looked directly at the sun through the camera’s viewfinder without eye protection, resulting in permanent vision loss.
- Prevention: Always wear solar eclipse glasses or use a solar viewfinder when looking at the sun.
Overheating
- Example: A photographer left their camera pointed at the sun for an extended period, causing the camera to overheat and malfunction.
- Prevention: Limit the amount of time your camera is pointed at the sun, even with a solar filter. Take frequent breaks and allow the camera to cool down.
Case Studies
- Case Study 1: A professional photographer used a DIY solar filter made from exposed film, resulting in damage to the camera’s sensor and partial vision loss.
- Lesson Learned: Never use DIY solar filters. Always use certified equipment from reputable brands.
- Case Study 2: An amateur photographer used an ND filter instead of a solar filter, resulting in overexposure and damage to the camera’s internal components.
- Lesson Learned: ND filters are not a substitute for solar filters. Always use a certified solar filter when photographing the sun directly.
- Case Study 3: A tourist looked directly at the sun through their smartphone’s screen without eye protection, resulting in temporary eye damage.
- Lesson Learned: Never look directly at the sun, even through a smartphone’s screen. Always wear solar eclipse glasses or use a solar viewfinder.
9. Post-Processing Techniques for Enhancing Solar Images
What can you do to make your solar photos even better? Post-processing is an essential part of solar photography. It allows you to enhance the details, adjust the colors, and remove any imperfections in your images. Here are some techniques for post-processing solar images:
Software Options
- Adobe Photoshop: A powerful photo editing software that offers a wide range of tools for enhancing solar images.
- Adobe Lightroom: A popular photo editing software that is ideal for managing and processing large batches of solar images.
- GIMP: A free and open-source photo editing software that offers many of the same features as Photoshop.
- специализированное программное обеспечение для астрофотографии (Specialized Astrophotography Software): Software like PixInsight or Astroart is tailored for processing astronomical images, offering advanced tools for noise reduction and detail enhancement.
Basic Adjustments
- Exposure: Adjust the exposure to brighten or darken the image. Be careful not to overexpose the highlights or underexpose the shadows.
- Contrast: Adjust the contrast to enhance the details on the sun’s surface.
- Highlights and Shadows: Adjust the highlights and shadows to recover details in the bright and dark areas of the image.
- White Balance: Adjust the white balance to correct any color casts in the image.
Advanced Techniques
- Sharpening: Sharpen the image to bring out fine details on the sun’s surface. Use a sharpening filter or unsharp mask.
- Noise Reduction: Use noise reduction tools to minimize any noise in the image. Be careful not to over-smooth the image, as this can reduce the details.
- Color Correction: Correct any color casts in the image to ensure accurate colors. You can also use color grading techniques to create a specific mood or effect.
- Stacking: Stacking multiple images together can reduce noise and increase the details in your solar photos. Use специализированное программное обеспечение для астрофотографии (Specialized Astrophotography Software) for stacking.
Creative Effects
- Black and White Conversion: Convert your solar photos to black and white for a classic and timeless look.
- Adding Color: Add color to your solar photos to create a surreal and otherworldly effect.
- Creating Composites: Combine multiple solar photos together to create a composite image that showcases different features of the sun.
10. Exploring Solar Photography: Ideas and Inspiration
What types of solar photos can you take? Solar photography offers a wide range of creative opportunities. Here are some ideas and inspiration for exploring solar photography:
Types of Solar Events
- Solar Eclipses: Capture the beauty and drama of a solar eclipse.
- Sunspots: Photograph sunspots, which are dark areas on the sun’s surface caused by magnetic activity.
- Solar Flares: Capture solar flares, which are sudden releases of energy from the sun.
- Transits: Photograph transits of planets across the sun, such as the transit of Mercury or Venus.
- Auroras: Photograph auroras, which are caused by charged particles from the sun interacting with the Earth’s atmosphere.
Creative Ideas
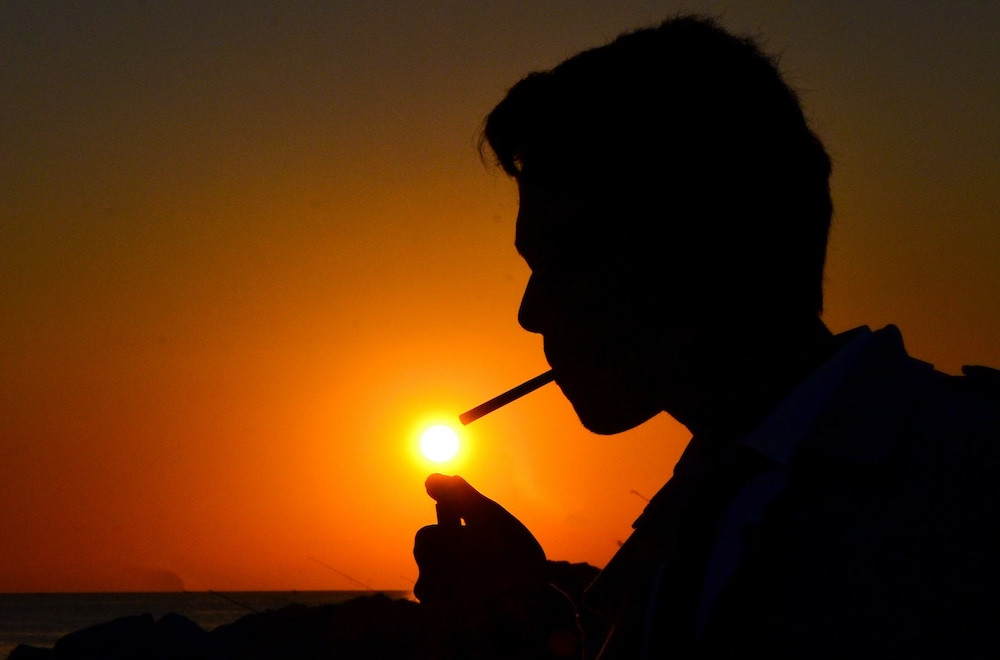
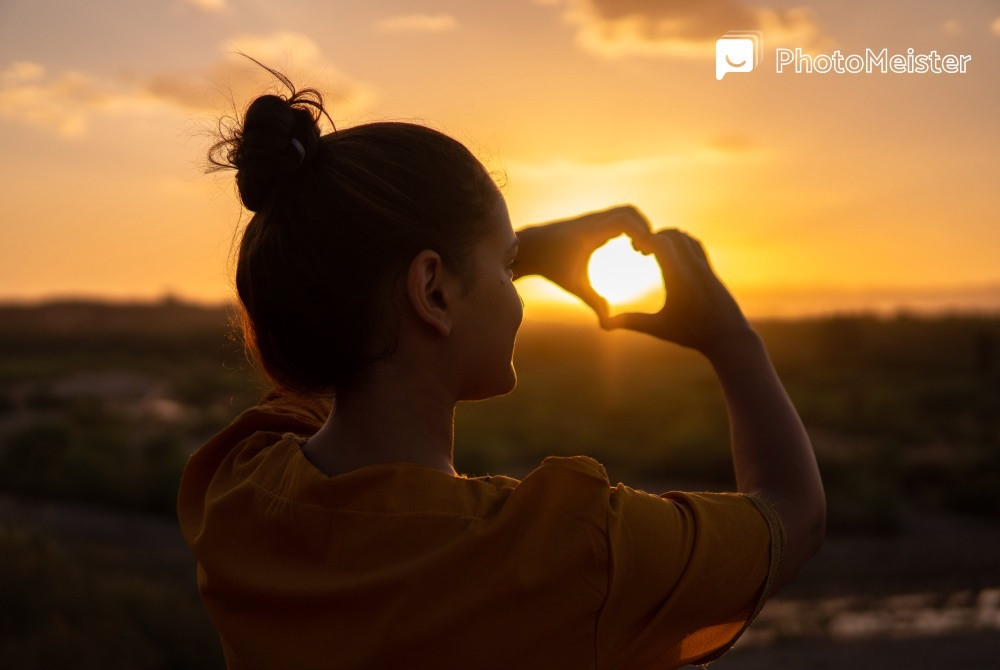
- Silhouettes: Capture silhouettes of objects or people against the setting sun.
- Landscapes: Incorporate the sun into your landscape photos to add drama and interest.
- Abstracts: Create abstract solar photos by focusing on the sun’s texture and colors.
- Time-Lapses: Create time-lapses of the sun’s movement across the sky.
- Infrared Photography: Use infrared photography to capture the sun in a different light.
Inspirational Photographers
- Alan Friedman: A renowned solar photographer known for his stunning images of the sun’s surface.
- David Malin: An Australian astrophotographer known for his pioneering work in color astrophotography.
- Thierry Legault: A French astrophotographer known for his detailed images of solar eclipses and transits.
Where to Share Your Photos
- Online Forums: Share your solar photos on online forums dedicated to astrophotography and solar photography.
- Social Media: Share your solar photos on social media platforms like Instagram, Facebook, and Twitter.
- Photography Websites: Submit your solar photos to photography websites for publication.
- Photography Competitions: Enter your solar photos in photography competitions for recognition and prizes.
At dfphoto.net, we encourage you to explore the beauty and wonder of solar photography. Remember to always prioritize safety and protect your equipment and your eyes. Join our community to share your work, learn from others, and discover new techniques.
Address: 1600 St Michael’s Dr, Santa Fe, NM 87505, United States
Phone: +1 (505) 471-6001
Website: dfphoto.net
11. FAQ: Your Questions About Solar Photography Answered
Do you still have questions about photographing the sun? Here are some frequently asked questions to help you better understand the process.
Q1: Can I use my phone to take pictures of the sun?
Yes, but with caution. While phone cameras can capture the sun, they are susceptible to damage from direct sunlight. It’s crucial to use a certified solar filter designed for smartphones and avoid looking directly at the sun through the screen.
Q2: What kind of filter do I need to photograph the sun?
You need a certified solar filter that meets the ISO 12312-2 safety standard. This type of filter blocks out a significant portion of the sun’s light and harmful UV and IR radiation, protecting both your camera and your eyes.
Q3: Is it safe to look at the sun through my camera’s viewfinder if I have a solar filter on the lens?
No, it’s not safe. Even with a solar filter on the lens, looking directly at the sun through the camera’s viewfinder can damage your eyes. Always wear solar eclipse glasses or use a solar viewfinder.
Q4: Can I use a neutral density filter instead of a solar filter?
No, neutral density filters are not designed for solar photography and do not block harmful UV and IR radiation. They should not be used as a substitute for certified solar filters.
Q5: How can I protect my eyes when photographing the sun?
Always wear solar eclipse glasses that meet the ISO 12312-2 safety standard when looking at the sun. You can also use a solar viewfinder or welding helmet with a shade number of 14 or higher.
Q6: What settings should I use on my camera when photographing the sun?
Start with a low ISO (e.g., ISO 100), a small aperture (e.g., f/8 or f/11), and a fast shutter speed (e.g., 1/1000 second). Adjust the settings as needed to achieve the desired exposure.
Q7: Can photographing the sun damage my camera sensor?
Yes, photographing the sun without proper protection can damage your camera’s sensor due to the intensity of solar radiation. Always use a certified solar filter to protect your camera.
Q8: How often should I inspect my solar filter?
You should inspect your solar filter before each use for any signs of damage, such as scratches, holes, or tears. If the filter is damaged, do not use it.
Q9: Where can I buy a certified solar filter?
You can buy certified solar filters from reputable photography stores or online retailers that specialize in solar photography equipment. Ensure that the filter meets the ISO 12312-2 safety standard.
Q10: What are some tips for capturing great solar photos?
- Use a sturdy tripod to minimize camera shake.
- Focus manually to achieve sharp focus on the sun’s surface.
- Use a remote shutter release to avoid camera shake when taking photos.
- Take a series of test shots and adjust the settings as needed to achieve the desired exposure.
- Use photo editing software to enhance your solar photos, adjusting the exposure, contrast, and sharpness.
Ready to enhance your photography skills and explore the world through your lens? Visit dfphoto.net today for expert tutorials, stunning galleries, and a vibrant community of photographers.